Skip the store-bought rolls and start creating gift wrap that feels personal and thoughtful. DIY wrapping lets you turn simple supplies into unique packages that stand out and show extra care. With a few easy techniques, you can make every gift look special without spending much.
You can use everyday items like brown paper, fabric scraps, or even old maps to design wrapping that feels one-of-a-kind. Adding small details like twine, greenery, or handmade tags gives your gifts a polished look while keeping the process simple and fun.
DIY wrapping also gives you the chance to be more sustainable by reusing materials you already have. Instead of throwing money at disposable paper, you can craft something creative, practical, and memorable.
Key Takeaways
- Gather simple supplies to create unique gift wrap
- Use easy techniques to add personal touches
- Repurpose materials for sustainable wrapping options
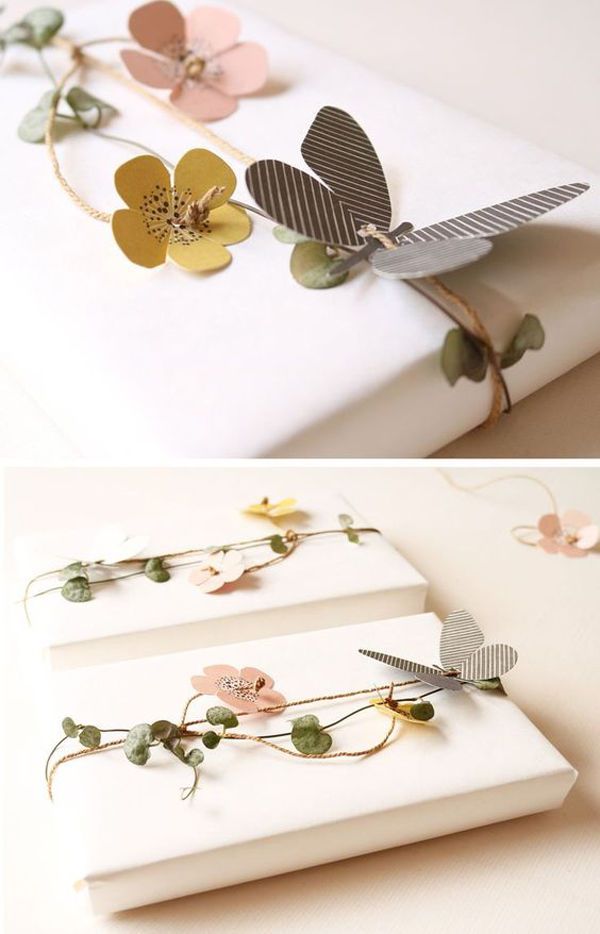
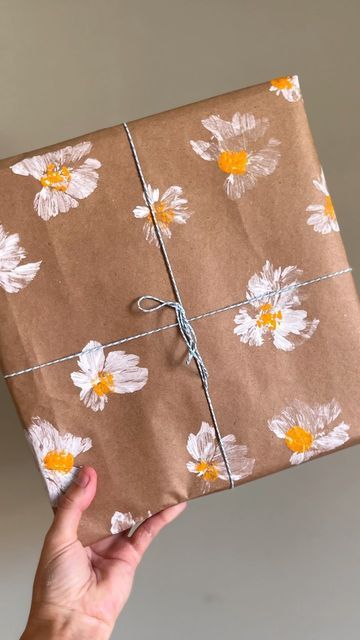
Essential Supplies for DIY Wrapping
The right supplies make wrapping easier, neater, and more enjoyable. With a few basic materials, reliable tools, and creative extras, you can prepare packages that look thoughtful without requiring complicated techniques.
Choosing the Right Paper and Materials
Start with a sturdy base. Butcher paper works well for a simple, rustic look, while patterned wrapping paper gives a more festive style. If you want durability, keep card stock on hand for tags or small boxes.
Neutral papers let you add color with ribbons or tape, while bold prints often stand on their own. You can also layer plain paper with strips of washi tape for a custom design.
Consider keeping a mix of rolls and sheets. Rolls are useful for larger gifts, while sheets reduce waste for smaller packages. Having both ensures you don’t run short or overuse materials.
Must-Have Tools for Wrapping Success
A few tools make wrapping much smoother. Sharp scissors are essential for clean cuts, and a reliable tape dispenser saves time when securing edges. Stock both clear tape for invisible seams and double-sided tape for hidden holds.
Keep glue sticks or liquid glue nearby for attaching heavier decorations like card stock cutouts or layered embellishments. A ruler or measuring tape helps you cut paper with less waste.
Storing everything in one place, like a small basket or rolling cart, saves you from searching through drawers. With your tools ready, you can wrap quickly without interruptions.
Decorative Elements and Embellishments
This is where you add personality. Ribbon, string, and yarn all create different looks. Satin ribbon feels polished, while twine or yarn gives a handmade touch.
Use bows, gift tags, or layered washi tape strips to add detail. Even a simple package can look special with a tied string and a handwritten tag.
Mix textures for variety. For example, pair matte butcher paper with a shiny ribbon, or combine patterned washi tape with plain string. Small details like these make your wrapping stand out without requiring extra effort.
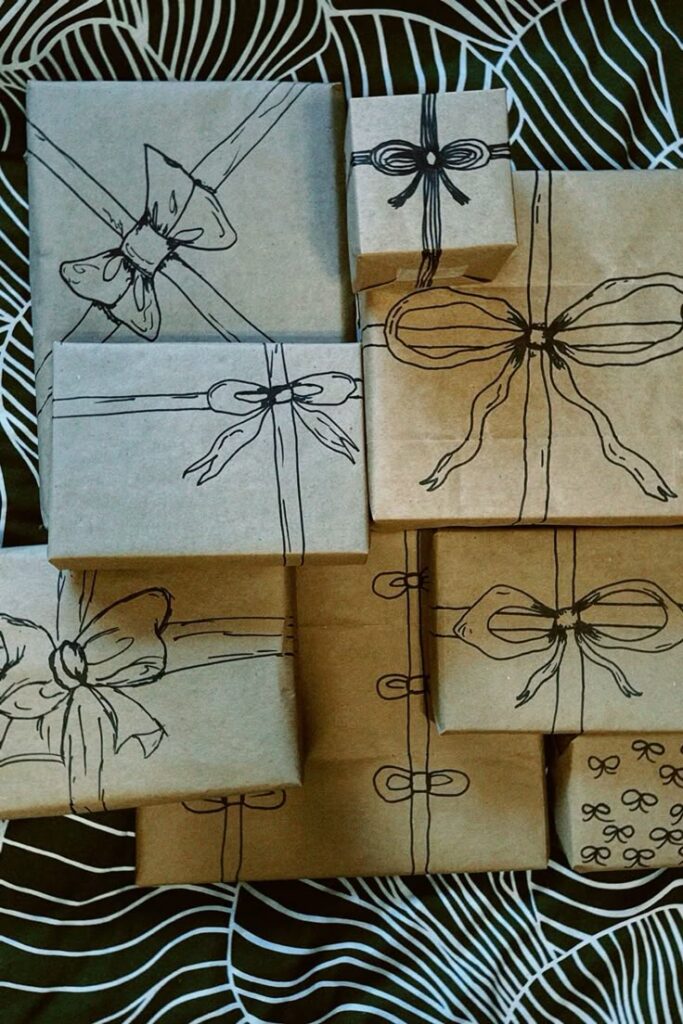
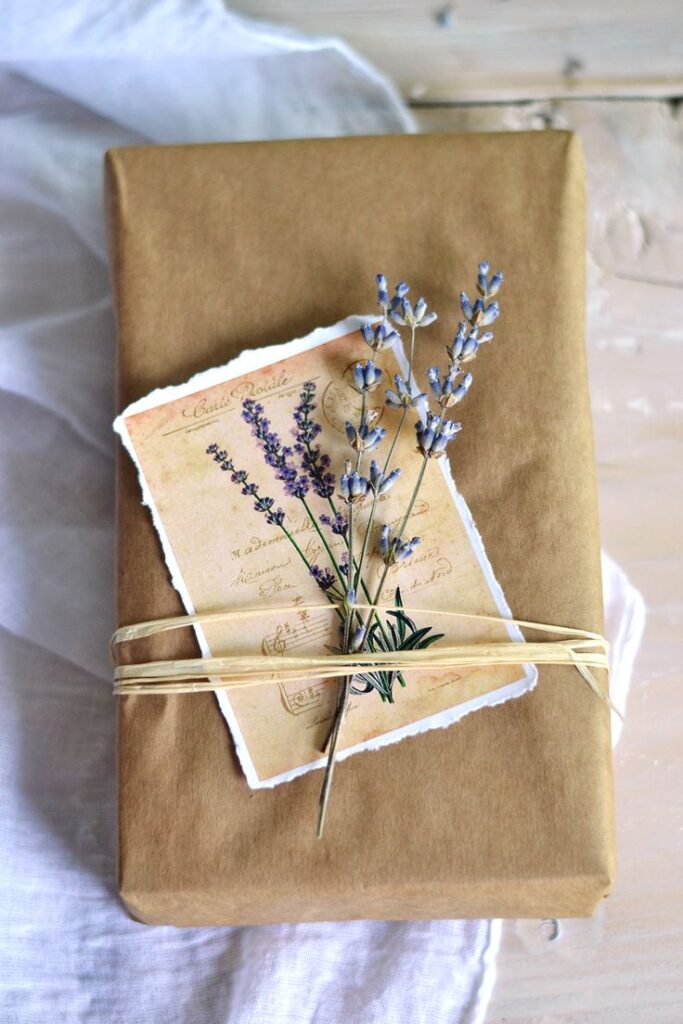
Creative Gift Wrapping Techniques
You can make your gifts stand out by choosing wrapping methods that highlight texture, material, and presentation. Practical techniques like fabric wrapping, recycled paper, and simple folds let you add personality while keeping the process easy to follow.
Classic Wrapping Methods
Traditional wrapping with paper, tape, and ribbon remains a reliable option. You fold the paper neatly around the box, secure the edges with tape, and finish with a bow or string. This method works well for square and rectangular packages.
To add variety, use double-sided wrapping paper for a layered look. You can also create pleated folds on the top surface for a decorative touch. Adding small extras like sprigs of greenery, dried flowers, or a wax seal gives a polished finish.
If you want to save time, try the diagonal wrapping method. It uses less paper and works especially well for medium-sized boxes. This approach keeps the corners neat without much trimming.
Furoshiki and Fabric Wraps
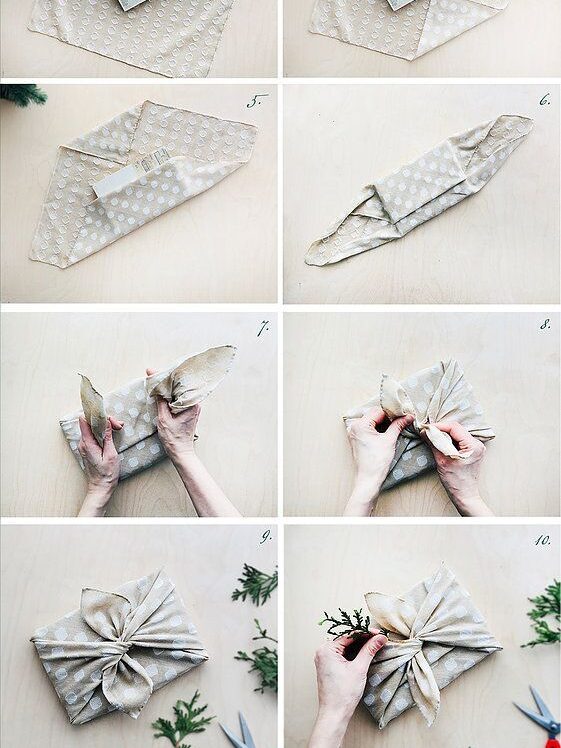
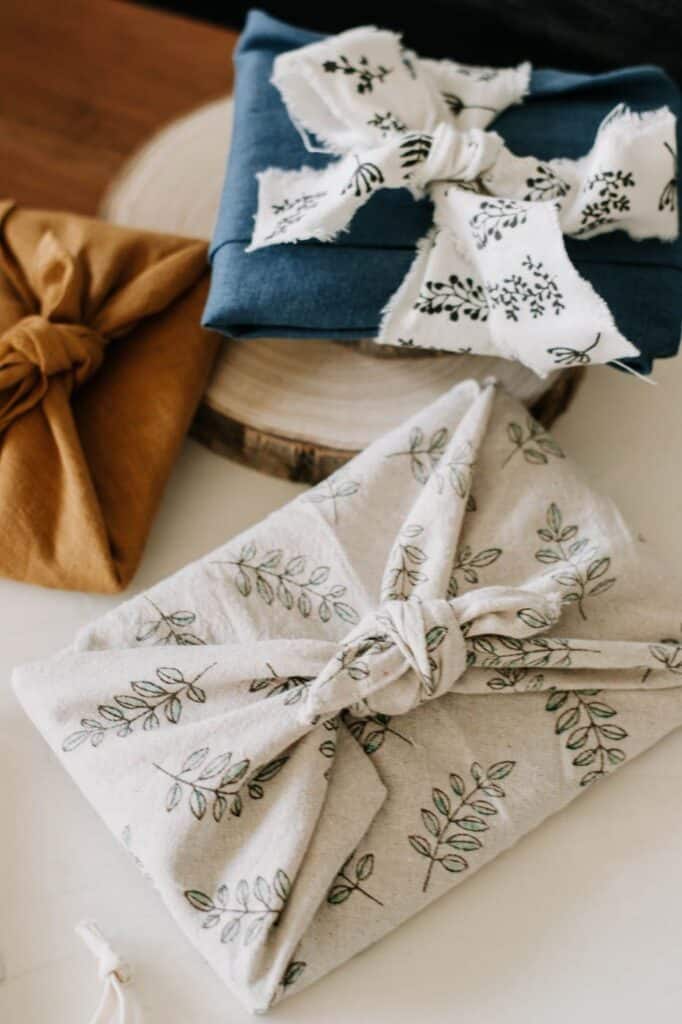
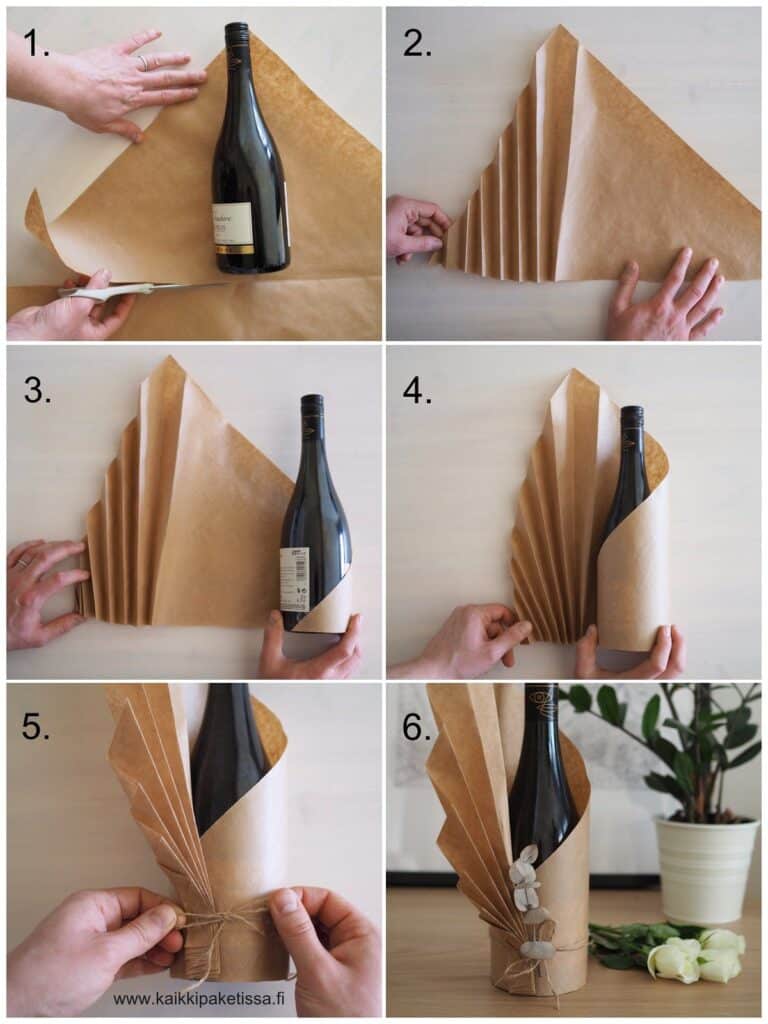
Furoshiki is a Japanese wrapping technique that uses fabric instead of paper. You place the gift in the center of a square cloth, then fold and knot the corners to secure it. The cloth itself becomes part of the gift, making it both practical and reusable.
You can use scarves, tea towels, or fabric remnants. For bottles, tie the ends of the fabric at the neck for a snug fit. For flat items, fold the fabric tightly and knot diagonally for a clean look.
This method is flexible because it adapts to different shapes. Oddly shaped items that are difficult to wrap with paper often look better when wrapped with fabric. It also reduces waste since the fabric can be reused many times.
Brown Paper Gift Wrap Styles
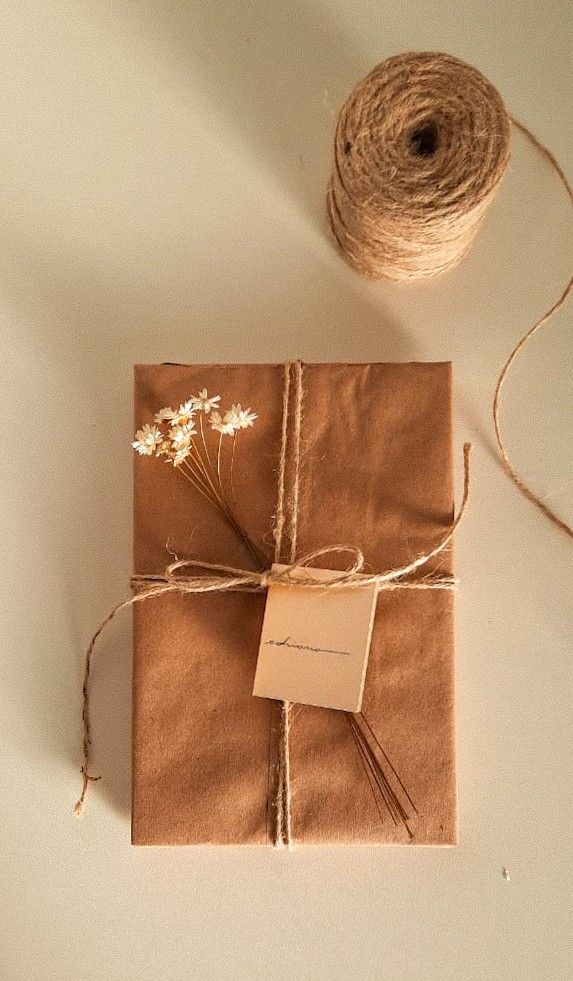
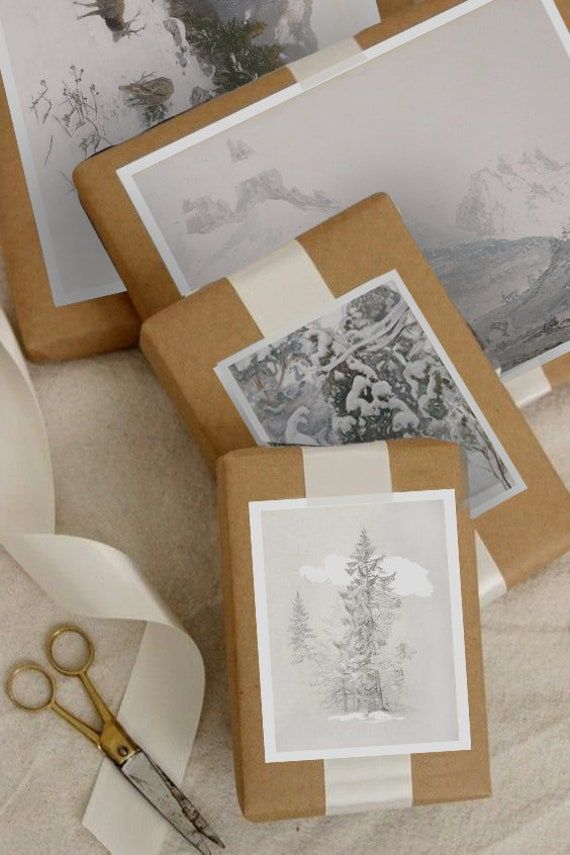
Brown paper gift wrap offers a simple and versatile base. You can leave it plain for a minimalist look or decorate it with string, twine, or ribbon. The neutral color makes it easy to pair with both bold and subtle accents.
Stamping designs with ink or painting small patterns adds personality. You could also use stencils for clean shapes. A strip of lace or washi tape across the package creates a contrast that stands out against the plain background.
Another option is layering. Wrap the gift in brown paper, then add a strip of patterned wrapping paper as a band across the middle. This creates a balanced and stylish presentation without much effort.

Eco-Friendly and Upcycled Wrapping
Eco-friendly wrapping focuses on reducing waste and reusing materials. You can repurpose newspapers, old maps, or sheet music as wrapping paper. These materials give your gift a unique look while avoiding single-use paper.
For ties, swap plastic ribbon for jute twine, yarn, or fabric strips. You can also decorate with natural elements like pinecones, cinnamon sticks, or pressed leaves. These details make the package attractive without adding synthetic materials.
If you prefer reusable options, fabric gift bags are simple to sew and can be used many times. Even jars or boxes you already own can serve as containers, eliminating the need for disposable wrapping altogether.
DIY Gift Wrap Ideas and Tutorials
You can make your gifts stand out with simple wrapping techniques, step-by-step tutorials, and custom paper designs. By using everyday materials and a few creative touches, you add a personal element that store-bought wrapping often lacks.
Easy Gift Wrapping Ideas
Start with brown kraft paper as a base. It’s inexpensive, sturdy, and gives you plenty of room to decorate. You can tie it with twine, add greenery like pine sprigs, or attach a small ornament for a seasonal touch.
Fabric wrapping is another quick option. Using scarves, tea towels, or even old shirts saves paper and doubles as an extra gift. The Japanese furoshiki technique works especially well for oddly shaped items.
For baked goods or small homemade treats, place them in a box or jar and wrap with patterned tissue paper. Add a ribbon or string tag for a neat finish. These simple approaches are easy to do yet look thoughtful.
Step-by-Step Gift Wrap Tutorials
Following a clear gift wrapping tutorial helps when you want a polished result. Flat boxes are the easiest to start with. Measure enough paper to cover the box fully, fold the edges neatly, and secure with double-sided tape for a clean look.
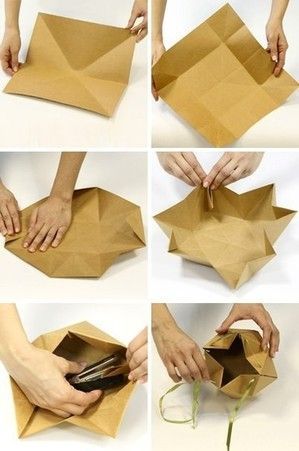
For gift bags, you can fold and tape wrapping paper into a bag shape. Add ribbon handles or punch holes for string. This method works well when you don’t have a store-bought bag on hand.
Odd-shaped gifts can be wrapped using the candy roll method. Place the item in the center of the paper, roll it up, and tie each end with ribbon. Tutorials often show this step-by-step, making it simple for you to follow along.
Custom Wrapping Paper Designs
Creating your own custom wrapping paper adds personality. You can stamp plain paper with shapes using potatoes, sponges, or rubber stamps. White ink on kraft paper gives a clean, modern look, while metallic paint adds shine.
Another option is to use confetti or sequins. Spray adhesive on the wrapped gift and sprinkle decorations across the surface. This works best on solid-colored paper.
You can also design wrapping with everyday items. For example, dip Q-tips in paint to create dotted patterns or use leaves as natural stencils. These small details turn ordinary paper into something unique and memorable.
Personalized Touches and Gift Toppers
Adding small, thoughtful details to your wrapping makes your gift stand out before it’s even opened. Simple accents, creative tools, and handmade extras help you create a presentation that feels personal and carefully considered.
Using Gift Toppers and Accents
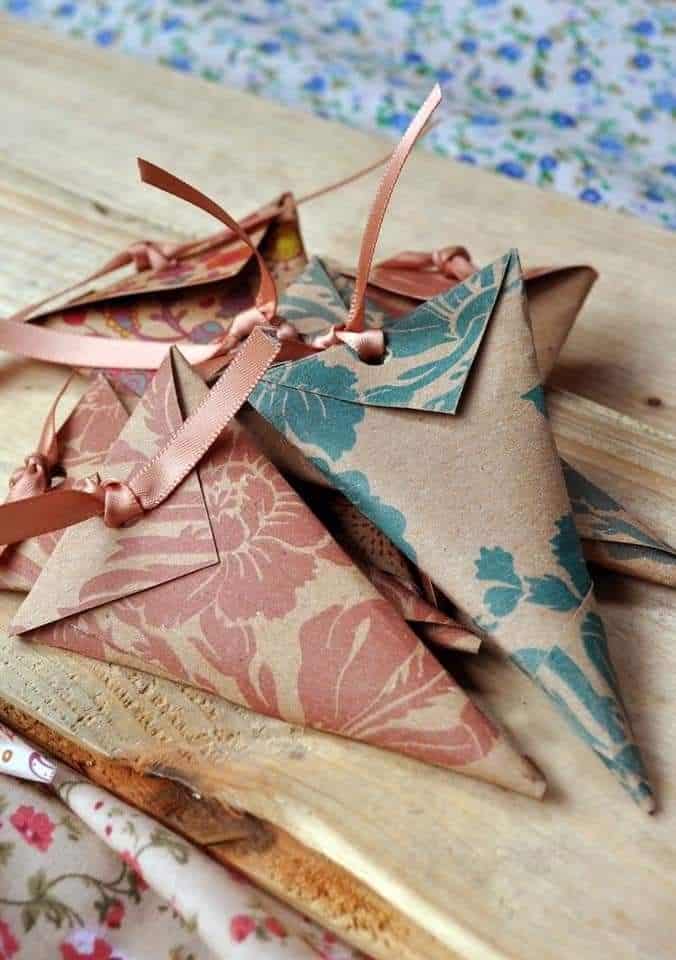
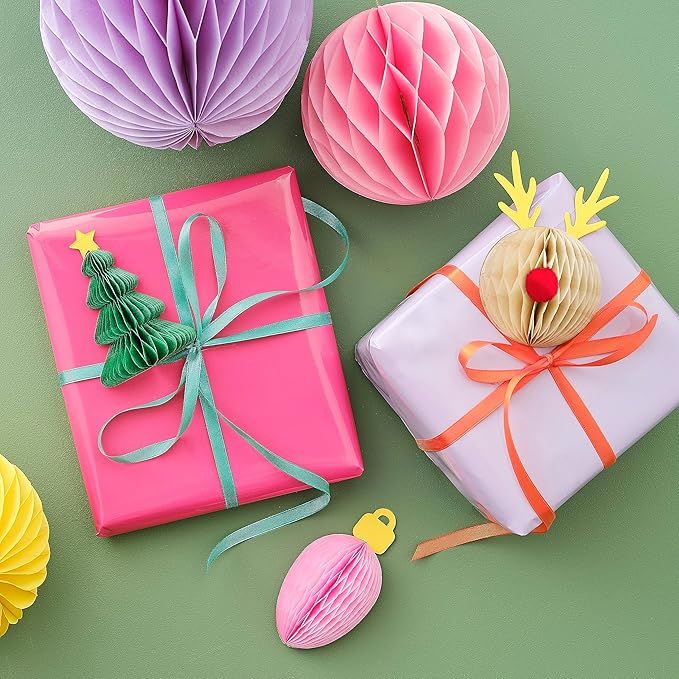
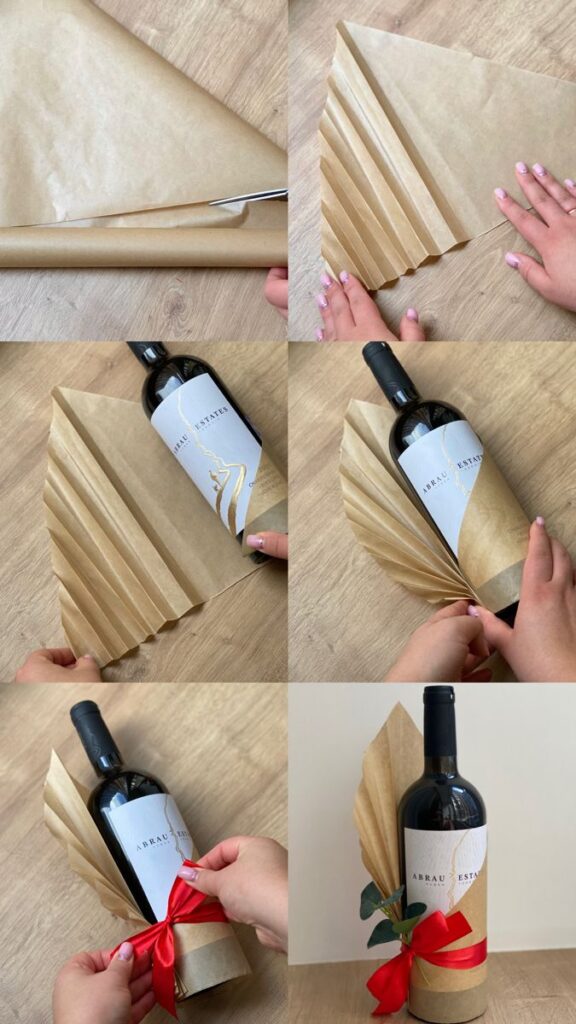
Gift toppers instantly elevate plain wrapping paper. You can use items like gold tipped paper feathers, sprigs of greenery, or small ornaments to create a polished look. These accents work well for holidays, birthdays, or any occasion where you want your wrapping to feel special.
A paper straw star is another easy option. Cut and glue paper straws into a star shape, then place it on top of your wrapped box. It’s lightweight, affordable, and adds dimension without being bulky.
For a simple approach, tie on a piece of twine and attach a dried flower or pinecone. These natural elements add texture while keeping costs low. If you want more shine, metallic ribbon or foil stickers give a clean, modern finish.
Create variety by mixing different toppers across multiple gifts. This way, each package feels unique while still tying into a consistent theme.
Incorporating Stencils and Washi Tape
Stencils let you add clean, repeatable designs directly onto wrapping paper. You can use star, snowflake, or geometric patterns with paint or ink. This works best on plain kraft paper, where the design becomes the focal point.
Washi tape offers another way to decorate. With its wide range of colors and prints, you can create stripes, borders, or crisscross patterns. Layering tapes in different widths makes your design more dynamic.
Try combining both techniques. For example, stencil a shape in the center of the package, then frame it with washi tape lines. This creates a balanced look without needing extra embellishments.
Because washi tape is easy to remove and reposition, you can adjust your design until it looks right. That makes it beginner-friendly while still producing professional-looking results.
Handmade Gift Tags and Cards
A handmade gift tag or card adds a personal message to your wrapping. You can cut tags from cardstock, punch a small hole, and tie them on with ribbon or string. Handwriting the recipient’s name makes it more personal than a store-bought tag.
For added detail, decorate tags with stamps, stickers, or small stencil designs. You could also layer patterned paper or use scraps from your wrapping to create a coordinated look.
Mini cards work well if you want space for a longer note. Fold a small piece of cardstock, decorate the front, and tuck it under the ribbon. This keeps your message attached to the gift without taping it directly to the paper.
If you enjoy crafting, try embossing or adding metallic ink for a subtle shine. These small design choices show care and effort, making your wrapping feel complete.
Sustainable and Unique Wrapping Alternatives
You can make your gifts look thoughtful while cutting down on waste by choosing materials that either decompose naturally, can be reused many times, or give a second life to everyday items. These options reduce landfill waste and still let you create packages that feel personal and creative.
Wrapping with Seed Paper
Seed paper is a biodegradable material embedded with flower, herb, or vegetable seeds. When you wrap a gift with it, the recipient can plant the paper in soil, water it, and watch plants grow. This turns the wrapping into part of the gift itself.
You can find seed paper in sheets, rolls, or even tags. It works well with small to medium-sized items because it is flexible but not as strong as thicker wrapping paper. To secure it, use natural twine, jute, or cotton ribbon instead of tape.
If you want to personalize it, write directly on the paper with a water-based pen. Avoid markers with heavy ink since they can affect seed germination. This option is especially nice for birthdays, weddings, or eco-conscious celebrations.
Repurposing Everyday Items
Many things you already have at home can double as wrapping. Old maps, newspapers, or sheet music add a unique look without any extra cost. Brown butcher paper is another versatile option that you can decorate with stamps, doodles, or sprigs of greenery.
You can also use fabric scraps like old scarves, tea towels, or pillowcases. These not only look creative but also reduce single-use waste. A simple knot or bow is usually enough to hold the fabric in place.
For smaller items, glass jars, tins, or baskets make excellent containers. They can be reused by the recipient and often eliminate the need for additional wrapping. Adding a handwritten tag gives these repurposed wraps a personal touch.
Reusable and Zero-Waste Options
Reusable wraps save resources while giving your recipient something practical. Fabric wrapping, often inspired by the Japanese furoshiki method, uses cloth squares that can be tied in different ways to fit items of varying shapes.
You can keep a small collection of cloth wraps, drawstring bags, or decorative boxes to use year after year. These options often end up becoming part of the gift itself since the recipient can reuse them too.
For a simple approach, combine reusable containers with natural accents. A plain box wrapped with twine and decorated with dried flowers or herbs looks elegant without creating extra waste. This style is easy to replicate and works for any occasion.
- 4.1Kshares
- Facebook0
- Pinterest4.1K
- Twitter3
- Reddit0


