Crafting your own bookmarks is a delightful way to add a personal touch to your reading experience. With an array of materials available, such as dried pressed flowers, origami paper, and acrylic embellishments, you can tailor each design to your style and preferences. These creative projects not only enhance your books but also offer a satisfying outlet for your artistic impulses.
DIY bookmarks provide an easy and enjoyable way to personalize your reading journey while also making thoughtful gifts for others. Whether it’s a simple paper bookmark or an intricate design featuring charms and stickers, the possibilities are endless. By engaging in these projects, you can express your creativity and give each book in your collection its unique marker.
Inspiration for your creations can come from many sources, including online platforms like Pinterest and YouTube, which offer a wealth of ideas and tutorials. From corner bookmarks to intricate cut-out designs, there’s something to suit every skill level and aesthetic. Dive into this versatile world of DIY bookmarks and discover how easy it is to enhance your reading experience with your personalized touch.


Understanding Bookmarks
The world of bookmarks is rich and varied, from their historical beginnings to the wide array of practical and decorative types available today. Each bookmark serves a unique purpose, offering both utility and artistic expression.
History and Purpose
Bookmarks have been an essential reading accessory for centuries. Originating in the medieval period, they emerged to protect manuscripts and allow scholars to quickly locate their place in a text. Traditional bookmarks were often made of leather or vellum, elegantly simple yet highly functional.
In the modern context, they not only preserve your page but also highlight passages of interest, making reading a more interactive experience. Their development showcases the evolving relationship between readers and their books, highlighting both utilitarian need and personal expression.
Different Types of Bookmarks
Bookmarks come in various forms and materials, each with distinct characteristics. Paper bookmarks are common, often featuring artistic designs or quotes. Magnetic bookmarks clip over the page, offering a secure hold.
Fabric or ribbon bookmarks often add a touch of elegance and texture. Metal bookmarks, sometimes engraved, are durable and sophisticated. There are also digital bookmarks used in e-readers, enabling users to bookmark locations or highlights without a physical presence. This variety ensures that there’s a bookmark type perfectly suited for any reader or occasion.


Materials and Tools for DIY Bookmarks
Creating unique DIY bookmarks involves selecting appropriate materials and using the right tools. Common choices include cardstock and markers, while essential tools range from hole punches to rulers.
Selecting the Right Materials
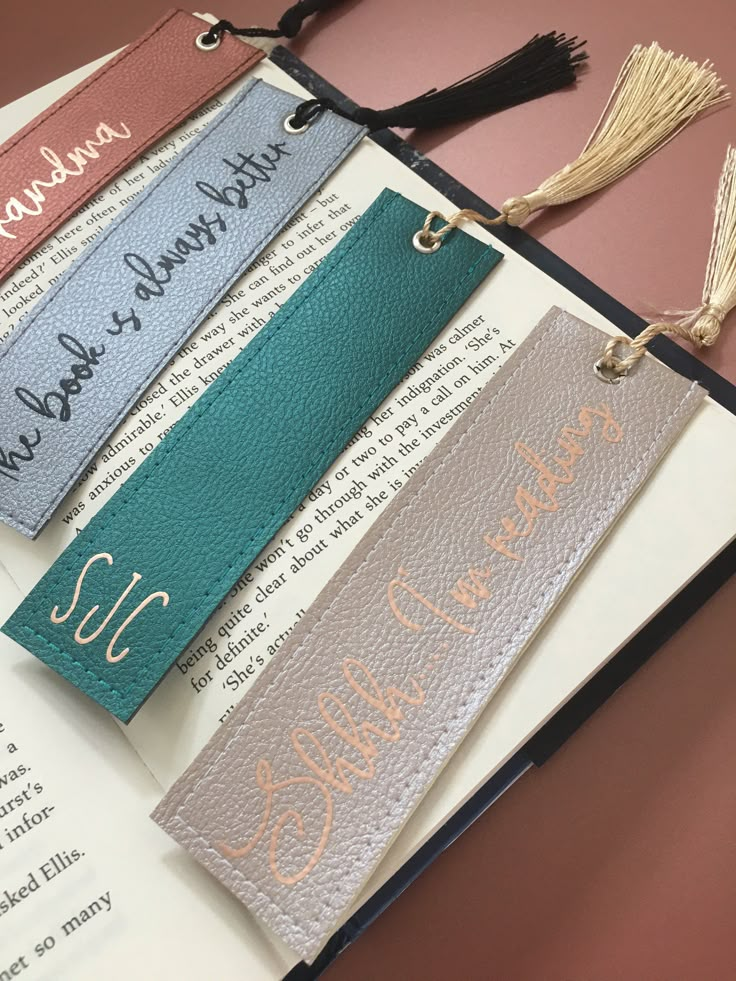
The choice of materials can significantly impact the durability and appearance of your bookmarks. Cardstock is a popular option due to its thickness and variety of colors, making it ideal for creating sturdy bookmarks. For an elegant touch, you might consider using leather or faux leather. These materials provide a sophisticated look and feel, suitable for gifts or special projects.
You can also enhance your bookmarks with various embellishments. Pressed flower stickers or foil butterfly stickers add personality and charm. To make your bookmarks stand out, consider including customizable features like scrapbook initial charms.
Essential Crafting Tools
A few essential tools can aid your bookmark-making process. A ruler and a pencil or fabric marker are necessary for accurate measuring and marking. Scissors will be required to cut materials to the desired dimensions, ensuring clean edges.
For adding decorative holes or attaching charms, a hole punch and eyelet setter are invaluable. These tools allow you to create consistent holes and attach decorative additions securely. If you’re using heavy paper like cardstock, consider colored pencils, markers, or gel pens to personalize your designs with creative artwork or messages.


Step-by-Step DIY Bookmark Tutorials
Creating your own bookmarks allows you a chance to personalize your reading experience. This guide walks you through crafting basic bookmarks and explores more advanced designs for those looking to enhance their creative skills.
Basic Bookmark Tutorial
Start by selecting a piece of paper that suits your style, such as card stock or colored craft paper. Cut it into a rectangle measuring about 2 inches by 6 inches. This size fits well within most books while providing ample space for decoration.
Next, choose your tools. You might want colored pencils, stamps, or stickers to embellish your bookmark. Consider laminating it to enhance durability. Adding a hole punch at the top and threading a piece of ribbon through it can give a polished look.
Complete your bookmark by adding personal touches such as your name or favorite quote. This simple step-by-step method produces a functional and aesthetic bookmark quickly.
Advanced Bookmark Designs
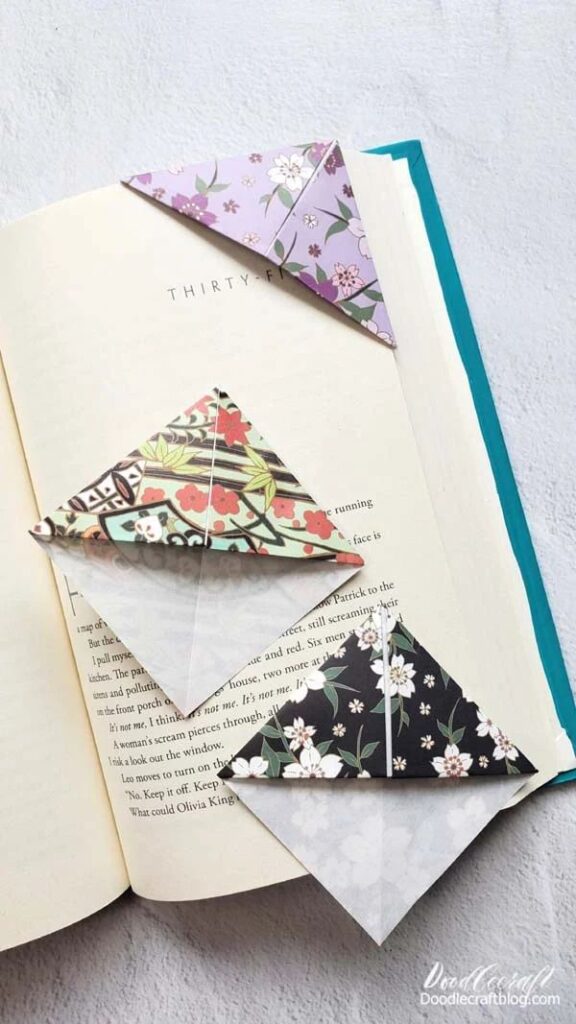
For a more complex project, consider creating an origami corner bookmark. This type folds over the corner of a page and can be shaped into various forms, such as animals or geometric designs. Begins with a square piece of paper; standard origami paper works well.
Follow an origami diagram or tutorial to fold the paper into the desired shape, ensuring creases are sharp for a professional finish. You can also use watercolor paints or metallic pens for additional artistic flair.
Another advanced technique involves creating a mixed-media bookmark using materials like fabric, buttons, or beads. Attach these elements with a strong adhesive to ensure longevity. Such designs provide a more tactile experience and can serve as memorable gifts.


Design Inspiration and Creative Ideas
When embarking on a DIY bookmark journey, inspiration is key. Consider exploring Pinterest boards dedicated to bookmarks. These platforms offer countless innovative ideas, from simple paper crafts to intricate designs with fabric or metal embellishments.
Experimenting with different materials can lead to delightful results. You can use watercolors for an artistic touch or repurpose eco-friendly materials for a sustainable option.
Engage your creative side by incorporating unique elements like gold leaf, or embellishments such as ribbons and beads. These additions can transform a basic bookmark into something truly bespoke.
Explore these ideas:
- Paper crafts: Simple and versatile.
- Fabric bookmarks: Soft and tactile.
- Metal accents: Add a modern flair.
- Pressed flowers: Timeless and beautiful.
You don’t need to be an experienced crafter to create stunning bookmarks. Start by selecting a theme or color scheme that resonates with your personal style. This approach helps in achieving a cohesive design that feels truly yours.
Let your imagination guide you in creating bookmarks that not only mark your place in a book but also serve as mini artworks.


Tips and Tricks for Perfect Bookmarks
Creating DIY bookmarks requires a balance of creativity and practicality. With a few essential tips and tricks, you can ensure your bookmarks are not only visually appealing but also durable enough to withstand regular use.
Ensuring Durability
To make your bookmarks last longer, consider the materials you use. Cardstock is a popular choice due to its sturdiness, while lamination can protect your designs from wear and tear. It’s important to seal any decorations with a layer of clear adhesive or mod podge to prevent peeling.
When cutting out shapes or designs, sharp scissors or craft knives can provide clean, precise edges. This gives your bookmark a professional look. For a neat finish, round the edges slightly, preventing them from catching or bending.
Innovative Decorating Techniques
Unleash your creativity with a variety of decorating techniques. Pressed flowers can add a natural touch and pairing them with embroidery floss can create texture. For a modern look, try incorporating washi tape in various patterns or colors to create stripes or borders.
Photo cutouts or drawings on decorative paper allow you to personalize your bookmarks uniquely. Utilize paint chips for a colorful, gradient effect, and experiment with fabric scraps for a tactile feel. Mixing and matching these elements can lead to a unique design that reflects your personal style.
- 6.9Kshares
- Facebook0
- Pinterest6.9K
- Twitter0


