Creative projects can be a simple way to unwind, spark new ideas, or spend quality time with family and friends. You don’t need specialized skills or expensive supplies—just a little inspiration and an interest in trying something new.
Easy craft ideas make it possible for you to create enjoyable and impressive projects with minimal effort. Whether you’re looking for activities to do at home or just want a relaxing way to express your creativity, these straightforward crafts offer accessible fun for any skill level.
1) Paper Mache Bowls
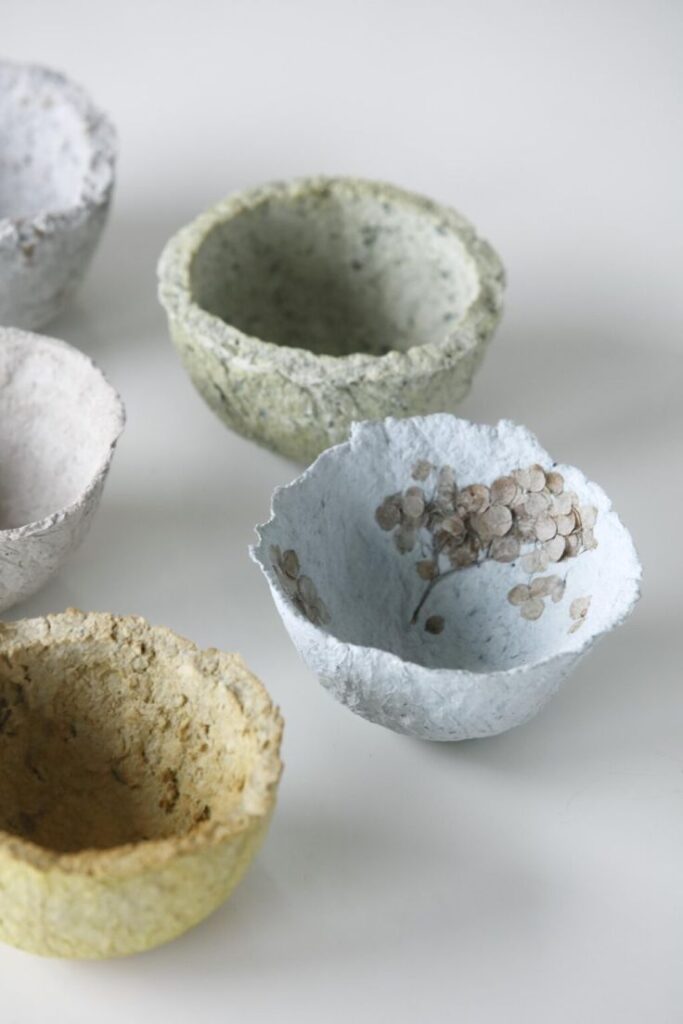
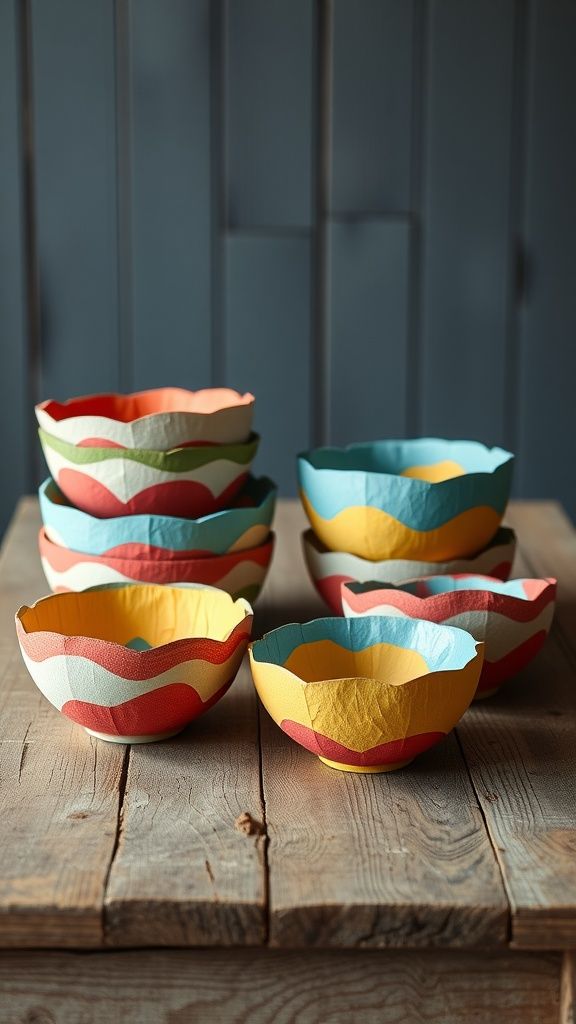
Paper mache bowls are a simple and creative craft idea. You only need basic materials like newspaper, plain flour, water, a balloon, and some paint. This project is low-cost and easy to do at home.
Start by making a paste from flour and water. Tear the newspaper into strips, dip them in the paste, and layer them over a balloon shaped like a bowl. Allow each layer to dry thoroughly before adding the next.
When the paper mache dries, pop and remove the balloon. Trim the edges if needed to create a smooth finish. Paint your bowl with colors or patterns of your choice.
Paper mache bowls can be used as decorative storage for keys, jewelry, or small household items. This craft is suitable for both kids and adults. The drying process does take some time, but the steps are straightforward and manageable.
For extra durability, you can apply a layer of varnish once the paint has dried. Your finished bowl makes a unique display piece or a handmade gift.
2) Painted River Rocks
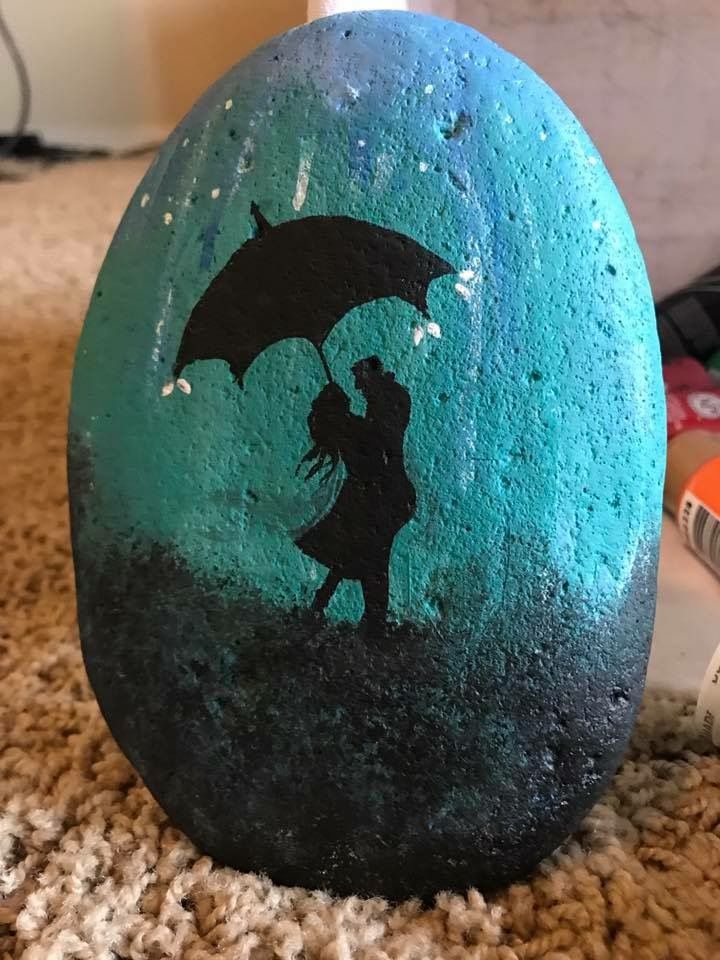
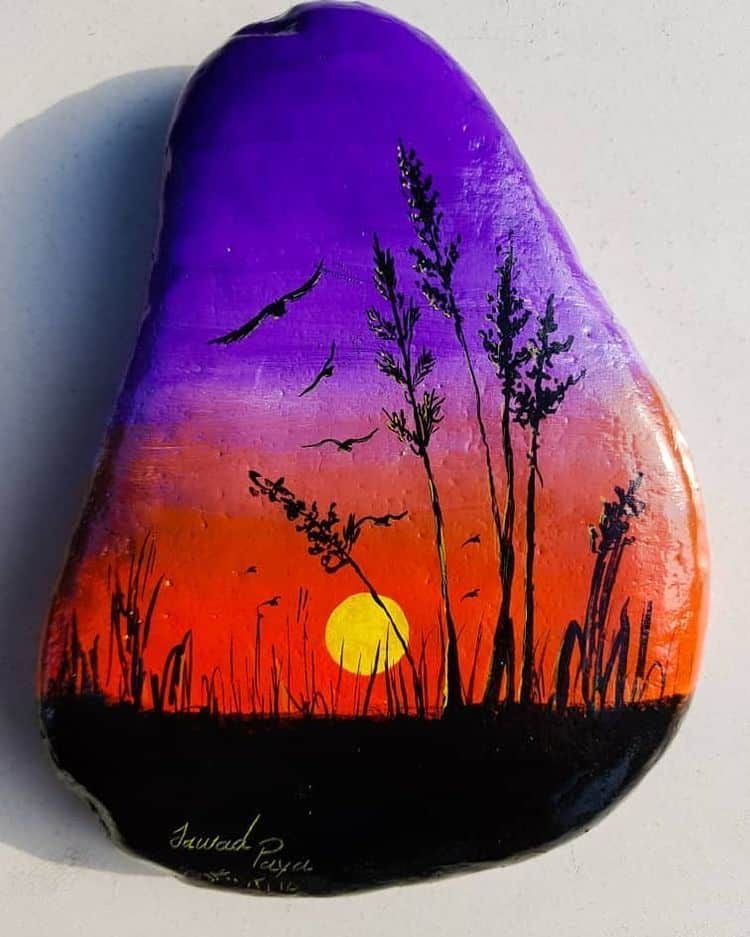
Painting river rocks is an easy and relaxing craft that lets you express creativity using simple materials. All you need are clean, smooth river rocks, acrylic paints, and brushes. Optional sealant is recommended if you want to use your painted rocks outside.
You can start with basic designs like dots, stripes, or simple shapes. Flowers, animals, and patterns work well if you prefer detailed imagery. Painted rocks can be left in gardens, given as gifts, or even placed in public spaces as part of community art projects.
Kids and adults both enjoy this craft, and you don’t need advanced artistic skills. Flat, light-colored rocks usually show paint best, but any size or color of rock can work.
Before painting, make sure your rocks are washed and dried completely. Allow your painted rocks to dry fully before applying a clear sealant. This helps protect your designs from weather or wear.
Experiment with different color palettes and techniques. Try using small brushes for details, or even dotting tools for patterns. Painted river rocks offer flexibility, and you can complete a few in a short crafting session.
3) Pom Pom Garlands
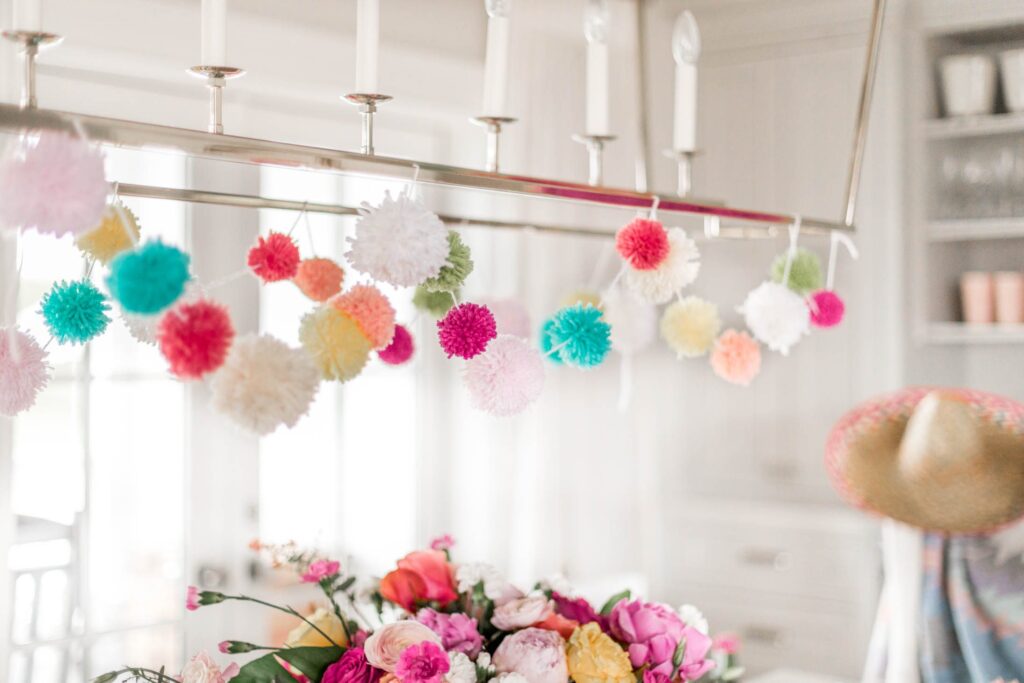
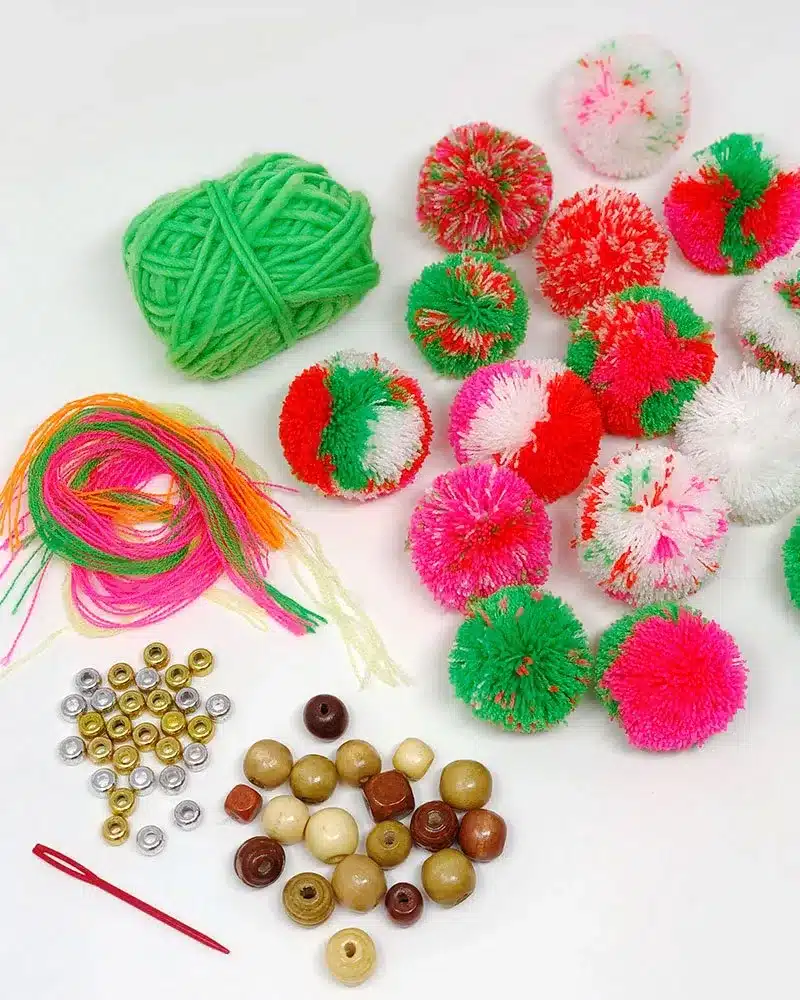
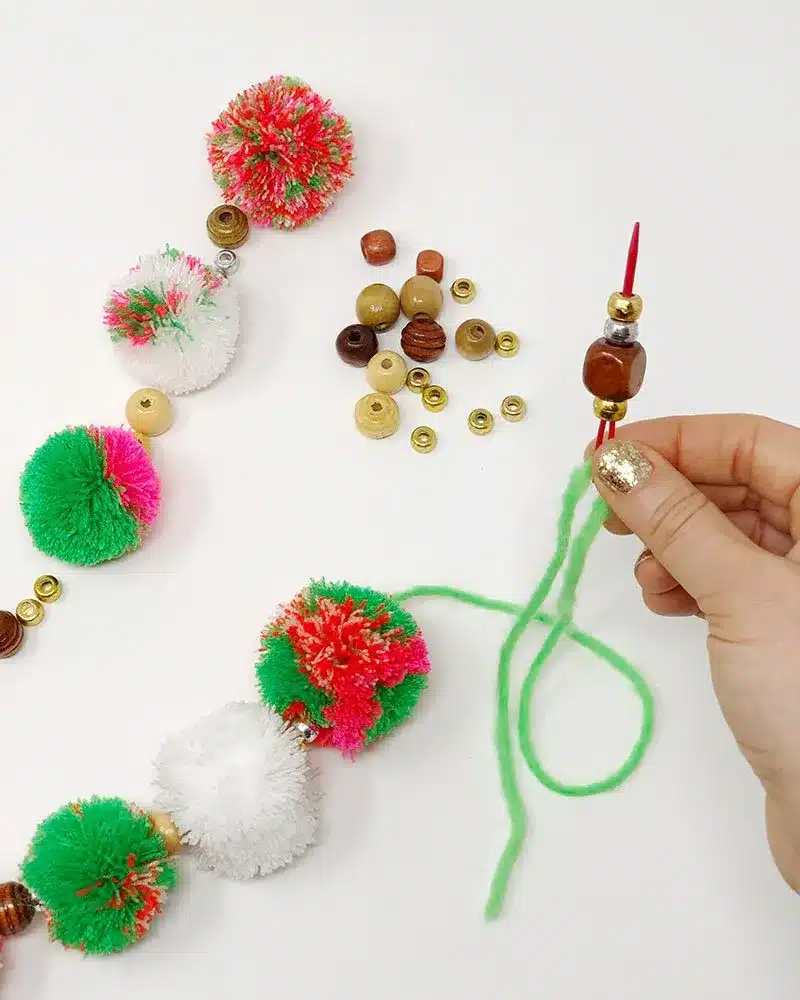
Creating pom pom garlands is a practical way to bring color and texture into any space. These garlands are easy to assemble and work well for decorating bedrooms, offices, or for special occasions like parties.
You can use any yarn or string, making it a good option for using up leftover materials. Simply make pom poms with a pom pom maker or by hand, then string them onto a piece of twine or ribbon.
Pom pom garlands look appealing draped over mantels, along walls, or above doorways. You can customize the color scheme to match your decor or event theme, whether you prefer a single color or a mix.
The process of making the garland is straightforward and suitable for all ages and skill levels. You only need basic supplies such as yarn, scissors, and something to string the pom poms onto.
Pom pom garlands can be reused for different events or as year-round decor. Adjusting the size and spacing of the pom poms lets you control the look, from dense and fluffy to spaced and airy.
4) Watercolor Collage Art
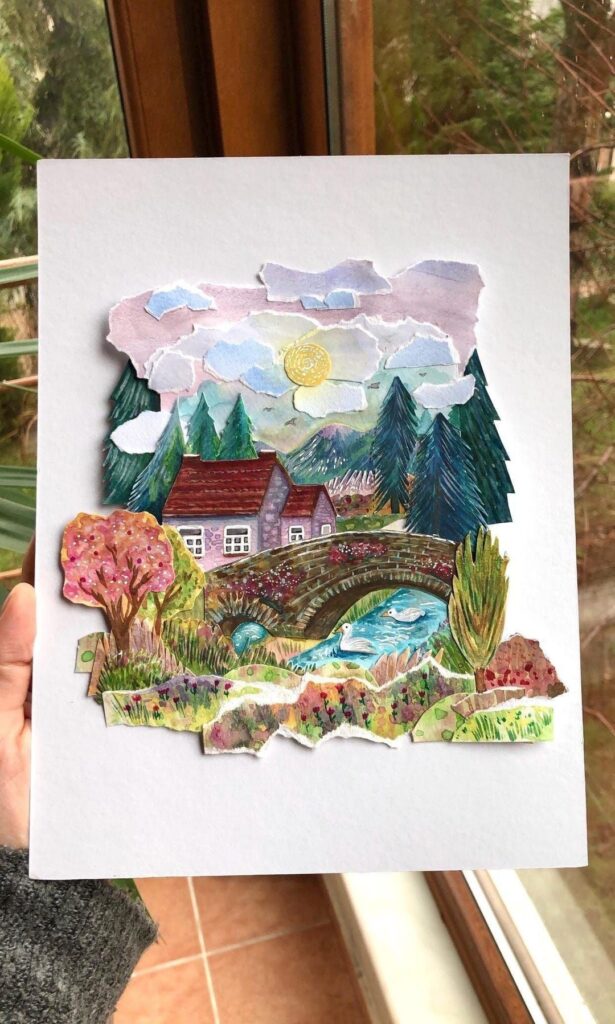
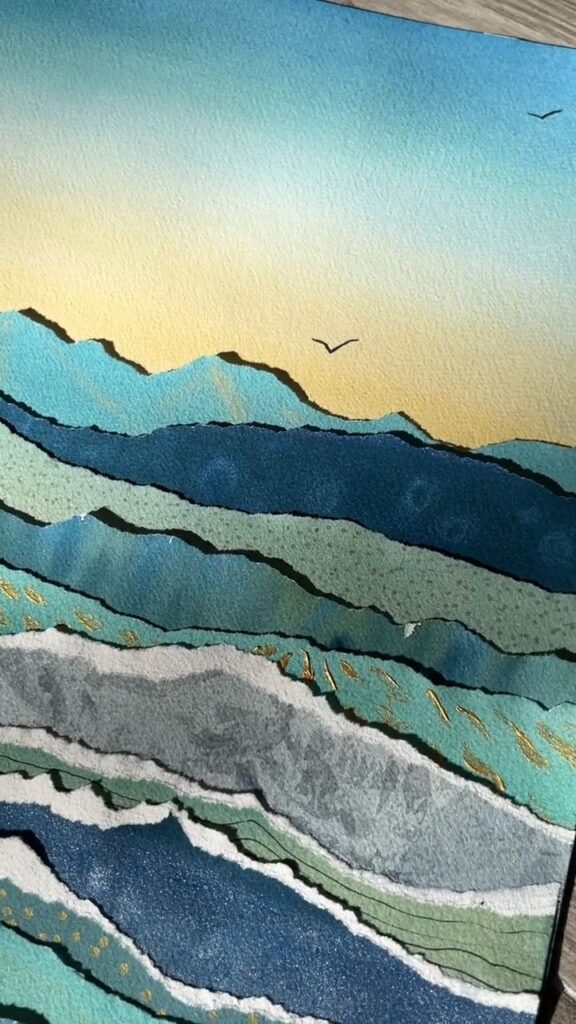
Watercolor collage art combines painting and collage techniques to create layered, textured artworks. You begin by making several simple watercolor paintings on separate sheets. These can be abstract washes, simple shapes, or playful patterns.
Cut or tear your painted papers into different shapes or strips. Arrange and layer these pieces onto a canvas, sturdy paper, or even a wood panel. You can overlap edges to create interesting effects and depth.
Use decoupage glue or a glue stick to attach the watercolor pieces to your base. Smooth each piece as you go to reduce wrinkles. Experiment with layouts before gluing anything down.
This project gives you the chance to explore color and shape while staying relaxed and creative. Watercolor collage art works well for both kids and adults, making it a versatile option.
Try mixing in other materials like tissue paper or magazine clippings if you want extra variety. The process is simple, and every finished collage is unique.
5) Recycled Tin Can Windsocks
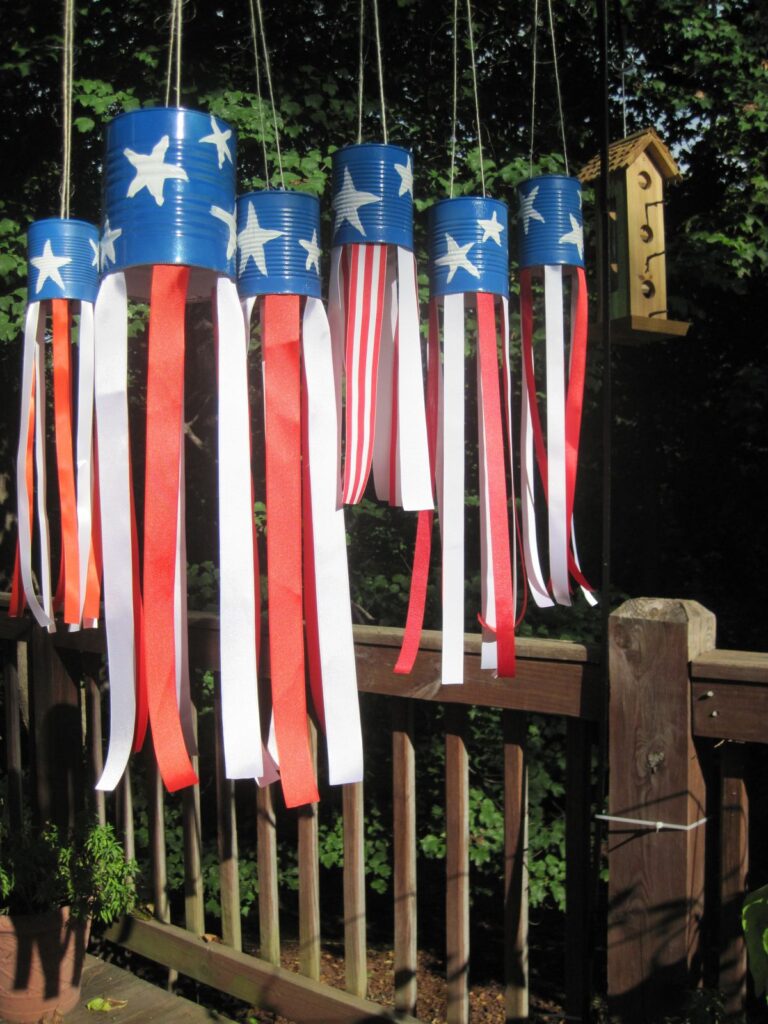
You can create colorful windsocks from empty tin cans using simple materials found around your home. This project is a practical way to reuse and repurpose cans while adding some color to your outdoor space.
Start by thoroughly washing and drying an empty tin can. Remove any sharp edges for safety. Paint the outside of the can in your favorite colors or patterns. Acrylic paint works well and dries quickly.
Once the paint has dried, attach ribbons, crepe paper, or strips of fabric to the open end of the can. You can glue or tape them inside the edge so they hang down as streamers. Use as many colors as you like.
Punch two holes near the top and thread a string or yarn through to create a hanger. This lets you easily display your windsock from a porch, tree, or balcony.
This craft is simple, low-cost, and flexible. You can use materials you already have and easily adjust the design. It’s also suitable for all ages with proper supervision.

6) Microwave Puffy Paint
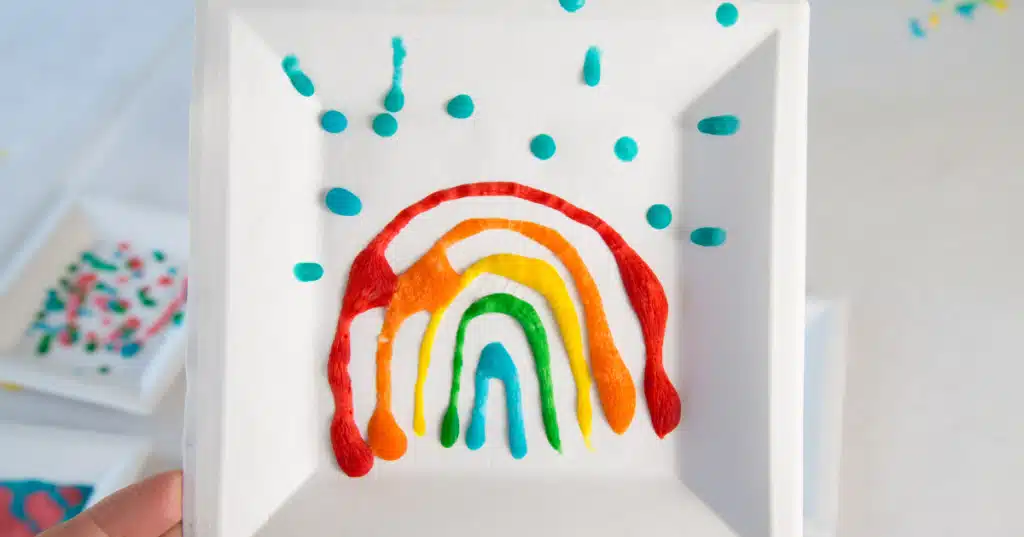
Microwave puffy paint is a simple craft that creates raised, textured artwork in just minutes. You only need a few basic kitchen ingredients, such as self-rising flour, salt, water, and food coloring.
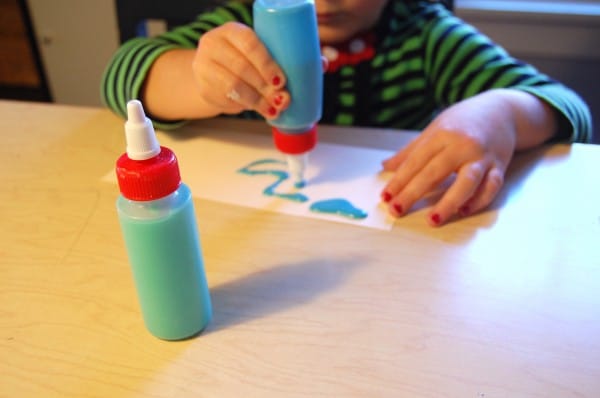
To make the paint, mix 1 tablespoon self-rising flour with 1 tablespoon salt. Add a few drops of food coloring and 1/4 teaspoon of water at a time until you reach a yogurt-like consistency. Prepare separate batches for different colors.
Use brushes, cotton swabs, or even a plastic bag with the corner snipped off to draw your designs on sturdy paper or cardboard. Once finished, place the decorated paper in the microwave for about 30 to 45 seconds.
The mixture quickly puffs up and dries. Your artwork will have a distinct, three-dimensional texture when it comes out of the microwave. This project is quick, budget-friendly, and easy for all ages.
7) Colorful Paper Flower Wreaths
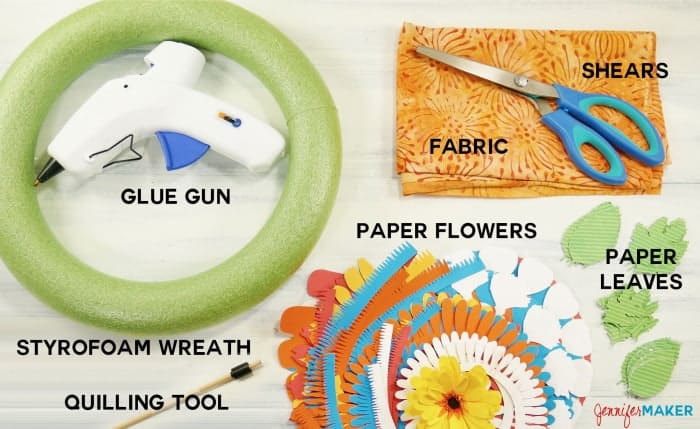
Creating a paper flower wreath is a simple and affordable way to brighten up your space. You only need some colored paper, scissors, glue, and a base such as a paper plate or cardboard ring.
Start by cutting out flower and leaf shapes from colorful paper. You can find many free printable templates online to help with this step. If you prefer, draw the shapes by hand for a more personalized touch.
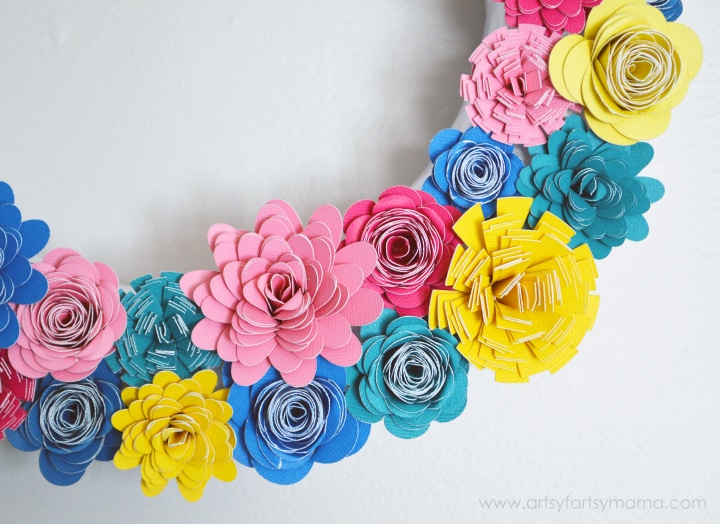
Arrange the paper flowers and leaves around your wreath base and glue them in place. You can mix different colors and shapes to achieve a vibrant look. Layering petals and adding curled edges will give your flowers extra dimension.
This project works well for any season or occasion. Display your finished wreath on your door or wall, or give it as a handmade gift. You can easily adapt the colors and styles to fit your decor or specific event.
8) Macrame Clay Pot Holders
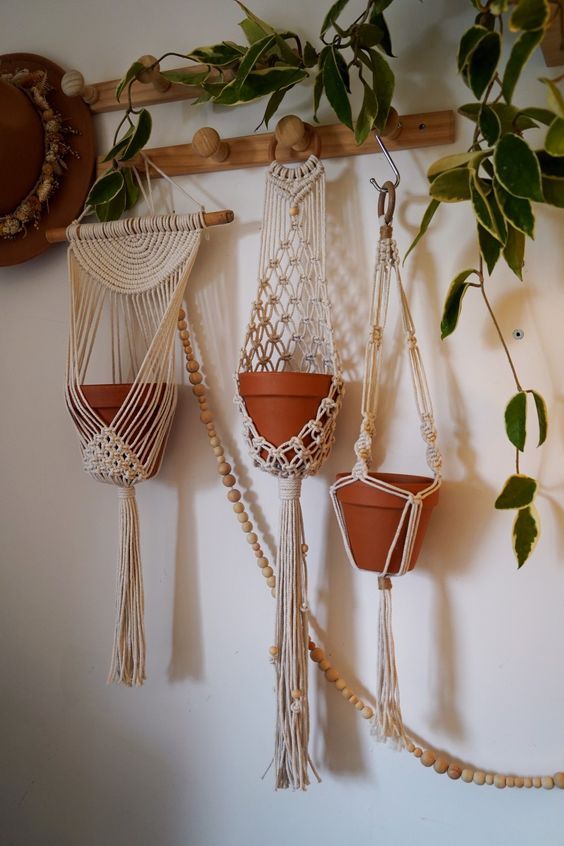
Macrame clay pot holders add a handmade touch to your indoor or outdoor spaces. You only need basic materials: a clay pot, some sturdy rope, and scissors.
Start by painting or decorating your clay pot, if you wish. Allow it to dry before moving on to the macrame part. Use a simple macrame knot pattern, such as the square knot, to create a supportive net for your pot.
Cut several equal lengths of rope. Tie them together at one end with a secure knot. Braid or knot the ropes in pairs, measuring as you go to keep the net even.
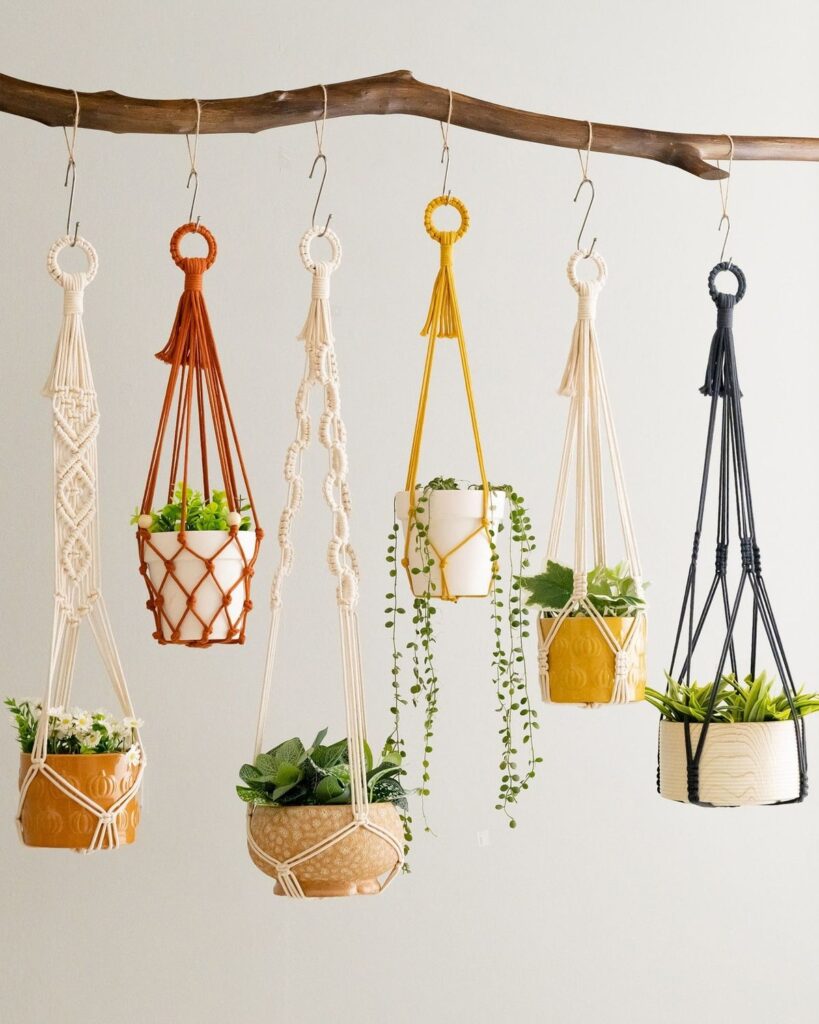
Once you’ve created a nest for your pot, place it inside and adjust the knots to hold it snugly. Finish by tying a final knot above the pot, creating a loop for hanging.
You can hang your finished piece by a hook in the ceiling or outside on a sturdy branch. Simple changes in rope color or knot style let you customize each holder easily.
This craft gives you both a decor item and a functional planter. It’s a practical way to display your plants while adding texture and style to your space.
Materials and Tools for Simple Crafts
Having the right materials and tools makes crafting at home enjoyable and stress-free. Focusing on safe, sustainable, and easily available supplies ensures your projects are both creative and practical.
Essential Supplies to Get Started
Start by collecting a basic set of tools and materials for your crafts. Scissors, glue (school glue or hot glue gun), and tape are staples for almost every project. Keep a variety of paper—such as construction paper, colored cardstock, or recycled printer paper—on hand.
Other versatile items include markers, crayons, colored pencils, paint, and paintbrushes. Consider adding craft sticks, pipe cleaners, yarn, and string for more creative options. Don’t overlook household items like empty boxes, toilet paper rolls, egg cartons, and bottle caps, which are useful for many easy crafts.
| Essential Item | Purpose |
|---|---|
| Scissors | Cutting paper and fabric |
| Glue/Tape | Attaching pieces |
| Markers/Crayons | Adding color and details |
| Paper/Cardstock | Craft base |
| Recycled Items | Unique textures/shapes |
Keeping these essentials organized in a small container or drawer saves time and allows you to start crafting whenever inspiration strikes.
Choosing Safe and Sustainable Materials
When selecting supplies, prioritize safety and environmental impact. Use non-toxic glue, water-based paints, and child-safe scissors for younger crafters. Always check packaging for certifications or safety labels if children are involved.
Opt for recycled or upcycled materials whenever possible. Clean and reuse items like jars, fabric scraps, or cardboard to minimize waste. If purchasing new supplies, look for biodegradable or recyclable products, such as paper straws or wooden craft sticks.
Minimize the use of single-use plastics and avoid hazardous materials like permanent markers or industrial adhesives if you’re crafting with kids. This not only keeps everyone safe but also encourages more responsible crafting habits.
Tips for Crafting Success
Choosing the right setting and managing your time help you finish crafts efficiently. Simple changes to your environment and daily schedule can make projects more enjoyable and productive.
Creating a Dedicated Crafting Space
Setting up a dedicated area for your crafts streamlines both setup and cleanup. Even a small table or corner will provide a stable surface to work on. Use storage bins, shelves, or drawers to keep tools and materials sorted.
Keep only the supplies you’ll need for each project within arm’s reach. The rest should be put away in labeled containers. Good lighting—natural or from a bright desk lamp—helps you see details clearly and reduces eye strain.
Protect your workspace by covering it with a plastic mat, newspaper, or old tablecloth. This makes it easy to clean up any spills or scraps. Having your own crafting zone also helps you mentally shift into creative mode and avoid distractions from other activities or family members.
Time Management for Quick Projects
For quick projects, planning matters. Break tasks down into steps and estimate how much time each step will take. Set a timer or use a checklist to track your progress, especially if you have a limited window for crafting.
Prepare all your materials before you start. This prevents interruptions while you hunt for supplies. If you only have a short amount of time, choose smaller crafts or prep parts of a bigger project.
Block out specific periods in your day or week dedicated to crafting. Remove distractions by silencing notifications and letting others know not to disturb you. Staying organized and working in manageable time blocks helps you finish more projects without feeling rushed.
- 831shares
- Facebook0
- Pinterest823
- Twitter8
- Reddit0

