Hello everybody in my artist studio!
I’m going to share some tips and ideas to learn portraits drawing male and female. We start to draw any part of a human body with a pencil as any objects with schematic forms and without unnecessary details.
Introduction
Portrait drawing is one of the most rewarding—and challenging—skills an artist can learn. Capturing a person’s likeness goes beyond copying facial features; it involves understanding proportions, structure, light, and expression. For many beginners, drawing portraits can feel intimidating, but with the right approach and practice, it becomes an achievable and enjoyable process.
This guide to drawing portraits brings together practical tutorials and creative ideas to help you build confidence step by step. You’ll learn how to break the face into simple shapes, place features correctly, and use shading to create depth and realism. Whether you’re sketching from photographs, working from life, or developing your own style, these techniques provide a strong foundation.

No matter your skill level, portrait drawing improves observation and artistic awareness. By practicing consistently and exploring different methods, you’ll not only improve accuracy but also learn how to convey personality and emotion in your work. This guide is designed to help you start strong, stay motivated, and continue growing as a portrait artist.
Portraits drawing for beginners
I suggest you start to draw a face with a sharp photograph than with a live person. This will make you feel more comfortable starting to understand how to draw portraits in pencil step by step. You will do it without feeling pressured by someone who poses for you and remaining calm enough to be able to draw.


Drawing portraits from photos are really what we have been doing from the very beginning. How to make a good photo so that it reflects well in our drawing? Avoid blurring your photos because you will only be able to paint what you can clearly see. Use bright locations or a lighting fixture to illuminate the entire face well in detail.


I do not suggest to start learning from portrait drawings by other artists because you will be unable to develop your own language and style. Suppose you are interested in drawing from other people’s drawings. So I will make a specific post with clear recommendations on which links to take.
Starting a pencil portrait
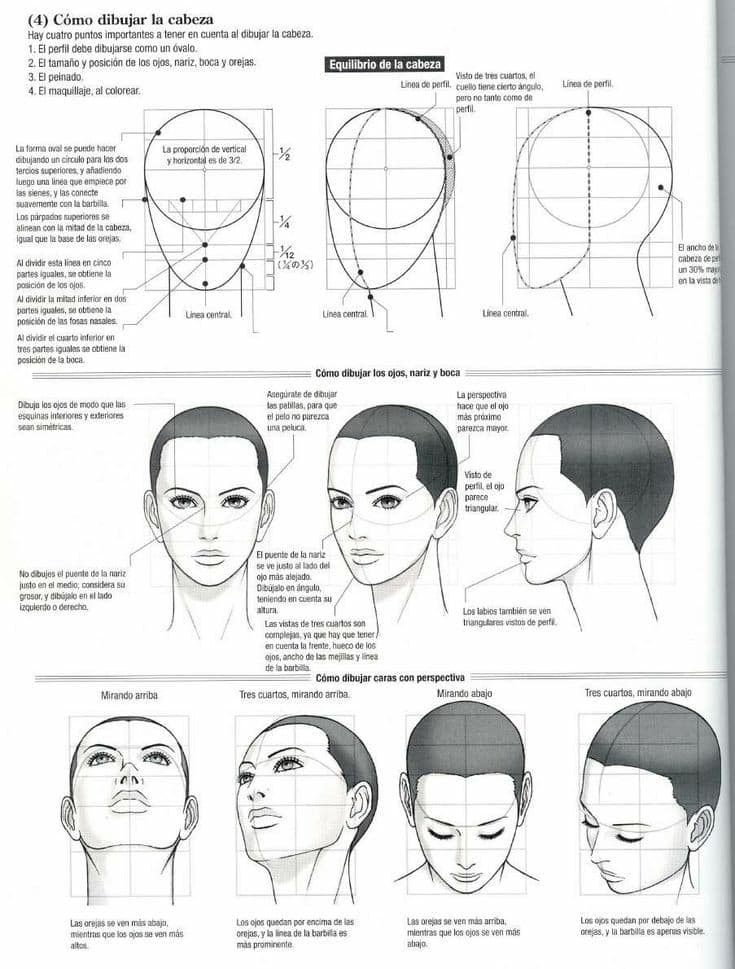
Start by marking the face height and width to make it easier for you to see proportions. As to facial anatomy, you can compare how many times width is contained in a face height. Draw the shape of a face oval schematically. You don’t need to round off features at this point.
Mark imaginary lines for the height or position of eyes, a nose, and a mouth. You should pay attention to the distance between the eye height, a tip of a nose, and a position or the lips tilt. The likeness of any face is largely due to these sizes. Take your time with detailing. The original design should be well-built.


How to draw eyes, a nose, and a mouth
Eyes are drawn quite simply. Upper eyelid curves and lower ones in a form of contracted ovals are almost a mirror image of one another. Iris circles extend beyond a top line. Bottom curves don’t reach irises. Eyelid contours follow spherical contours of eyeballs. Upper eyelids run almost parallel to upper lines and reach irises.

The same situation applies to lower eyelids. But they narrow at both ends. Pay attention to the peculiarities of lash curls.
You can first sketch out eyes in the shape of an almond or a diamond. The distance between both eyes is equal to their length. Eye whites are not visually absolutely white. It is necessary to shade eye whites, as eyelashes invariably cast shadows on them.


A nose must be made in a triangular shape. This imaginary triangle is born between the eyebrows. Place nose fins at the triangle base. A mouth initially has a rhombic shape. You can note a distance between the corners of lips. Remember to make your drawn mouth proportional.
You can use a vertical line to note mouth position relative to eyes. You need to place hair around a perimeter. Hair will help you understand the whole face. Set the neck width and the beginning of the shoulders in the same way.


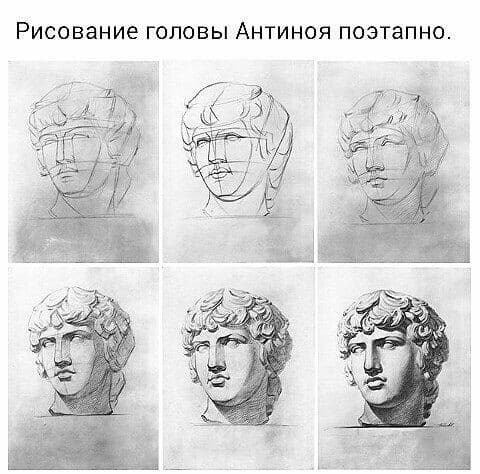
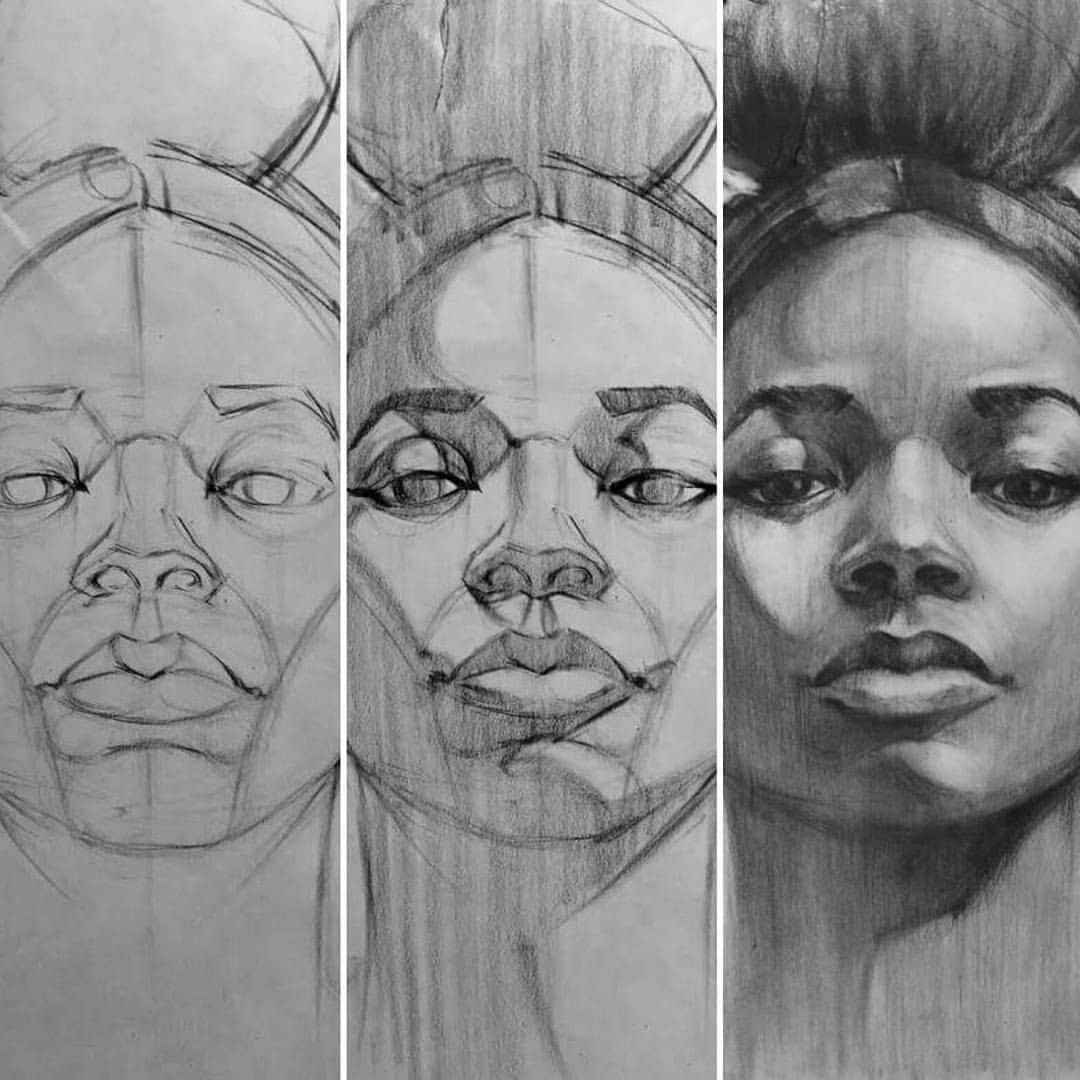
Rounding shapes for a more realistic look
We are now at the point where we have an embedded and started portrait. We can move forward in search of more natural and rounded shapes. You can half-erase lace lines that bother you and complete your pattern with more organic and softer lines. For they resemble the appearance you see in a photo.


Likewise, this will be the point where you can include the smallest areas: gaps, ear holes, eyelashes, corners, and folds of lips. The motto we are following is: from general to specific. Don’t be impatient. Place details in proper places.

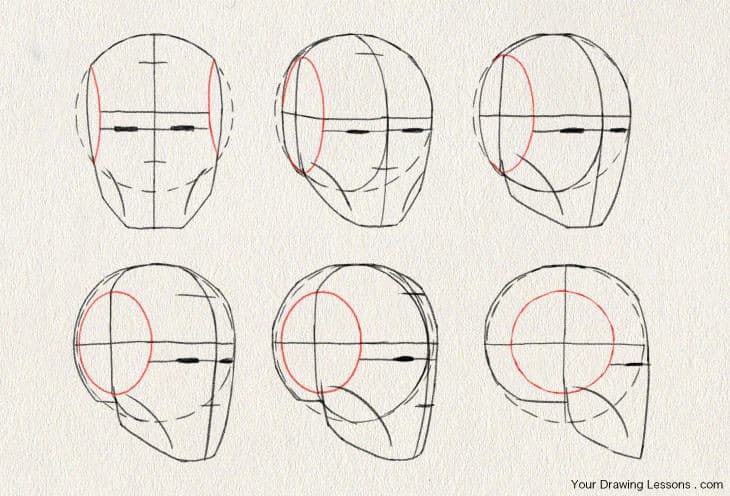
Step 1: Sketch the Basic Head Shape and Guidelines
Start by lightly sketching the overall head shape using simple forms such as an oval or circle with a jawline. Add guideline lines to divide the face vertically and horizontally—these help place the eyes, nose, and mouth accurately. This step sets the foundation and keeps facial features balanced and proportional.
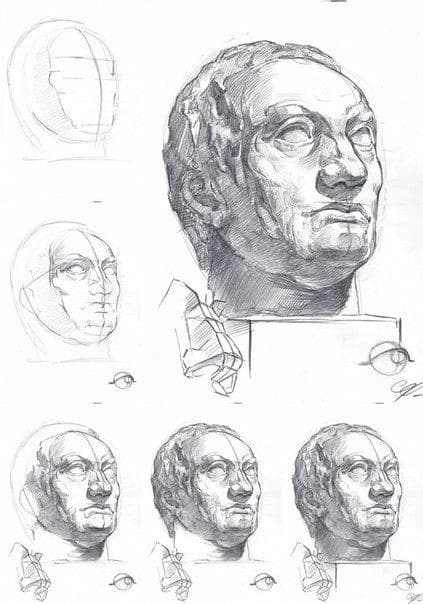
Step 2: Block in Facial Features and Shapes
Place the eyes, nose, mouth, and ears using basic shapes rather than details. Focus on spacing and alignment instead of perfection. At this stage, think in terms of planes and forms, not outlines. Keeping lines light makes it easier to adjust proportions before refining the drawing.
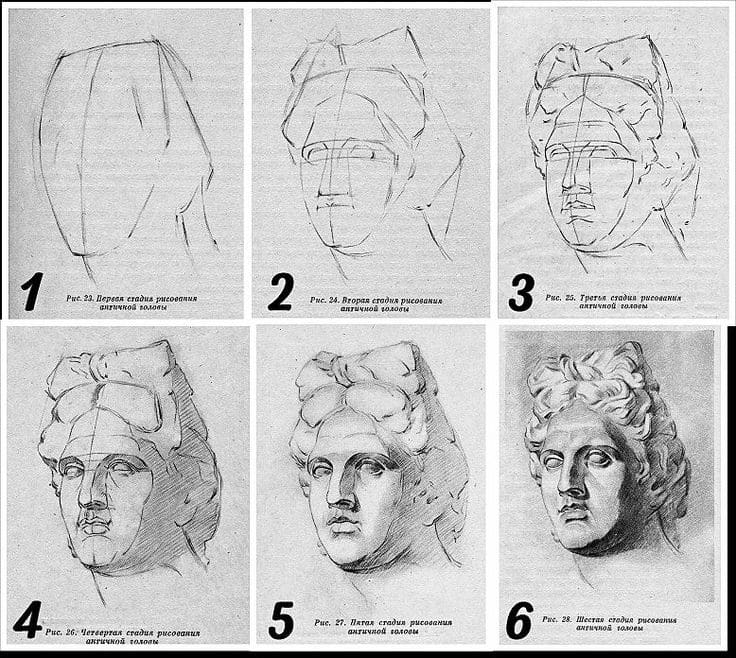
Step 3: Add Shading, Details, and Expression

Once the structure looks correct, begin adding shading to create depth and realism. Observe where light and shadow fall on the face and use gradual value changes instead of hard lines. Refine features, add hair texture, and adjust contrasts to bring expression and personality into the portrait.
If you would like to learn a little more about face drawing techniques, feel free to contact me on Facebook to visit my tutorials. I look forward to meeting you in our creative online workshop.
Conclusion
Learning how to draw portraits is a journey that blends observation, patience, and practice. By understanding basic facial proportions, studying individual features, and using light and shadow to create form, portrait drawing becomes far less intimidating and far more enjoyable. Tutorials provide structure, but real growth happens when you apply those lessons through regular sketching and experimentation.
Portrait ideas—such as drawing different expressions, angles, ages, or lighting conditions—help strengthen your skills and push you beyond copying what you see. Mistakes are part of the process, and each drawing builds visual awareness and confidence. Over time, your lines become more intentional, your shading more controlled, and your portraits more expressive.
Whether you’re a beginner starting with simple studies or an advancing artist refining realism and style, portrait drawing rewards consistency. Keep observing real faces, keep practicing foundational techniques, and allow your personal approach to develop naturally. Every portrait you draw brings you one step closer to capturing not just likeness, but character and emotion as well.
See you soon!
- 137.7Kshares
- Facebook0
- Pinterest137.7K
- Twitter0
- Reddit0


