Ever felt that little itch to create, to put pencil to paper and bring something beautiful to life, but then a voice whispers, “I can’t even draw a straight line”? Well, guess what? You don’t need to draw a straight line to sketch! Especially when it comes to the wonderfully curvy and dynamic human form. This isn’t about rigid perfection; it’s about embracing the flow, the gesture, and the sheer joy of creating. If you’ve always wanted to try your hand at sketching, particularly the female body outline, but felt intimidated, then you’re in the perfect place. We’re going to dive into some super casual, no-pressure steps to get you started on your artistic journey. Think of this as less of a drawing lesson and more of a friendly chat about how to just start.
Drawing the human figure is one of the most rewarding challenges for any artist. It connects us to our own form, to the beauty of movement, and to the endless variations of life itself. But it can also feel overwhelming. Where do you even begin with all those muscles and bones? The secret? You don’t start with muscles and bones. You start with simple shapes, fluid lines, and a whole lot of patience with yourself. This guide is all about demystifying the process, making it approachable, and helping you unleash that inner artist you know is just itching to get out. So, grab a pencil, some paper, and let’s get sketching!


Why Sketching the Female Form is a Fantastic Starting Point
You might be wondering, “Why the female form specifically?” While all human forms offer incredible artistic opportunities, sketching the female body often introduces a fascinating interplay of curves, softer transitions, and unique gestural qualities that can be incredibly satisfying to capture. It encourages an eye for subtlety and flow, which are fantastic skills to develop for any kind of drawing.
It’s also about representation. Learning to draw the female form allows you to celebrate diversity, strength, and grace in your art. It’s not about drawing one “ideal” body type, but about understanding and appreciating the vast spectrum of human shapes. This journey is less about anatomical correctness and more about capturing the essence of a pose, the rhythm of a figure, and the story a silhouette can tell. It builds a foundational understanding of proportion and movement that can be applied to countless other subjects. Plus, it’s just plain fun! There’s a special magic in seeing a figure emerge from simple lines on your page.
Your Casual Sketching Toolkit: Keep It Simple!
Before we jump into the actual drawing, let’s talk about what you’ll need. The good news? It’s not much! You don’t need fancy art supplies to start. In fact, keeping it simple helps you focus on the fundamentals rather than getting bogged down by choices.
Pencils: Your Best Friend
- HB Pencil: This is your everyday pencil, good for initial light sketches and general lines. It’s a great all-rounder.
- 2B or 4B Pencil: These are softer, darker pencils. They’re excellent for adding a bit more emphasis to your lines, creating varied line weight, and even some light shading. Don’t worry about getting a full set of 6H to 6B; a couple of options are more than enough.
Paper: Any Surface Will Do
- Sketchbook: A simple spiral-bound sketchbook (any size from 5×7 to 9×12 inches is great) is perfect. It keeps all your practice in one place, which is super satisfying to look back on later.
- Loose Printer Paper: Honestly, even plain old printer paper works! Don’t feel like you need expensive art paper. The goal here is practice, not masterpieces (yet!).
- Newsprint Pad: If you’re doing a lot of quick gesture drawing, a large newsprint pad is wonderfully inexpensive and forgiving.
Eraser: For Lightening Up, Not Erasing Mistakes
- Kneaded Eraser: This is a fantastic tool. Instead of just rubbing things out, you can dab it to lift pencil pigment, lightening lines without completely removing them. It’s also great for molding into small points for precise adjustments.
- Plastic Eraser (White): Your standard block eraser. Good for when you really want to clear a section.


References: Your Silent Guides
- Photos: This is probably the easiest way to start. Search online for “figure drawing references,” “female poses,” or even fashion photography. Pinterest is an absolute treasure trove!
- Pose Apps: There are great apps for your phone or tablet that allow you to manipulate 3D models into various poses. They’re super handy for understanding perspective and form.
- Mirror or Live Models: If you’re feeling brave, try sketching your own reflection or find an online figure drawing session. Live observation is the ultimate teacher, but definitely not a requirement for starting casually.
- Art Books/Tutorials: Look for books on figure drawing, but remember, we’re keeping it casual. These are for inspiration and guidance, not strict rules. You might even find inspiration in cute summer drawing ideas or even book art drawings to warm up your hand.
That’s it! No need for fancy charcoals, pastels, or watercolor sets just yet. Just the basics will get you far.


Embracing Imperfection: Your Core Philosophy
Before we put pencil to paper, let’s set a crucial mindset: embrace imperfection. This isn’t about creating gallery-worthy art from day one. This is about exploration, learning, and having fun. Every wonky line, every misplaced limb, every disproportionate head is a step in your learning process.
Think of it like learning a new language. You wouldn’t expect to be fluent overnight, right? You’d start with simple words, make mistakes, and slowly build your vocabulary. Drawing is the same. Those “mistakes” are actually valuable data points that show you what to adjust next time.
- Don’t erase constantly: Learn to draw lightly first. Often, you can adjust a line by drawing a new, better one right next to it, then simply ignoring the old one. This also helps you see your thought process.
- Focus on the process, not the outcome: The act of observing, interpreting, and putting lines down is the reward. The finished sketch is just a record of that process.
- It’s okay to doodle: Sometimes the best warm-up is just scribbling aimlessly, letting your hand get used to the movement.
This casual approach will free you from self-criticism and allow your creativity to truly blossom.
Understanding the Human Form (Simplified)
Okay, now for the fun part! How do we actually start drawing a body without getting lost in the details? The trick is to break it down into super simple, almost childlike shapes. Forget about muscles and tendons for now. We’re thinking basic geometry.


The Stick Figure Foundation: More Than Child’s Play
Every complex drawing of a human figure starts with a basic framework, and the humble stick figure is your absolute best friend here. It helps you get the pose, balance, and general flow before you commit to any “flesh.”
1. The Head: Start with a simple oval or circle for the head. This will be your primary unit of measurement. 2. The Spine/Line of Action: This is arguably the most important line! Don’t draw a straight line unless the figure is standing rigidly at attention. Bodies are dynamic. Draw a curving line that represents the overall movement or “spine” of your figure. This is your “line of action.” Is the figure bending, twisting, leaning? Capture that with this initial curve. 3. The Torso (Rib Cage & Pelvis): Rib Cage: Draw a simple oval or egg shape for the rib cage, tilting it according to your line of action. Pelvis: Below that, draw another simpler shape – a wider oval, a rounded rectangle, or even a ‘panties’ shape – for the pelvis. Think of it as a bowl or a bucket. Connect Them: Connect the rib cage and pelvis with two short lines representing the waist. There’s a slight twist or bend between them, so they rarely stack perfectly. 4. The Limbs (Sticks and Circles): Shoulders and Hips: Mark the shoulder joints with small circles, extending out from the rib cage. Do the same for the hip joints from the pelvis. Arms: Draw stick lines for the upper arm, forearm, and hand. Mark the elbow and wrist joints with small circles. Legs: Similarly, draw stick lines for the upper leg (thigh), lower leg (calf), and foot. Mark the knee and ankle joints with circles.
This stick figure gives you the entire pose and proportions in just a few light lines. It’s incredibly freeing!


Basic Proportions (General Guidelines): The Head Unit
Proportions can feel intimidating, but we’re going to keep it super casual. Think of the head as your measuring unit.
- The 7-8 Head Rule: A typical adult figure is often depicted as 7 to 8 heads tall. This means if you stack 7 or 8 heads on top of each other, that’s roughly the height of the whole body.
The chin aligns with the top of the first head. The nipples are usually around 2 heads down. The belly button is around 3 heads down. The crotch/pubic bone is roughly 4 heads down (the halfway point of the body). The knees are about 6 heads down. The feet are at 7-8 heads down.
- Other Quick Guides:
The elbows often align with the belly button. The wrists align with the crotch. * The distance from shoulder to shoulder is typically 2-3 heads wide.
IMPORTANT: These are guidelines, not rigid laws! Everyone’s body is different, and art is about interpretation. Use these as a loose framework, especially when you’re just starting, to avoid wildly disproportionate figures. Don’t stress if your figure ends up 6.5 heads tall or 8.2 heads tall. It’s all good!
Key Landmarks: Anchoring Your Form
Think of these as the major points you can “hang” your shapes on:
- Shoulder Points: Where the arms connect.
- Rib Cage Widest Points: The sides of the rib cage.
- Pelvic Bumps: The bony protrusions at the front of the hips.
- Knees and Elbows: Major hinge points.
- Ankles and Wrists: Also important hinge points.
Observing how these landmarks align and relate to each other in your reference will greatly improve your ability to sketch accurately.


Building Blocks: Simple Shapes to Start
Once you have your stick figure down, it’s time to add some “meat” to those bones, but still using simple shapes. This is where your light lines really come in handy, as you’ll be drawing over them.
Head: From Oval to Form
Your initial oval or circle can now be refined slightly. Think about the jawline, the subtle curve of the skull. Don’t worry about features (eyes, nose, mouth) for outlines; just focus on the overall shape.
Torso: The Egg and the Bowl
- Rib Cage: Build out your egg shape for the rib cage. It’s wider at the top and tapers slightly towards the waist. Consider the chest/bust area as simple, rounded forms attached to the rib cage.
- Pelvis: Your ‘bowl’ or ‘panties’ shape for the pelvis now gets a bit more volume. Think about the curve of the hips.
- Connecting the Two: Remember that slight twist or curve between the rib cage and pelvis? This is where the core of the body is, and it’s rarely a straight connection. Observing this connection is key to dynamic poses.
Limbs: Cylinders and Ovals
- Arms and Legs: Instead of just sticks, imagine these as slightly tapered cylinders or elongated ovals. The upper arm and thigh are generally thicker than the forearm and calf.
- Joints: The circles you drew for elbows, knees, wrists, and ankles now become the centers of these joint areas. Add a slight bulge or curve around them to suggest form.
Hands and Feet: Simplified Shapes First
These are notoriously tricky, so don’t fret over them!
- Hands: Start with a simple mitten shape or a block for the palm, then add simplified fingers as either small cylinders or even just lines. Don’t try to draw individual fingers perfectly; just suggest their presence and direction.
- Feet: Think of a wedge or a triangular block. The ankle connects to the thinner part. Again, don’t worry about toes initially; just the overall silhouette.


Finding Your Flow: Dynamic Poses and Gestures
This is where the magic really starts to happen. Bodies are rarely static; they’re full of energy and movement. Capturing that “flow” is what gesture drawing is all about.
Gesture Drawing: The Soul of the Pose
Gesture drawing is about capturing the essence of a pose in a very short amount of time – often 30 seconds to 2 minutes. It’s not about accuracy; it’s about energy, movement, and emotional impact.
- Quick Lines: Use loose, continuous lines. Don’t lift your pencil much.
- Focus on the Whole: See the entire figure as one moving mass, not individual parts.
- Exaggerate: If a curve is present, make it more pronounced. If a lean is there, lean harder.
Gesture drawing is a fantastic warm-up and helps you avoid stiff, lifeless figures. It truly helps you find the “line of action.”


The Line of Action: Your Central Curve
As mentioned earlier, this is the invisible curve that dictates the main movement of the pose. If a figure is leaning, the line of action is curved. If they’re reaching, it’s an arc. Always try to identify this first! It’s the backbone of your drawing.
Breaking Down Poses: C-Curves and S-Curves
Look for large, sweeping curves in the body.
- C-Curves: A single, continuous curve, like the curve of a bent arm or a hunched back.
- S-Curves: A flowing, serpentine curve, often seen in the spine of a twisting figure, or the combined curve of a hip and opposite shoulder.
These simple curves help you quickly block in complex poses without getting lost in minutiae.
Using References Effectively: Don’t Just Copy!
References are your friends, but treat them as guides, not handcuffs.
- Observe, Don’t Trace: Look at your reference, understand the pose, the angles, the proportions, then try to replicate it on your paper. Don’t just trace.
- Understand the “Why”: Why is a limb bent that way? What’s the weight distribution? Asking these questions helps you understand the underlying structure.
- Mix and Match: Don’t be afraid to take elements from different references or even combine them to create a new pose.
- Explore Pose References: If you’re looking for different positions and angles, checking out resources like poses drawing can give you a ton of inspiration and practical examples to work from.


Adding Detail (Lightly): From Outline to Form
Once you have your foundational shapes and gesture down, you can start to lightly refine your outline. Remember, we’re still focusing on the outline here, not hyper-realistic rendering.
Defining the Silhouette: The Outer Edges
The silhouette is everything! It’s the overall shape of the figure against a background. Spend time on this.
- Clean Up Your Lines: Choose the “best” lines from your initial messy sketches and darken them slightly, making a more definitive outer edge.
- Look for Negative Space: The shapes around the figure are just as important. Do they make sense? Does the negative space contribute to the pose?
Subtle Curves and Contours: The Body’s Natural Flow
Human bodies aren’t made of straight lines and sharp angles (mostly!). Look for those subtle, beautiful curves:
- The curve from the shoulder to the elbow.
- The gentle sweep of the back.
- The fullness of the thigh.
- The tapered line of the calf.
These soft contours are what give the figure a sense of life and realism, even in a simple outline.
Understanding Weight and Balance: Making It Believable
A figure needs to look like it could actually stand or sit.
- Center of Gravity: Imagine a plumb line dropping from the figure’s head. Does it fall within their base of support (their feet, or the chair they’re sitting on)? If not, they’ll look unbalanced.
- Weight Shift: Notice how a figure’s weight shifts onto one leg when they’re standing casually (contrapposto). This creates a subtle tilt in the shoulders and hips, adding dynamism.
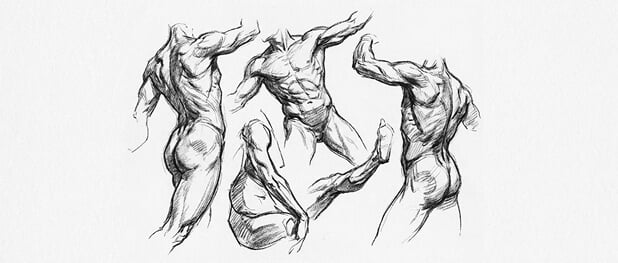
Basic Muscle Groups (Simplified): Just the Bumps and Dips
You don’t need to learn every muscle name, but understanding where major muscle groups create subtle bumps and dips will make your outlines more convincing.
- Shoulders: Deltoids create a rounded shape.
- Biceps/Triceps: The upper arm has some volume.
- Glutes: The rounded forms of the buttock.
- Thighs: Quadriceps and hamstrings create volume.
- Calves: The distinctive curve at the back of the lower leg.
Don’t draw them as separate muscles; just suggest their presence through the flow of your outline.


Overcoming Common Hurdles
It’s completely normal to hit snags. Everyone does! Here are a few common frustrations and how to tackle them casually.
Fear of the Blank Page: Just Start!
The hardest part is often just making that first mark. Don’t stare at a blank page. Scribble, doodle, draw a really bad stick figure. Just get some lines down. The page isn’t precious; it’s a playground.
Proportion Frustration: It Takes Practice
Your first few hundred (or thousand!) drawings might have weird proportions. That’s totally okay! Go back to your head units and guidelines. Compare your drawing to your reference. Where did you go wrong? Don’t beat yourself up; just learn from it. Persistence is key.
Symmetry vs. Natural Asymmetry: Embrace the Unique
Human bodies are not perfectly symmetrical. One shoulder might be slightly higher, one hip might be more pronounced, especially in dynamic poses. Trying to make everything perfectly balanced will often lead to a stiff, unnatural drawing. Embrace the subtle asymmetries you observe.
Seeking Feedback (Optional, but Helpful)
If you’re comfortable, sharing your sketches (online art communities, a trusted friend, a local art group) can provide valuable fresh eyes. Ask for constructive criticism: “What feels off here?” or “How can I make this look more natural?” Just be open to hearing it!


Practice Makes Progress: Daily Sketching Habits
Like any skill, drawing improves with consistent practice. Even a little bit each day makes a huge difference.
Quick Sketches: Build Your Visual Vocabulary
- 30-Second Gestures: Draw as many figures as you can in 30 seconds each. Focus purely on the line of action and the biggest shapes.
- 1-Minute Gestures: Add a little more definition to your shapes.
- 5-Minute Gestures: Now you can start to refine the outlines a bit more and check proportions.
These quick exercises train your eye and hand to work together rapidly, recognizing essential forms.
Dedicated Sessions: Dive a Little Deeper
Set aside 15-30 minutes a few times a week for more focused practice. Pick one or two poses and spend longer on each, really thinking about the curves, connections, and balance.
Drawing from Life vs. Photos: Both Are Great!
- Photos: Convenient, static, and you can zoom in. Great for beginners.
- Life Drawing: (Even if it’s just your hand, a pet, or a friend who’s willing to sit still for a bit!) Teaches you to interpret 3D forms onto a 2D surface, which is a different skill.
Embrace both methods as they offer distinct advantages to your learning process.
Keeping a Sketchbook: Your Visual Journal
Your sketchbook is your journey. Don’t worry about perfect pages. Fill it with doodles, experiments, “bad” drawings, and good ones. Looking back at your earlier work is incredibly motivating when you see how far you’ve come. Consider making it a habit, much like keeping a diary. It can even evolve into something like draw your day: creating a visual diary. It’s a fantastic way to track your progress and celebrate your artistic growth.


Exploring Different Styles and Mediums (Casual Exploration)
Once you’re comfortable with basic outlines, you might feel a desire to explore a little. Remember, there’s no right or wrong way to make art!
Line Art: The Power of the Outline
Many artists focus purely on line art, using varied line weight (how thick or thin a line is) to create emphasis and depth. A strong, confident outline can be incredibly expressive. If you’re into minimalistic and clean aesthetics, exploring things like outline tattoo drawing ideas could give you new perspectives on how powerful a simple line can be.
Cross-Hatching/Shading (Basic): Adding Depth
If you’re curious, you can lightly add some basic shading to give your figures a sense of three-dimensionality.
- Hatching: Drawing parallel lines.
- Cross-Hatching: Drawing parallel lines in one direction, then drawing another set of parallel lines across them.
- Scribbling: Loosely filling in areas to suggest shadow.
The idea is just to suggest light and shadow, not to fully render.


Digital Sketching (If Inclined): A New Playground
If you have a tablet and stylus, digital drawing offers incredible flexibility with layers, undo buttons, and a vast array of brushes. It’s a different beast than traditional drawing, but the core principles of gesture and form remain the same. If you’ve been traditionally drawing and are wondering about making the switch, articles like how to start drawing in digital format: a guide for those who are used to paper can be a great starting point for understanding the transition.
Stylization: Finding Your Unique Voice
After some practice, you might start to develop your own unique way of seeing and drawing figures. This is called stylization. You might exaggerate certain features, simplify others, or create a distinctive visual language. Don’t force it; it will emerge naturally as you draw more. You might even find inspiration in minimalist fashion line sketch with 2025 trends to see how artists simplify and stylize figures for different artistic purposes.
The Journey, Not the Destination
Sketching female body outlines is a beautiful journey, not a destination. It’s about learning to see, learning to interpret, and learning to trust your hand. There will be days when your drawings feel awkward, and days when they flow effortlessly. Both are part of the process. The most important thing is to keep showing up, keep practicing, and keep that sense of casual curiosity alive.
You don’t need to be a professional artist to enjoy the meditative and joyful act of sketching. It’s a wonderful way to express yourself, to observe the world around you with new eyes, and to connect with that creative spark within. So, shed the pressure, embrace the wonky lines, and celebrate every single mark you make.
Ready to unleash your inner artist? Grab that pencil, open your sketchbook, and just start. There’s no perfect first line, only the beginning of a truly rewarding adventure.
- 31.1Kshares
- Facebook0
- Pinterest31.1K
- Twitter3
- Reddit0


