A body drawing base is the simple figure structure you build before the final character, clothes, hair, or shading. If that base is stiff, the finished drawing usually feels stiff too. This guide shows how to start with cleaner proportions, gesture lines, and simple body forms so your human figure sketches feel more alive from the first rough pass.
Body drawing base references
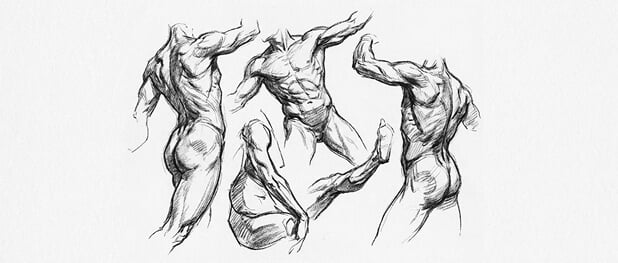
Use the body drawing base examples below as references for human figures, anime characters, original characters, and pose studies. For more targeted practice, pair this guide with our OC body base ideas, anime pose references, and anatomy drawing references.


Your figures look like corpses. The proportions are close—maybe even correct—but something’s dead about them. They stand there, stiff, frozen, like mannequins waiting for someone to breathe life into them.
I know this feeling. I spent my first year drawing human figures that were technically accurate and completely lifeless. The heads were the right size. The arms reached the right length. Everything measured correctly. And every single drawing looked like a police chalk outline.
- Human figure proportions: the 8-head canon
- Gesture lines that make a pose feel alive
- From gesture to simple body forms
- Torso, arms, legs, and head anatomy
- Common figure drawing mistakes and fixes
- Practice routines for better figure drawing
- Body drawing base FAQ
- Conclusion
Here’s what I eventually learned: proportion alone doesn’t make a figure look human. Movement does. The subtle lean of weight onto one leg. The twist of the torso. The curve of the spine responding to gravity. That’s what separates a drawing of a human from a diagram of one.

This is why most figure drawing tutorials fail beginners. They start with anatomy—bones, muscles, insertion points—when the real foundation is gesture. Before you can draw what a body is, you need to capture what it’s doing. Andrew Loomis understood this. So did the classical Greek sculptors who established the 8-head proportion canon that artists still use today. So does Stan Prokopenko (Proko), whose figure drawing courses have taught millions of artists online.

This guide covers both: the structural knowledge you need (proportions, landmarks, basic anatomy) and the dynamic understanding that makes figures feel alive (gesture, weight, rhythm). We’ll work from the ground up—starting with the proportion system that artists have used since the Renaissance, then adding gesture and construction, and finally putting it all together into a complete drawing process.
Whether you’re drawing for animation, illustration, comics, or fine art, these fundamentals apply universally. The human figure is the most complex and rewarding subject in art. Let’s learn to draw it properly.
Human figure proportions: the 8-head canon
Before anything else, you need a reliable system for measuring the human body. Artists have developed proportional canons for thousands of years—the ancient Egyptians used a system based on fist measurements, the Greeks refined it to head heights. The version we use today comes from the Renaissance and has remained the standard ever since.
Why We Measure in Heads
The head is the universal unit of measurement in figure drawing because it’s a discrete, easily identifiable form. You can always find the top of the skull and the bottom of the chin. Unlike an arm (where does it really “end”?) or the torso (which blends into hips), the head has clear boundaries.
The standard adult figure is approximately 7.5 to 8 heads tall. The 7.5-head figure is closer to average human proportions. The 8-head figure—often called the “ideal” or “heroic” proportion—creates a slightly taller, more elegant appearance. Most artists default to 8 heads because the math is cleaner and the result looks more graceful without appearing unrealistic.

Leonardo da Vinci’s Vitruvian Man illustrates these classical proportions. The figure fits perfectly within both a circle and a square, demonstrating the mathematical relationships between body parts that Renaissance artists obsessed over.
The 8-Head Breakdown
Here’s how the body divides when using an 8-head measurement:
Head 1: Top of skull to bottom of chin. This establishes your unit of measurement.
Head 2: Chin to nipple line (on males) or just below the armpit. The shoulders begin about one-third of a head below the chin.
Head 3: Nipple line to navel. The ribcage ends here. The elbows also align roughly at this level when arms hang naturally.
Head 4: Navel to pubic bone (crotch). This is the exact middle of the figure—halfway between the top of the head and the soles of the feet. The wrists align here when arms hang down.
Head 5: Pubic bone to mid-thigh. The fingertips reach approximately here.
Head 6: Mid-thigh to just below the knee. The bottom of the kneecap falls at this line.
Head 7: Below the knee to mid-shin, roughly at the widest part of the calf muscle.
Head 8: Mid-shin to the soles of the feet.
Critical Landmarks
Beyond the head-height divisions, certain landmarks help you check proportions:
Shoulder width: Approximately 2 to 2.5 heads wide for males, slightly narrower (about 2 heads) for females.
Hip width: About 1.5 heads for males, closer to 2 heads for females (sometimes wider than shoulders).
Hand length: Equal to the face (chin to hairline), roughly three-quarters of a head.
Foot length: Approximately equal to the forearm (elbow to wrist).
Arm span: Equal to total height. When arms extend horizontally, fingertip to fingertip equals head to toe.
Elbow position: Elbows align with the navel/waist when arms hang naturally.
Wrist position: Wrists align with the crotch when arms hang naturally.
Male vs. Female Proportions
The 8-head canon applies to both sexes, but the distribution differs:
Males tend to have broader shoulders relative to hips (inverted triangle silhouette), a longer torso relative to legs, and a narrower waist-to-hip ratio.


Females tend to have wider hips relative to shoulders, a shorter torso relative to legs, and a lower waist position. The classical female figure is sometimes drawn at 7.5 heads to emphasize these proportions.

These are generalizations. Individual variation is enormous, and stylistic choices may exaggerate or minimize these differences.


Age and Proportions
Head-to-body ratios change dramatically with age:
Infants: 3-4 heads tall. The head is proportionally enormous.
Toddlers: 4-5 heads tall.
Children (5-10): 5-6 heads tall.
Teenagers: 6-7 heads tall.
Adults: 7.5-8 heads tall.
Understanding these ratios is essential for drawing figures of different ages convincingly.

Gesture lines that make a pose feel alive
Proportions tell you how big things are. Gesture tells you what they’re doing. A figure can have perfect proportions and still look dead if it lacks gesture.
What Gesture Actually Means
Gesture isn’t the contour of the body. It isn’t the forms. It isn’t the details. Gesture is the movement that connects everything—the flow, the rhythm, the action, the story of the pose.


Think of gesture as the answer to these questions: What is the figure doing? Where is the weight? What’s the emotional state? What just happened, or what’s about to happen?
Stan Prokopenko (Proko) describes gesture as “the movement between things”—not the things themselves, but the relationships between them. If you have three points, gesture is the curve that connects them, not the points themselves.
The Action Line
Every pose has a primary action line—a single flowing line that captures the main thrust of the figure’s movement. In a standing figure leaning to one side, it might be a gentle C-curve from head through torso to the weight-bearing foot. In a dynamic action pose, it might be a dramatic S-curve sweeping through the entire body.


Finding this action line is the first step in any figure drawing. Before you draw a single form, ask yourself: what is the primary direction of movement?
Stretch and Pinch
When the body moves, one side stretches while the opposite side compresses (pinches). This happens at every joint and along the entire torso.
If a figure leans to the right, the left side of the torso stretches (longer, more open) while the right side pinches (shorter, compressed). This creates the natural rhythm of the body—opposites working in concert.
Learn to see stretch and pinch immediately. It’s one of the fastest ways to add life to a pose.
Weight and Balance
 and incorrect (no) weight. | Sky Rye Design")


Humans don’t hover. Weight must go somewhere. In a standing pose, identify which leg bears the weight. The hip on that side rises, the shoulder on that side drops (contrapposto). The spine curves to accommodate. The head tilts to maintain balance.
Draw this weight distribution clearly. Nothing kills a figure faster than ambiguous balance—the viewer subconsciously knows something is wrong even if they can’t articulate it.
Gesture drawing practice
The classic exercise is timed gesture drawing:


30 seconds to 1 minute: Capture only the action line and the most essential rhythm. No details. No forms. Just movement.
2-5 minutes: Add basic forms to the gesture—the tilt of the ribcage, the angle of the pelvis, the direction of limbs.
5-10 minutes: Include proportional accuracy and begin suggesting anatomy, but keep the gesture priority.
Websites like Line of Action, Quickposes, and SketchDaily provide timed figure references specifically for this practice. Many artists do 20-50 gesture drawings daily as warm-up.
The goal isn’t pretty drawings. The goal is training your eye to see movement first, details second.
From gesture to simple body forms

Once you understand proportions and gesture, you need a method for building the figure. This is where construction comes in—using simple 3D forms to represent the complex shapes of the body.

The Basic Forms
The human body can be simplified into these primitive shapes:
Head: Sphere (cranium) with a wedge (jaw/face plane). The Loomis method is the most widely taught approach.
Ribcage: Egg or barrel shape, slightly tapered at the bottom. Tilts and rotates as a unit.
Pelvis: Box or bucket shape, wider at the top (iliac crests) than at the bottom. Tilts and rotates opposite to the ribcage in most poses.
Limbs: Cylinders that taper at joints. Legs are longer and thicker than arms.
Hands and Feet: Complex, but can be simplified to box shapes initially.
The Bean and Robo Bean
Proko popularized the “bean” as a way to connect the ribcage and pelvis into a single flowing form. The bean captures the twist and bend of the torso while maintaining the gesture.
The “robo bean” adds structure—hard edges that indicate the front, side, and back planes of the torso, helping you visualize the form in 3D space.
Step-by-Step Construction Process
Here’s a systematic approach to constructing a figure:
Step 1: Basic Mannequin Structure (2-3 minutes)
Start with a simplified mannequin — geometric shapes that represent the body’s main masses.

Draw the head as a basic form with facial guidelines. Use an oval for the ribcage, a smaller shape for the pelvis, and simple cylinders for the limbs. This is your foundation — proportions matter here, detail doesn’t. Notice how the figure already has slight gesture: weight shifted, one hip higher than the other.
Step 2: Anatomical Forms (5-7 minutes)

Build flesh onto your mannequin. Add volume to the torso — indicate the waist narrowing between ribcage and hips. Shape the legs with proper taper from thigh to ankle. Refine the arms. The figure is still nude at this stage, which helps you understand the body underneath any clothing. Keep construction lines visible — they’re your roadmap.
Step 3: Basic Clothing and Hair (5-7 minutes)

Add simple clothing over the anatomical form. In this example: a basic dress siluet. Sketch the hair as a mass, not individual strands. The clothing follows the body’s form — it wraps around the ribcage, drapes from the shoulders, and responds to the hip position. Keep shading minimal.
Step 4: Refined Clothing and Values (10-15 minutes)

Replace the simple clothing with more detailed garments — here, a fitted dress. Add proper folds where fabric bunches: at the elbows, waist, knees, and ankles. Begin building values (light and shadow) to create depth. The hair gets more definition. The face receives more attention to features.
Step 5: Final Rendering (15-20 minutes)

Complete the drawing with full detail and shading. Render fabric textures, refine shadows, add highlights. The hair has individual strand suggestions. Skin tones are smooth with proper value transitions. This is where your earlier structural work pays off — the figure looks solid because the foundation was correct.
Total time: 40-50 minutes for a fully rendered figure

The key insight: each step builds on the previous one. You can stop at any stage depending on your goal — Step 2 is enough for gesture studies, Step 3 works for quick character concepts, Steps 4-5 are for finished illustrations.
Torso, arms, legs, and head anatomy
Drawing the Head
The head deserves its own study, but for figure drawing purposes:


Basic structure: Sphere for the cranium, wedge for the face plane. The Loomis method adds guidelines for feature placement.
Proportions: Eyes sit at the vertical center of the head. The face divides into thirds: hairline to brow, brow to nose, nose to chin.

Connection to body: The neck is a cylinder that tilts forward. The head sits on top of the neck, not directly on the shoulders. The pit of the neck (where the collarbones meet) is a crucial landmark.


Drawing the Torso
The torso is the most complex part of the figure—it twists, bends, and compresses in multiple directions simultaneously.

Ribcage: Think of it as a slightly compressed egg or barrel. The sternum runs down the front. The spine creates a center line down the back. The bottom edge of the ribcage is visible on most figures.


Pelvis: A bowl or bucket shape. The iliac crests (top of the hip bones) are visible on lean figures. The pelvis tilts forward or backward, affecting the curve of the lower back.
Connecting them: The waist area between ribcage and pelvis has no bone—only muscle and soft tissue. This is where the torso can twist and bend most dramatically.
Key landmarks: Pit of the neck, clavicles, sternum, nipples, navel, iliac crests, pubic bone.
Drawing Arms and Hands
Arms: The upper arm (humerus) is roughly 1.5 heads long. The forearm (radius/ulna) is roughly 1.25 heads long. The elbow is the widest point when the arm is extended.

Hands: The palm is roughly square. Fingers are about the same length as the palm. The hand equals the face in length. Simplify hands as mittens initially, then add finger separation.


Common issues: Arms too short, elbows at wrong height, hands too small. Check against landmarks: elbows at navel, wrists at crotch, fingertips at mid-thigh.
For the small but tricky part of the figure, keep this how to draw a hand guide open while you connect the wrist and fingers to the body base.
Drawing Legs and Feet
Legs: The thigh (femur) is roughly 2 heads long. The lower leg (tibia/fibula) is roughly 2 heads long. The leg tapers from hip to ankle.

Feet: About one head long (same as forearm). The ankle is higher on the inside than the outside. The arch creates negative space between foot and ground.

Common issues: Legs too short, knees at wrong height, feet too small. The halfway point of the figure is the crotch, not the waist—many beginners place it too high.
Common figure drawing mistakes and fixes
Stiff, Lifeless Poses
The problem: Figures stand straight up and down with no gesture, no weight shift, no life.
The cause: Starting with contours or details instead of gesture. Copying what you see literally instead of interpreting the movement.
The fix: Always start with an action line. Exaggerate the gesture initially—you can always pull it back. Practice timed gesture drawings to train your eye.
Wrong proportions
The problem: Head too big, legs too short, arms reaching past the knees.
The cause: Drawing body parts independently without checking against the whole.
The fix: Learn the 8-head system. Mark proportion points before drawing forms. Constantly compare: “Is this arm reaching to mid-thigh?” “Is this leg half the total height?”

Flat, 2D Figures
The problem: Figures look like flat cutouts rather than 3D forms in space.
The cause: Drawing contours without understanding the forms underneath. Ignoring foreshortening.
The fix: Practice mannequinization—draw the body as boxes and cylinders until you can visualize the 3D forms. Draw figures from imagination using simple shapes.
Symmetrical “Front View” Syndrome
The problem: Every figure faces directly forward with identical left and right sides.
The cause: Avoiding the difficulty of three-quarter views and foreshortening.
The fix: Force yourself to draw figures from angles. Use reference poses that twist and turn. The most interesting poses are rarely straight-on.
Rushing to Details
The problem: Spending time on facial features and fingers while the overall figure is structurally wrong.
The cause: Impatience. The desire to see a “finished” drawing.
The fix: Large to small, always. Get the gesture right before the forms. Get the forms right before the anatomy. Get the anatomy right before the details.

Practice routines for better figure drawing
Daily Gesture Practice (20-30 minutes)
Warm-up: 10-15 poses at 30-60 seconds each. Focus purely on action lines and rhythm.
Mid-length studies: 5-10 poses at 2-5 minutes each. Add forms to the gesture.
Longer study: 1-2 poses at 10+ minutes. Develop toward a more finished drawing while maintaining the gesture foundation.
Proportion Studies (Weekly)
Draw a standing figure from reference, carefully measuring against the 8-head system. Mark all landmarks. Compare your drawing to the reference and identify where proportions went wrong. Repeat until your eye calibrates.
Mannequin Drawing (Weekly)
Draw simplified figures from imagination—just boxes, cylinders, and spheres. Practice poses you’ve never seen. This builds your ability to construct figures without reference.
Anatomy Study (Ongoing)
Once gesture and construction are solid, begin systematic anatomy study. Focus on one body region at a time: the torso muscles, then the arm muscles, then the leg muscles. Understand how anatomy affects surface form.

Body drawing base
A simple figure becomes more useful once you draw clothes over a body base, checking the shoulders, elbows, waist, knees, and ankles before adding seams.
FAQHow do you draw a simple body base?
Drawing a human very easily starts with breaking down the figure into simple shapes such as circles, ovals, rectangles, and lines. Begin with a basic stick figure to establish the pose and proportions, then add volume by fleshing out the shapes for the head, torso, arms, and legs. Focus on the overall structure before adding details. Using reference images and practicing gesture drawing can also help capture the essence and movement of the human form quickly and effectively.
What can a 7 year old draw realistic?
A 7-year-old can begin drawing realistic figures by focusing on simple shapes and basic proportions. They can start with stick figures or simple block shapes to represent the human body and gradually add features like the head, limbs, and facial characteristics. Encouraging practice with reference photos and easy step-by-step tutorials helps children develop observational skills and improve their ability to draw more lifelike figures over time.

What are the 7 steps of sketching?
The 7 steps of sketching generally include:
- Observation: Carefully look at your subject to understand its shape, proportions, and details.
- Basic Shapes: Start by drawing simple shapes to represent the main parts of the subject.
- Outline: Connect the shapes with lines to form the basic outline of the figure.
- Proportions: Check and adjust the proportions to ensure accuracy.
- Details: Add important features such as facial features, fingers, or clothing folds.
- Shading: Use light and shadow to create depth and volume.
- Refinement: Clean up the sketch by erasing guidelines and enhancing key lines for clarity and emphasis.
These steps help create structured and realistic sketches, especially when drawing complex subjects like the human body.

Conclusion
Learning to draw the human figure – that’s a skill that’ll test your patience, push you to be creative, and reward you in spades. Its got lots to do with proportions, movement, building form, and knowing the ins and outs of human body – all of which you need to somehow tie together in a way that feels natural.
: pencil sketches showing female torso progression from rough construction to detailed shaded rendering. | Sky Rye Design")
Heres whats really important :
Gesture takes top priority. Before you get into all that other stuff – proportions, anatomy, painstaking details – you need to get a sense of movement, feeling in the pose, and the energy thats in the subject. If your figure looks stiff and lifeless – no matter how great the proportions or anatomy might be – it just wont work. Learn to see the gesture in them before you start worrying about what your hands are drawing.
Proportions bring it all together. The 8-head thing ? Not just some arbitrary rule – its been figured out over centuries because it actually works. Get to know it, so you can just glance at a figure and know if the proportions are off, without even thinking about it.
Breaking down to basics helps build form. When you see a body, dont just see flat lines on a page – see three dimensional shapes – spheres, cylinders, boxes – all working together to create this figure. Get a feel for how the body’s put together in 3D space.
Anatomy brings it all home. Now that you can draw a figure that moves and looks ( roughly) right in proportion, the anatomy behind it starts to make sense. You can see why the surface looks a certain way.

Here’s your practice plan:
This week: Do 20 gesture drawings daily. 30 seconds to 1 minute each. No forms, no details—just action lines. Train your eye to see movement.
Next two weeks: Add the 8-head proportion system. Draw 5 standing figures per day, carefully measuring proportions. Mark all landmarks before drawing forms.
Month one: Combine gesture and construction. Start every figure with the action line, add proportion marks, then build forms with simple shapes. Spend 30-60 minutes daily.
Ongoing: Continue daily gesture practice as warm-up. Add anatomy study one body region at a time. Draw from reference and from imagination.
I spent years making the same mistakes: copying contours, ignoring gesture, rushing to detail before the foundation was solid. The artists who improve fastest are the ones who resist that temptation—who build the foundation before decorating the house.
The figure is waiting. Start with the gesture.
I’ve packed all these rules, 3D form techniques, and the secret of “wrapping lines” into a handy 15-page PDF guide. Grab it absolutely free!


When the body base is solid but the finished pose still feels plain, this sexy figure drawing base helps with curves, lighting, and figure rhythm.
If you want a winged figure to practice next, try this angel pose reference guide guide for wing placement, silhouette, and gesture ideas.
- 428.9Kshares
- Facebook0
- Pinterest428.9K
- Twitter3
- Reddit0


