Drawing the female body can be both challenging and exciting for artists. This article offers ten unique female body drawing ideas that spark creativity and help improve skills. By exploring different poses, styles, and techniques, artists will find ways to enhance their understanding of anatomy and refine their drawing abilities.
From capturing simple gestures to creating detailed and realistic figures, there are many approaches to consider. With a variety of ideas, artists can experiment with their materials and find new styles that resonate with them. For example, a great beginner-friendly idea is to start with basic body shapes and simple poses, which helps build confidence and foundational skills. This journey through different drawing concepts will leave readers inspired and eager to pick up their pencils.
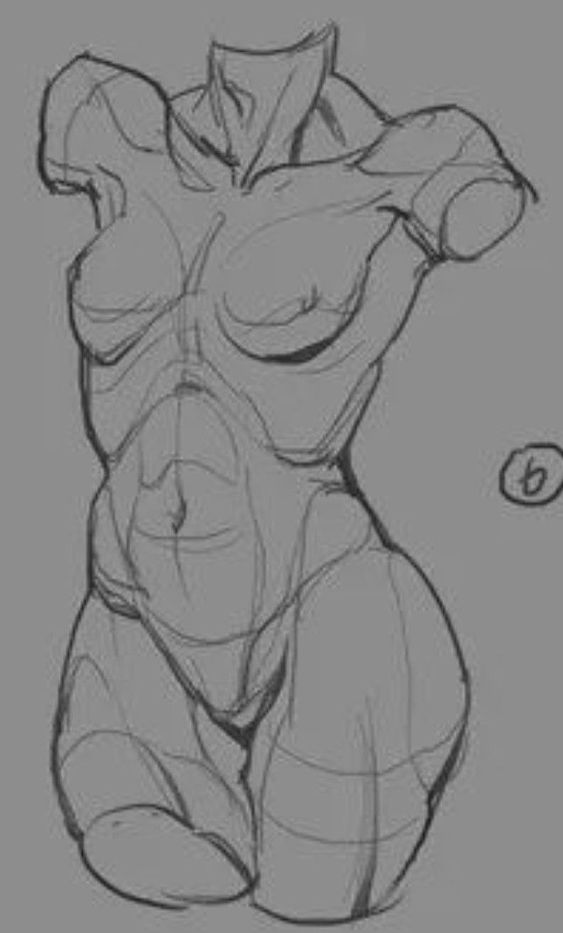

Artists, whether beginners or experienced, can find value in these drawing ideas. They can use these tips to practice and grow their skills while enjoying the process of artistic expression.
Key Takeaways
- The article presents ten inspiring ideas for drawing the female body.
- It emphasizes the importance of practicing different techniques and styles.
- The tips provided help artists improve their skills and creativity.
Understanding Female Anatomy
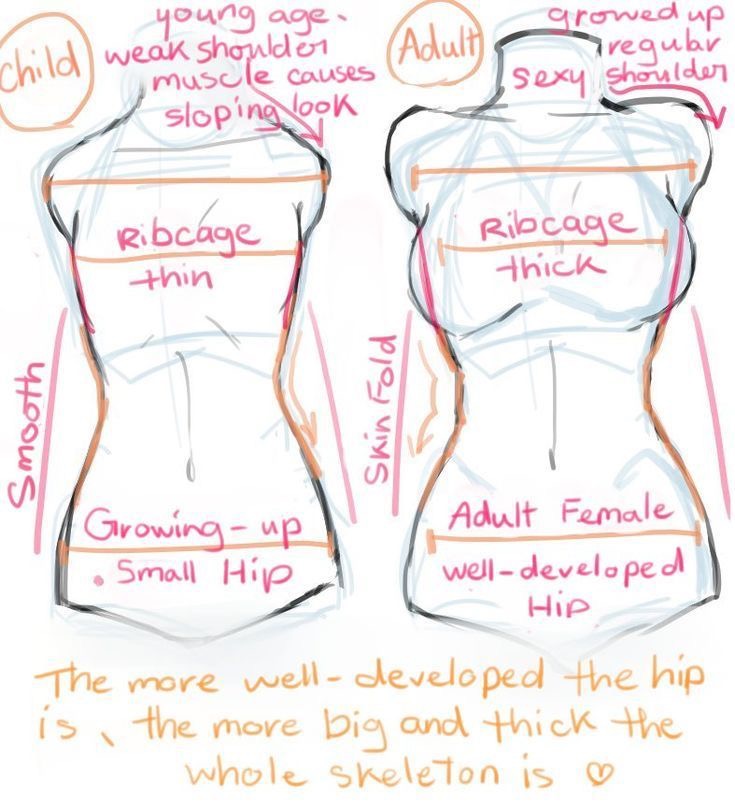
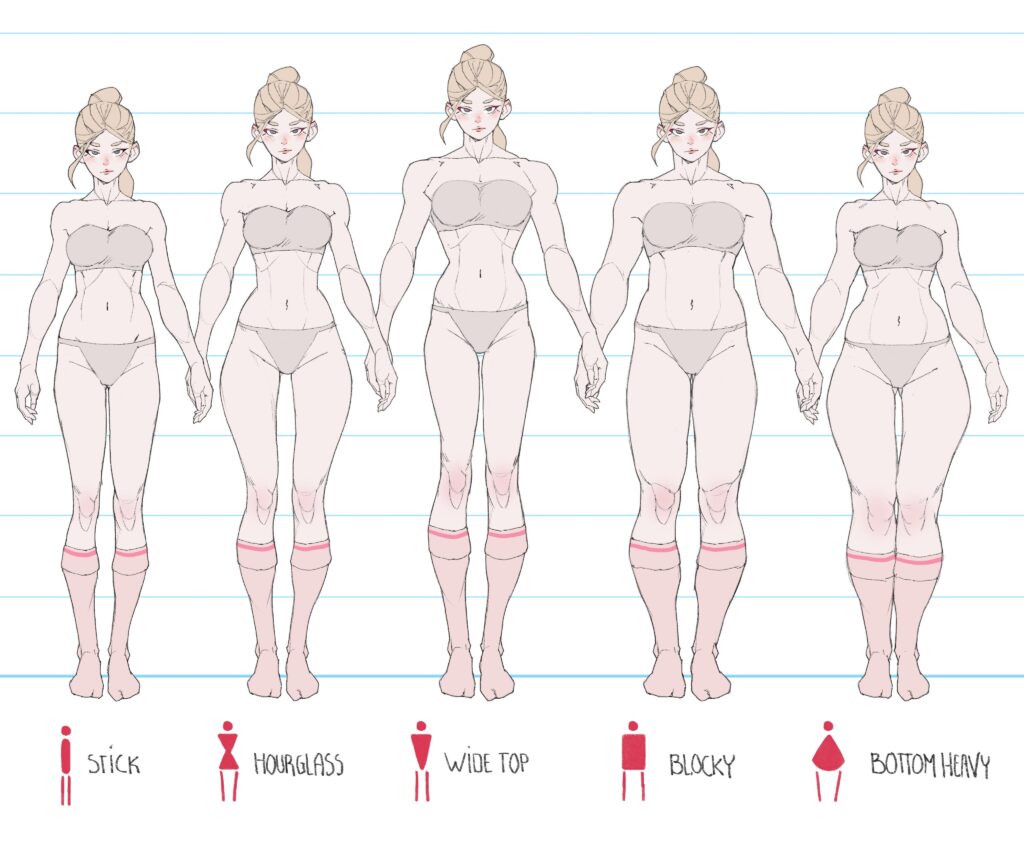
Female anatomy is unique and has specific features that are important to know for drawing. Understanding proportions and key focus points helps create accurate and realistic representations of the female body. Understanding the anatomy and placement of the knees and calves is essential for achieving accurate leg proportions and realistic flow in your drawings.
Proportions and Basic Shapes
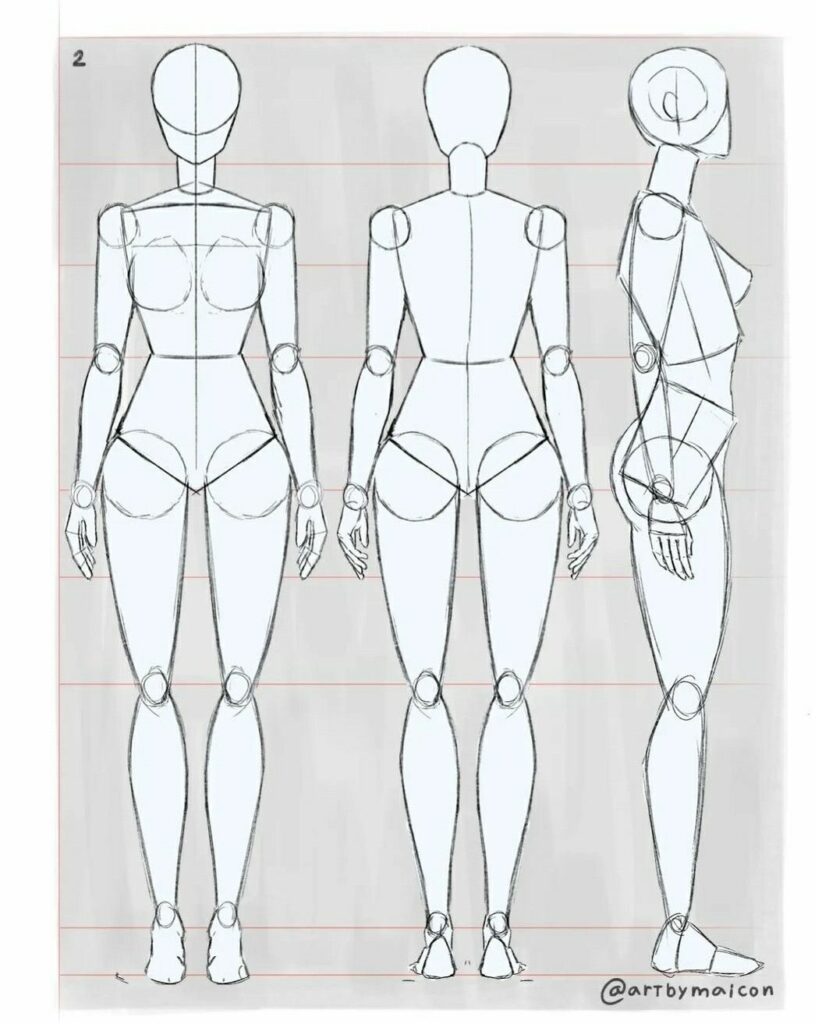
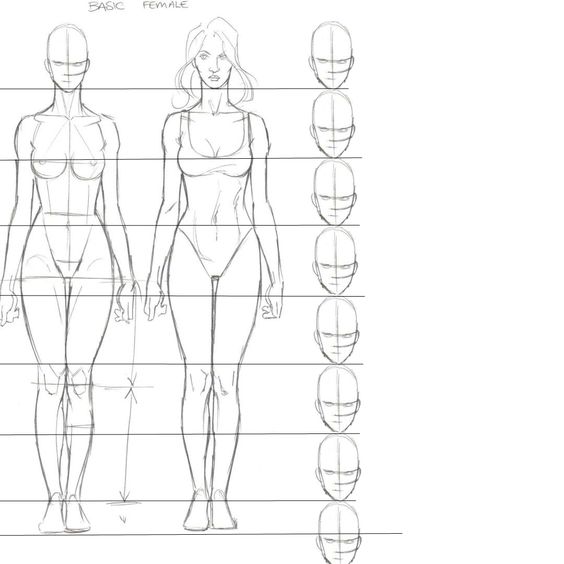
When drawing the female form, starting with basic shapes is key. Artists often use circles and ovals to outline the head, torso, and joints. The general proportion is often considered to be about 8 heads tall.
Key Proportions Include:
- Hips: Typically wider than the shoulders.
- Waist: Noticeably narrower than the hips.
- Torso: Curved at the rib cage and often tapers down to the waist.
These shapes provide a foundation for the body. They can be adjusted based on individual styles and the pose, which can add personality and flair to the artwork.
Anatomy Focus Points
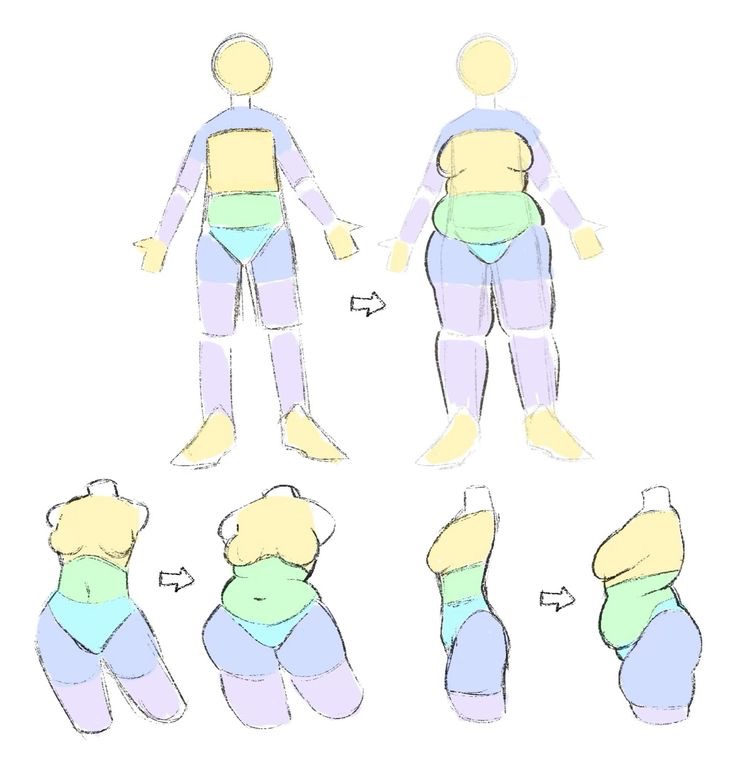
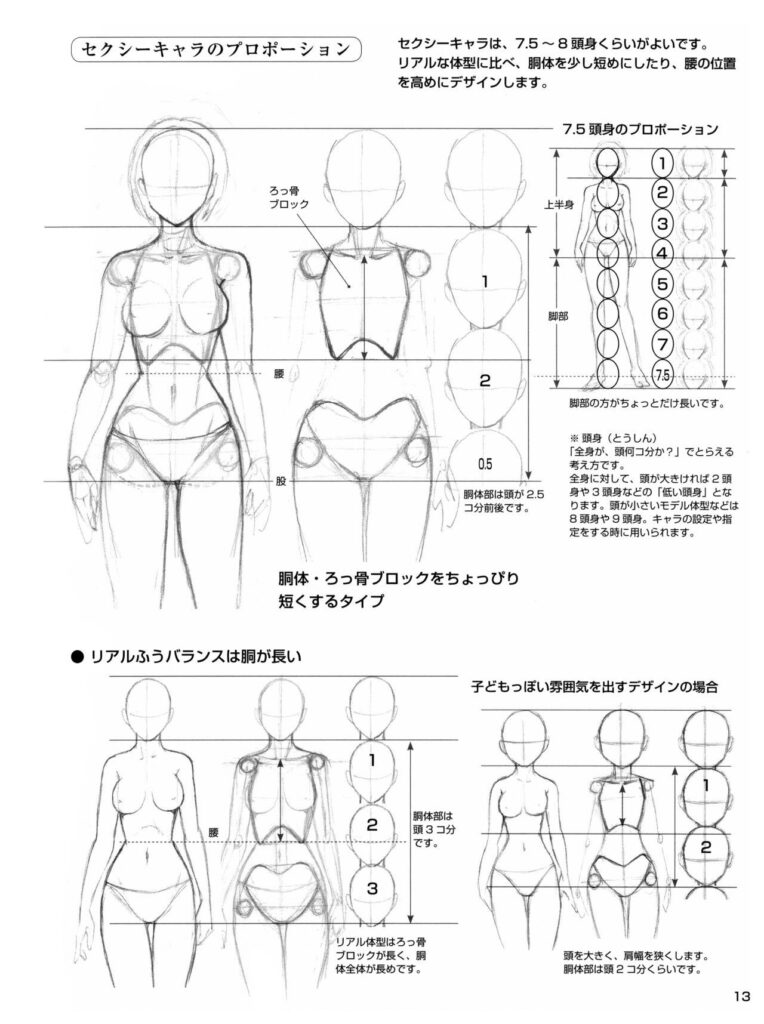
Focusing on the correct anatomy enhances the realism in drawings. Key areas to emphasize are the breasts, shoulders, legs, arms, pelvis, neck, and rib cage.
Important Anatomy Points:
- Breasts: Vary in size and shape; vital for drawing the torso.
- Shoulders: Sloped gently, affecting the posture.
- Pelvis: Wider in women, influencing the hip line.
- Legs and Arms: Proportions matter. Legs can be longer and arms more slender.
Understanding these focus points aids in capturing the essence of the female form accurately. Paying attention to how these areas interact with one another will lead to better and more lifelike illustrations.
Getting Started with Materials and Techniques
Before beginning body drawings, it’s important to know the right tools and basic techniques. Selecting proper materials can make a big difference in the quality of the sketches. Basic sketching methods help in creating strong outlines of the body.
Choosing the Right Tools
For body drawing, choosing the right tools is key. A good selection can make sketching smoother. Here’s a quick list of what to consider:
- Pencils: A range of pencils, from HB to 2B, helps create different shades and outlines.
- Erasers: Use a kneaded eraser for gentle lifting of pencil marks without damaging paper.
- Paper: Choose sketch paper with a bit of texture for better grip and detail.
Investing in quality tools is worth it. They help improve the precision of lines and shapes in the drawings.
Sketching Basic Outlines
When sketching, start with simple shapes like circles, ovals, and rectangles. These forms help to lay a foundation for the figure’s body.
- Begin with Circles: Use circles for the head and joints. This adds balance to the drawing.
- Add Ovals: Ovals can represent the torso and limbs, making the body easier to visualize.
- Use Lines: Draw light lines connecting your shapes to establish the figure’s posture.
Construction lines guide the drawing process. They can easily be erased later, leaving behind cleaner outlines and defined shapes. Keeping sketches light at first allows for adjustment before committing to details.
Finding Inspiration for Your Drawings
Finding inspiration for your drawings is an essential part of growing as an artist, especially when it comes to figure drawing and exploring different body shapes. There are countless ways to spark your creativity and keep your art feeling fresh. Start by browsing art books, online tutorials, and social media platforms like Pinterest, where you can search for keywords such as “female body,” “poses,” and “figure drawing” to discover a wide range of ideas and techniques.
Studying the work of other artists can open your eyes to new things—notice how they use lines, angles, and reference images to bring their figures to life. Don’t hesitate to experiment with drawing from life or using photo references to find unique poses and body shapes that challenge your skills. Trying out different mediums or tools can also help you find new ways to express your ideas and keep your drawings exciting.
Remember, inspiration can come from anywhere: a walk in the park, a favorite movie, or even a quick sketch of people you see every day. By staying curious and open to new things, you’ll continually find fresh ideas for your art and develop a style that’s uniquely yours.
From Gesture to Detailed Figure Drawing
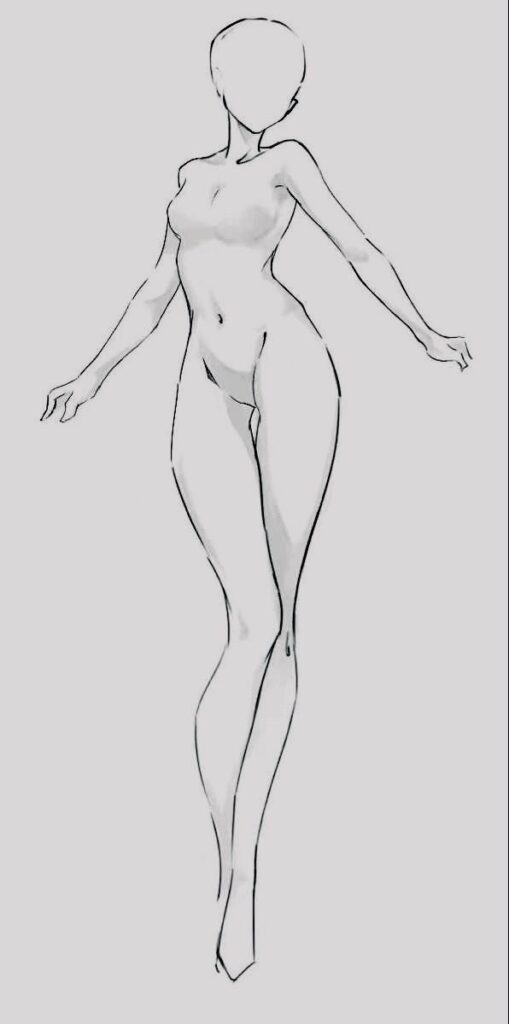
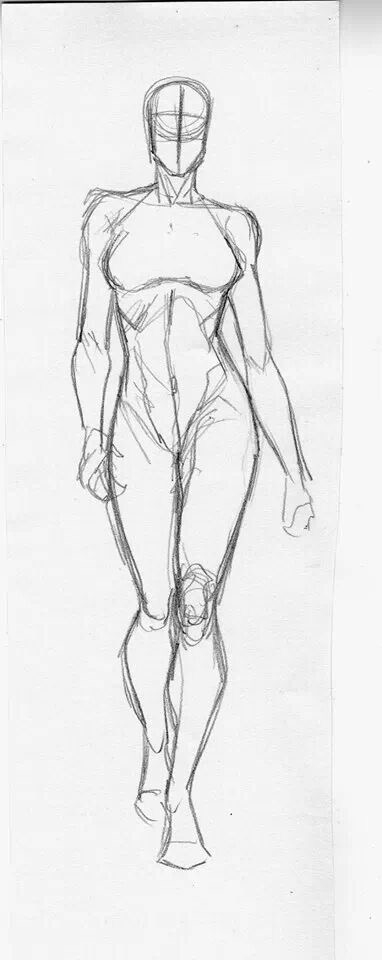
Starting with gesture drawing lays the foundation for creating more detailed artwork. This approach helps capture the essence and movement of the body. After establishing the gesture, the next step is to refine those figures by adding details. Practicing drawing different poses, such as sitting, can help improve your understanding of body movement and posture.
Mastering Gesture Drawing
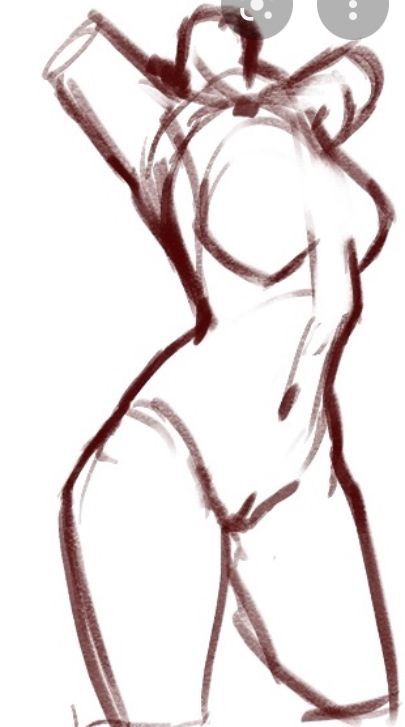
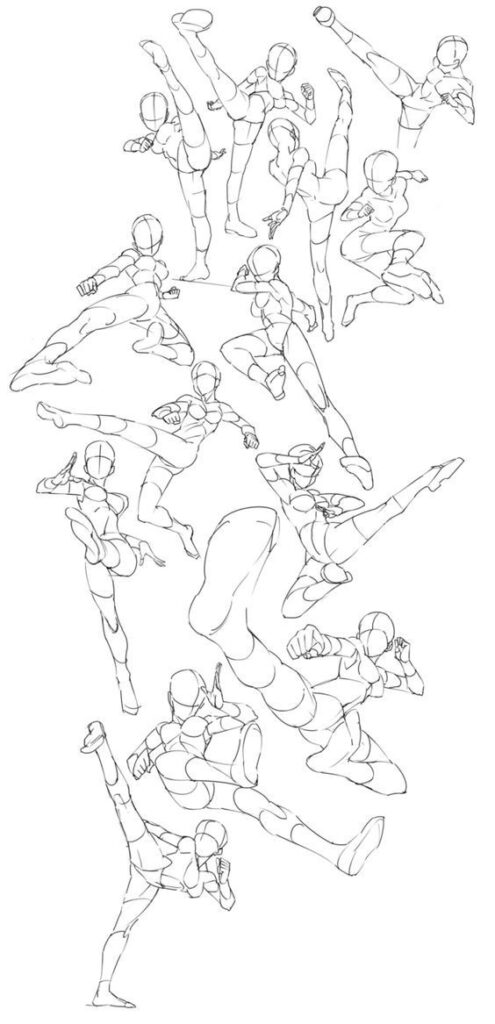
Gesture drawing is all about capturing quick, fluid movements. Artists often spend just a few minutes on each pose to focus on the body’s posture and flow. This technique helps in understanding the overall proportions and how different parts connect.

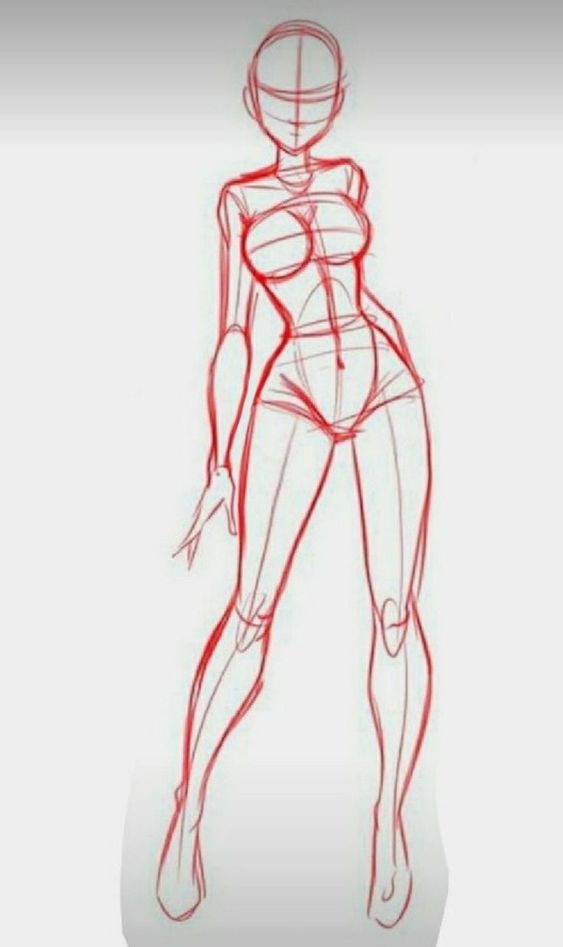
When practicing gesture drawing, they should pay attention to key body parts. For example, the curves of the hips, the length of the arms, and the angle of the head are important. Using light strokes, they can establish lines that define the pose without getting stuck in detail.
Consider doing multiple quick sketches in one session. This not only improves speed but also builds confidence in capturing motion. Regular practice leads to better understanding of how the human body moves, setting a strong base for detailed work.
Adding Details and Refinement
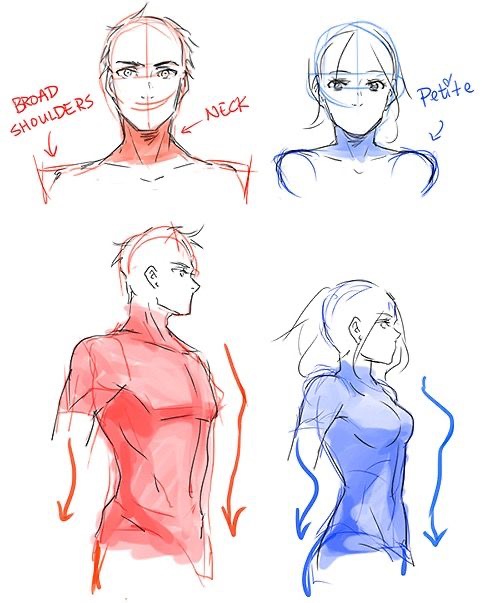
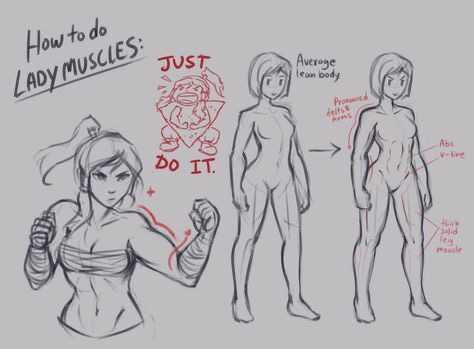
Once the gesture is established, it’s time to add details to bring the drawing to life. This includes facial features like the eyes, nose, and lips. Understanding the structure of the face ensures proper placement and scale. For example, the chin can give character and dimension, while the hair adds personality.
Next, they should focus on hands and feet. These features need careful attention as they can express emotion and action. Incorporating shadows and highlights enhances depth and realism. Light shading can show the curves of the body and the form of the muscles.
Finally, refining the drawing involves checking proportions and adding any last details. This can mean adjusting angles or defining edges to improve the overall look. Taking time to perfect each area helps in creating a compelling and lifelike representation.
Creating Realistic Poses

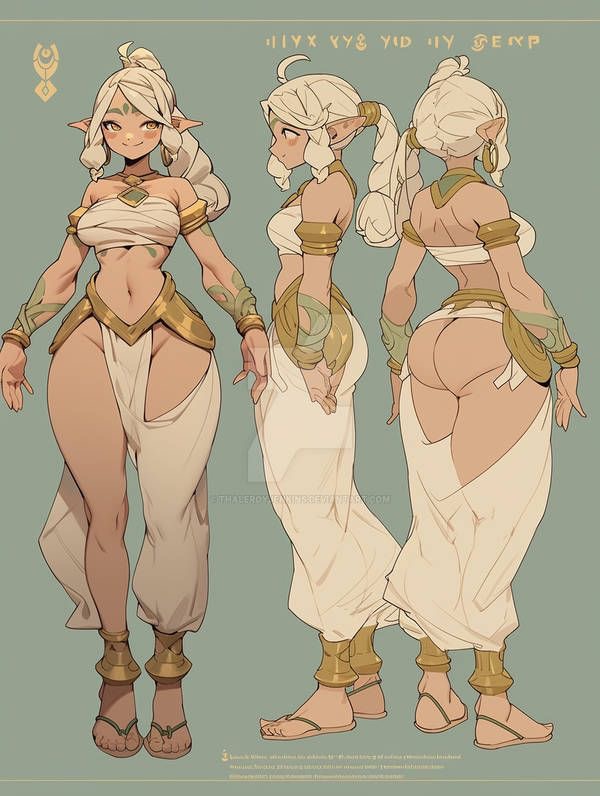
Realistic poses in body drawing can bring artwork to life. Understanding how weight is distributed and capturing dynamic movement are key to creating lifelike figures. Using reference images and classical drawing rules, such as the ‘Eight-Head Rule’, helps suit different body types and poses for more accurate and realistic results.
Understanding Weight Distribution
Weight distribution is vital when drawing poses. It affects how a body looks and feels in space.
When a figure stands, their weight shifts to one side. The foot on the ground bears the weight, while the other leg may bend or lift. For example, if she stands on her right leg, the left leg will naturally bend or dangle.
Tips for Weight Distribution:
- Identify the weight-bearing leg.
- Show bent limbs in a relaxed way.
- Use the center of gravity to balance the pose.
This technique helps portray stability or movement. A figure that follows these rules looks more realistic and grounded in the environment.
Capturing Dynamic Movement
Dynamic poses show action and energy. They bring excitement and life to drawings. To achieve this, artists should focus on the line of action.
The line of action is an imaginary line that shows how the body moves through space. It helps to create diverse poses. For instance, a dancer in mid-leap has a clear line of action that runs from her head to her feet.
Key Points for Capturing Movement:
- Identify the curve of the line of action.
- Use foreshortening to depict depth.
- Keep limbs in various angles to suggest motion.
Capturing movement involves careful observation. A figure in motion should feel natural and fluid, inviting the viewer to engage with the artwork.
Exploring Advanced Techniques and Styles


When creating female body drawings, artists can enhance their skills by developing a personal style and trying out different techniques. Two important areas to focus on are personal style and the use of perspective. Mastering these can help make drawings more captivating.
Developing Your Own Style
Each artist has a unique way of expressing their vision. Finding a personal style involves experimenting with lines, color, and shading. Some artists prefer smooth lines while others enjoy rough sketches. Practical tips to develop a style include:
- Study different artists: Look at styles you admire.
- Practice regularly: Dedicate time to draw each week.
- Use references: Draw from real life or photographs.
As artists practice, they can mix techniques to create a great combination. Adding personal touches, like playful color choices or unexpected poses, can showcase individuality. This helps their work stand out and feel more genuine.
Experimenting with Perspective and Foreshortening
Perspective is key to adding depth to drawings. When figures are drawn at angles, it changes how they appear. Understanding how to use foreshortening can make a figure look dynamic. Foreshortening involves adjusting proportions so parts closer to the viewer look larger.
To work on perspective:
- Draw simple objects first: Start with basic shapes.
- Use guidelines: These help maintain proportions.
- Analyze shadows: Shadows can show depth and form.
By combining shadows with perspective, the drawing gains realism. An experienced artist knows how to use these techniques to enhance their figure drawing skills. Trying out different angles and proportions can lead to impressive results. This practice is essential for any aspiring artist.
Creating Diverse Drawings: Body Types, Ages, and Ethnicities
Bringing diversity into your figure drawings is a powerful way to make your art more relatable and meaningful. To create drawings that reflect a variety of bodies, ages, and ethnicities, start by seeking out reference images that showcase people from different backgrounds. You can log in to see curated collections on art platforms or use QR code features to access exclusive galleries filled with diverse figures and poses.
When working on your drawings, pay close attention to the unique features that make each person special—whether it’s the shape of their bodies, the texture of their hair, or the subtle differences in facial structure. Exploring new things and experimenting with different body types and ages will not only improve your skills but also help you find inspiration in the rich variety of people around you.
Using your art as a force for positivity, you can help promote self-acceptance and celebrate the beauty of all bodies. If you’re looking for more ideas, agree to Pinterest’s terms and conditions to unlock even more reference images and inspiration. By continuing to find new things and reference materials, you’ll keep your drawings dynamic and inclusive, inspiring both yourself and others to appreciate the diversity in art and life.
Dressing Up Your Figures
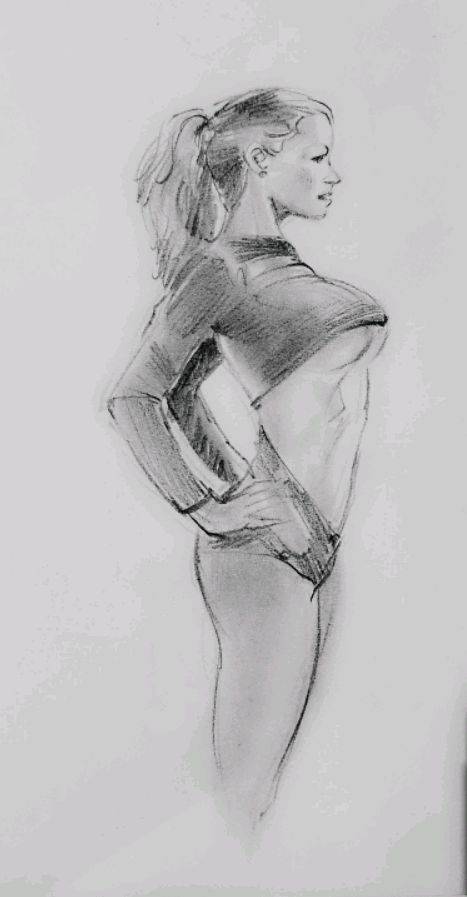
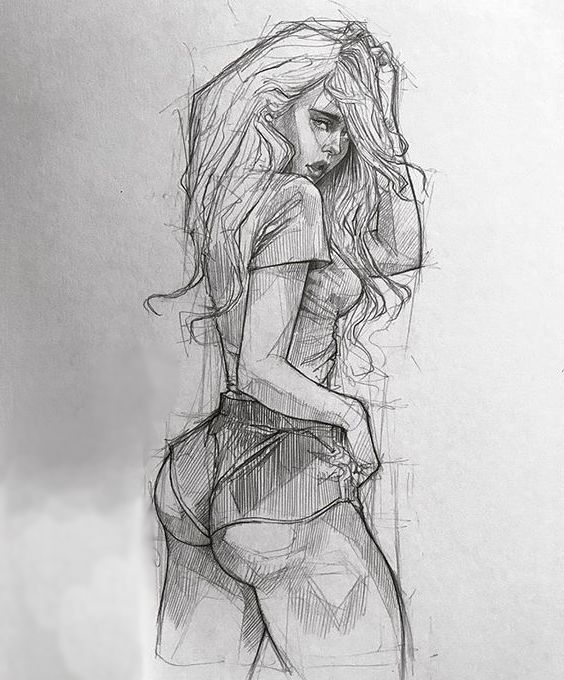
Adding clothing and accessories to figures can bring them to life. It allows the artist to express style and personality. Exploring how to sketch these elements is key to creating dynamic drawings.
Sketching Clothing and Accessories
When sketching clothes, start with basic shapes to get the fit right. Use simple lines to outline the clothing, focusing on how it hangs on the figure. Notice how the clothing interacts with the body’s curves.
Tips for sketching clothing:
- Layering: Draw layers of clothing to show depth.
- Accessories: Don’t forget hats, jewelry, and bags. They add character.
- Style: Consider the fashion style. Is it casual, business, or something else?
Look at real clothing or photos for reference. This helps in understanding details like collars, cuffs, and hemlines.
Understanding Fabric Drapery
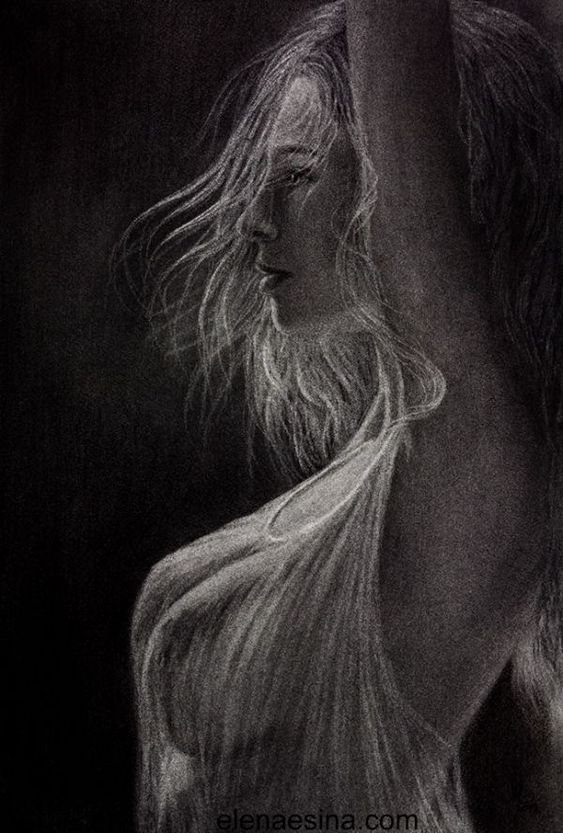

Fabric drapes differently depending on its material. Some fabrics are stiff, while others flow easily. Knowing this can make drawings more realistic.
Common fabric types:
- Cotton: Stiff and holds shape well.
- Silk: Flows smoothly and creates soft folds.
- Denim: Has some stiffness, but can curve with movement.
When illustrating drapery, think about how gravity affects the fabric. Use curves and folds to show movement. Pay attention to the way fabric clings to or falls away from the body. This adds depth and realism.
By mastering clothing and fabric, figures become more engaging and lifelike.
Practical Exercises for Continuous Improvement
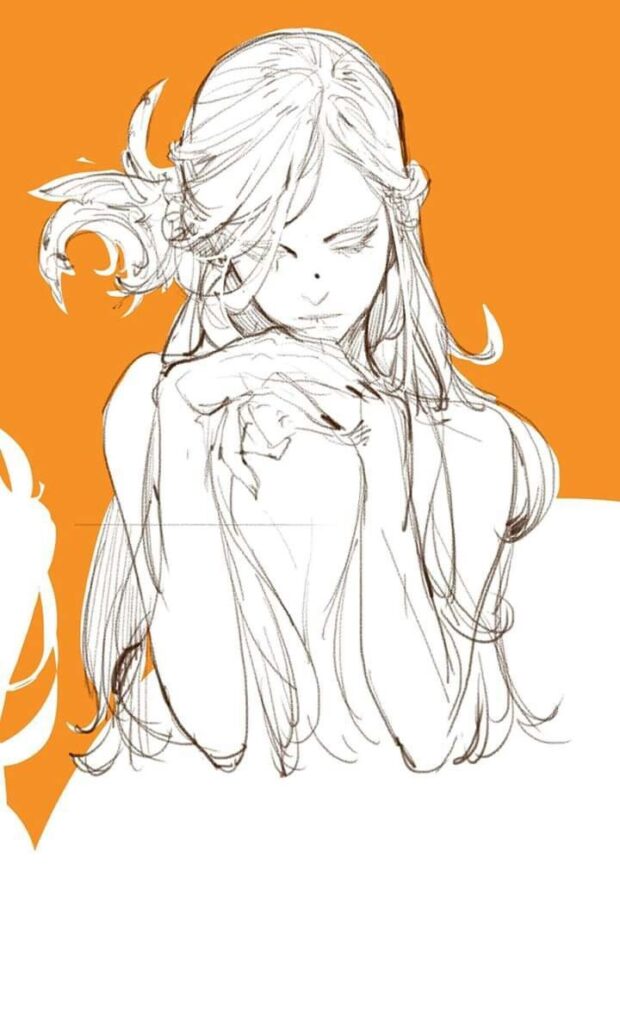
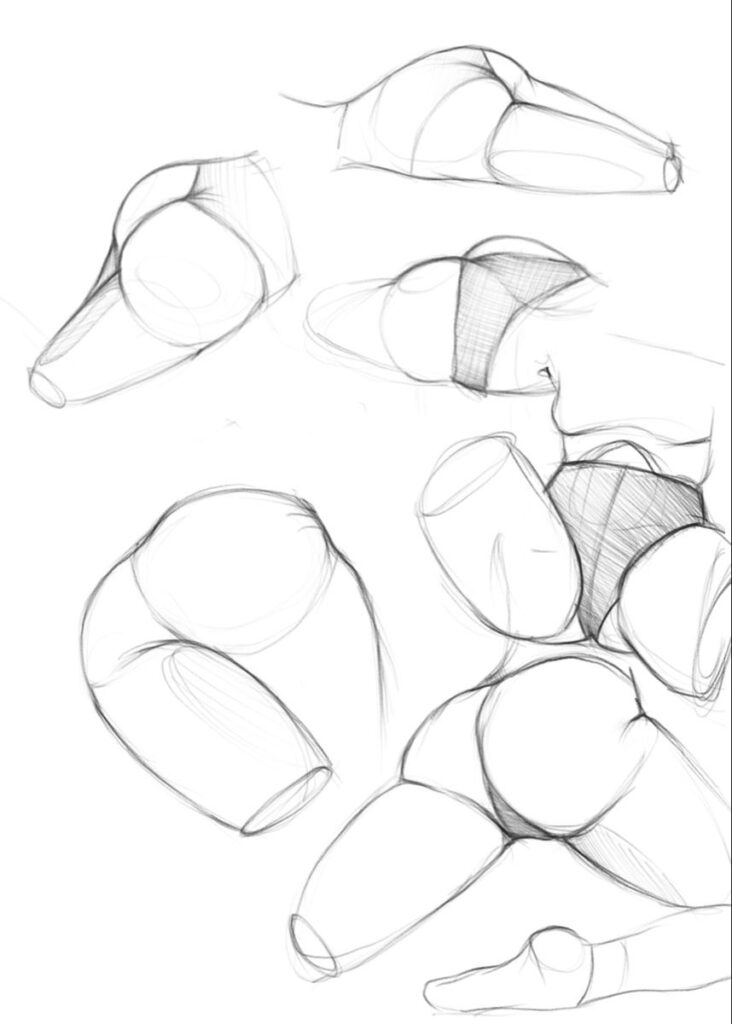
Improvement in body drawing comes with practice. Consistent exercises can help strengthen skills. Here are some helpful tips:
Daily Sketching: She can set aside at least 15 minutes each day. Quick sketches of different poses will boost confidence.
Step-by-Step Instructions: Following tutorials can simplify complex drawings. Step-by-step guides break down body parts for better understanding.
Reference Images: Using reference images is key. She can find photos or artwork to replicate. This helps with proportions and details.
Join Workshops: Participating in workshops can provide valuable feedback. Other artists can offer insights and tips for improvement.
Feedback Loop: Sharing her work with peers is important. Constructive feedback helps identify strengths and areas for growth.
Variety of Poses: Experimenting with different poses expands skill sets. Diverse angles and movements lead to more dynamic drawings.
Gesture Drawing: Practicing quick gesture drawings develops speed. This exercise enhances the ability to capture movement.
Copy from Masters: Copying works from experienced artists can be beneficial. It teaches techniques and styles she can add to her own.
By incorporating these exercises, she can see steady progress. Continuous practice and exploration will build confidence and skill in body drawing.
Additional Resources for Further Learning
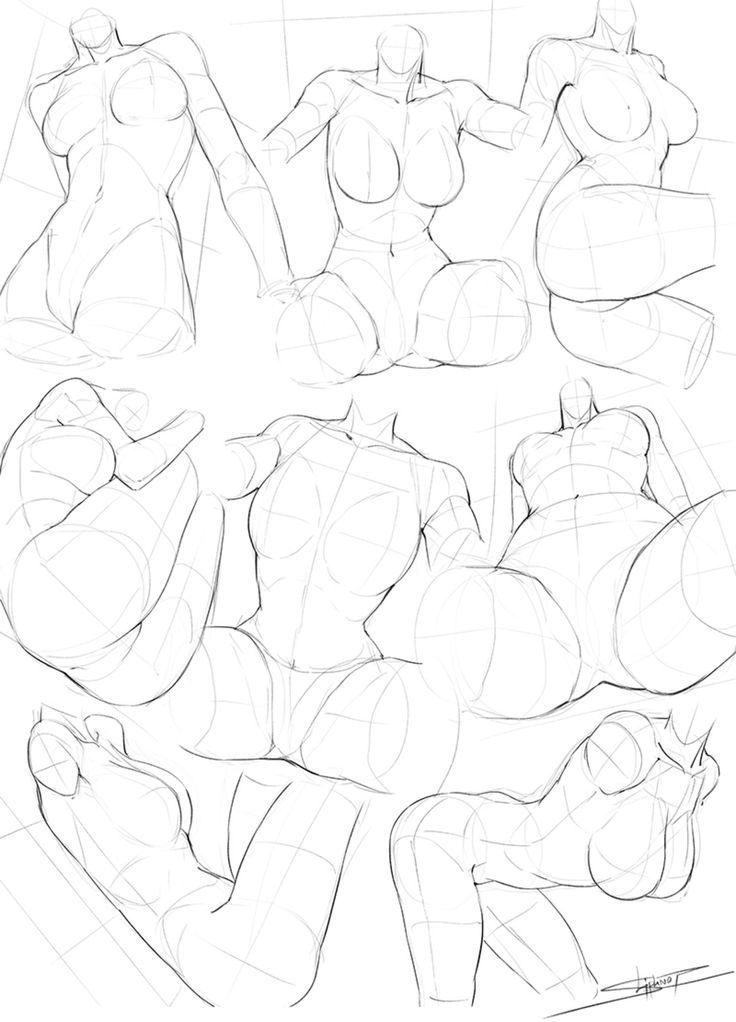

There are many ways to improve drawing skills, especially when it comes to figure drawing and understanding human anatomy. Below are some helpful resources for anyone interested in learning more about drawing female figures.
One cool website to check out is Line of Action, which offers a wide variety of diverse bodies and poses, complete with useful filtering options for artists. I love discovering new resources that showcase different body types and provide fresh drawing inspiration.
Leveraging Online Tutorials
Online tutorials are a fantastic way to learn figure drawing at any skill level. Websites like YouTube offer numerous channels focused specifically on drawing the female form. Artists such as Proko and Drawabox provide step-by-step videos.
Many platforms also host live streaming sessions. These allow viewers to interact with the instructor and ask questions in real-time. This direct engagement can make learning even more effective. Don’t overlook websites like Skillshare or Udemy, which host structured courses for a deeper dive into anatomy drawing.
To get the most out of these resources, take notes and practice regularly. Creating a routine can significantly boost skill development.
Drawing Books and Guides

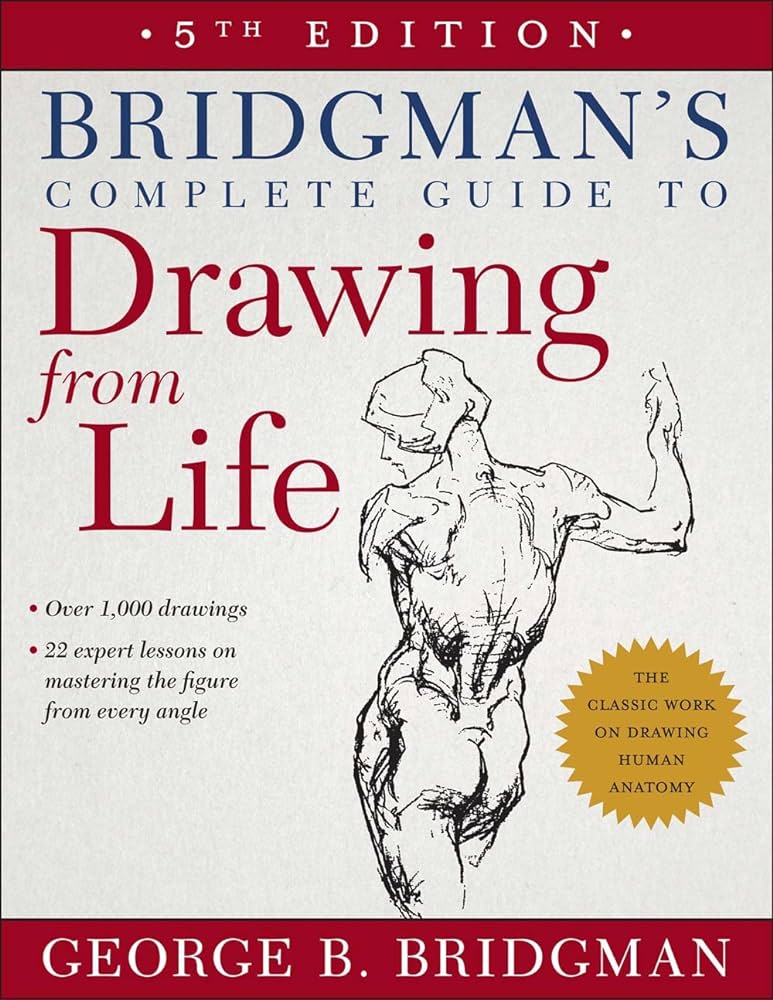
Books can provide in-depth knowledge about anatomy and figure drawing. Classics like “Figure Drawing for All It’s Worth” by Andrew Loomis are invaluable. Loomis breaks down complex concepts into easy-to-understand parts.
Another great book is “Bridgman’s Life Drawing”, which emphasizes proportions and movement in the human figure. Alongside these, personal sketchbooks can be useful for tracking progress and experimenting with styles.
Many art supply stores sell books that focus solely on drawing women. These guides often include exercises and tips that apply directly to drawing various body types. Including such resources in a drawing library can be a game changer for practice.
- 60.8Kshares
- Facebook0
- Pinterest60.8K
- Twitter0
- Reddit0
