Ever tried to draw a rock and ended up with something that looks suspiciously like a lumpy potato or a rather sad grey blob ? You’re definitely not the only one … Drawing rocks might seem like a no-brainer, but let me tell you – they’re actually pretty tricky & present a real challenge – they can have all sorts of unique textures, come in just about any shape & size, and have some very interesting interactions with light.
They’re the true unsung heroes of all the amazing landscapes out there, giving your work a solid foundation & bringing a level of added realism that’s just fantastic. If you’ve been scratching your head, wondering how to draw some decent looking rocks that seem genuinely solid, heavy & full of personality – then you’re in the right place. This guide is your easy to follow roadmap to finally mastering the art of drawing rocks like a pro, leaving those awful blobs behind & discovering incredible geological formations that are actually worth looking at.
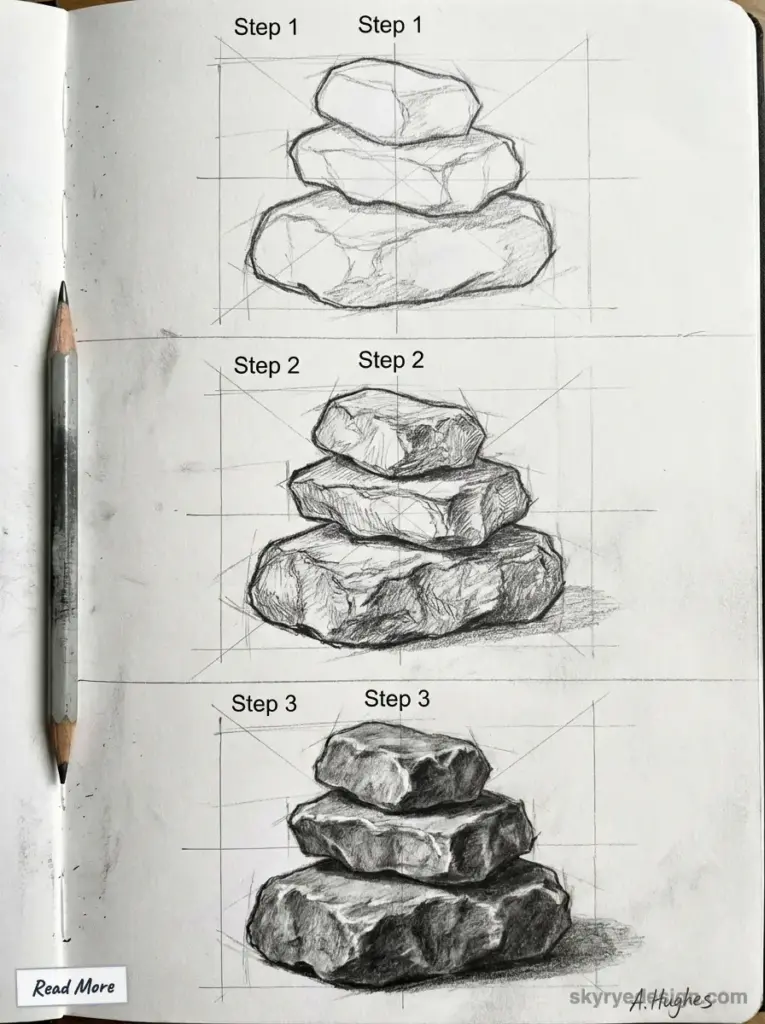
We’re going to break this down in to easy to follow, bite-sized chunks – starting with the basic shapes that make up a rock, and then working on how to capture all the tiny details that turn a rock into a real ‘rock’. Get ready to take your landscape drawings to the next level, improve your observation skills & pick up a whole new skillset to add to your artistic toolkit.
Why Rocks? More Than Just Grey Lumps
You might think, “Why dedicate so much time to drawing rocks?” The truth is, mastering rock drawing unlocks a whole new level of realism and depth in your artwork. Rocks are fundamental elements in almost every natural setting – mountains, riversides, beaches, forests. They provide:
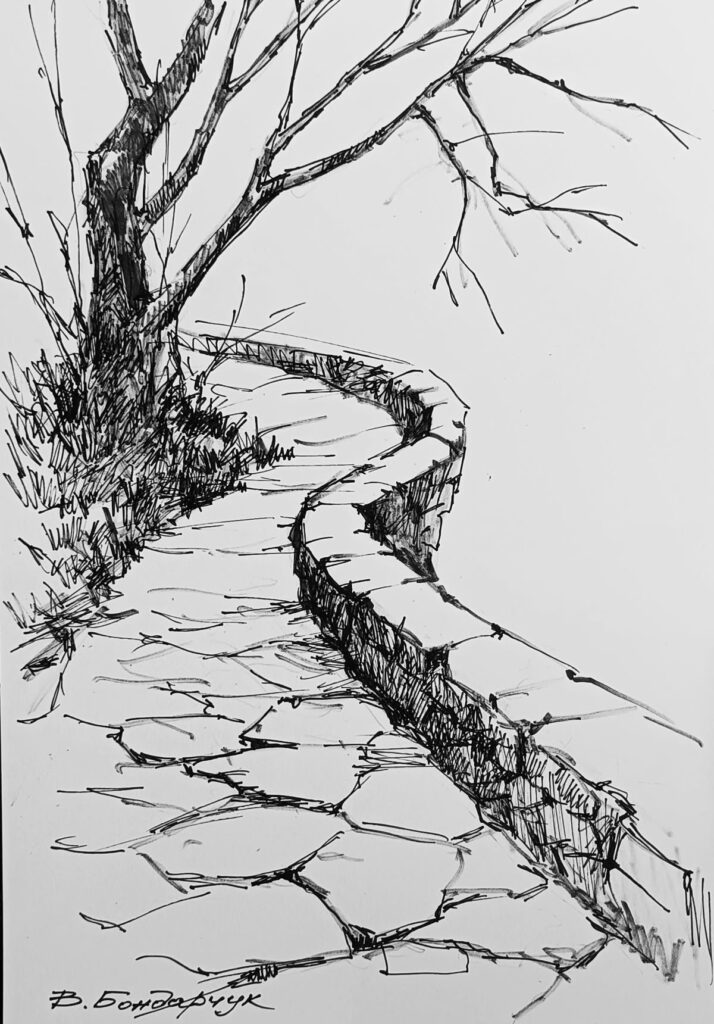
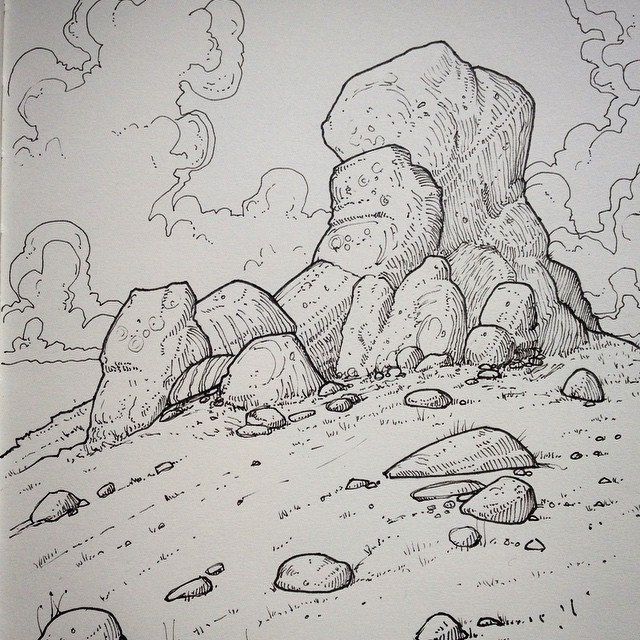
- Weight and Grounding: A well-drawn rock gives a sense of stability and anchors your composition.
- Texture and Detail: The varied surfaces of rocks offer endless opportunities to practice different shading and texture techniques.
- Light and Shadow Play: Their angular and irregular forms create fascinating patterns of light and shadow, essential for understanding three-dimensionality.
- Narrative: Cracks, moss, and erosion tell a story of time and natural forces, adding character to your scenes.
Ignoring rocks or drawing them poorly can make an otherwise beautiful landscape feel flat and unconvincing. By investing in this skill, you’re not just learning to draw rocks; you’re enhancing your overall artistic perception and technical ability.
Getting Started: Your Essential Rock Drawing Toolkit
You don’t need a fancy art studio to start drawing fantastic rocks. A few basic tools are all you require:
- Pencils: A range of graphite pencils is super helpful.
H pencils (Hard): Great for light, faint lines, initial sketches, and subtle textures. Think 2H or 4H. B pencils (Black): Perfect for darker tones, shadows, and richer textures. A 2B, 4B, and 6B will give you a good range. An 8B or even a pure graphite stick can create intense blacks.
- Paper: Any good quality drawing paper will do. A slightly textured paper can sometimes enhance rock textures.
- Erasers:
Kneaded Eraser: Fantastic for lifting graphite gently without smudging, and for shaping into fine points for highlights. Rubber/Plastic Eraser: Good for more precise corrections and creating sharp highlights.
- Blending Tools (Optional but Recommended):
Tortillons or Blending Stumps: For smoothing out graphite and creating soft transitions. Cotton Swabs or Tissues: Can also work for broader blending.
- Reference Photos or Real Rocks: Absolutely crucial! We’ll talk more about this soon.
That’s it! With these simple items, you’re ready to embark on your rock-drawing adventure.
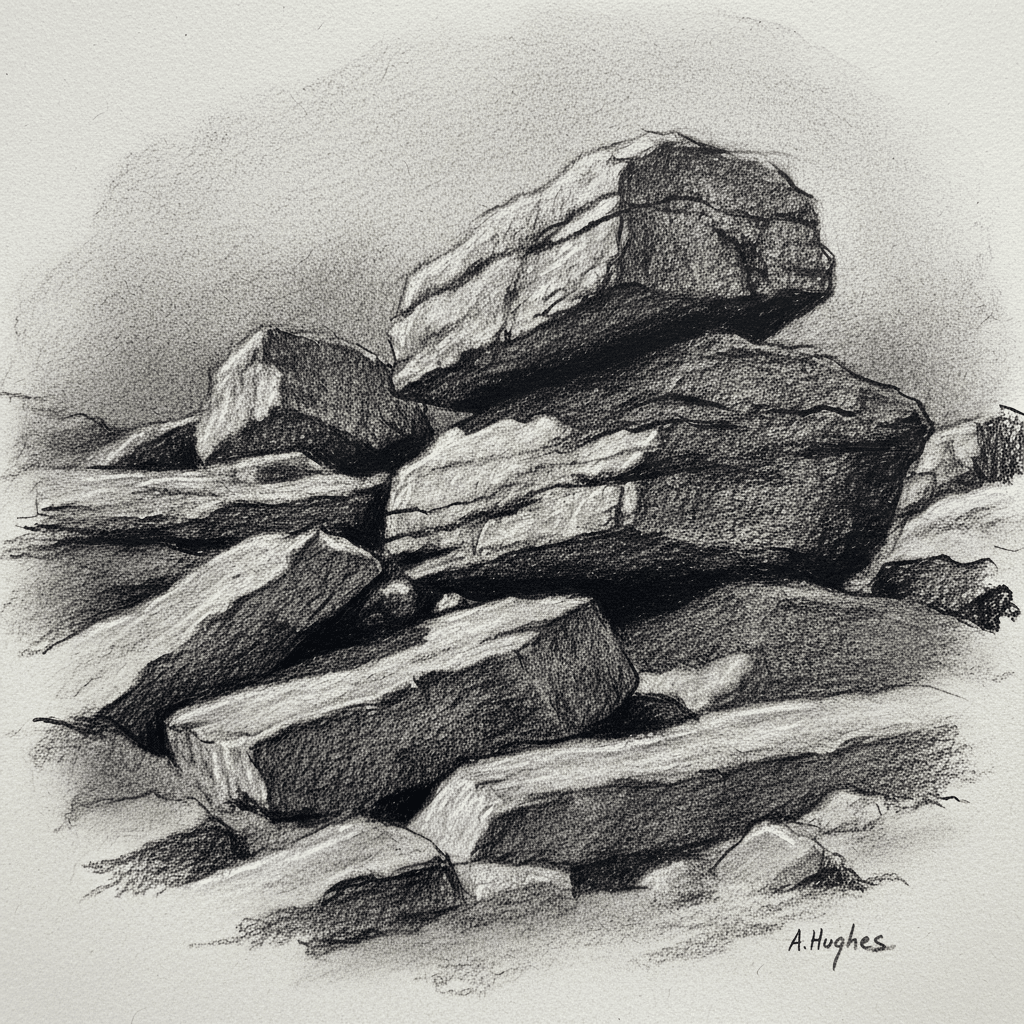
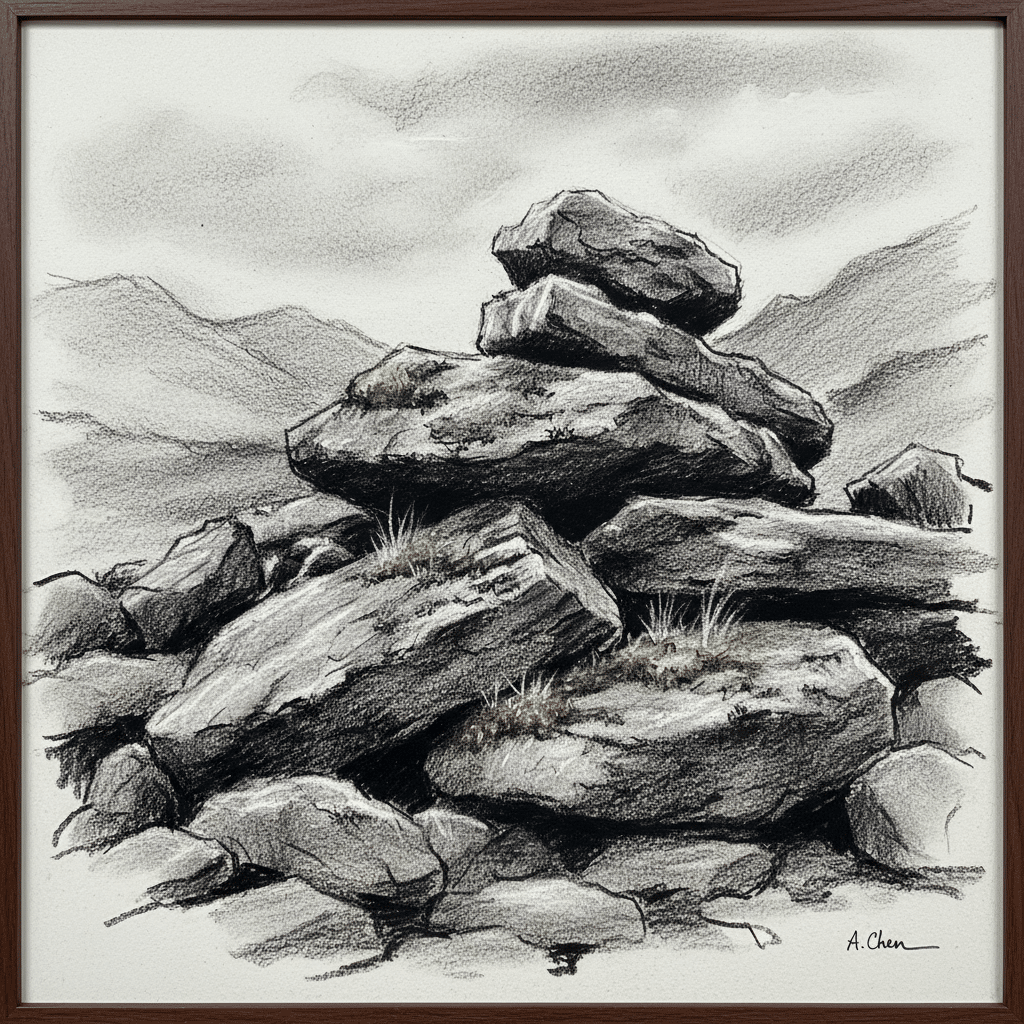
The Foundation: Seeing Beyond the Surface (Form & Structure)
Before you even think about texture or shading, you need to understand the fundamental form of a rock. Rocks are essentially three-dimensional objects, and to draw them convincingly, you need to see them as such.
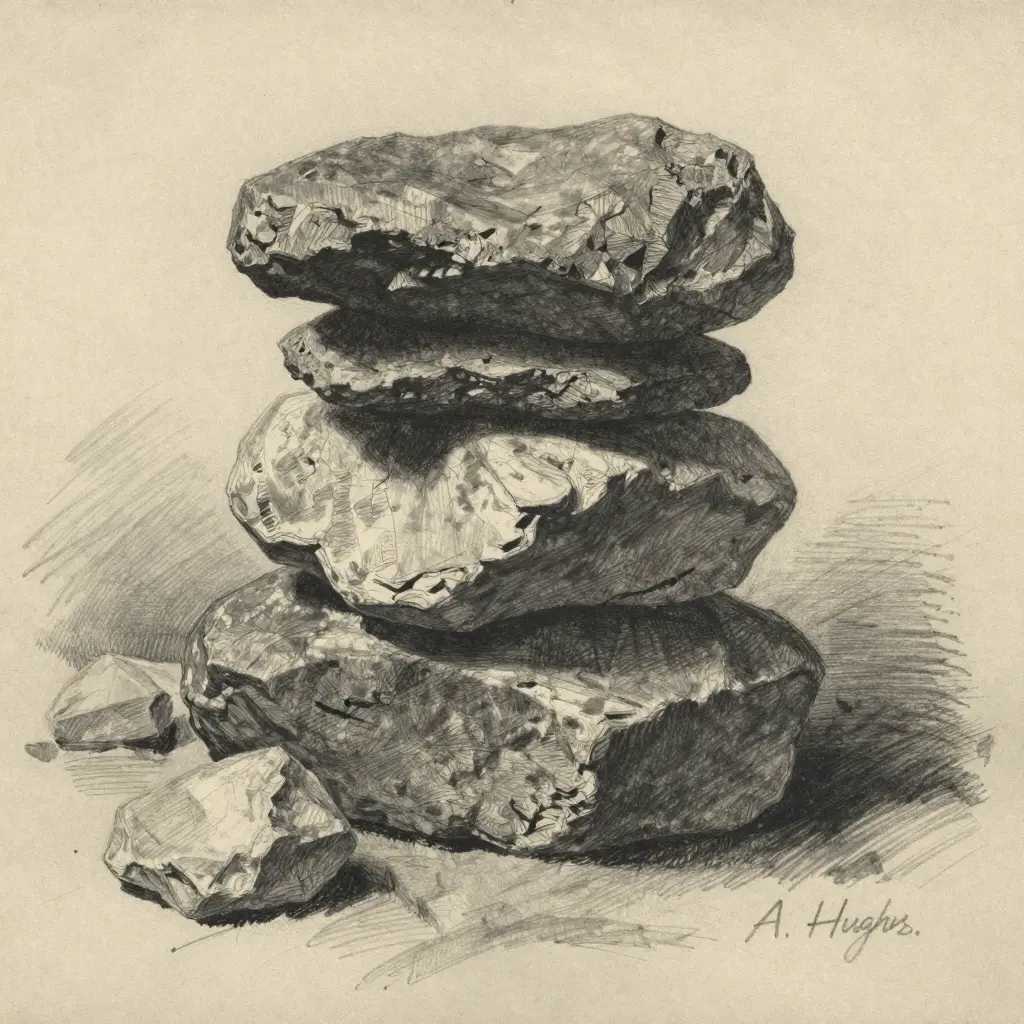
Basic Geometric Shapes
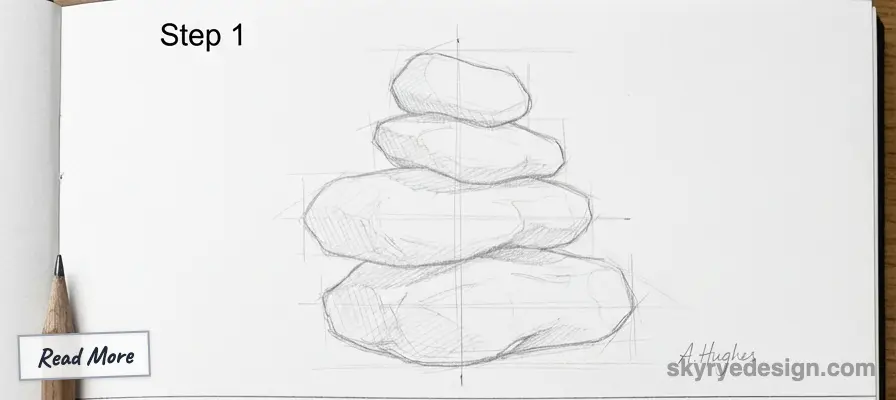
Every complex form can be broken down into simpler geometric shapes. This is a core concept in drawing and applies beautifully to rocks.
- Cubes: Many rocks have angular, blocky qualities. Imagine a rock as a collection of interlocking cubes or rectangular prisms. This helps define its planes.
- Spheres/Ovals: Smooth river stones or weathered boulders often lean towards spherical or oval forms.
- Irregular Polygons: Most rocks are a combination of these, forming irregular, multifaceted shapes. Start by sketching a loose, simplified polygon that captures the overall silhouette of your rock.
Don’t jump straight into detail. Begin by lightly sketching these basic shapes. This establishes the rock’s overall mass and direction.
Planes and Angles
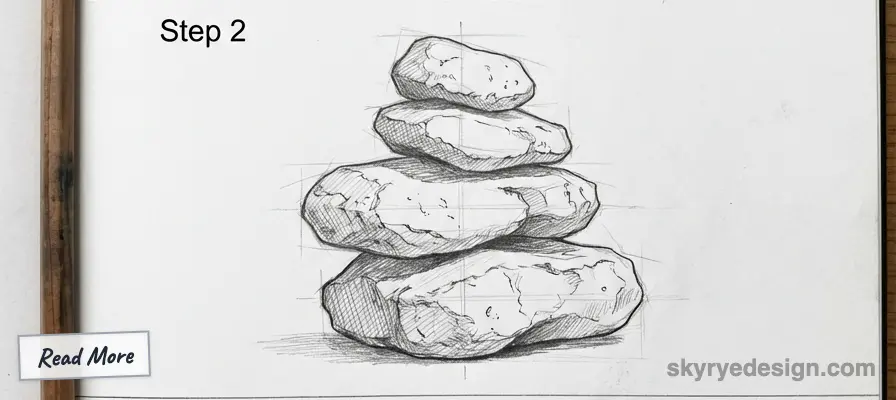
Think of a rock as having many “faces” or planes, just like a faceted jewel. These planes catch light differently.
- Identify Major Planes: Look for the larger, flatter surfaces on the rock. Even a rounded rock will have subtle planes.
- Sketch the Angles: Use straight lines initially to define these planes and the sharp angles where they meet. This will give your rock a solid, structural feel.
- Consider Foreshortening: As planes recede into the distance or turn away from you, they will appear shorter. Understanding perspective is vital here.
Understanding Geological Forces
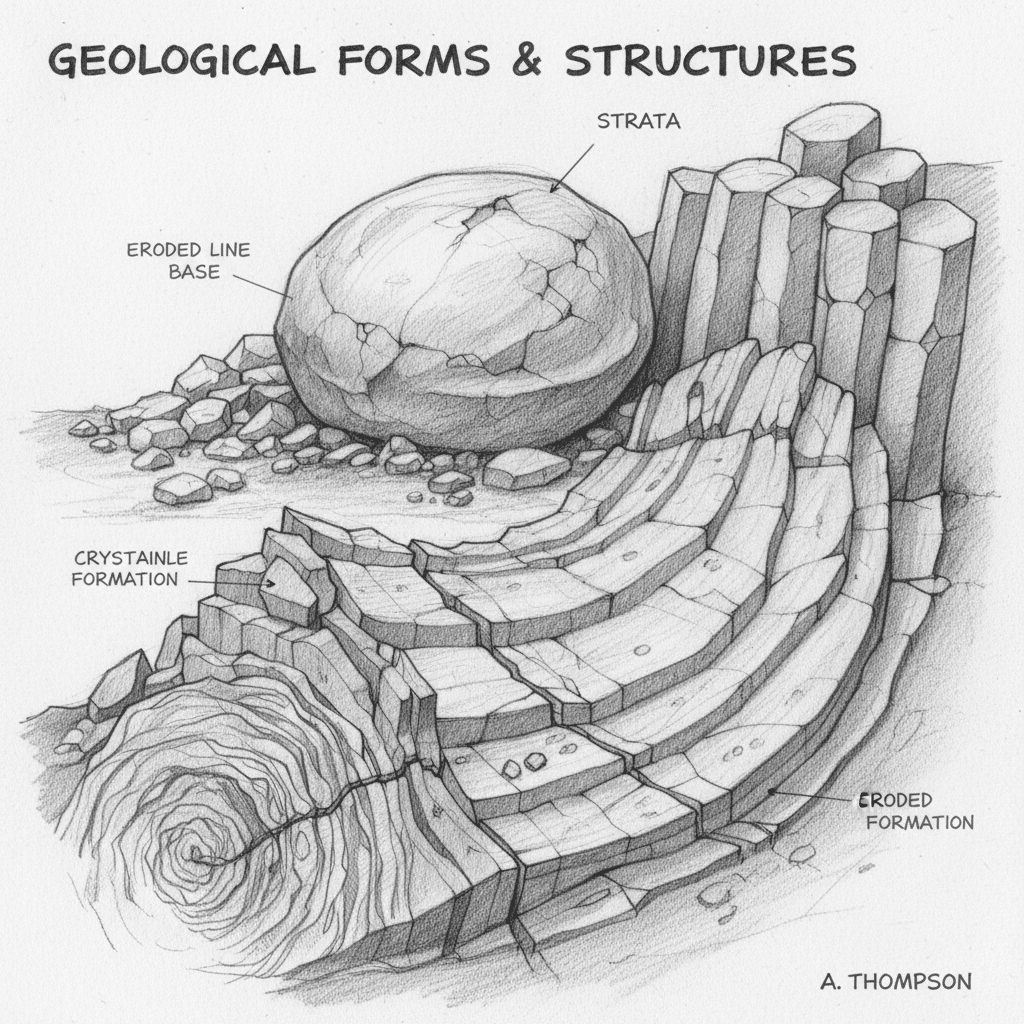
Rocks dont just appear out of nowhere, their shapes are a direct result of all kinds of geological activity – erosion, cracking apart, and rocky sediment. Knowing a bit about whats going on here can really help out.
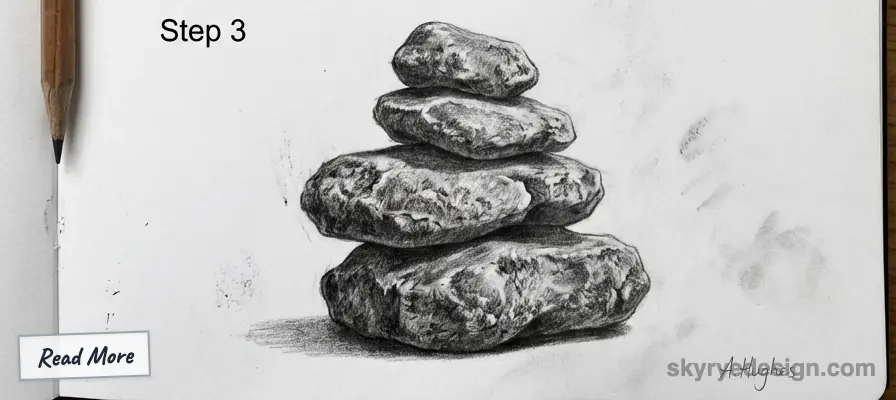
Layering (Sedimentary Rocks): If youve ever seen the layers in a rock formation, you know how a rock thats formed from compressed sediment can have these really distinctive horizontal bands – drawing those layers out to the best of your ability can make your rocks look so much more believable.
Erosion: Water, wind, and ice are the main culprits when it comes to wearing down rocks, but they do it in pretty different ways – smooths out stones into rounded pebbles or carves out cliff faces with jagged edges.
Faults and Cracks: When tectonic plates move and rocks get broken, they split along fault lines, creating sharp edges and deep fissures – and these arent just random; the patterns that emerge often reflect the internal structure of the rock too.

The Art of Observation: Your Secret Weapon
Drawing from imagination is great, but to draw realistically, especially when learning how to draw rocks, observation is your absolute best friend.
Reference, Reference, Reference
Never underestimate the power of a good reference.
- Real Rocks: If you can, go outside and pick up some rocks! Hold them, turn them, feel their texture. Observe how light hits them from different angles. This tactile experience is invaluable.
- High-Quality Photos: When real rocks aren’t an option, use excellent reference photos. Look for images with clear lighting that highlight form and texture.

Pro Tip:* Don’t just pick any random image. Seek out photographs that inspire you and show the rock in an interesting context. Sometimes, capturing visual inspiration can be an art form in itself!
- Analyze Before You Draw: Before putting pencil to paper, spend a few minutes just looking.
Where is the light coming from? What are the darkest and lightest areas? What kind of texture does it have? Is it smooth, rough, porous? Are there any dominant angles or curves?
Studying Light and Shadow
Light is what defines form. Without it, everything is flat.
- Identify the Light Source: This is the absolute first step. Is the light coming from above, below, the side, or behind? This dictates everything.
- Observe Value Changes: Notice how the same rock has different shades (values) depending on how much light hits that particular plane. Surfaces directly facing the light source will be brightest, while those angled away will be darker.
Analyzing Rock Types
Different types of rocks have distinct visual characteristics.
- Igneous Rocks (e.g., Granite, Basalt): Often appear crystalline, coarse-grained, or very dense and dark. Can have a blocky or volcanic, bubbly texture.
- Sedimentary Rocks (e.g., Sandstone, Limestone): Frequently show visible layers or strata, have a more granular or sandy texture, and can be relatively softer.
- Metamorphic Rocks (e.g., Marble, Slate): Can appear banded, foliated (layered like slate), or have a more crystalline, often smoother, appearance due to intense pressure and heat.
You don’t need to be a geologist, but a basic understanding helps you anticipate and draw these features convincingly.
Building Volume: Mastering Light and Shadow
This is where your rock drawing truly comes alive. Light and shadow create the illusion of three dimensions on a two-dimensional surface.
Defining the Light Source
As mentioned, this is paramount. Every shadow and highlight radiates from this point. Sketch a little sun or lightbulb icon on your paper to remind yourself where the light is coming from.
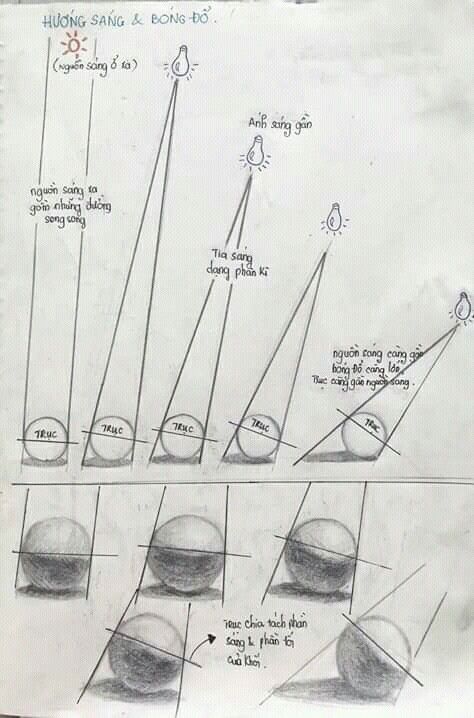
Highlights and Midtones
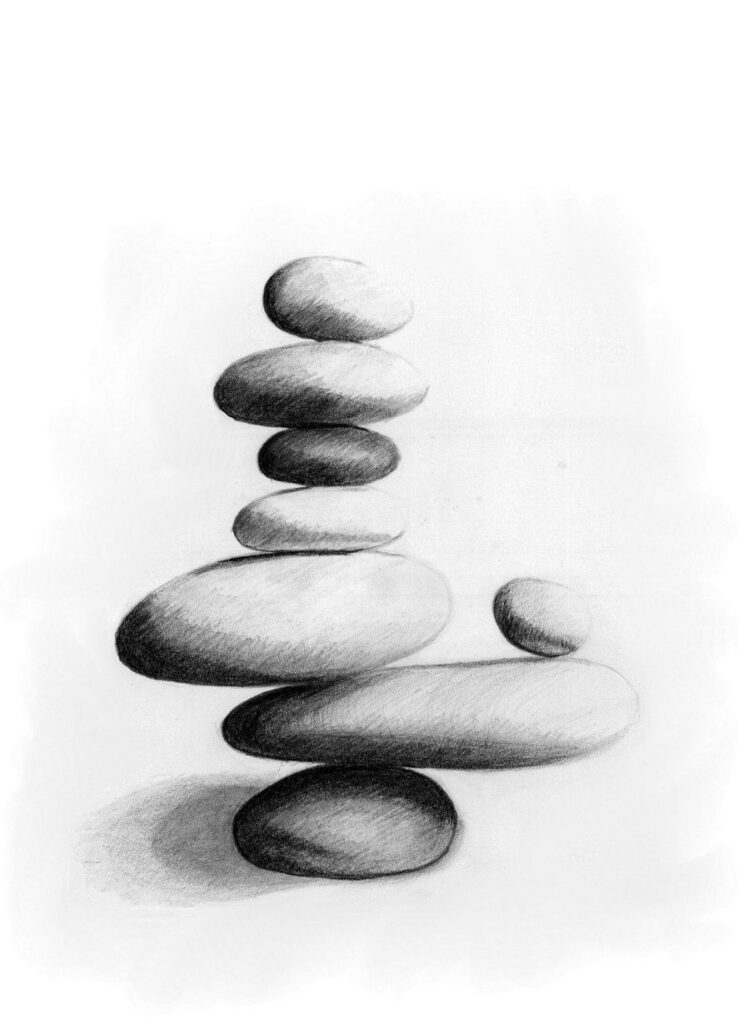
- Highlights: These are the brightest areas where the light hits the rock most directly. They define the edges and prominent features facing the light. Use your kneaded eraser to lift graphite for sharp highlights or leave paper white.
- Midtones: These are the general values across the rock’s surface that aren’t directly in the light or deep in shadow. They describe the general color and texture. Build them up with lighter pencil pressure.
Core Shadows
This is the darkest part of the rock itself, where light cannot reach. It defines the rock’s form.
- Darkest Value: Use your softer B pencils (4B, 6B) to lay down rich, dark tones here.
- Edge Definition: The core shadow helps separate one plane from another. It’s often where the form turns away from the light.
Reflected Light
Don’t forget this subtle but important element! Reflected light is ambient light bouncing off surrounding surfaces (like the ground, water, or other rocks) back onto the shadowed side of your rock.
- Lighter than Core Shadow: It brightens the shadowed side slightly, but it should never be as bright as your midtones or highlights. If it is, your rock will look flat.
- Adds Realism: This detail prevents shadows from looking like flat, cut-out shapes and connects the rock to its environment.
Cast Shadows
The shadow a rock throws onto the ground or other objects.
- Shape and Direction: Cast shadows mirror the shape of the object casting them and stretch away from the light source.
- Darkest Near the Object: They are usually darkest and most defined closest to the object, becoming lighter and softer as they extend away.
- Grounding Effect: Cast shadows are crucial for making your rock look like it’s actually sitting on the ground, not floating.

Using Contrast for Impact
Varying your values from very dark to very light creates visual interest and dramatic impact. Don’t be afraid to push your darks and preserve your lights. This contrast makes your rocks look solid and dramatic.
Texture is Key: Making Rocks Feel Real
Once you have the form and light down, texture is what breathes life into your rocks. It’s what makes them feel rough, smooth, cold, or warm.
Rough vs. Smooth: Different Drawing Techniques
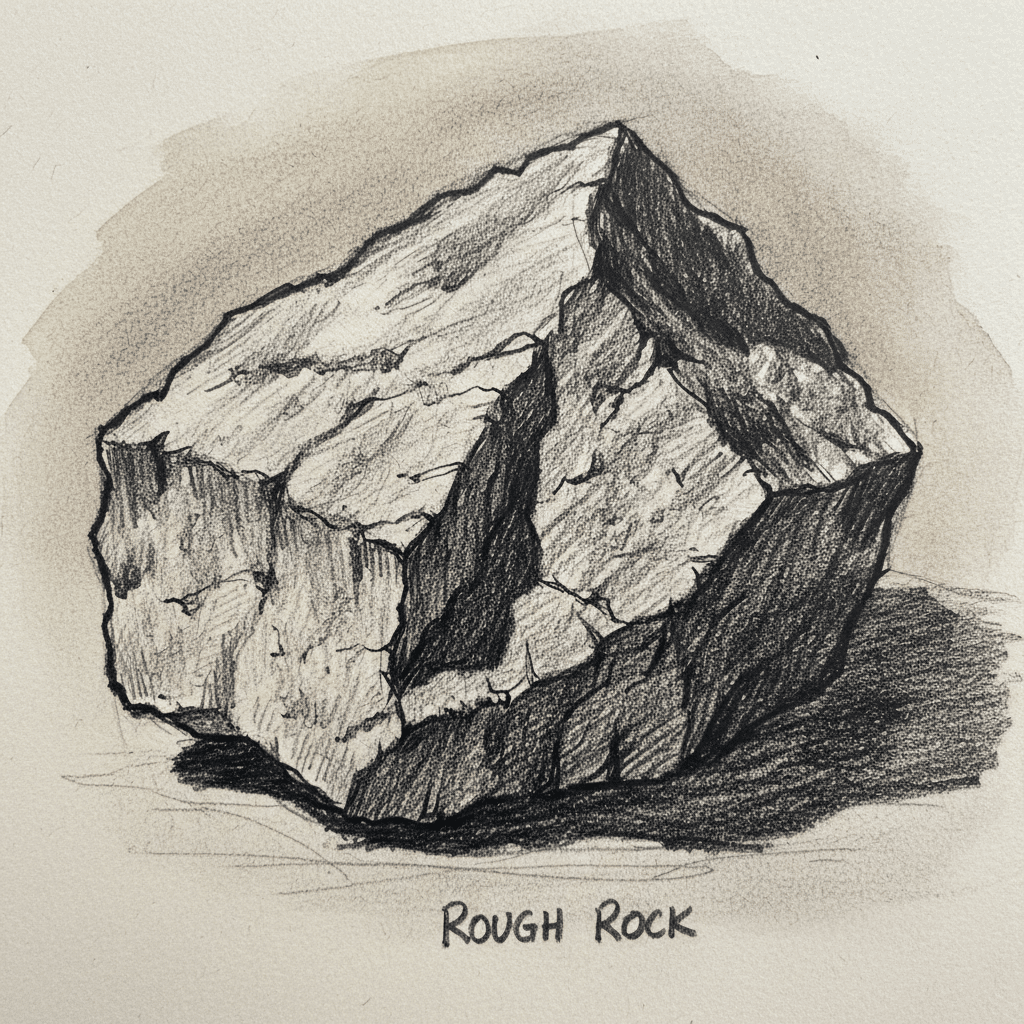
- Rough Textures (e.g., Granite, Sandstone):
Scumbling: Use small, circular, irregular scribbling motions with your pencil. Vary pressure to create unevenness. Stippling: Build up texture with tiny dots. Denser dots create darker, rougher areas. Cross-hatching: Layering sets of parallel lines in different directions can create a sense of grit and unevenness, particularly useful for more angular rock types. Varied Line Weight: Use thicker, broken lines for rough edges and fissures.
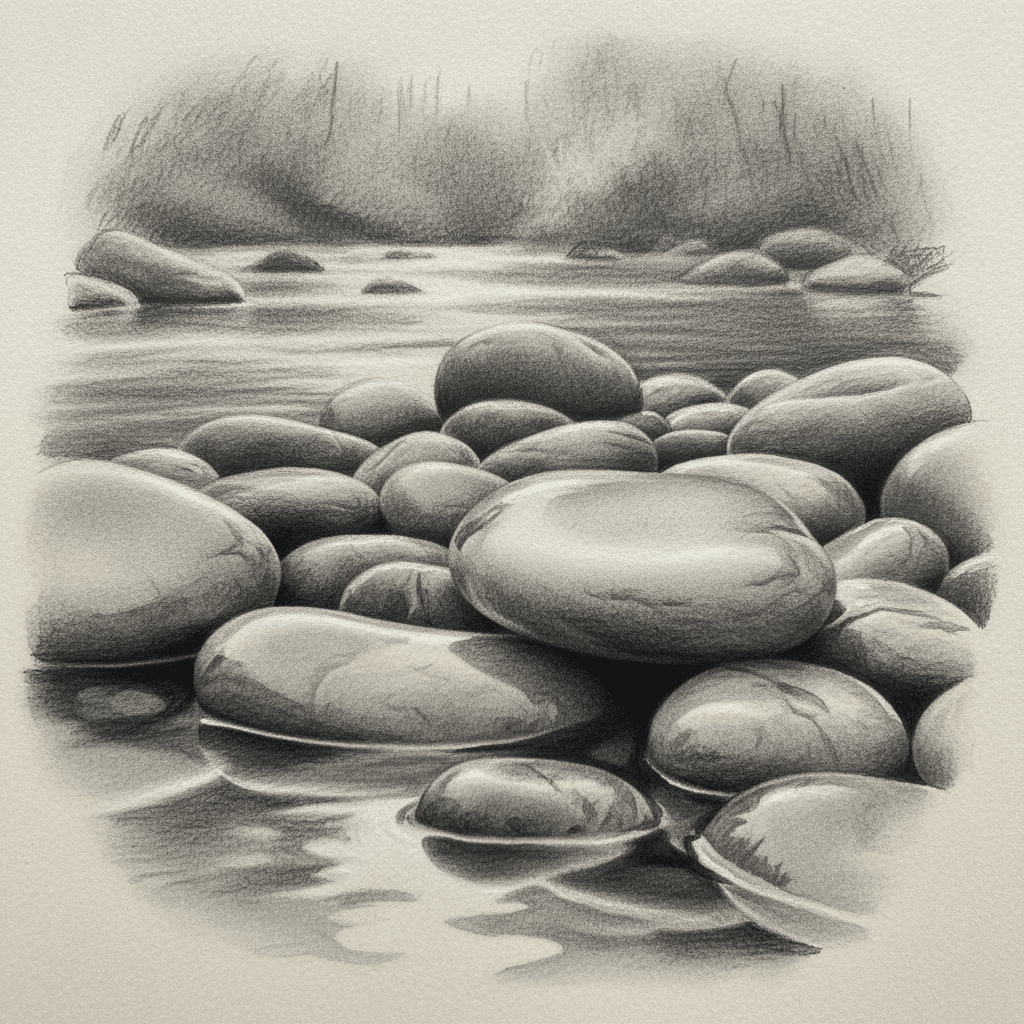
- Smooth Textures (e.g., River Stones, Polished Granite):
Blending: Use a blending stump or cotton swab to smooth out graphite for a sleek, even surface. Subtle Value Transitions: Focus on very gradual shifts in light and shadow, indicating a polished or water-worn surface. Reflective Qualities:* Smooth rocks might have more pronounced reflections, so pay attention to crisp highlights.
Cracks, Fissures, and Pitting: Adding Details that Tell a Story
These are the “scars” of a rock’s life and add immense character.
- Follow Form: Cracks shouldn’t just be lines on the surface; they should follow the contours and planes of the rock. They have depth, so shade inside them.
- Vary Line Weight and Darkness: Some cracks are deep and dark, others are hairline fractures. Use varying pressure and pencil grades.
- Pitting and Eroded Areas: Small indentations or areas where the surface has worn away add to the texture. Use tiny dots, dashes, or irregular smudges.
Mineral Grains and Inclusions: Subtle Variations
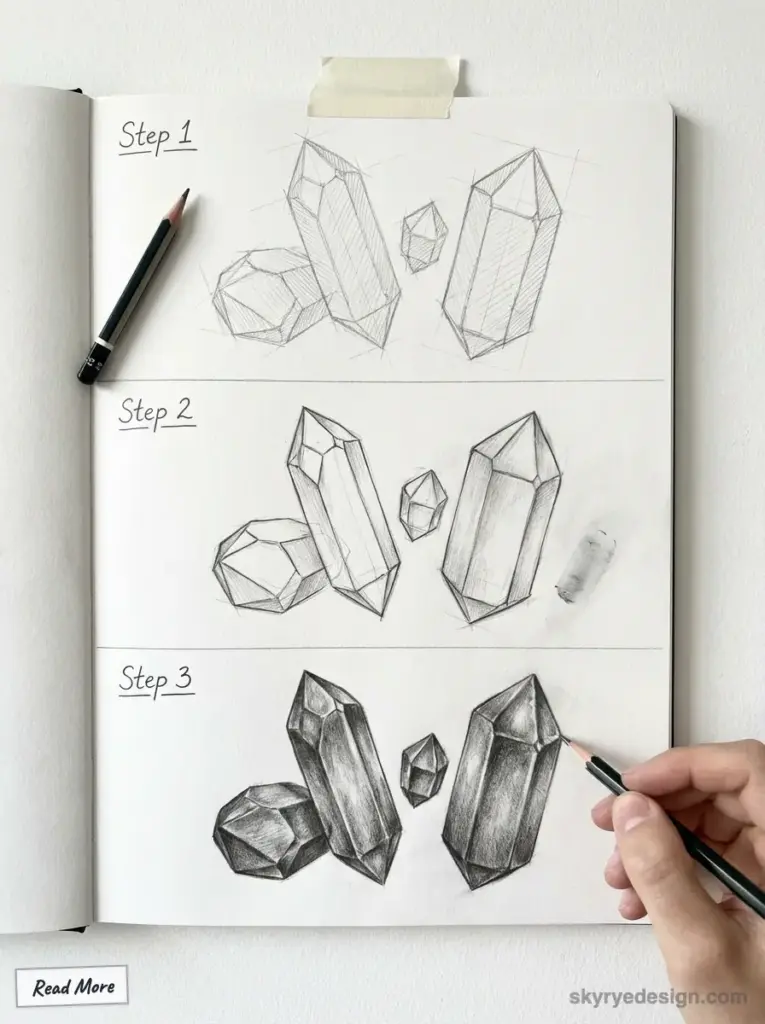
Many rocks aren’t uniform in color or texture. They might have different mineral inclusions, veins, or small embedded crystals.
- Subtle Tones: Don’t draw every single grain, but suggest patches of slightly different values or textures to indicate these variations.
- Randomness: Nature is rarely perfectly uniform. Introduce a bit of controlled randomness in your texture application.
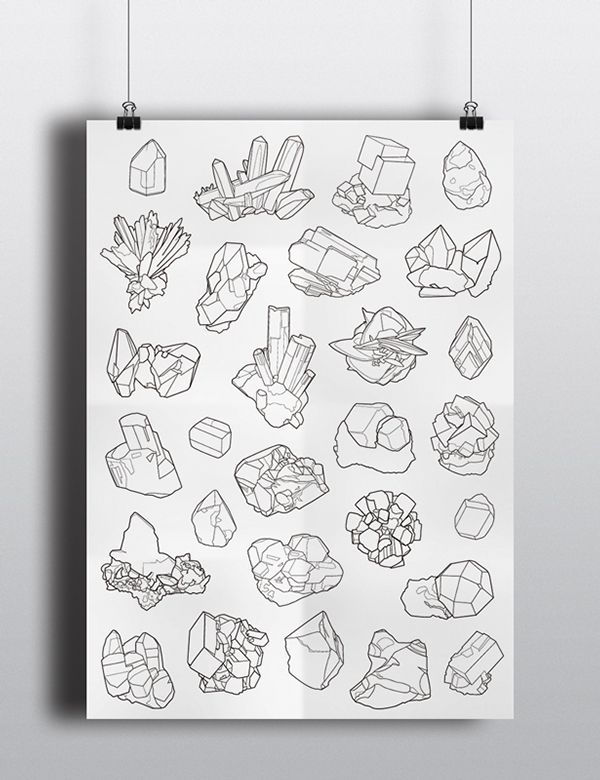
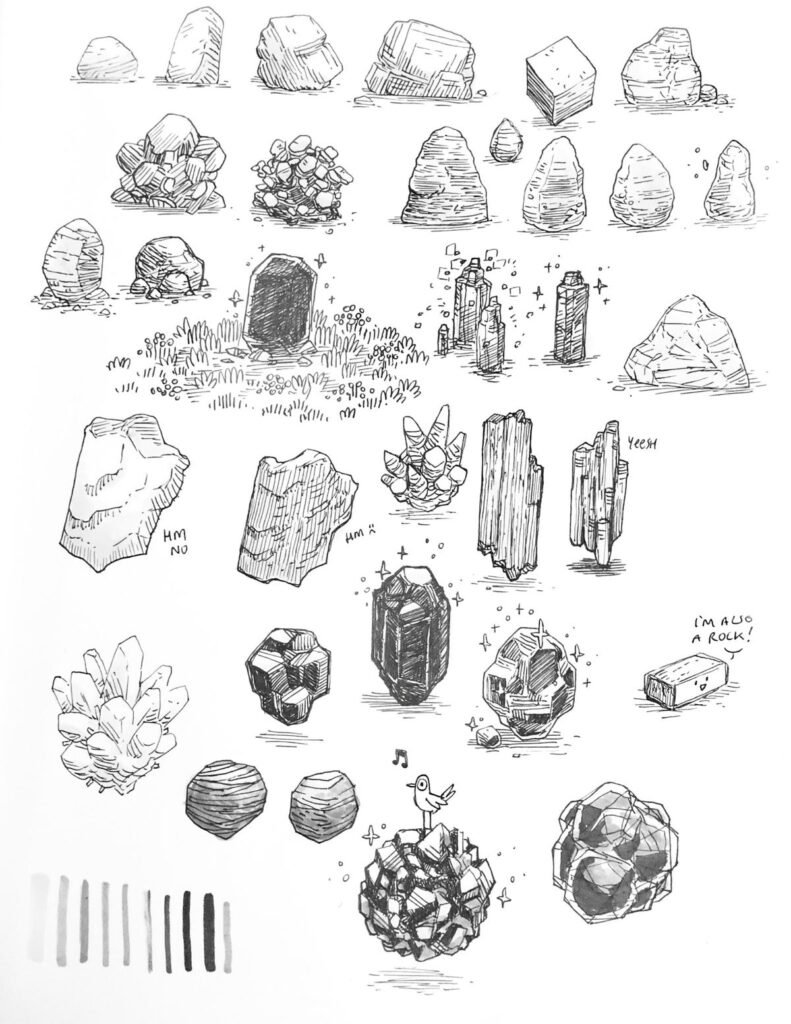
Drawing Different Rock Personalities
Rocks come in all shapes and sizes, and each type presents unique drawing challenges and opportunities.
Boulders and Large Rocks
These are about weight, solidity, and presence.
- Emphasize Mass: Use strong core shadows and well-defined cast shadows to make them feel heavy and grounded.
- Rounded or Blocky: They can be smooth and weathered or sharply angular. Pay attention to the overall silhouette.
- Grounding in a Landscape: Ensure they sit firmly in the scene, not floating above it. Consider how they displace soil or interact with nearby vegetation.
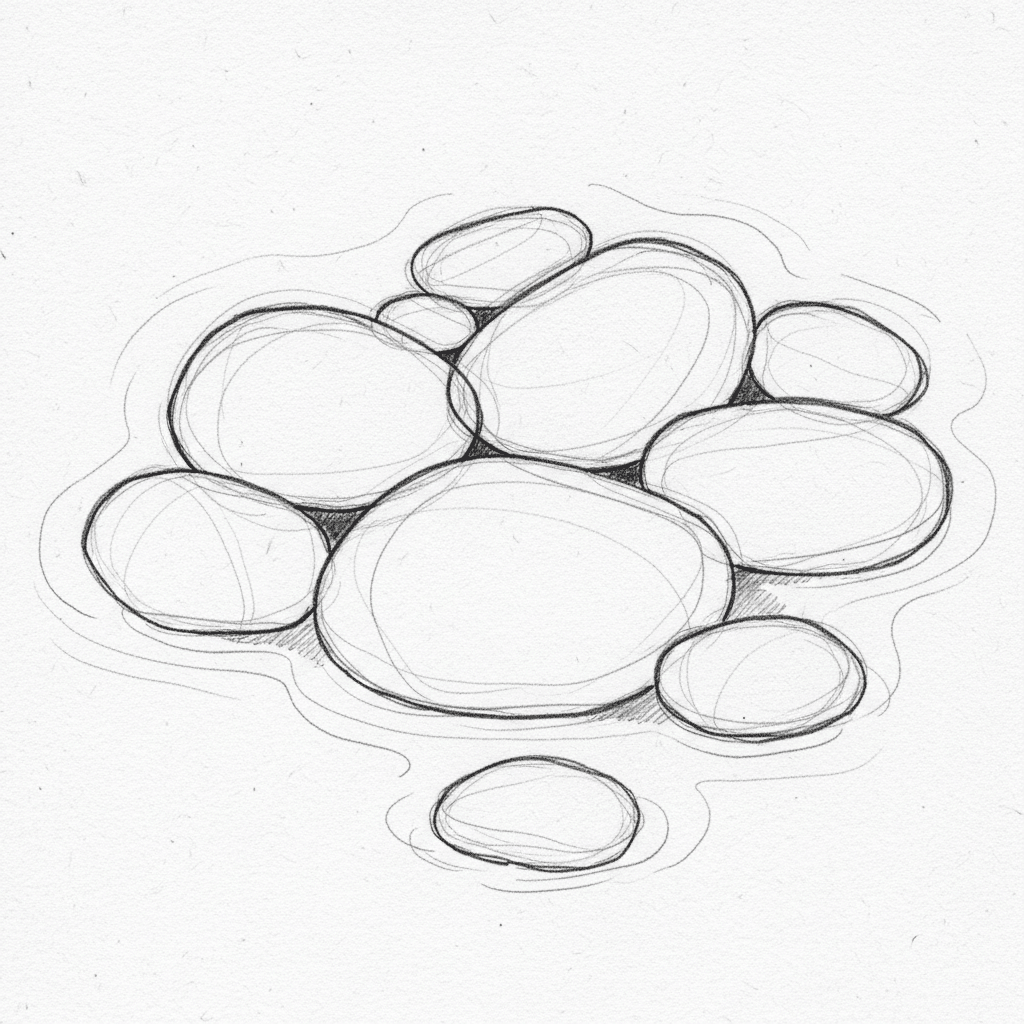
Pebbles and River Stones
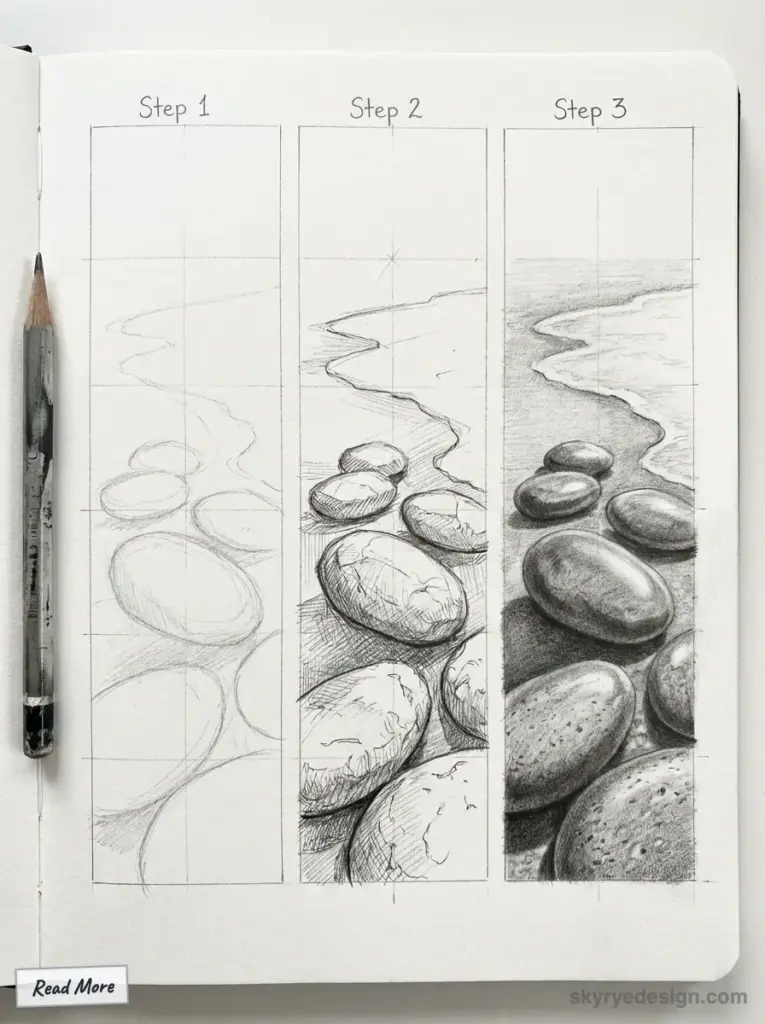
Smoothness, rounded edges, and often grouped compositions define these.
- Smooth Transitions: Focus on gentle value shifts to convey their water-worn surfaces.
- Reflections: Wet river stones will have sharper, brighter reflections.
- Group Dynamics: Pebbles are rarely alone. Draw them overlapping, casting small shadows on each other, creating a cluster. Consider creating a visual diary to regularly sketch these small, everyday elements and improve your observation skills.
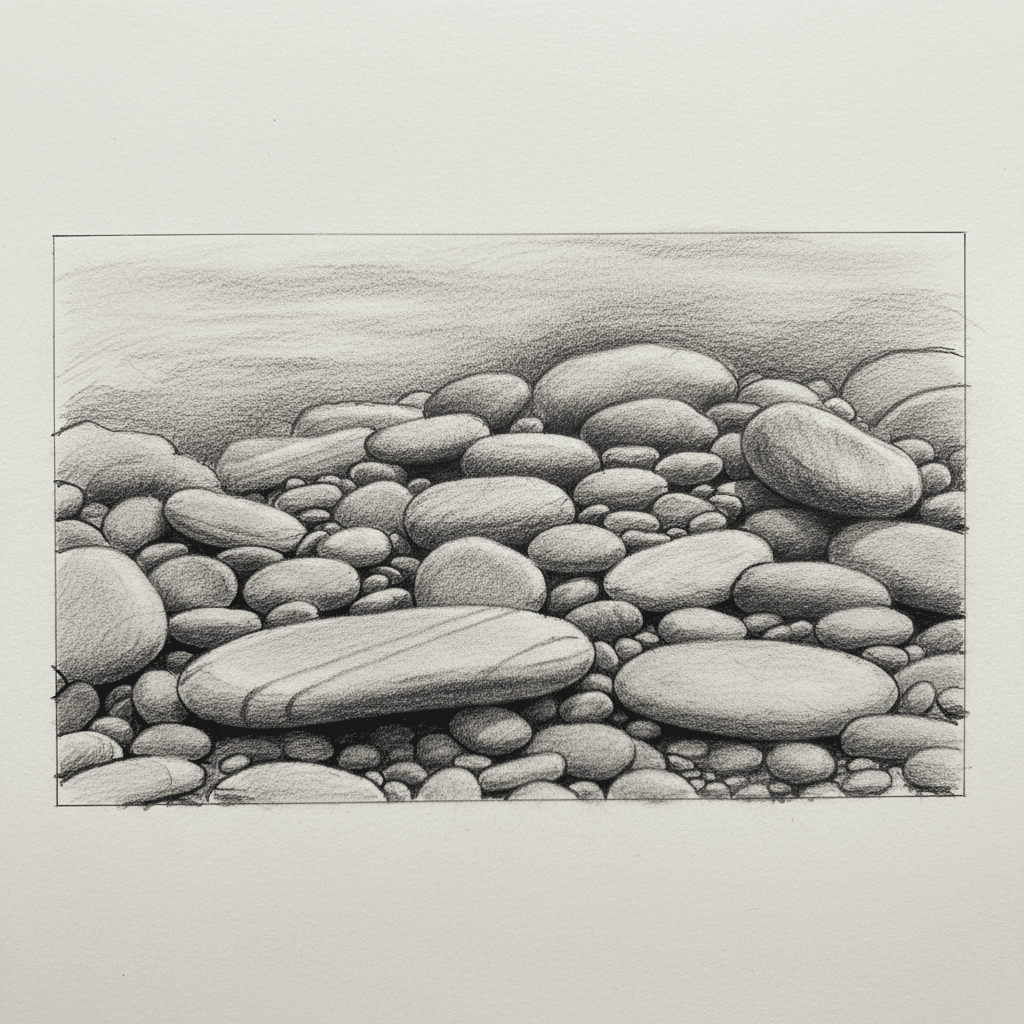
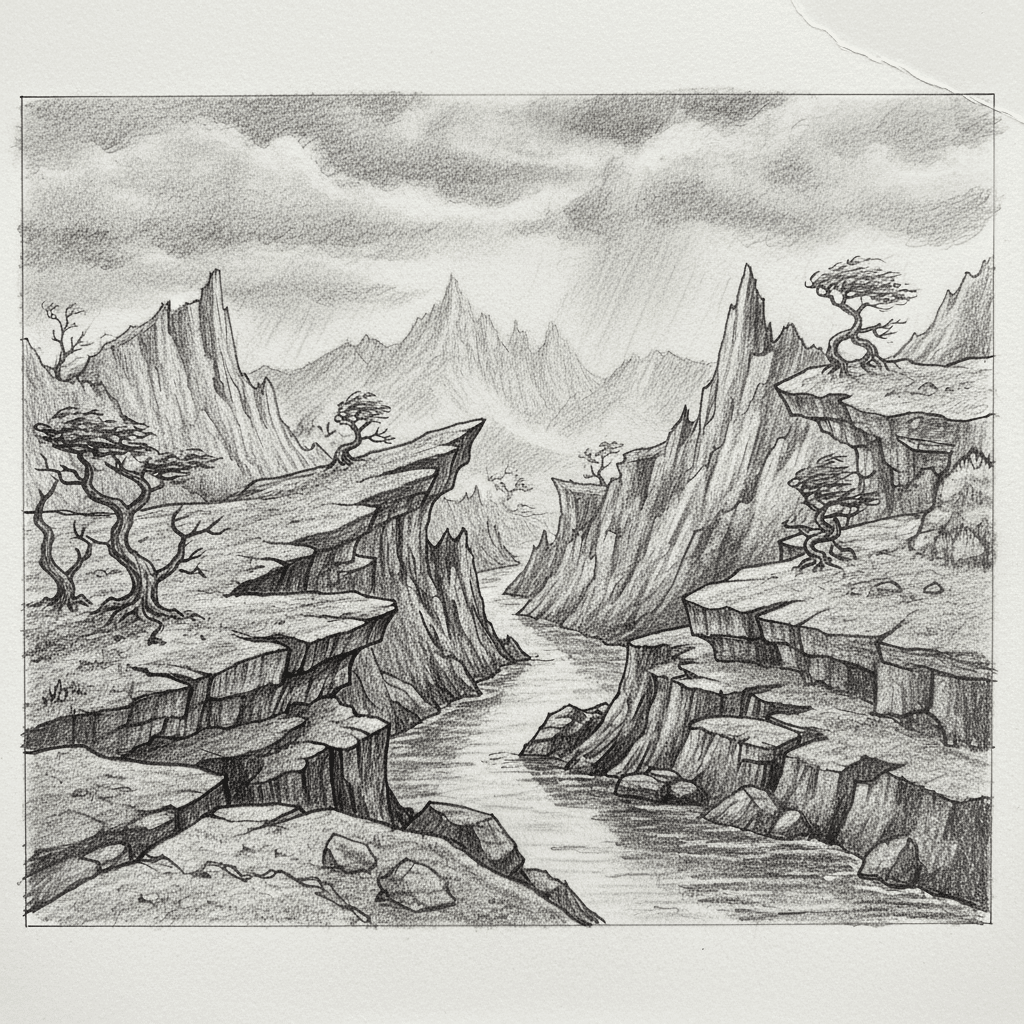
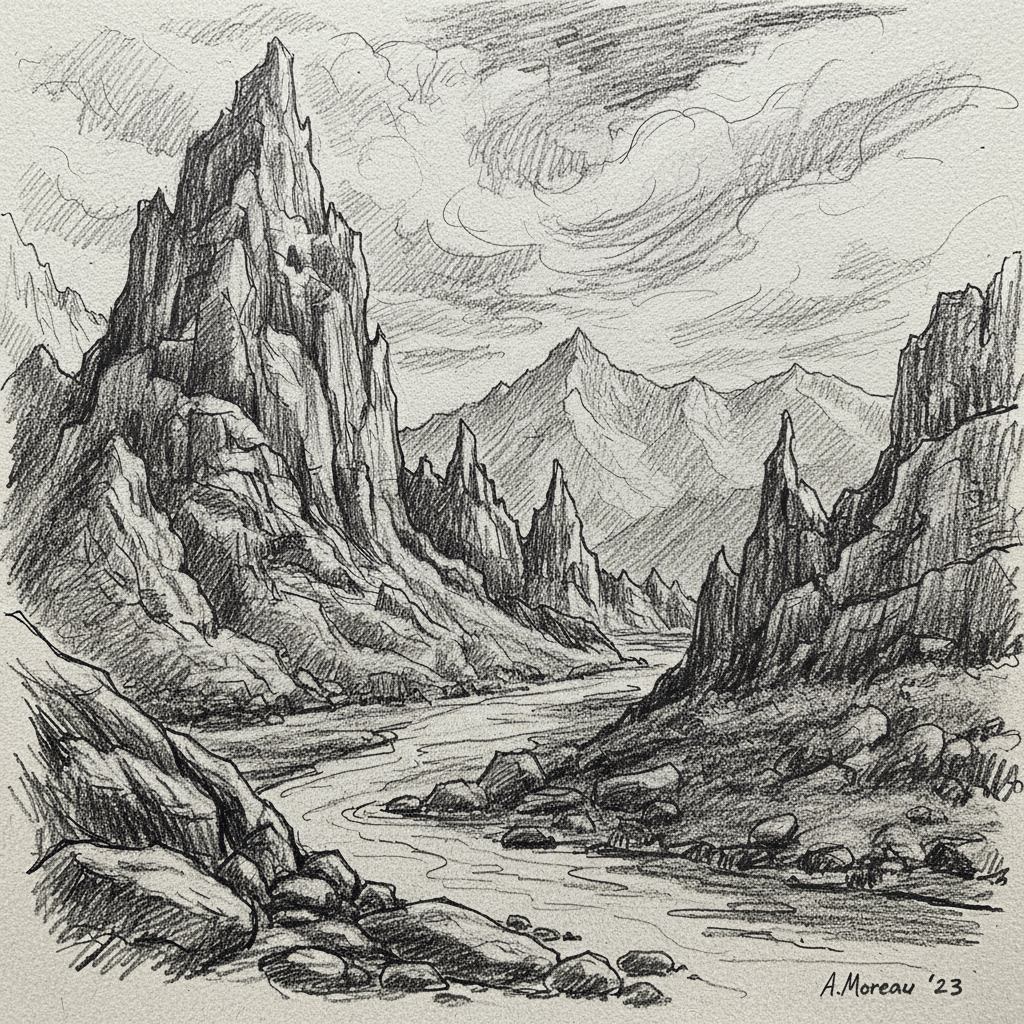
Cliff Faces and Rocky Outcrops
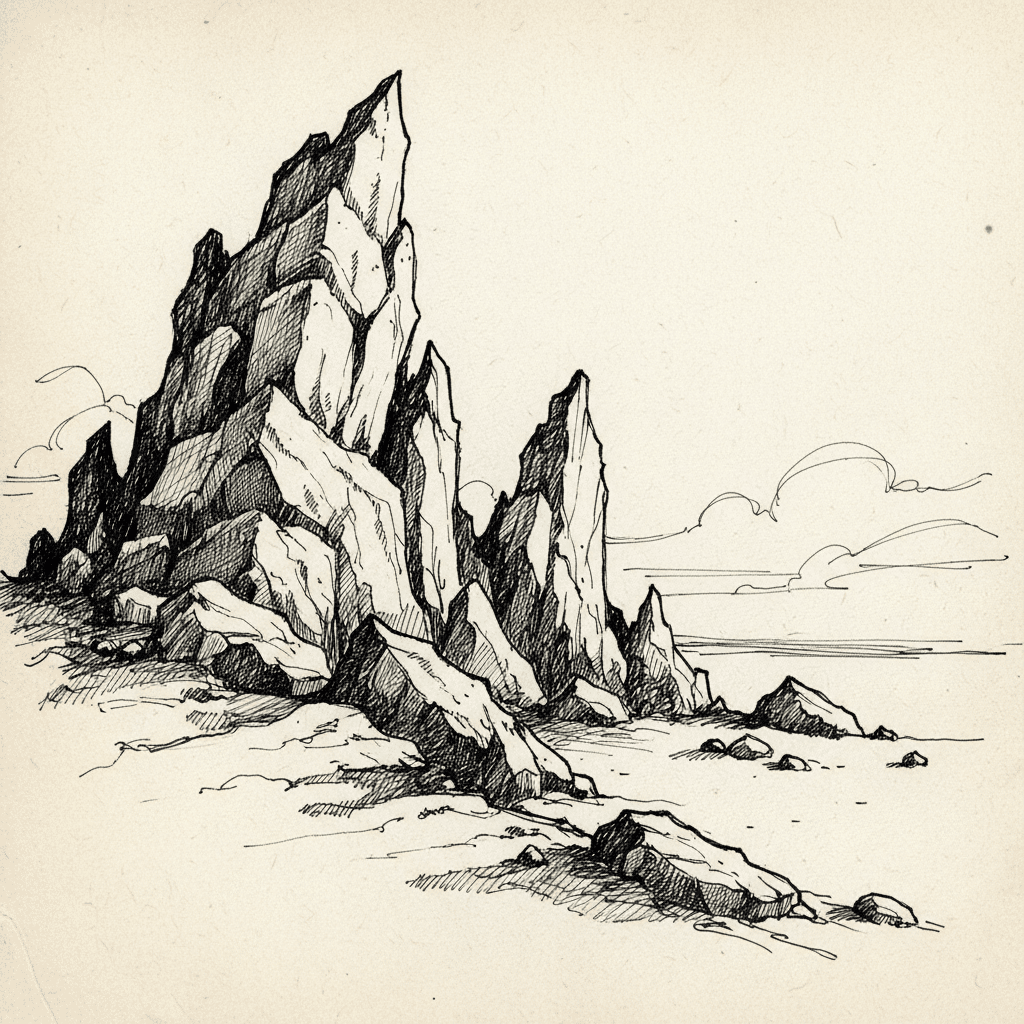
These are about scale, drama, and geological history.
- Layering: Often show distinct horizontal or diagonal strata. Emphasize these layers through careful line work and shading.
- Dramatic Angles: Use sharp, angular lines to convey jagged edges and steep inclines.
- Sense of Scale: Incorporate smaller details like tiny cracks or distant trees/figures to give a sense of how massive the cliff is.
- Weathering Patterns: Show how rain and wind have carved channels or smoothed certain areas.
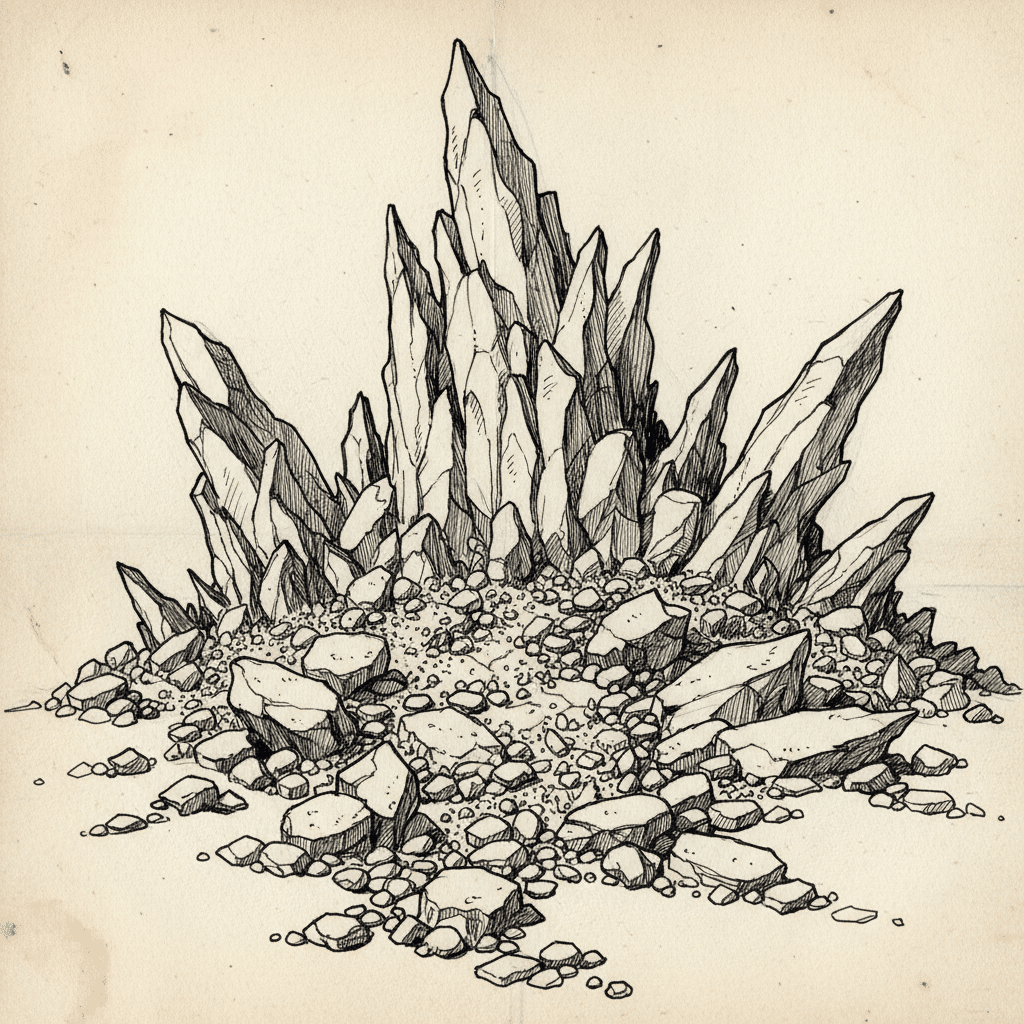
Jagged Rocks and Debris
Sharp edges, broken surfaces, and often a chaotic arrangement.
- Sharp, Broken Edges: Use broken, irregular lines to define their sharp, fractured forms.
- High Contrast: Jagged rocks often have deep, dark crevices contrasting sharply with bright, exposed surfaces.
- Randomness with Structure: While seemingly chaotic, even piles of debris have an underlying structure. Pay attention to how they lean on each other and cast shadows.
Consider this:* Just like understanding 3D forms in 3D printing helps in visualizing complex structures, recognizing the underlying geometric structure of even chaotic piles of rocks can greatly improve your drawing.
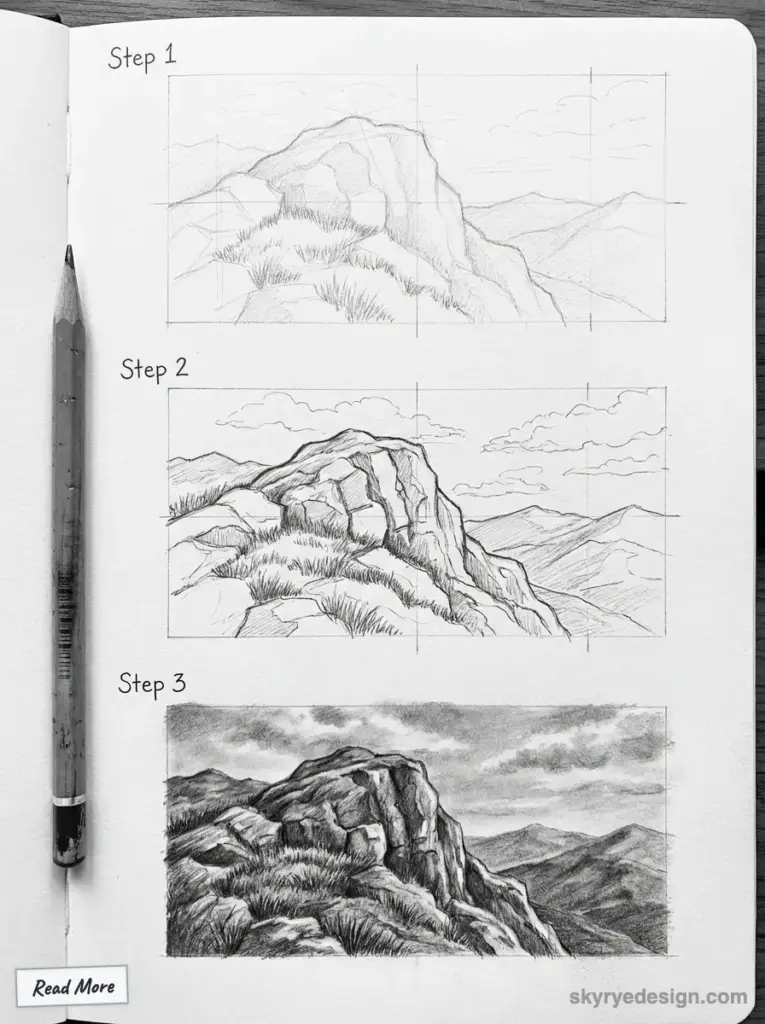
Putting it All Together: Rocks in a Landscape
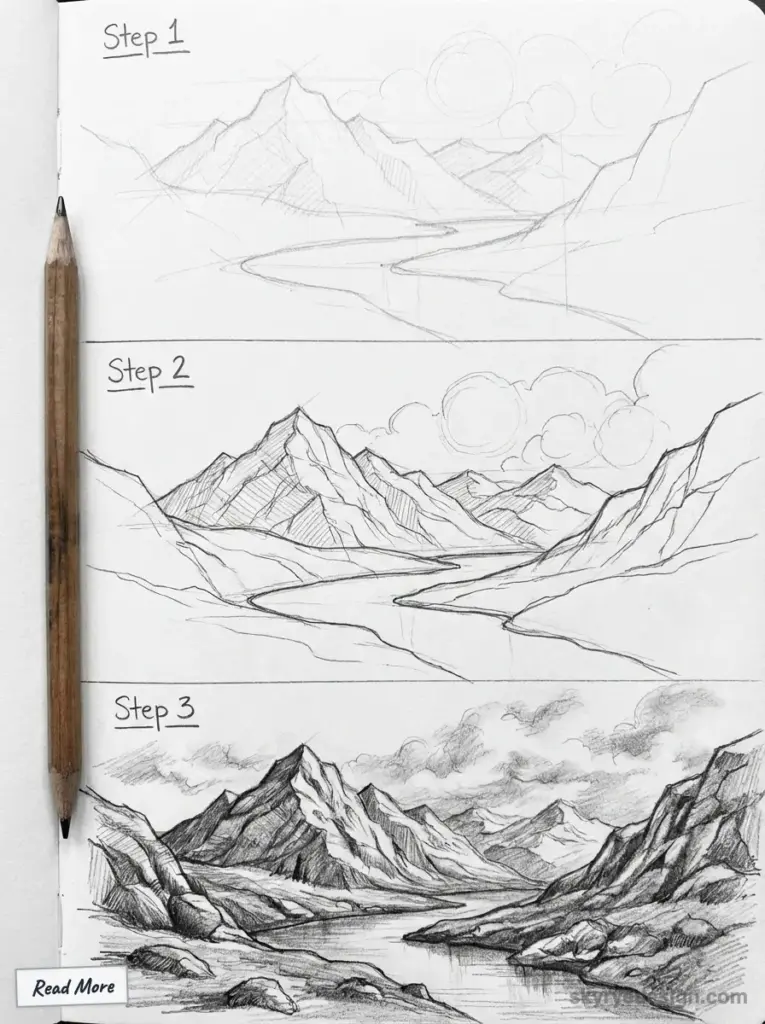
Drawing individual rocks is one thing; integrating them seamlessly into a larger scene is another.
Perspective and Scale
- Foreground vs. Background: Rocks closer to you will appear larger and more detailed. Rocks in the distance will be smaller, less detailed, and lighter in value.
- Atmospheric Perspective: Distant rocks may appear bluer or greyer and have softer edges due to the atmosphere.
Interaction with Environment
Rocks rarely exist in a vacuum. They interact with everything around them.
- Water: If a rock is in water, draw reflections and distortions. If water is flowing over it, show wet highlights and how the water molds around its form.
- Plants and Moss: Vegetation clinging to rocks adds incredible realism. Draw moss, lichen, or small plants growing in crevices. These details can break up harsh lines and add organic softness.

* Learning how to draw other natural elements, like a lily flower, can help you gain confidence in adding organic details to your rock compositions.
- Soil and Debris: Rocks often emerge from the earth or have smaller stones and soil accumulated at their base. Show this interaction.
Compositional Role
Rocks aren’t just filler; they can be powerful compositional elements.
- Leading the Eye: A line of rocks can guide the viewer’s eye through a scene.
- Creating Balance: Large boulders can balance out a busy sky or provide a focal point.
- Framing: Rocks can frame other elements in your landscape, drawing attention to a specific area.
Common Pitfalls to Avoid
Even seasoned artists can fall into these traps. Being aware of them will help you improve faster.
- Making them too Uniform or “Blobby”: This is the most common mistake. Avoid drawing rocks as perfectly round or oval shapes without any distinct planes or angles. Rocks are rarely smooth all over.
- Neglecting Accurate Light and Shadow: Without a consistent light source and proper value rendering, your rocks will look flat and weightless. Make sure your shadows are consistent.
- Lack of Varied Texture: Drawing all your rocks with the same texture makes them uninteresting. Mix it up! Introduce rough, smooth, cracked, and pitted areas.
- Drawing Outlines Instead of Forms: Start with the overall mass and form, then add details. Don’t just trace an outline and fill it in; build it up three-dimensionally.
- Ignoring the Environment: Rocks don’t exist in a vacuum. Ensure they interact with the ground, water, and plants around them. A floating rock is an unconvincing rock!
- Fear of Dark Values: Many beginners hesitate to use truly dark tones. Embrace the darks! They provide contrast and make your lights pop, giving your rocks depth and solidity.
Practice Makes Perfect: Your Journey to Rock Mastery
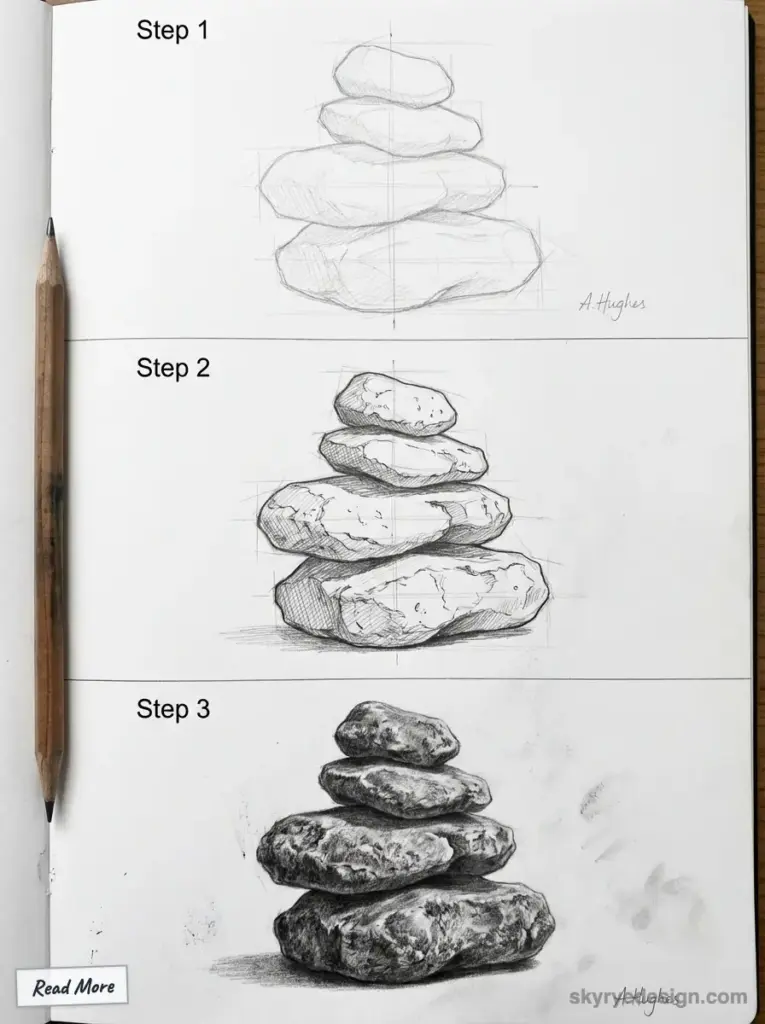
Like any skill, drawing rocks takes practice. Don’t get discouraged if your first few attempts aren’t masterpieces. Every stroke is a step towards improvement.
- Consistent Sketching: Dedicate time each day or week to sketching rocks. Even 15-20 minutes can make a huge difference. Try drawing a series of rocks from different angles or in different lighting conditions.
- Experimenting with Mediums: While we focused on pencil, try charcoal for deeper blacks and broader textures, or pen and ink for sharp details and cross-hatching. Don’t be afraid to expand your artistic horizons and learn to draw boats or explore other drawing subjects. Each new challenge refines your core skills.
- Learning from Others: Study how master artists render rocks. Look at landscape paintings, geological illustrations, and even photographs. Analyze their use of light, shadow, and texture.
- Apply [drawing hacks every artist should know](https://skyryedesign.com/art/drawing/10-genius-drawing-hacks-every-artist-should-know/) to streamline your learning process and discover new techniques. These tips can often unlock breakthroughs in your understanding of form and value.

Conclusion
Drawing rocks might seem like a small detail in the grand scheme of art, but mastering this skill can dramatically elevate your landscape drawings and overall artistic prowess. We’ve journeyed from understanding basic forms and the critical role of observation to building volume with light and shadow, and finally, adding intricate textures that bring your rocks to life. Remember that rocks are more than just grey lumps; they are ancient storytellers, carved by time and natural forces, each with a unique personality waiting to be captured on paper.
The key to success lies in observation, patience, and consistent practice. Grab your pencils, find some inspiring references (or better yet, real rocks!), and start sketching. Don’t be afraid to experiment, make mistakes, and learn from every stroke. With these techniques and a keen eye, you’ll soon be drawing rocks that are not only realistic but also evoke a powerful sense of presence and history. So go ahead, unleash your inner geologist-artist, and start making those geological formations pop off the page!
- 990shares
- Facebook0
- Pinterest989
- Twitter1
- Reddit0

