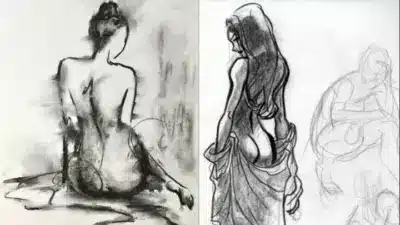
Ever tried to draw a character in motion, only to have them look stiff, awkward, or just plain lifeless? It’s a common struggle for many artists. The human body is a marvel of complex movement, and capturing that vitality on paper or screen requires more than just knowing where the bones and muscles go. It demands understanding how they interact, stretch, compress, and flow. This is where the magic of drawing dynamic anatomy comes in, transforming static figures into vibrant, energetic forms that practically leap off the page.
Imagine drawing a superhero mid-leap, a dancer pirouetting, or an athlete throwing a punch. What separates an impactful drawing from a flat one often boils down to the artist’s ability to infuse their figures with a sense of motion and life. This isn’t just about technical precision; it’s about conveying emotion, narrative, and the sheer power of human movement. If you’re ready to level up your art and make your characters truly expressive, join us as we explore easy tips and essential principles to bring unparalleled dynamism to your anatomical drawings.
Understanding the Fundamentals: Beyond Static Poses
When we first learn anatomy, it’s often from textbooks showing perfectly posed, static figures. While crucial for understanding individual muscle groups and bone structures, this approach often falls short when you want to depict a character in action. A static pose can give you the blueprint, but it doesn’t tell you how the building moves or breathes.
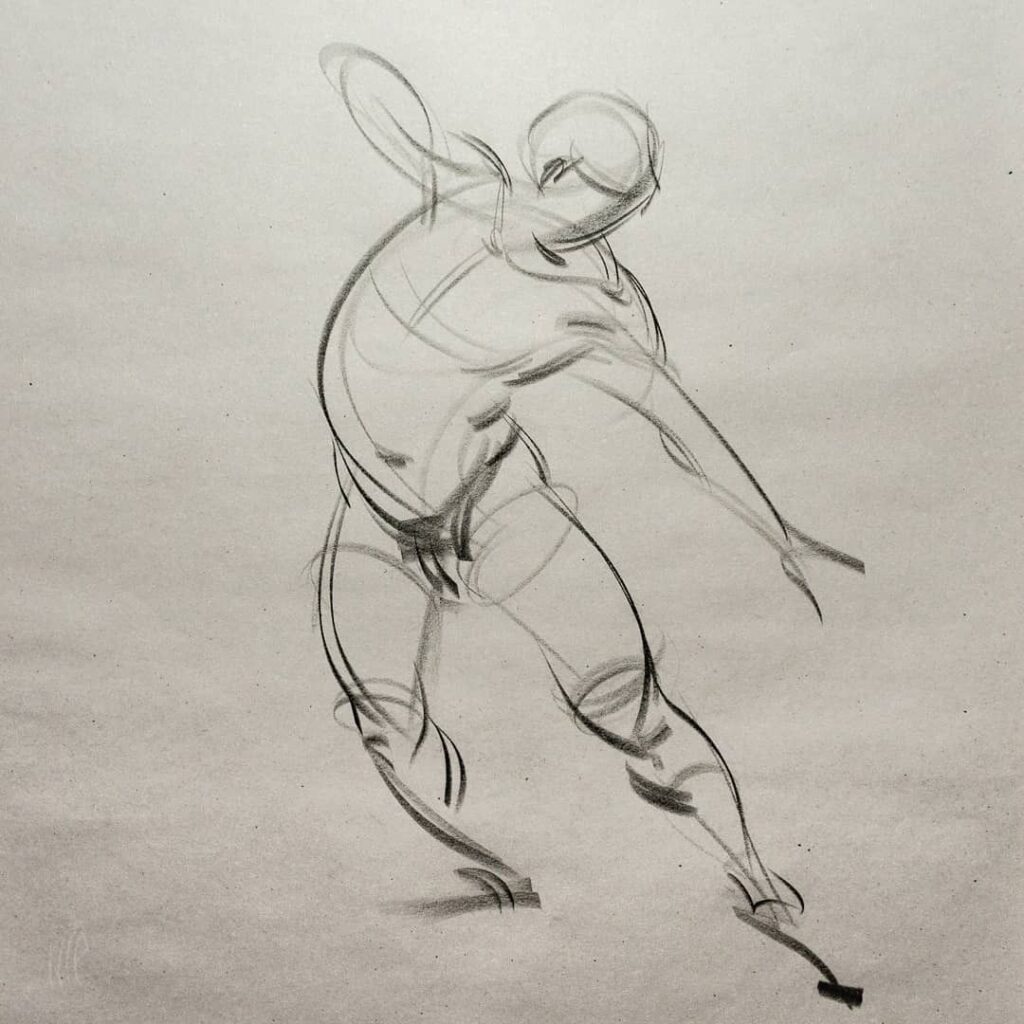
To draw dynamic anatomy, you need to shift your perspective from individual parts to the whole, focusing on the interplay of masses and the overall energy of the pose. This is where concepts like gesture drawing become your best friend. Gesture drawing isn’t about rendering details; it’s about capturing the essence of movement, the rhythm, and the flow of a figure in a matter of seconds. Think of it as drawing the wind through the figure, rather than just the figure itself. It teaches your eye to see the larger motion first, before getting bogged down in the intricacies of muscles and bones.
The Power of the Line of Action
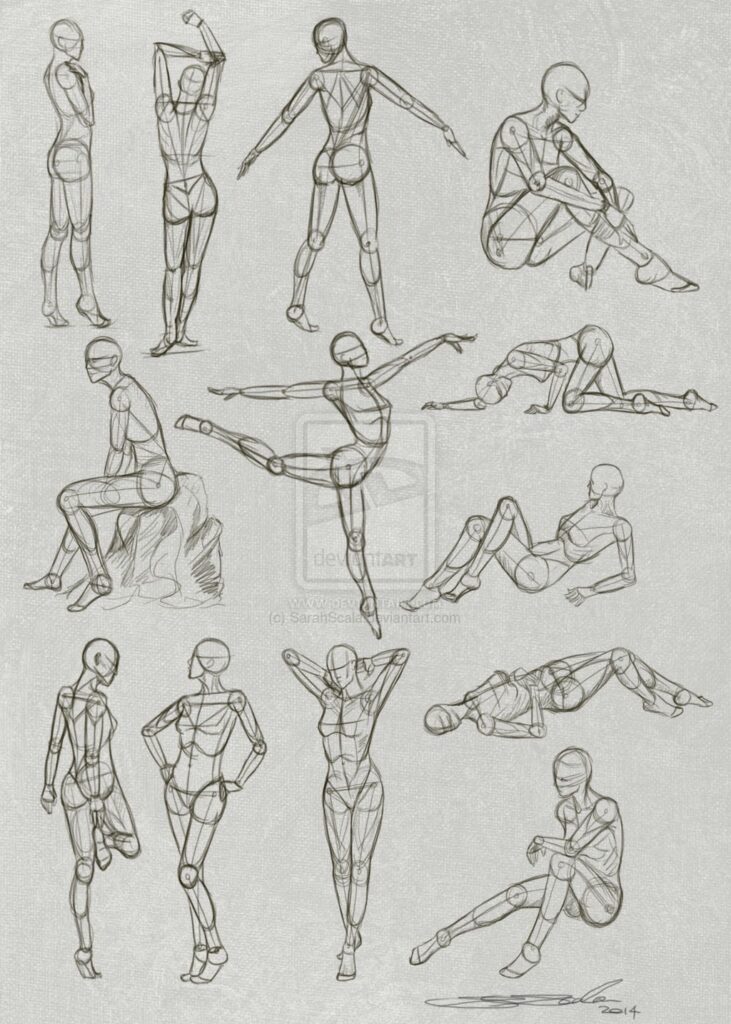
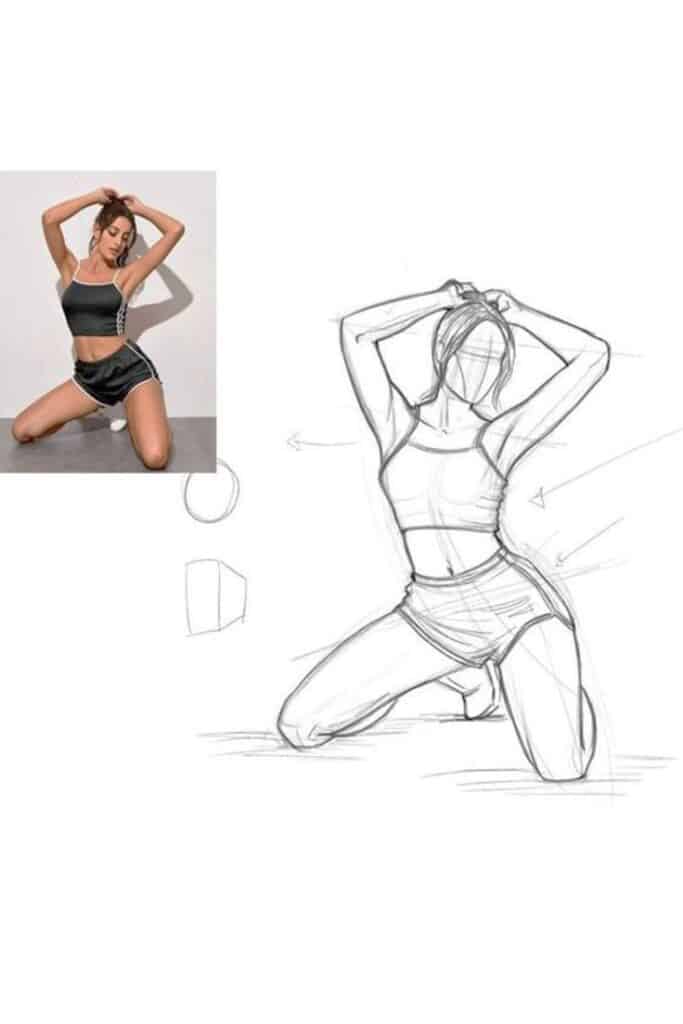
At the heart of every dynamic pose lies the “line of action.” This isn’t a physical line on the body, but an invisible, imaginary curve that expresses the main thrust or energy of the figure. It’s the visual pathway your eye follows, leading it through the movement. Think of it as the spine of your drawing’s energy.
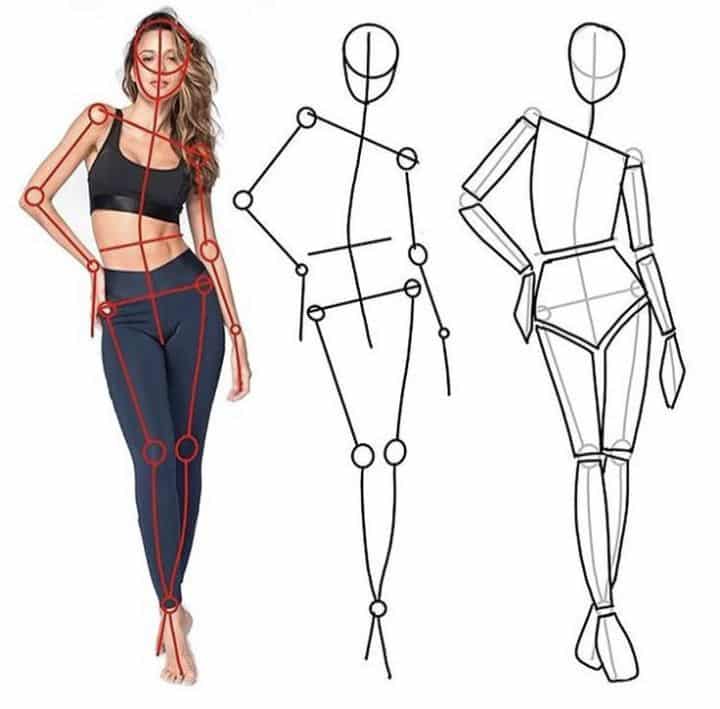
To find the line of action, look for the dominant curve that runs through the figure, often from the head, down through the spine, and exiting through a limb. In a figure running, it might be a powerful “S” curve. In someone jumping, it could be a dramatic “C” curve. This line dictates the overall rhythm and flow. Exaggerating this line slightly can instantly inject more dynamism into your drawing, making a pose feel more active and less rigid. Practice by sketching quick stick figures, focusing solely on the line of action before adding any mass. You’ll be surprised how much life a simple curve can bring.
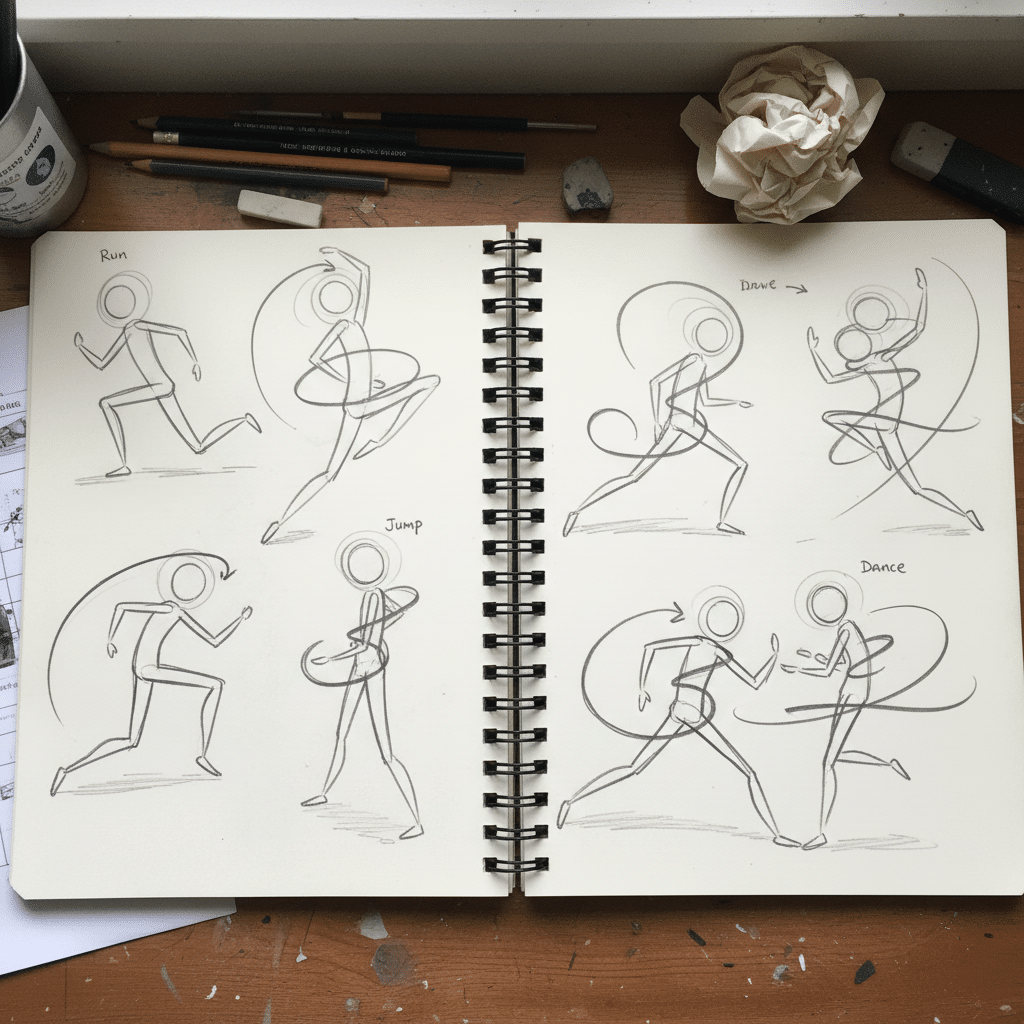
Seeing Forms in Motion: Simplified Shapes
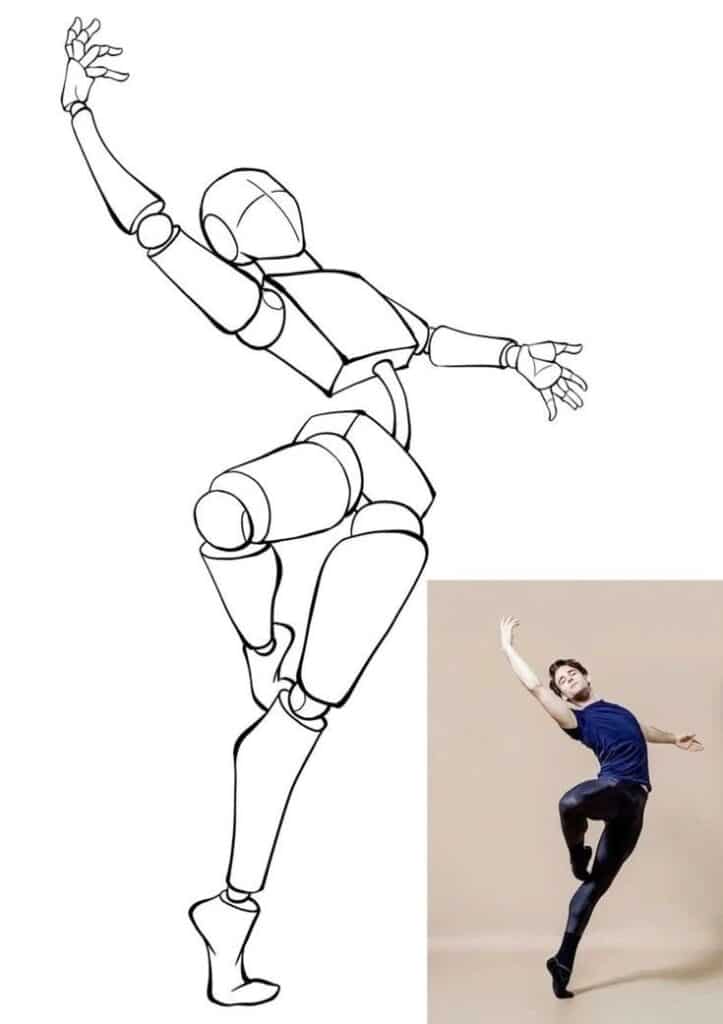
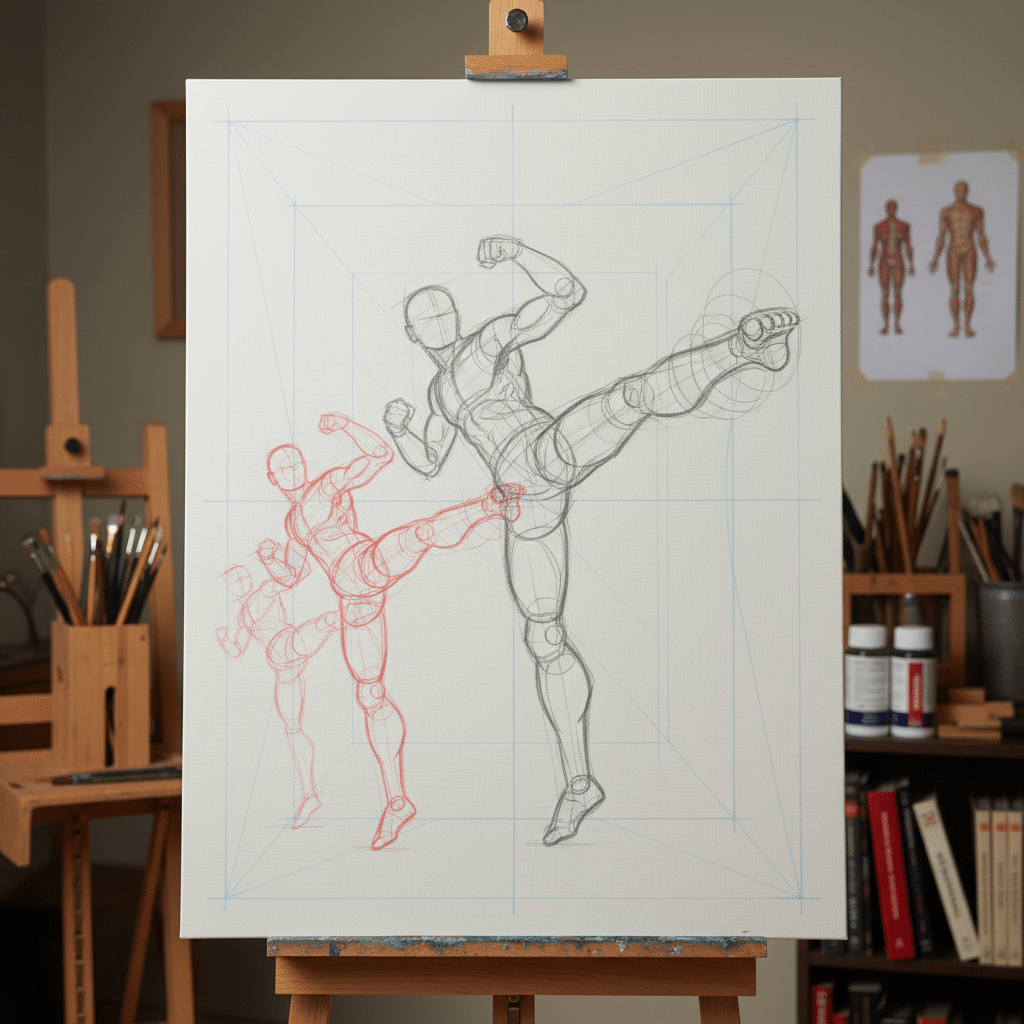
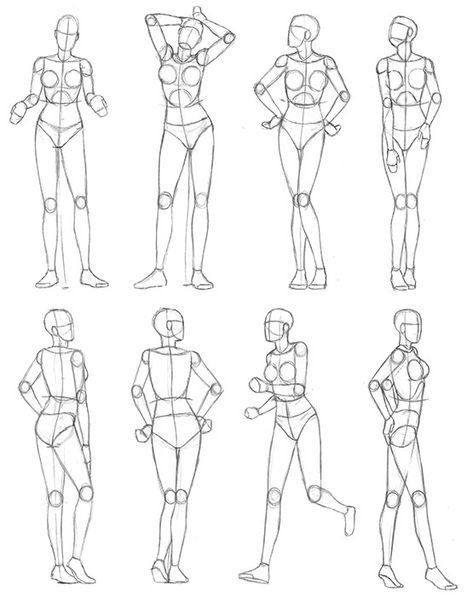
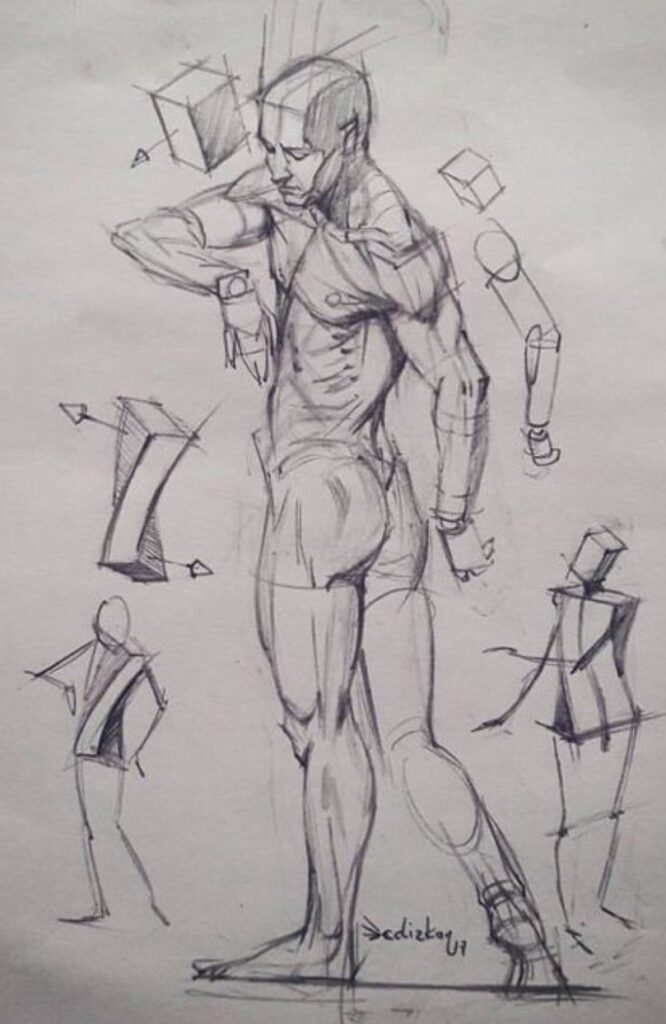
The human body is incredibly complex, but trying to draw every muscle and bone from the get-go in a dynamic pose is a recipe for frustration. Instead, break down the complex form into simple, recognizable 3D shapes: cylinders for limbs, boxes for the rib cage and pelvis, and spheres for joints. This “block-in” method helps you understand how these fundamental masses twist, turn, and overlap in space.
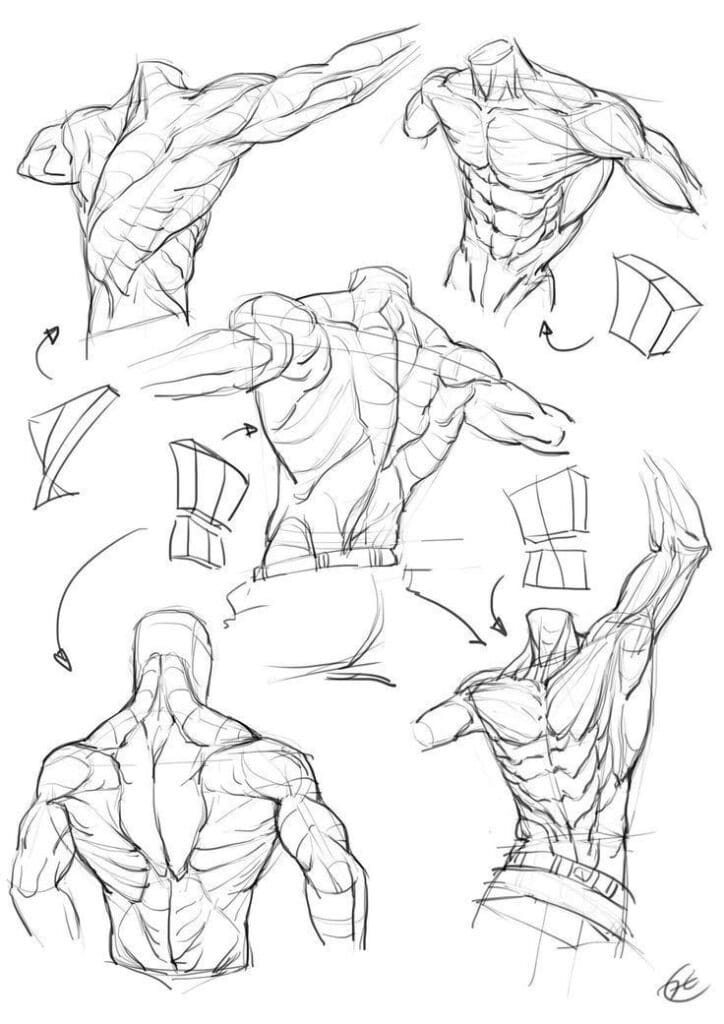
Think of the rib cage and pelvis as two separate boxes connected by the flexible spine. When a figure bends or twists, these two boxes will rotate relative to each other, creating interesting angles and tensions. This “beanbag” or “torso twist” concept is vital for showing dynamic upper body movement. Similarly, treat limbs as flexible cylinders. When a limb bends, the cylinder bends, and when it foreshortens, you see the end of the cylinder more prominently. This approach simplifies the form, allowing you to focus on the overall gesture and how the main masses interact before you even think about individual muscles.
Mastering Proportion and Perspective in Dynamic Poses
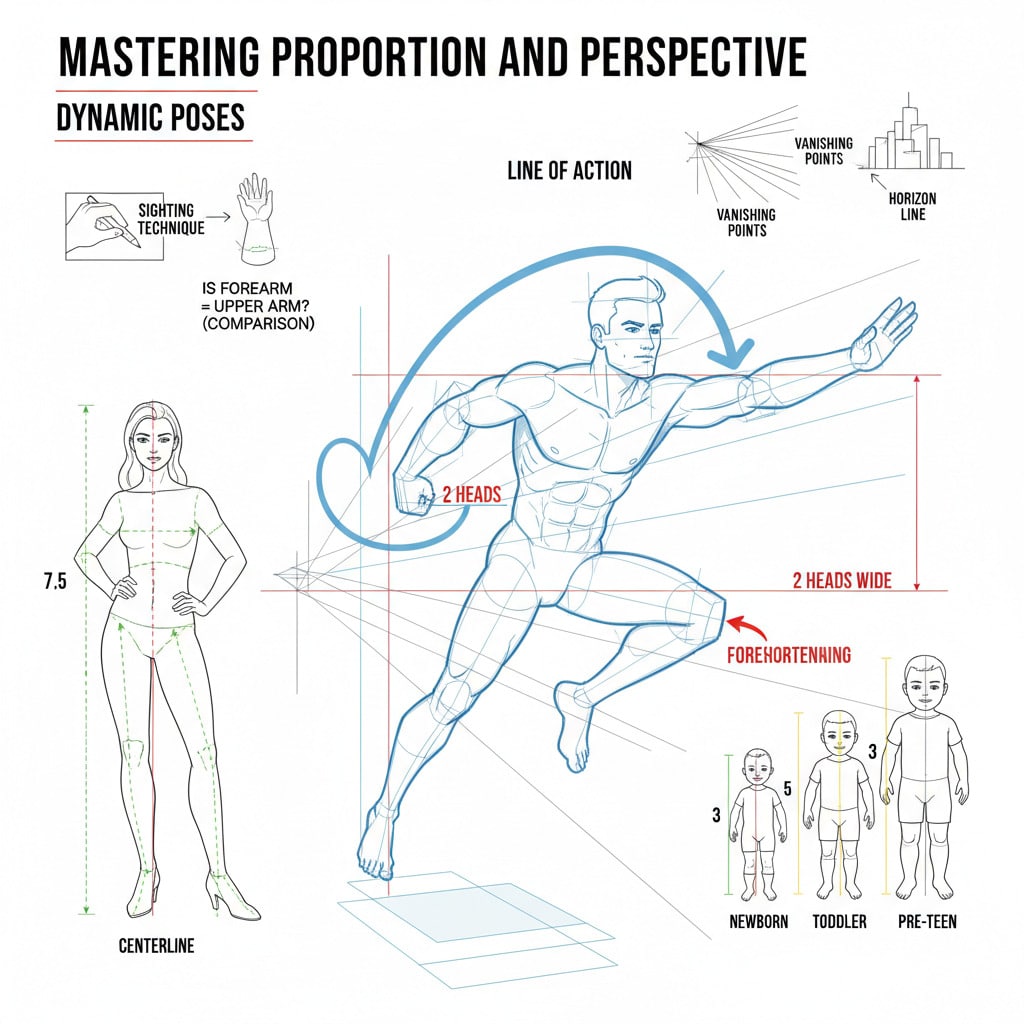
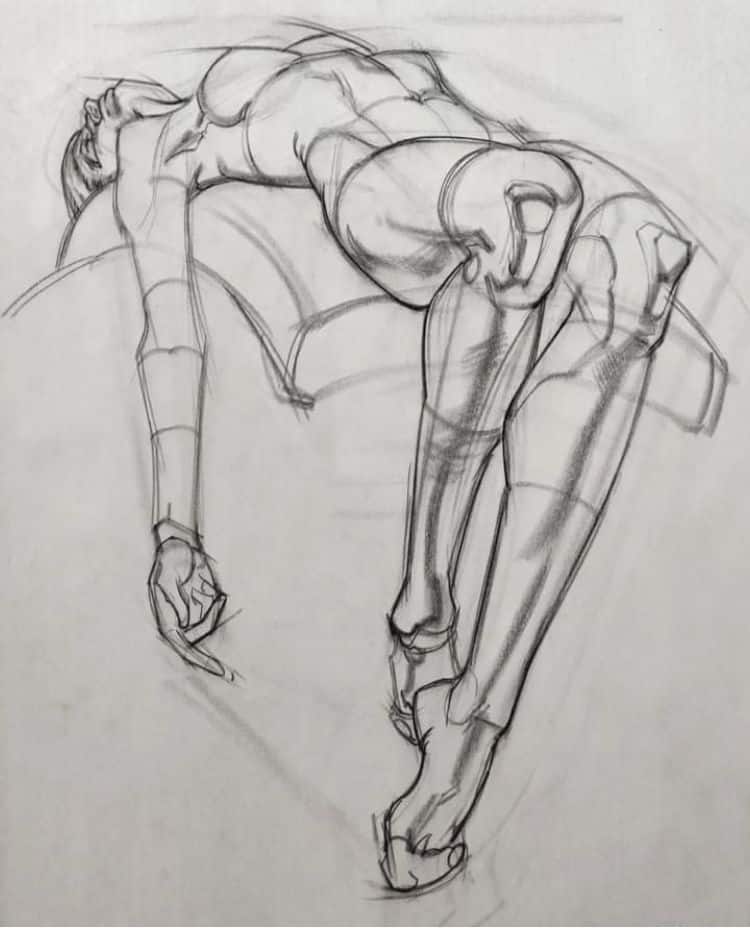
Dynamic poses often involve foreshortening, where parts of the body appear shorter than they are because they’re closer to the viewer or receding into the distance. This can be tricky, but it’s essential for conveying depth and motion. Mastering foreshortening requires a solid grasp of both proportion and perspective.
Perspective dictates how objects appear in space relative to your viewpoint. Understand your eye-level and how it affects the forms. If you’re looking up at a figure, the underside of the forms will be visible. If looking down, you’ll see the top. When a limb is foreshortened, remember it’s still the same length; it’s just angled towards or away from you. Practice by drawing simple cylinders or boxes at various angles to get a feel for how they distort. Use landmarks on the body (e.g., hip bone to knee, shoulder to elbow) to gauge proportions, even when foreshortened. Consistent measurement, even mental measurement, helps maintain realism amidst the dynamic distortions. You can also explore different photoshoot ideas to practice drawing from varied perspectives.
Anatomy in Action: Key Muscle Groups and Their Role
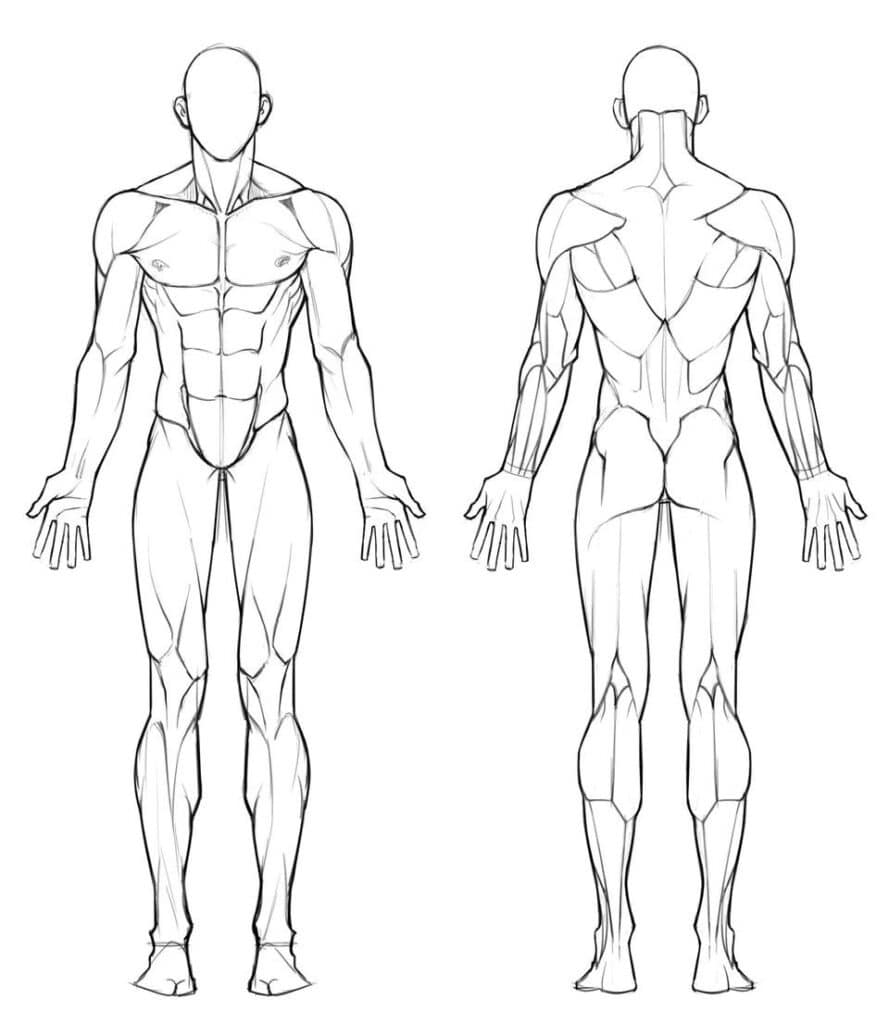
Knowing the names of all 600+ muscles is great for anatomy enthusiasts, but for dynamic drawing, it’s more important to understand the function of key muscle groups and how they interact during movement. Think of muscles as movers and shapers. They contract, causing bones to pull closer, and they extend, allowing bones to move apart.
Focus on the major muscle groups that define the contours and tensions of the body:
- Deltoids: Shape the shoulders, crucial for arm movement.
- Biceps and Triceps: Opposing forces in the upper arm, flex and extend.
- Pectorals and Latissimus Dorsi: Large chest and back muscles that dictate powerful upper body movements.
- Abdominals and Obliques: Core muscles that twist, bend, and stabilize the torso.
- Glutes and Quadriceps: Powerful leg muscles for running, jumping, and squatting.
- Calves: Key for pushing off and balancing.
Observe how these muscles stretch and lengthen on one side of a joint while compressing and bulging on the other. For instance, when an arm bends, the biceps bulge while the triceps stretch. This push and pull creates the visual tension and realism of a dynamic pose. Pay attention to how overlapping forms create depth and make the figure feel solid.
Capturing Weight, Balance, and Contrapposto
A truly dynamic drawing doesn’t just show movement; it shows the physics of movement. This means understanding weight, balance, and how the body shifts its center of gravity. Even in the most energetic poses, there’s an underlying sense of stability, however fleeting.
Consider the center of gravity: the point where the body’s weight is evenly distributed. In a standing figure, it’s usually around the pelvis. In motion, this point shifts constantly. For instance, an athlete throwing a ball will lean forward, shifting their weight to create momentum. The opposing forces—the push of the ground, the pull of gravity—all play a role in how a figure balances.
Contrapposto, a classical pose where the weight is shifted to one leg, causing a slight tilt in the shoulders and hips, is a fundamental example of dynamic balance. It makes a figure feel alive and relaxed, rather than stiff. Extend this concept to more extreme actions: when a figure pushes, pulls, or falls, where is their weight concentrated? How does their body compensate to maintain or lose balance? Conveying these subtle shifts makes your figures feel grounded and impactful.
Expressing Emotion and Narrative Through Pose
Anatomy isn’t just about structure; it’s a powerful tool for communication. A dynamic pose can tell a story, convey an emotion, and reveal a character’s personality without a single word. Think about the difference between a triumphant stance and a defeated slump. Both are anatomical poses, but the angles, the tensions, and the overall rhythm speak volumes.
Use body language to your advantage. A tightly clenched fist, a wide-open gesture, a subtle lean of the head – all contribute to the narrative. Exaggerate these elements to amplify the message. Consider how the pose interacts with facial expressions and hand gestures to create a cohesive emotional statement. A character in despair won’t have the same open, expansive pose as one celebrating victory. Your dynamic anatomy should resonate with the character’s internal state, making your art deeply expressive and relatable.
Tools and Techniques for Practice
Consistent practice is the undeniable key to mastering dynamic anatomy. Here are some techniques and tools to help you on your journey:
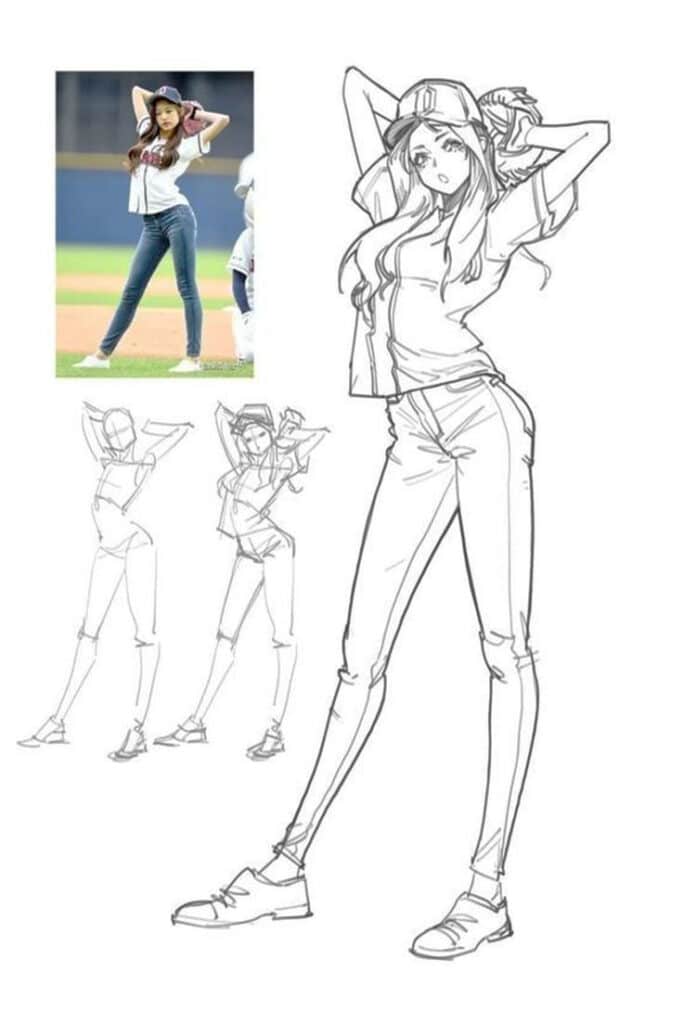
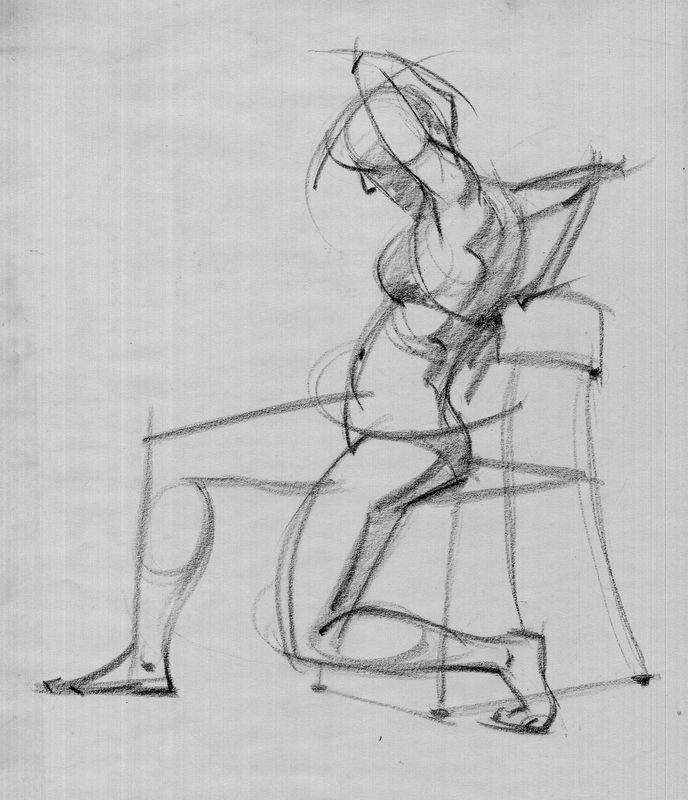
- Gesture Drawing Drills: Set a timer for 30 seconds, 1 minute, and 2 minutes. Sketch as many figures as you can from photos or life models, focusing only on the line of action and primary masses. Don’t worry about perfection; aim for energy.
- Life Drawing/Drawing from Reference: Nothing beats drawing from life, but high-quality reference photos (especially action shots) are invaluable. Websites with pose libraries or even just searching for “sports action photography” can yield great results.
- Quick Sketch Studies: Dedicate time each day to quick sketches of people in everyday situations – at a coffee shop, on public transport, or in a park. Observe how their bodies naturally settle or move.
- Drawing from Imagination: Once you’ve practiced from reference, challenge yourself to draw dynamic poses purely from imagination. This is where your visual library truly gets tested.
- Digital vs. Traditional: Both have their merits. Digital tools offer flexibility with layers, undo, and transformation tools, which can be great for experimenting with poses. Traditional drawing with charcoal or pencil connects you directly with the paper and gesture. For those interested in digital art, exploring digital art ideas can provide inspiration for incorporating dynamic anatomy into digital mediums.
- Building a Visual Library: Actively collect and study images of dynamic poses, not just for direct copying, but to understand the underlying principles. Think about creating an inspiration wall method that keeps me creating to keep these visual references handy.

Advanced Concepts: Exaggeration and Stylization
Once you have a solid grasp of realistic dynamic anatomy, you can start playing with exaggeration and stylization. This is where your personal artistic voice truly shines. Exaggeration means pushing the boundaries of realism to enhance impact, emotion, or movement. Think of the dynamic poses in comic books or animated films, where limbs might be stretched, torsos twisted, or forms simplified for maximum energy.
The trick with exaggeration is to understand why you’re doing it. Is it to make a character feel more powerful? More agile? More expressive? Always maintain a logical connection to the underlying anatomy, even when distorting it. Stylization involves developing a unique visual language for your figures. This could mean simplifying forms, using specific line qualities, or developing unique proportions. Learning from masters in animation, comics, and even fine art can show you how different artists have achieved incredibly dynamic results through their specific styles. If you’re looking for how to find inspiration for drawing, studying various artistic styles can be a great starting point.
The Journey of Continuous Improvement
Learning to draw dynamic anatomy is not a destination; it’s a continuous journey of observation, practice, and learning. There will be frustrating days when your figures still look stiff, and triumphant days when something just clicks. Embrace every stage of this process.
Consistency is more important than perfection. Regular, even short, practice sessions will yield far better results than sporadic, long ones. Don’t be afraid to make mistakes; they are your best teachers. Each “bad” drawing is a step closer to a “good” one because you’ve learned what doesn’t work.
Seek feedback from other artists, join online communities, or even just show your work to a trusted friend. A fresh pair of eyes can often spot areas for improvement that you might miss. Most importantly, enjoy the process. The joy of seeing your characters come alive with movement and emotion is one of the most rewarding aspects of being an artist. Every line you draw, every pose you capture, brings you closer to mastering the incredible art of drawing dynamic anatomy.

Conclusion
Drawing dynamic anatomy is about infusing your figures with life, energy, and storytelling. It moves beyond the static study of parts to embrace the fluid, expressive nature of the human form in motion. By focusing on the powerful line of action, simplifying complex forms into basic 3D shapes, mastering perspective and foreshortening, and understanding the functional interplay of muscle groups, you can unlock a new level of dynamism in your art.
Remember to consider weight, balance, and how a pose communicates emotion and narrative. Practice consistently with gesture drawing, quick sketches, and careful observation, and don’t shy away from experimenting with exaggeration and stylization. This journey will transform your art, making your characters not just visually accurate, but truly alive. So, grab your sketchbook, loosen your wrist, and start exploring the boundless possibilities of drawing dynamic anatomy today!
What is the importance of understanding dynamic anatomy in drawing characters in motion?
Understanding dynamic anatomy allows artists to depict characters with a sense of vitality and life, transforming static poses into energetic, believable figures that convey emotion, narrative, and power.
How does the line of action enhance a dynamic pose?
The line of action is an imaginary curve that captures the main energy and thrust of a figure, guiding the overall rhythm and flow, and adding liveliness to the pose by emphasizing movement.
Why should I use simplified shapes like cylinders and boxes when drawing in motion?
Using simplified shapes helps break down complex forms into manageable 3D masses, making it easier to understand how they twist, turn, and overlap in space, which is essential for creating believable dynamic figures.
How does perspective and foreshortening affect drawing dynamic poses?
Perspective and foreshortening influence how parts of the body appear shortened and angled, imparting depth and realism, and require understanding how to measure and observe proportions from various viewpoints to maintain accuracy.
- 90shares
- Facebook0
- Pinterest89
- Twitter1
- Reddit0


