Ever looked at a car drawing and thought, “Wow, that practically drives off the page!”? The secret isn’t magic; it’s all about perspective. Drawing a car in a way that makes it look three-dimensional and realistic can feel like a daunting task, especially with all those complex curves and angles. But trust us, it’s far from impossible. In fact, with a few casual steps and a good understanding of how objects appear in space, you can absolutely master how to draw a car perspective that looks dynamic and convincing. Forget the intimidating art school lectures; we’re breaking it down into simple, actionable chunks that anyone can follow. Ready to make your automotive art truly pop? Let’s get rolling!
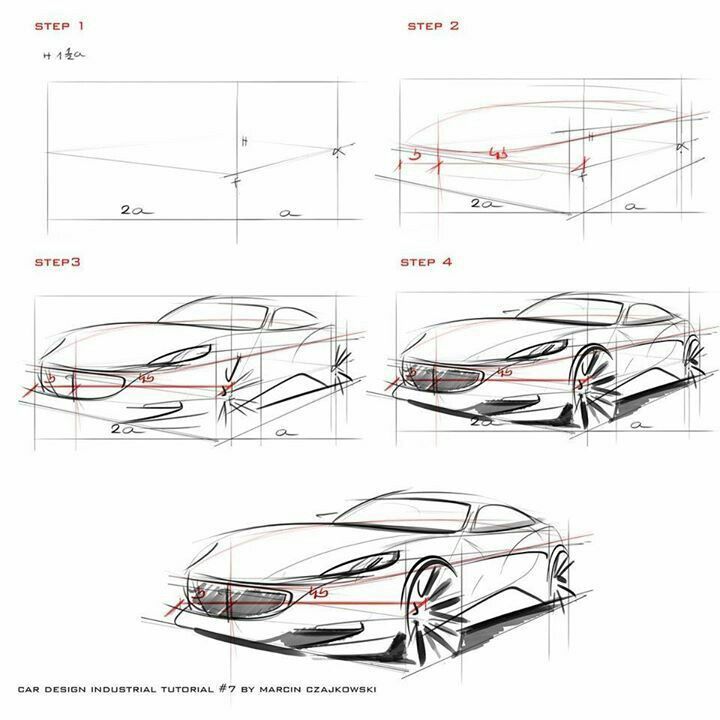
1. Get Cozy with the Basics: Horizon Lines and Vanishing Points
Before you even think about sketching a headlight, we need to talk about the absolute fundamentals of perspective drawing. Think of it as setting the stage for your car. Everything you draw, whether it’s a sleek sports car or a trusty old truck, exists in a three-dimensional world, and perspective is how you translate that 3D world onto a flat 2D surface. It’s essentially an optical illusion, but a controlled one!
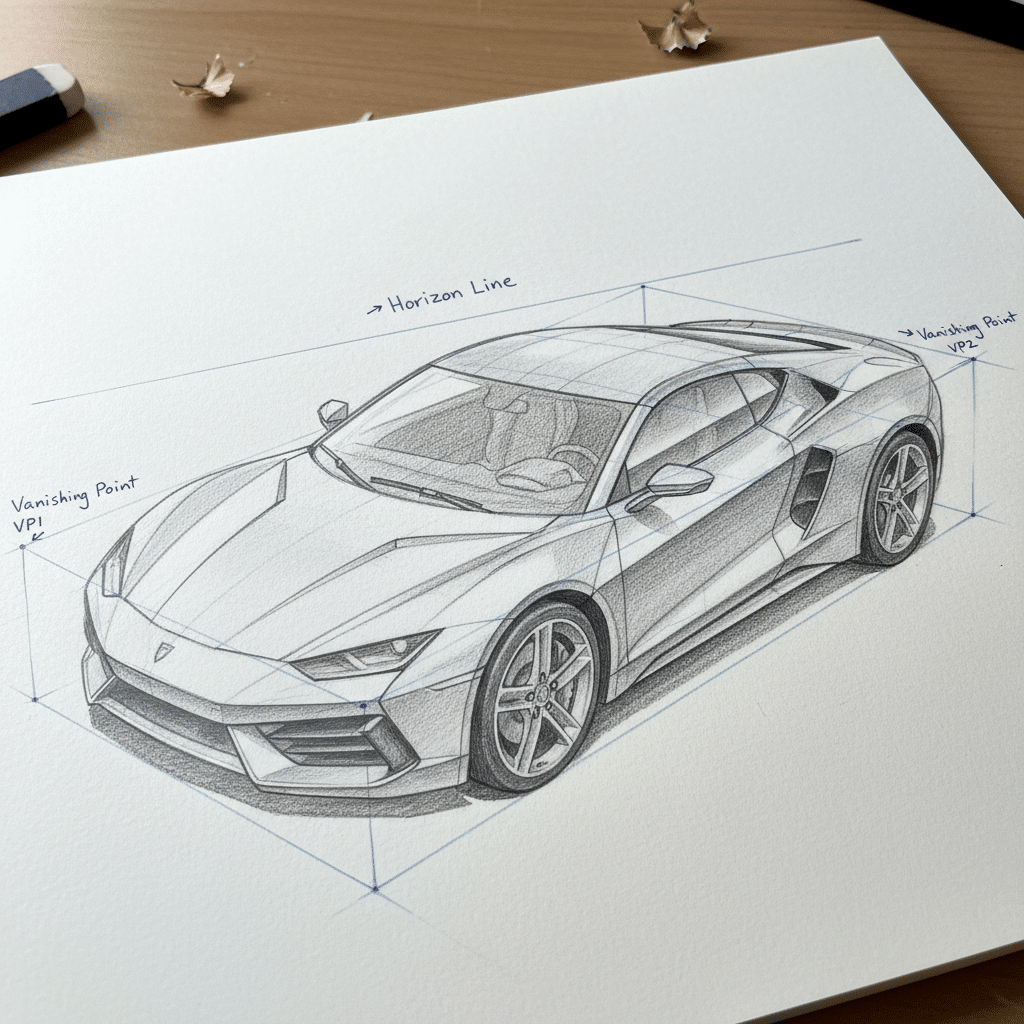
At the heart of it all are two concepts: the horizon line and vanishing points. The horizon line is simply your eye level. Imagine you’re standing on a perfectly flat plain, looking straight ahead. That line where the sky meets the land? That’s your horizon line. Even if you’re drawing indoors, you still have an imaginary horizon line at your eye level. Objects above it appear to angle down, and objects below it appear to angle up. Simple, right?
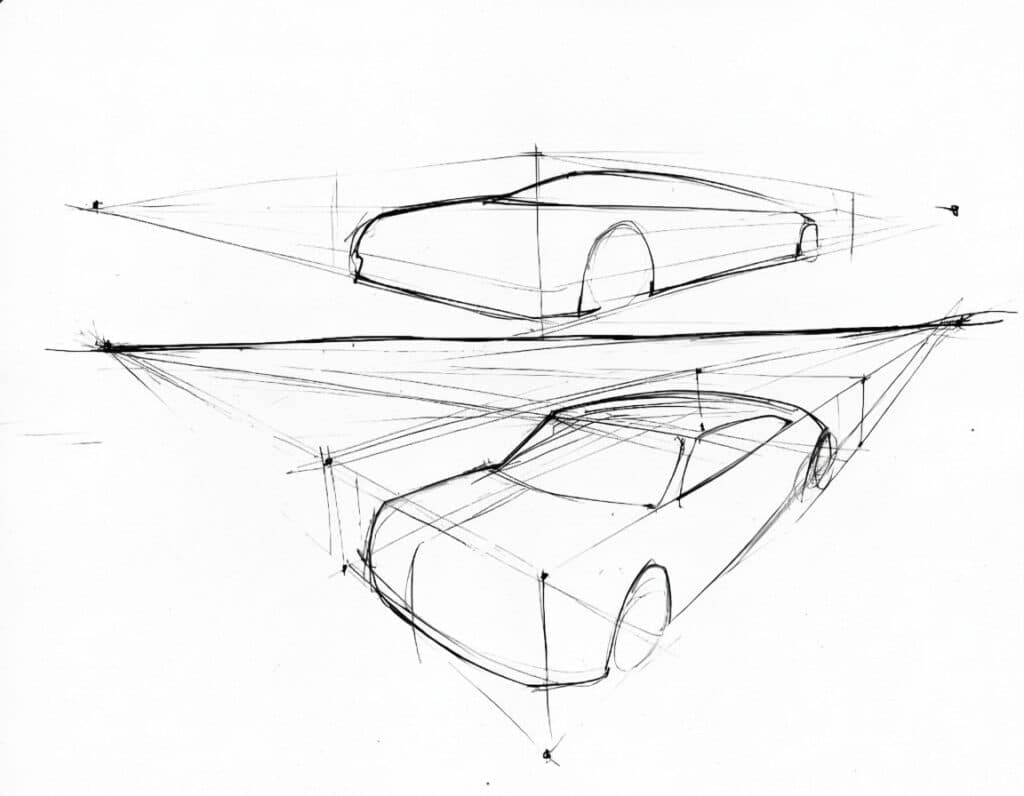
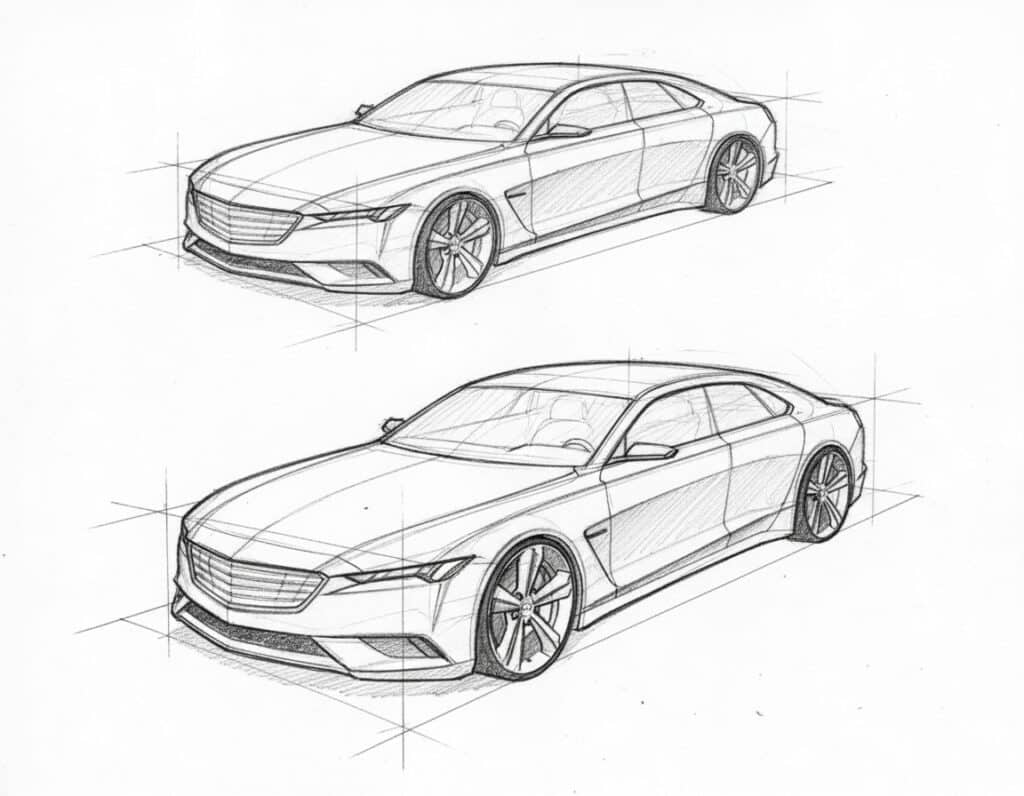
Next up are vanishing points. These are points on your horizon line where parallel lines, as they recede into the distance, appear to converge and disappear. Think about standing on a long, straight road – the parallel edges of the road seem to meet in the distance. That meeting point is a vanishing point. For basic perspective, you’ll typically work with one, two, or sometimes three vanishing points.
- One-Point Perspective: This is often the easiest to start with. Imagine looking straight down a tunnel or a long hallway. All lines parallel to your line of sight converge to a single vanishing point on the horizon line. If you’re drawing a car head-on, or perfectly from the side, one-point perspective might be your go-to.
- Two-Point Perspective: This is where things get a bit more dynamic, and it’s super common for drawing cars. Here, you have two vanishing points on the horizon line. It’s like looking at a corner of a building, or in our case, a car positioned at an angle. The lines going back from one side of the car go to one vanishing point, and lines going back from the other side go to the second vanishing point. This gives your car a much more realistic, angled appearance. Most car drawings benefit immensely from starting with a two-point perspective setup.
- Three-Point Perspective: This adds another layer of depth, usually for objects viewed from a very high or very low angle, like looking up at a skyscraper or down from an airplane. For cars, you might use this if you’re drawing it from a bird’s-eye view or a worm’s-eye view, making it appear more dramatic. The third vanishing point is either above or below the horizon line.
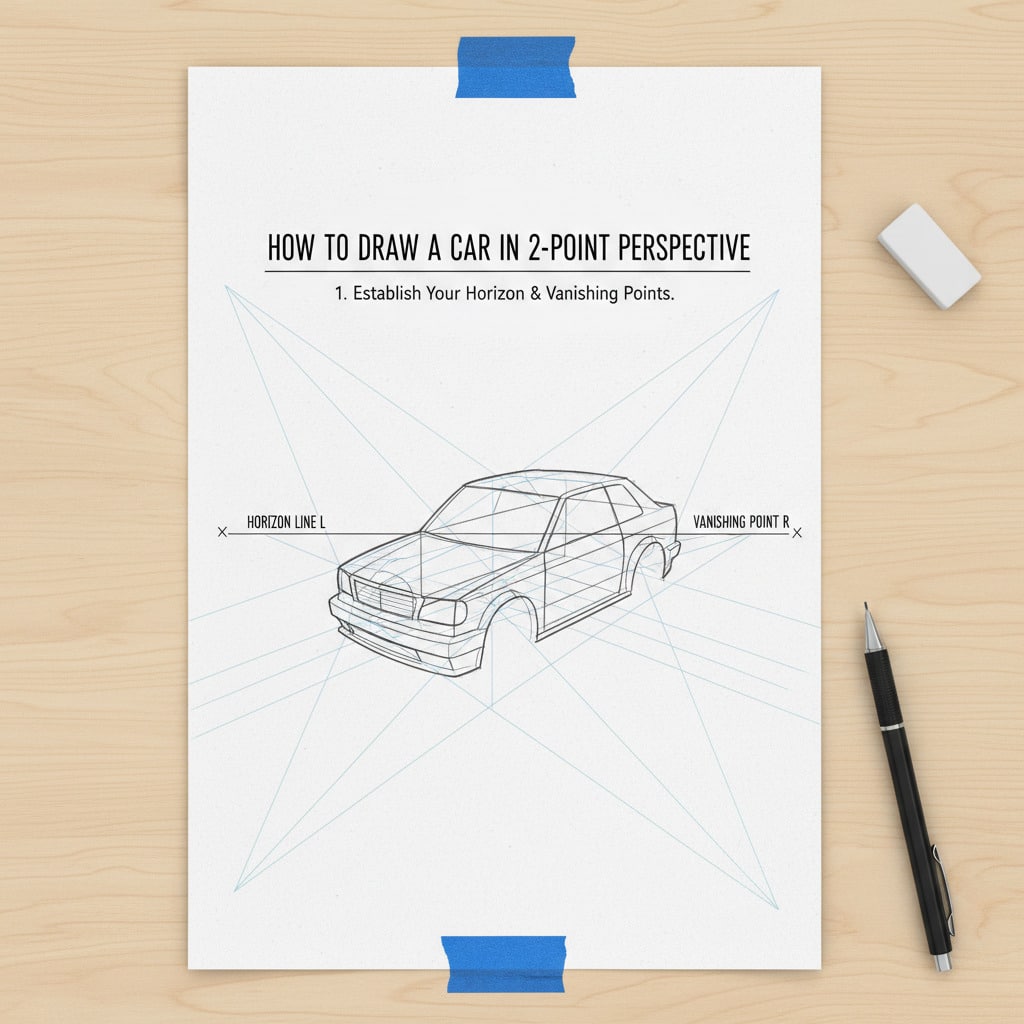
Before drawing anything else, lightly sketch your horizon line and mark one or two vanishing points on it, depending on the angle you want your car to appear. This foundational step is critical because every line you draw for your car will either be vertical, horizontal (parallel to the horizon line), or converge towards one of these vanishing points. It truly is the scaffolding for your entire drawing. Don’t skip this initial setup; it saves a ton of headaches later on! Getting comfortable with these initial concepts will make all the difference, much like understanding the base drawing principles for any subject.
2. Break Down the Beast: Simplifying the Car into Basic Forms
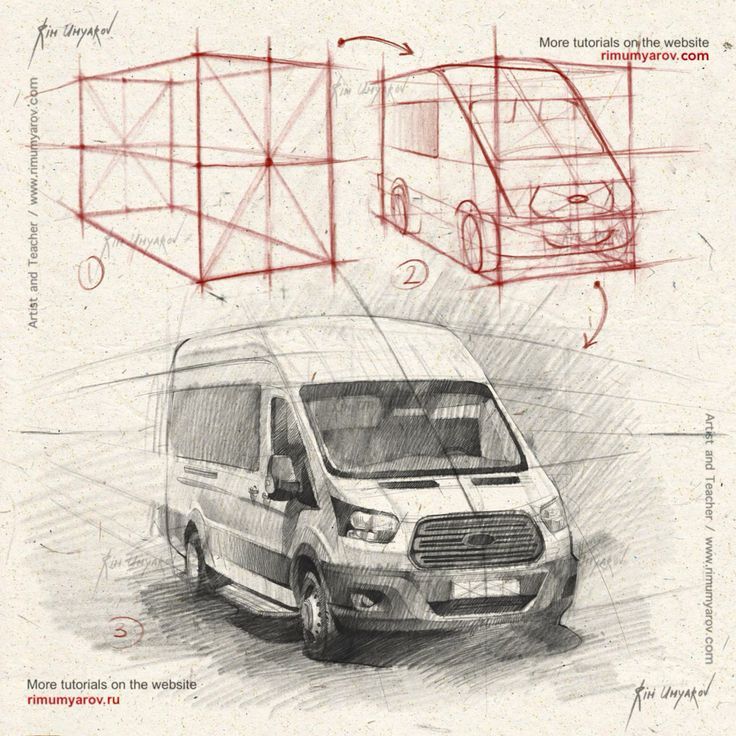
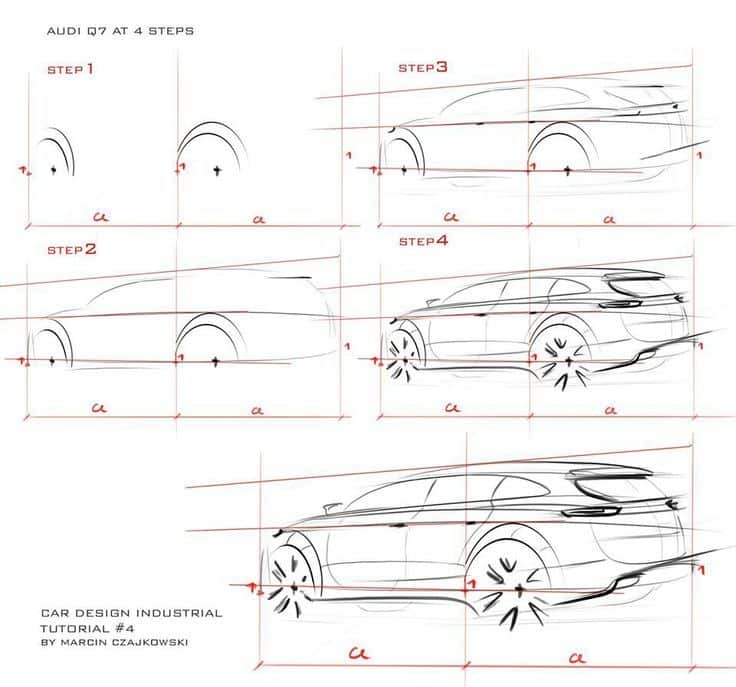
Alright, now that you’ve got your perspective playground set up with a horizon line and vanishing points, it’s time to tackle the car itself. Looking at a complex car model can feel overwhelming, right? All those sleek curves, intricate details, and unique body lines! The secret to making it manageable is to stop seeing a “car” and start seeing a collection of simple geometric shapes. Think like a sculptor carving from a block of stone.
Every car, at its core, can be simplified into a few fundamental forms: cubes, cuboids (rectangular boxes), and cylinders. Yes, even the most aerodynamic sports car started its life on the drawing board as a series of simple blocks.
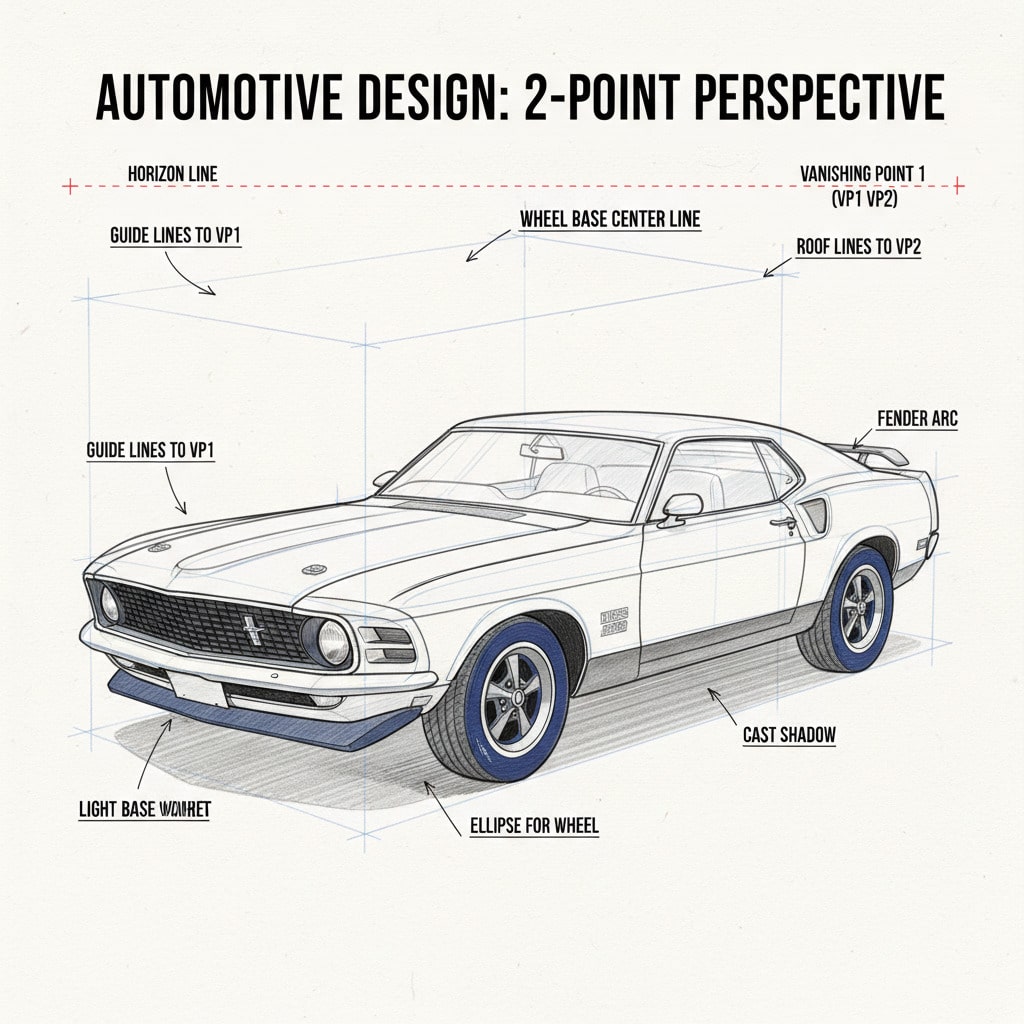
Here’s how to approach it:
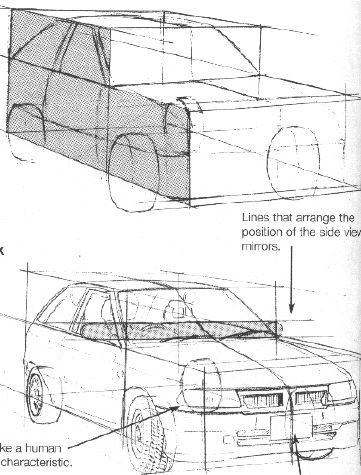
- The Main Body: A Boxy Beginning: Start by sketching a large rectangular box (a cuboid) that represents the overall volume of the car’s main body. This box should fit within your established perspective grid. Use light, construction lines for this. Don’t press hard; these are just guides. Pay attention to how this box recedes towards your vanishing points. Is the front facing mostly towards one vanishing point, or is it more balanced between two? This initial box dictates the entire vehicle’s mass and how it sits in space.
- The Cabin: Another Box on Top: Once you have the main body box, sketch another, smaller cuboid on top of it to represent the car’s cabin or passenger compartment. This includes the windshield, roof, and rear window area. Again, ensure the lines of this cabin box also adhere to your vanishing points. Think about the proportions – is it a low-slung sports car with a tiny cabin, or an SUV with a tall, spacious one?
- The Wheels: Perfect Circles (in Perspective): This is where many beginners stumble. Wheels are circles, but in perspective, they become ellipses (ovals). To draw them convincingly, first draw squares or rectangles on the side of your main body box where the wheels will go. These squares should also follow your perspective lines. Then, within these squares, draw your ellipses. The key is that the ellipses should get narrower as they recede into the distance (towards a vanishing point). The bottom of the tire should always appear to touch the ground plane consistently. Drawing a central axis through the ellipse can help ensure its symmetry in perspective.
- Connecting the Blocks: Once you have these primary boxes (main body, cabin, wheel areas), you can start to very lightly connect and shape them, still using straight lines. You’re not adding curves yet; you’re just defining the major planes and angles that make up the car’s general silhouette. For example, the hood might be a slightly inclined plane, the trunk a flat plane, and the sides mostly vertical.
This phase is all about getting the large, foundational forms correct in perspective. If your basic boxes and ellipses are off, no amount of detail will save the drawing. Take your time, measure with your pencil (holding it up to gauge angles and proportions), and use your vanishing points religiously. Think of it as creating a wireframe model before you apply any skin or paint. Getting these basic shapes right is an incredible confidence booster and ensures your car has a solid, believable structure.
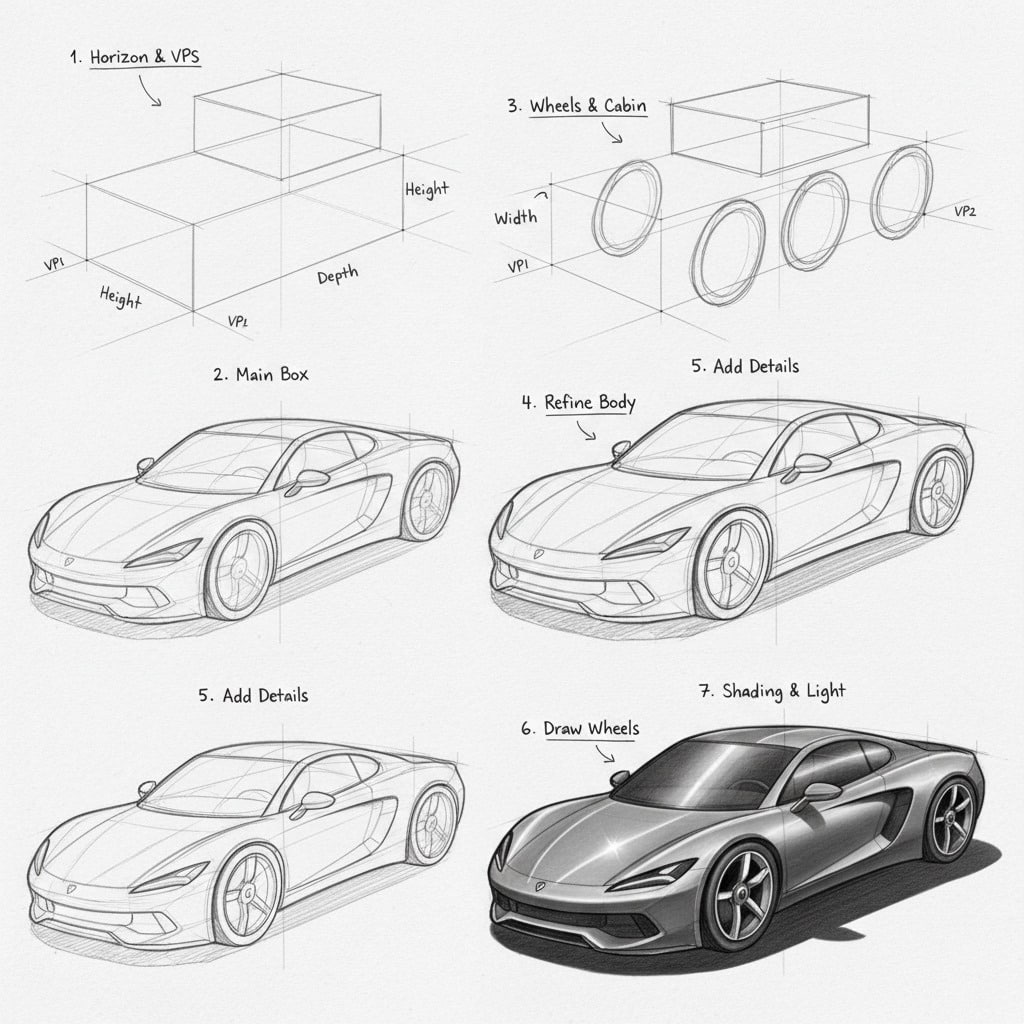
3. Define Your Viewpoint and Plot Your Vanishing Points Like a Pro
Now that you understand the basic components of perspective and how to simplify a car into foundational shapes, let’s talk about the single most impactful decision you’ll make: your viewpoint. This isn’t just about where the horizon line is; it’s about where you, the imaginary observer, are standing in relation to the car. Your viewpoint fundamentally dictates the mood, drama, and sense of scale of your drawing.
Consider these questions:
- Eye-Level View (Standard): Are you looking at the car from a typical human eye level? This is the most common and often the easiest place to start. Your horizon line will be around the middle of your page, and the car will feel grounded and accessible. It’s like standing next to it on the street.
- Low Angle (Worm’s-Eye View): Are you looking up at the car? This means your horizon line will be very low on your page, perhaps even below the bottom of the car’s tires. A low angle makes the car appear massive, powerful, and imposing. Think of classic movie posters where a hero car looms large. This often requires a three-point perspective, with the third vanishing point high above the horizon.
- High Angle (Bird’s-Eye View): Are you looking down on the car? Your horizon line will be high on the page, potentially above the roof of the car. A high angle can make the car seem smaller, more vulnerable, or give a sense of overview, like looking at a toy car or seeing it from a drone. Again, a third vanishing point, this time below the horizon, might be needed for dramatic effect.
Choosing Your Vanishing Points:
Once you’ve decided on your general viewpoint, it’s time to refine your vanishing points. For most dynamic car drawings, you’ll be using two-point perspective.
1. Draw Your Horizon Line: This is your eye level. Place it strategically based on your chosen viewpoint (low, mid, or high on the page). 2. Place Your Vanishing Points (VPs): Distance Matters: The further apart your vanishing points are on the horizon line, the less distorted your perspective will be. If they’re too close together, your car will look stretched or squashed, like using a wide-angle lens up close. A good rule of thumb is to place them outside the boundaries of your drawing surface initially, or at least significantly wider than your car’s width on the page. You can even tape extra paper to your drawing board to extend your horizon line and place VPs far apart. Symmetry and Angle: Consider the angle at which you want to view the car. If you want a more head-on, slightly angled view, one vanishing point will be closer to the center of your car sketch, and the other will be further away. If you want a more balanced 3/4 view, the vanishing points might be more equidistant from your central car sketch area. Experiment with placement! Vertical Lines:* Remember, in two-point perspective, all vertical lines (like the height of the wheels, windows, or doors) remain vertical and parallel to each other. Only the lines extending into depth converge to the vanishing points.
Practice Exercise: Before drawing the actual car, try drawing several basic boxes from different viewpoints and with different vanishing point placements. Draw a box with a low horizon line, then a high one. See how it changes the feel of the simple shape. This practice will build your spatial intuition. It’s a bit like learning to position characters in dynamic poses, as discussed in unlock creative ideas for your characters with OC poses. The more you play with the basic elements, the more naturally the car will come together. This foundational stage is where you truly lay out the spatial relationship, making all subsequent steps much smoother and more accurate.
4. Sketching the Main Body: From Block to Automotive Form
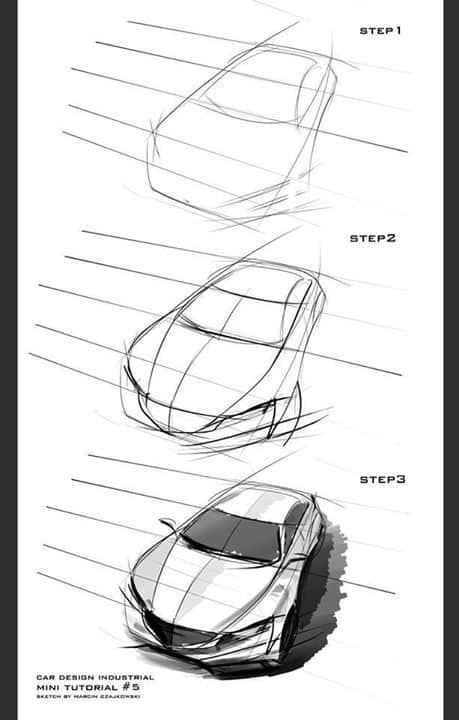
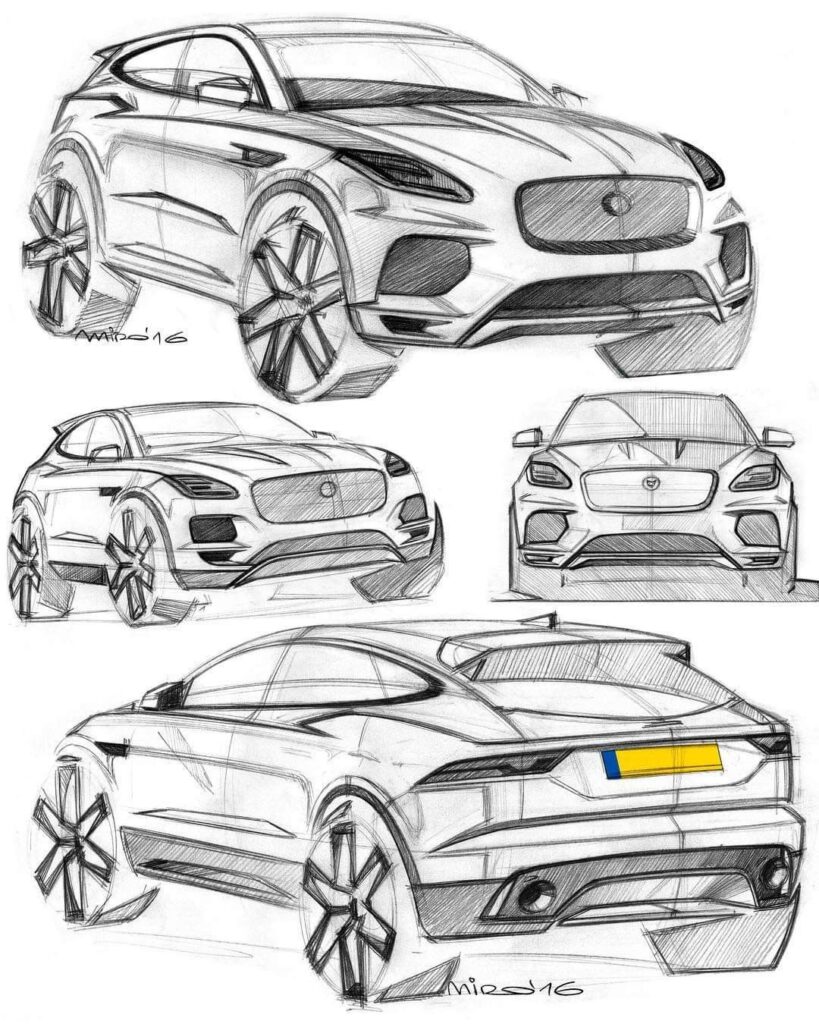
With your perspective grid firmly in place and your car simplified into basic boxes, it’s time to start refining those blocks into something recognizable as a vehicle. This is where the magic really begins to happen, as you transform rigid geometry into fluid automotive design. Remember to keep your lines light and loose; we’re still in the “construction” phase.
Here’s how to transition from block to body:
- Carving the Chassis: Your initial large box represents the overall footprint and height of the car. Now, using your vanishing points, begin to ‘carve’ out the basic chassis. If it’s a sedan, the front and rear might taper slightly. If it’s a truck, it might remain quite rectangular. Think about the ground clearance and the general outline of the car’s underbelly. The bottom edges of your main box are crucial here. These lines define where the wheels meet the road and the overall stance of the vehicle.
- Defining the Wheel Arches (Crucial for Stance): The wheel arches are incredibly important for conveying the car’s character and making it look grounded.
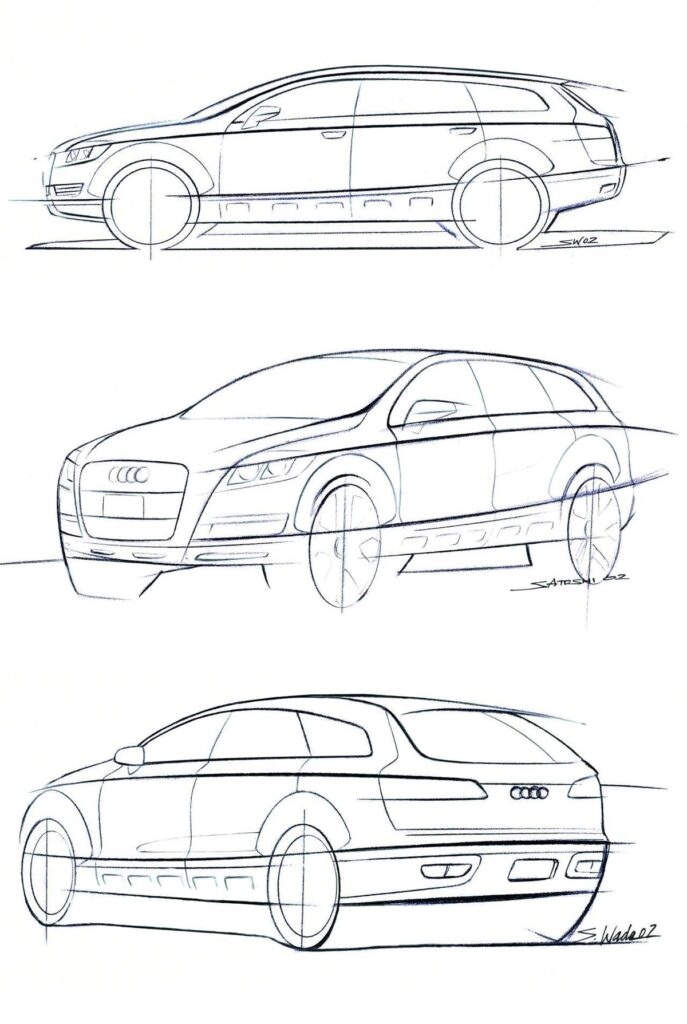
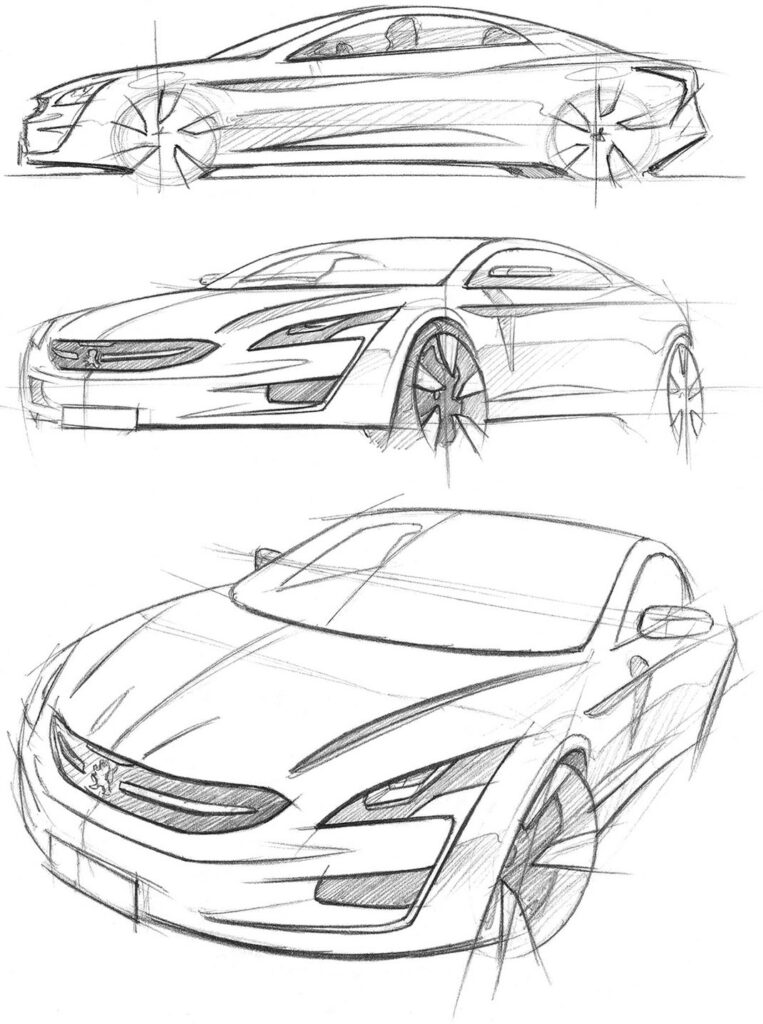
Establish the Wheelbase: First, ensure the placement of your ellipses for the wheels is correct within your perspective. Draw light lines from your vanishing points to define the front and back of each wheel well. Construct the Arch Box: Around each wheel ellipse, lightly sketch a rectangular box that represents the outer boundary of the wheel well. This box, like all other parts, must recede towards your vanishing points. Curve the Arch:* Now, within these boxes, gently round off the corners to create the actual wheel arch. Remember, the curve of the arch will appear more squashed in perspective the further it is from your eye, and more open when closer. Pay attention to how the arch meets the side of the car. Is it flush? Does it bulge out? This detail adds significant realism.
- Shaping the Cabin and Hood:
Windshield Angle: The cabin box you drew earlier now needs refinement. Determine the angle of the windshield. It’s rarely a perfectly vertical line; most windshields slope back. Use new perspective lines from your vanishing points to define this angle. Roofline: Similarly, shape the roofline. Is it flat, curved, or does it slope dramatically (like a coupe)? All these contours are initially defined by connecting points that recede to your vanishing points. Hood and Trunk:* The hood and trunk areas will also have their own slopes and curves. Imagine them as smaller planes within your main body box, all leading back to the appropriate vanishing points.
Think about the Car’s “Gesture”: At this stage, you’re not just drawing lines; you’re capturing the essence of the car’s design. Does it feel aggressive and low to the ground, or stately and upright? The angles of the windshield, the curve of the roof, and the way the body tapers all contribute to this. Take a moment to look at your favorite car designs – how do their major forms flow? For example, drawing a Formula 1 car would involve emphasizing extremely low profiles and aerodynamic curves, all while adhering strictly to perspective.
Continue to use very light pencil strokes. You’ll be erasing a lot and making adjustments. The goal here is to get the major forms and their relationship to each other correct in three-dimensional space before you commit to any darker lines or detailed elements. This stage is about sculpting the car’s overall form with confident, yet still tentative, strokes, ensuring every major plane and curve fits perfectly within your established perspective framework.

5. Adding the Finer Details and Bringing Your Car to Life
You’ve got the skeleton, the muscles, and now it’s time to add the skin and expression! This final major step is where your car truly transforms from a blocky outline into a dynamic, recognizable vehicle. With the major forms and perspective firmly established, you can now confidently layer in all those enticing details that give a car its character.
Here’s how to approach the detailing phase:
- Headlights, Grille, and Bumpers: These are the “face” of your car.
Perspective First: Even small details like headlights must adhere to perspective. Lightly block out the shapes of your headlights and taillights within their respective planes. Ensure their angles recede correctly to your vanishing points. A headlight closer to you will appear larger and more detailed than one further away. Grille and Air Vents: The grille is often a complex mesh. Start with its overall shape, then add the individual slats or patterns, making sure they also follow perspective lines. The same goes for air intakes and bumper shapes; treat them as separate forms carved into the main body.
- Windows and Mirrors:
Window Frames: Use your vanishing points to draw the frames of the side windows. Remember that the tops and bottoms of the windows, if parallel in reality, will converge to your vanishing points. Glass Curvature: Windows aren’t flat; they often have a slight curve. You can imply this with subtle shading later, but for now, focus on accurate outlines. Side Mirrors:* These are small but crucial. Sketch them as distinct forms, ensuring they project outward convincingly and also follow the perspective.
- Door Lines, Handles, and Panel Gaps:
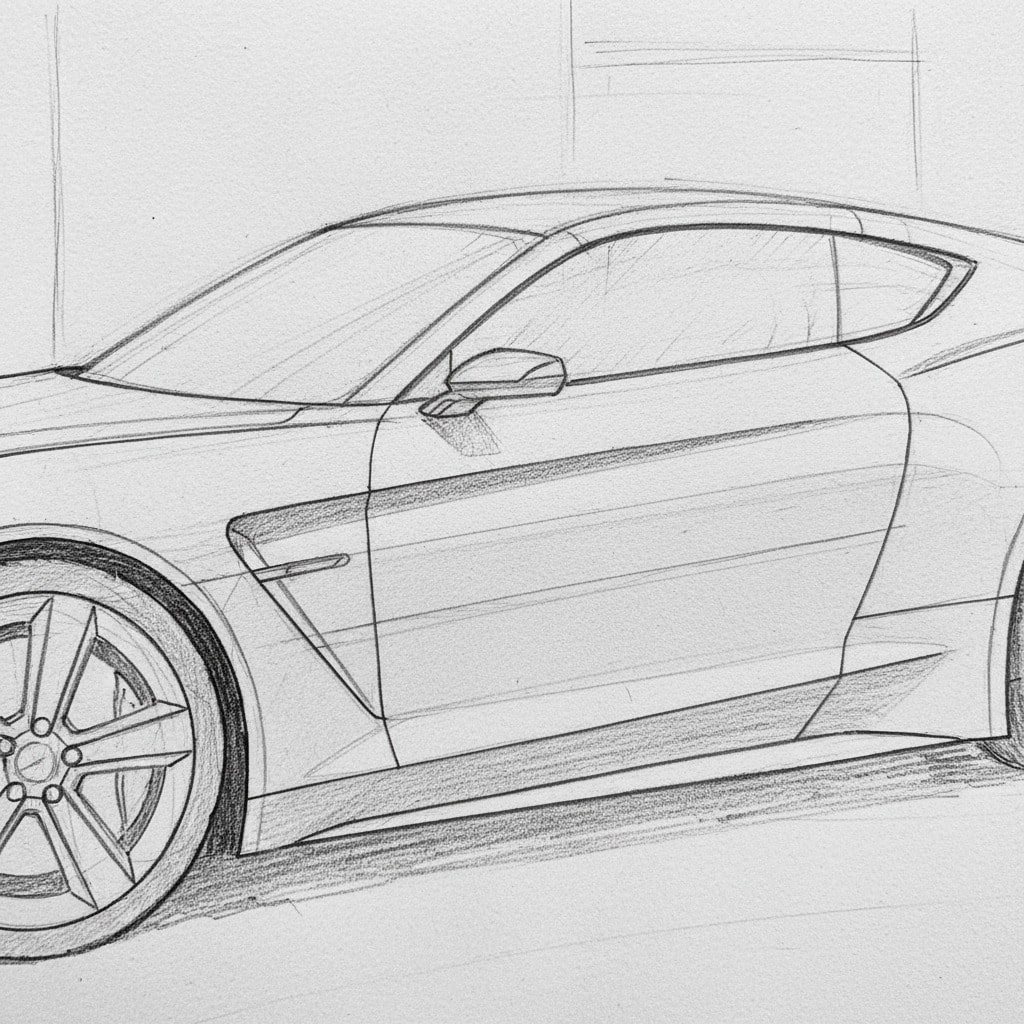
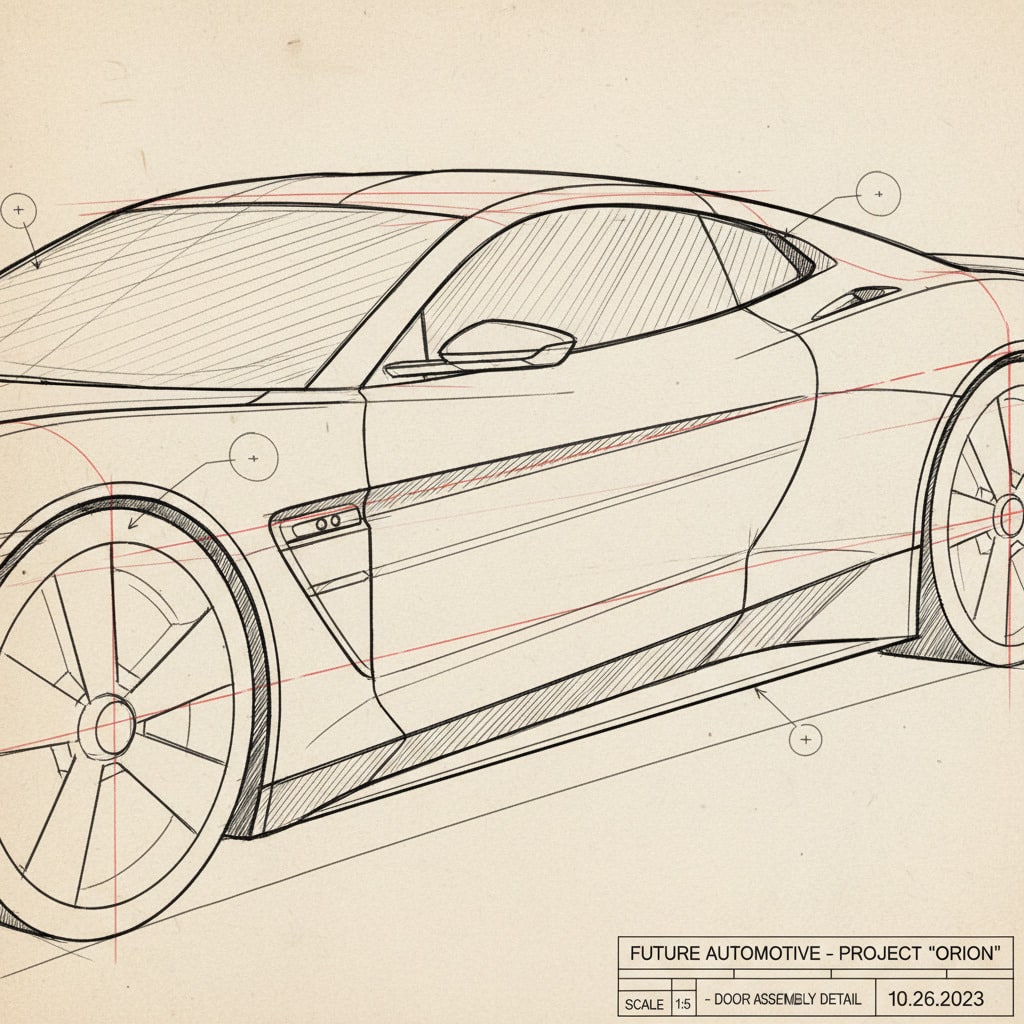
Flow and Form: Panel lines are key to defining the car’s surfaces. Look closely at reference photos to see how door lines, hood lines, and trunk lines flow. They often aren’t perfectly straight, but subtle curves that define the body panels. All these lines must also align with the perspective of the car’s body. Handles and Emblems: These are small details, but they add a lot. Block out their basic shapes, ensuring their size and placement are correct in perspective.
- Wheels and Tires (Advanced Detail):
Rims/Hubcaps: Once your tire ellipses are solid, you can start drawing the spokes or pattern of the wheel. This is challenging because the spokes also recede in perspective. Draw a central axis for the wheel and then draw the spokes radiating from it, foreshortening them as they go back. The hubcap circle will also be an ellipse, slightly smaller than the tire ellipse. Tread: For realism, add a subtle tread pattern. This will also need to follow the curve of the tire’s ellipse.
- Shading and Line Weight (Bringing it to Life):
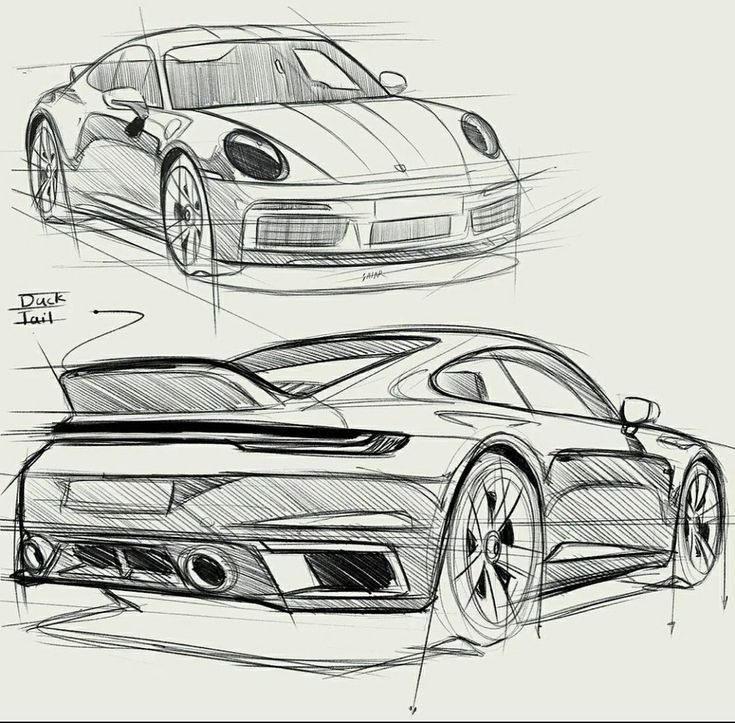
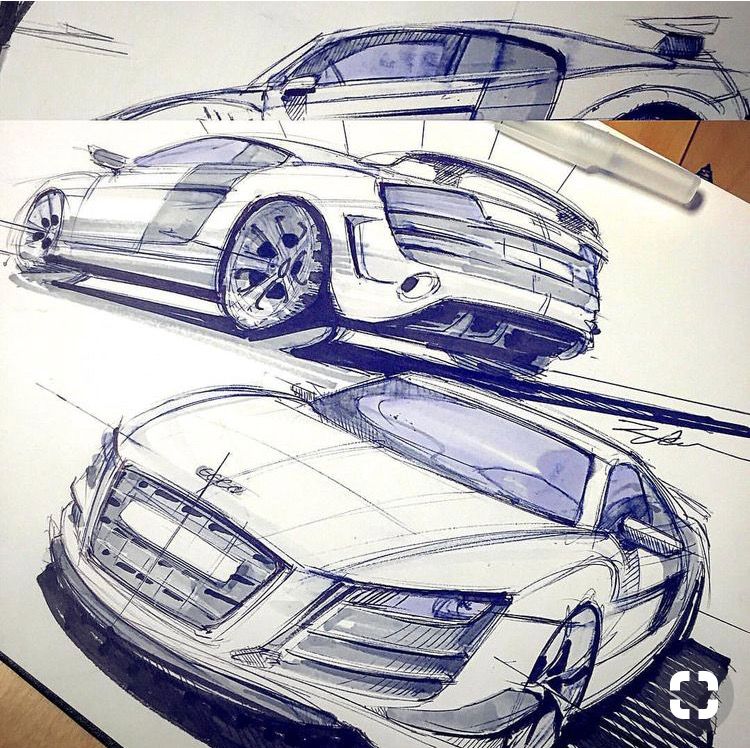
Line Weight: Use varying line weights to create depth. Darker, thicker lines for closer edges or edges in shadow, and lighter, thinner lines for edges further away or highlights. This instantly makes your car feel more three-dimensional. Shading: Think about your light source. Where is the light coming from? This will dictate where the shadows fall. Use gentle gradations of tone to indicate curves, reflections on the bodywork, and shadows under the car. Reflections are particularly important for cars, showing the environment around them and emphasizing their shiny surfaces. Ground Shadow:* Don’t forget the shadow the car casts on the ground! This helps ground the car and makes it feel like it’s actually sitting in its environment, not floating.
This stage demands patience and keen observation. Refer to plenty of reference images of the specific car model you’re drawing. Pay attention to how light plays on its surfaces and how the various parts interact. Don’t be afraid to zoom in on details, but always keep the overall perspective in mind. Just as when you’re crafting a complex scene like how to draw a magical garden scene, the small details, when placed correctly within the overall composition, are what elevate the entire piece. You’re no longer just drawing a car; you’re creating an illusion of a car existing in space, ready to speed away.
The Final Lap: Driving Your Skills Forward
Learning how to draw a car in perspective might seem like a marathon, but by breaking it down into these five casual steps, you’ve essentially driven through the most challenging parts. From understanding the foundational rules of horizon lines and vanishing points to simplifying complex forms into basic blocks, and finally, layering in those captivating details, you’ve built a solid roadmap for creating dynamic automotive art.
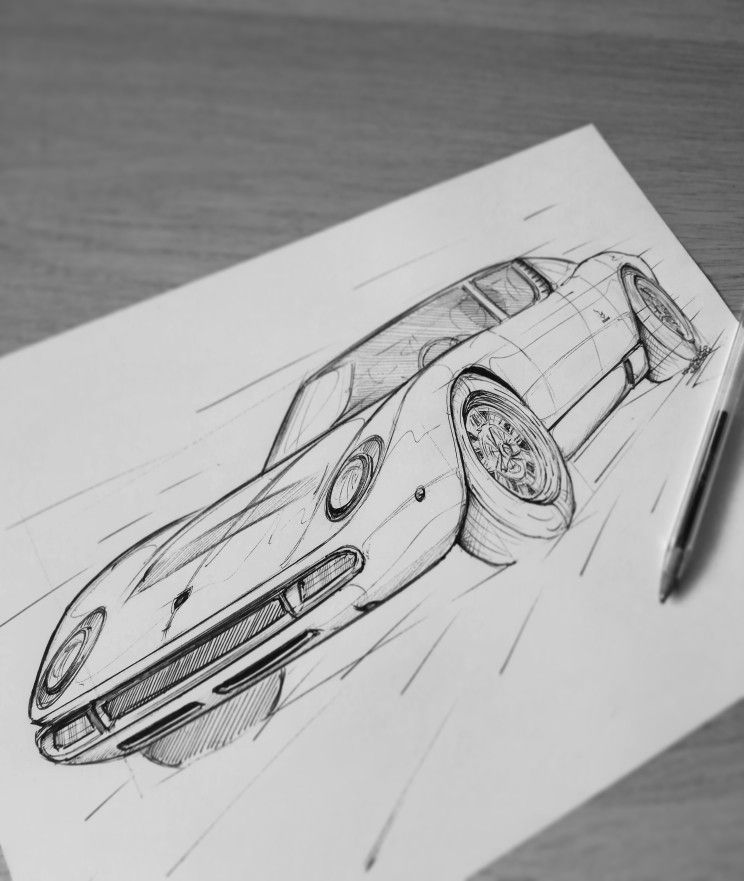
Remember, practice isn’t just about repetition; it’s about observation. Look at cars around you, really see their angles, the way light hits their surfaces, and how they sit in their environment. Notice how even slight shifts in your viewpoint change their appearance. Start with simple models, and gradually work your way up to more complex designs. Don’t be discouraged by initial struggles; every artist, no matter how skilled, began with hesitant lines and a lot of trial and error.
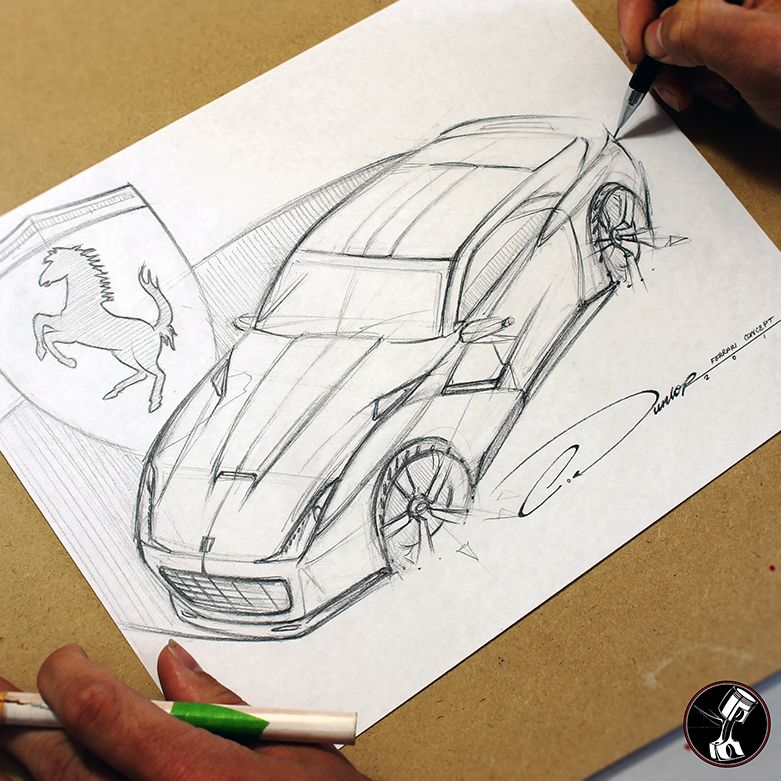
Your artistic journey, much like a car on an open road, is all about the path you take and the skills you pick up along the way. Keep sketching, keep experimenting with different perspectives – from high-octane sports cars to classic cruisers – and most importantly, keep enjoying the process. The more you draw, the more intuitive perspective will become, and soon, drawing cars that look like they’re ready to peel off the page will feel like second nature. So grab your pencil, find some inspiration, and hit the drawing board – your next masterpiece is waiting to be created!
What are the fundamental concepts of perspective drawing I need to understand before sketching a car?
Before sketching a car, it’s essential to understand the horizon line, which represents your eye level, and vanishing points where parallel lines seem to converge in perspective drawing.
How does the viewpoint affect the way I should draw a car?
Your viewpoint determines the placement of the horizon line and vanishing points, which in turn influence the car’s appearance, mood, and sense of scale, whether you view it from a low angle, high angle, or eye level.
What are the main steps to simplify a complex car into basic shapes for drawing?
Start with a large rectangular box for the main body, add a smaller box for the cabin, and draw ellipses for the wheels within perspective to simplify the car into manageable geometric forms.
How do I establish the correct perspective and vanishing points for my car drawing?
Draw a horizon line based on your chosen viewpoint, then place two vanishing points on this line, ensuring they are far apart for realistic proportions, and use them to guide your lines for the car’s structure.
What details should I focus on to bring my car drawing to life after establishing the basic shapes and perspective?
Add finer details such as headlights, grille, windows, door lines, handles, and wheels with correct perspective, then use varying line weights and shading to create depth and realism.
- 188shares
- Facebook0
- Pinterest185
- Twitter3
- Reddit0
