The festive season offers a unique opportunity to engage young minds in creative and meaningful activities. For preschoolers, Christmas crafts are more than just artistic endeavors; they are foundational experiences that foster development across multiple domains. From enhancing fine motor skills and hand-eye coordination to stimulating imagination and encouraging self-expression, these activities provide a rich learning environment wrapped in holiday cheer. As educators and parents, our role is to facilitate these experiences, transforming simple materials into cherished memories and valuable learning moments. This article explores five engaging Christmas crafts specifically designed for preschoolers, ensuring joy, skill development, and a touch of festive magic. Each craft is chosen for its accessibility, safety, and developmental benefits, promising delightful outcomes and quality bonding time.
1. Festive Fingerprint Ornaments
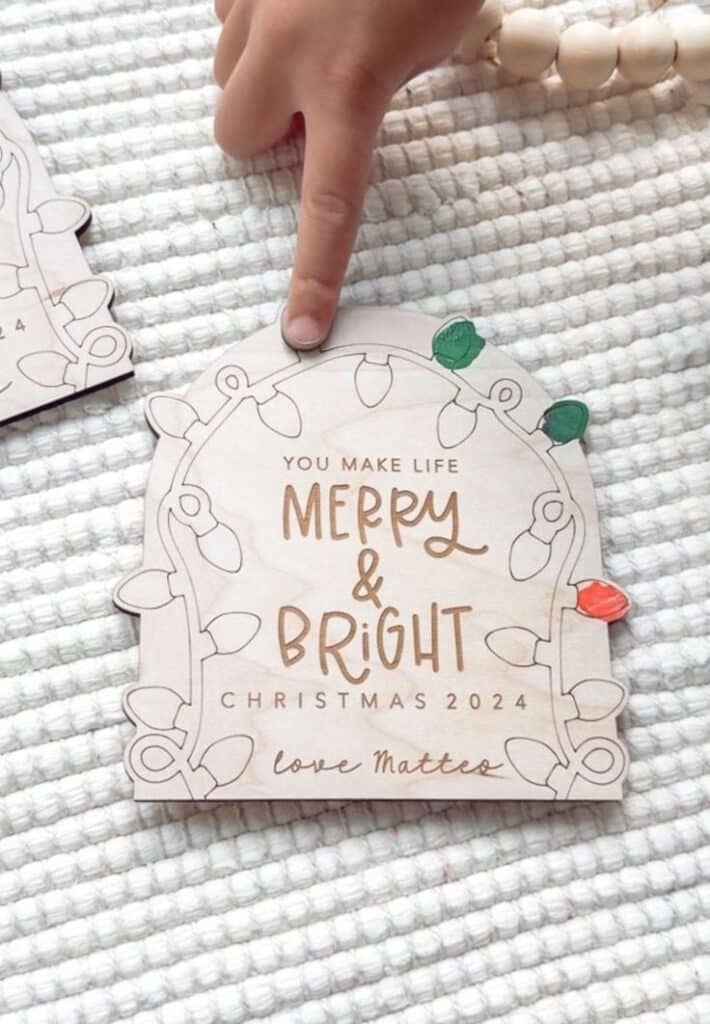
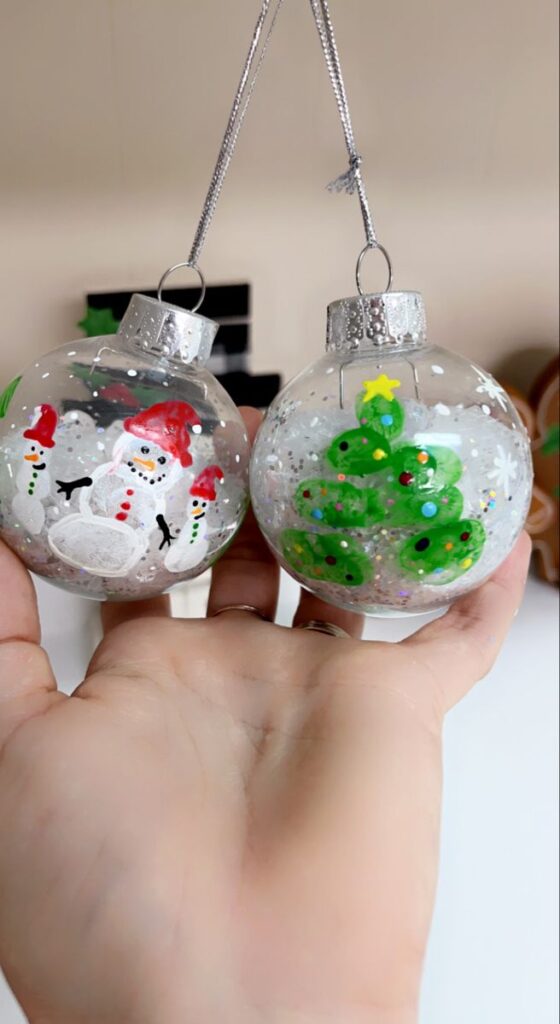
Fingerprint ornaments are a timeless classic, offering a personalized touch to your Christmas decor while engaging preschoolers in a wonderfully sensory and creative activity. This craft taps into a child’s natural curiosity about textures and colors, transforming their unique fingerprints into adorable holiday figures.
Developmental Benefits
This craft is exceptionally rich in developmental advantages for preschoolers.
- Fine Motor Skills: The act of pressing fingers onto an ink pad or paint, then carefully transferring them to the ornament surface, requires precise control. This strengthens small hand muscles and improves dexterity, crucial for tasks like writing and self-feeding.
- Hand-Eye Coordination: Children must guide their fingers accurately to create the desired print, enhancing their ability to coordinate visual information with motor actions.
- Color Recognition and Mixing: Working with various colors of paint allows children to identify and differentiate hues. Observing how different colors blend (e.g., when making multiple fingerprints close together) introduces basic color theory.
- Creativity and Imagination: Transforming a simple fingerprint into a reindeer, snowman, or Santa encourages imaginative thinking and storytelling. Children visualize the character and bring it to life with simple additions.
- Self-Expression: Each child’s fingerprint is unique, and so will be their ornament. This fosters a sense of individuality and pride in their creation, validating their personal artistic contribution.
- Sensory Exploration: The tactile experience of paint on fingers, the smooth surface of the ornament, and the gentle pressure of printing provide valuable sensory input.
Materials Needed
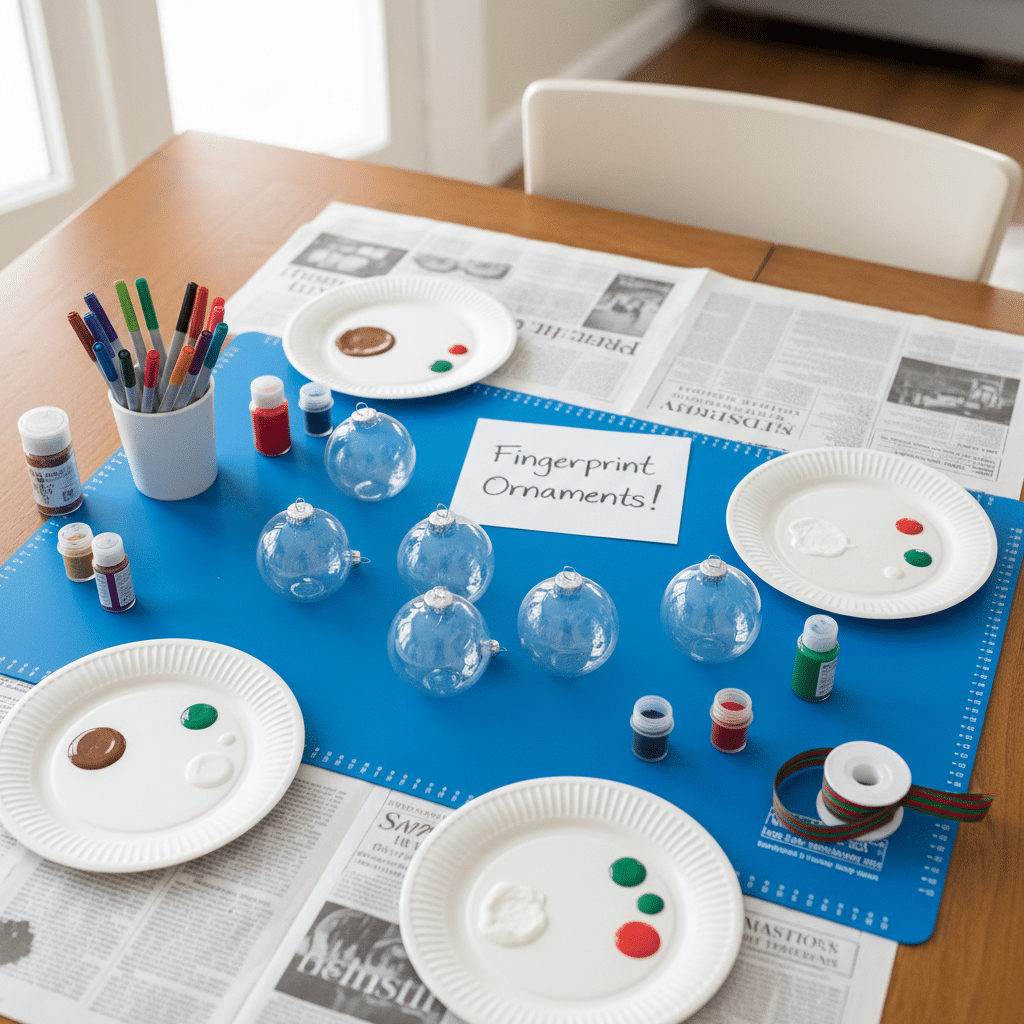
- Plain, smooth-surfaced ornaments (ceramic, wooden, or sturdy plastic work best). Clear glass or plastic ornaments also work well, allowing prints on the inside or outside.
- Non-toxic, washable acrylic paints in assorted festive colors (red, green, white, brown, black, gold, silver). Tempera paint can also be used, but acrylic offers more durability.
- Small paper plates or paint palettes for paint.
- Fine-tip permanent markers (black, red) for details.
- Glitter or glitter glue (optional, for extra sparkle).
- Ribbon or twine for hanging.
- Wipes or damp cloths for quick clean-up.
- Protective covering for your workspace (newspaper, craft mat).
Step-by-Step Instructions
- Prepare the Workspace: Lay down newspaper or a craft mat. Gather all materials within easy reach. Pour small amounts of different colored paints onto separate paper plates.
- Fingerprint Application:
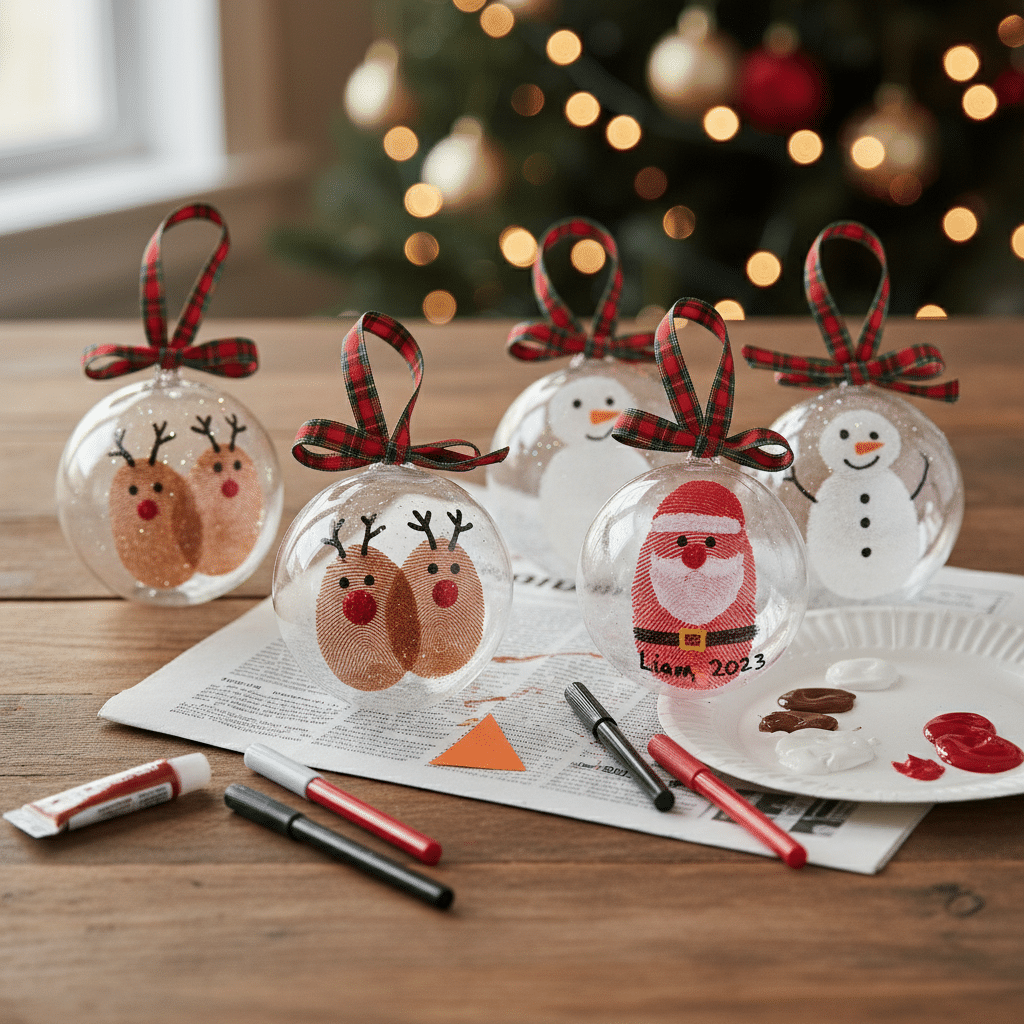
- Reindeer: Dip a child’s thumb or index finger into brown paint. Press it firmly onto the ornament, creating an oval shape. Repeat several times for a herd of reindeer, allowing space between each.
- Snowman: Dip a fingertip into white paint and press it down to form the snowman’s body. You might do two or three overlapping prints to create a larger snowman.
- Santa/Elf: Use a red fingerprint for Santa’s body or an elf’s hat.
- Allow to Dry: Let the fingerprints dry completely. This is a crucial step to prevent smudging when adding details. Drying time will vary depending on the paint type and thickness.
- Add Details: Once dry, use fine-tip permanent markers to bring the characters to life.
- Reindeer: Add small black dots for eyes, a red dot for Rudolph’s nose, and drawn antlers with black marker.
- Snowman: Draw tiny black dots for eyes and a mouth, a small orange triangle for a carrot nose, and thin lines for stick arms.
- Santa: Draw a white beard, a black belt, and a tiny pom-pom on his hat.
- Optional Embellishments: If desired, add glitter or glitter glue for a sparkly finish. Ensure it’s fully dry.
- Finishing Touch: Thread a festive ribbon or twine through the ornament hanger. Write the child’s name and the year on the back of the ornament with a permanent marker, creating a lasting keepsake.
Tips for Engagement and Adaptation
- Storytelling: Encourage children to tell a story about the characters they create. “Where is your snowman going?” “What is this reindeer’s name?”
- Supervision and Safety: Always use non-toxic paints and supervise closely, especially when using permanent markers. Ensure proper ventilation.
- Manage Expectations: Focus on the process, not just the perfect outcome. Celebrate every unique print.
- Variation: Inside Out: For clear plastic or glass ornaments, children can dip their fingers in paint and press them on the inside surface, then gently swirl the ornament to coat the interior. This creates a vibrant, less-messy effect with their prints still visible.
- Create a “Family” Ornament: Have each family member contribute a fingerprint to one ornament, creating a truly collaborative piece. This reinforces a sense of belonging and shared celebration.
2. Pinecone Christmas Trees with Pom-Poms
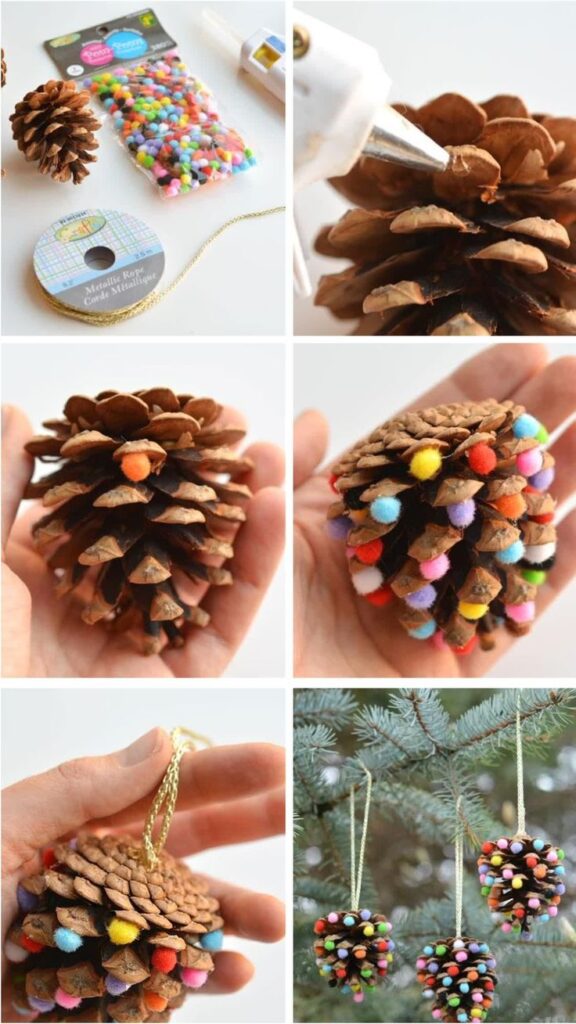
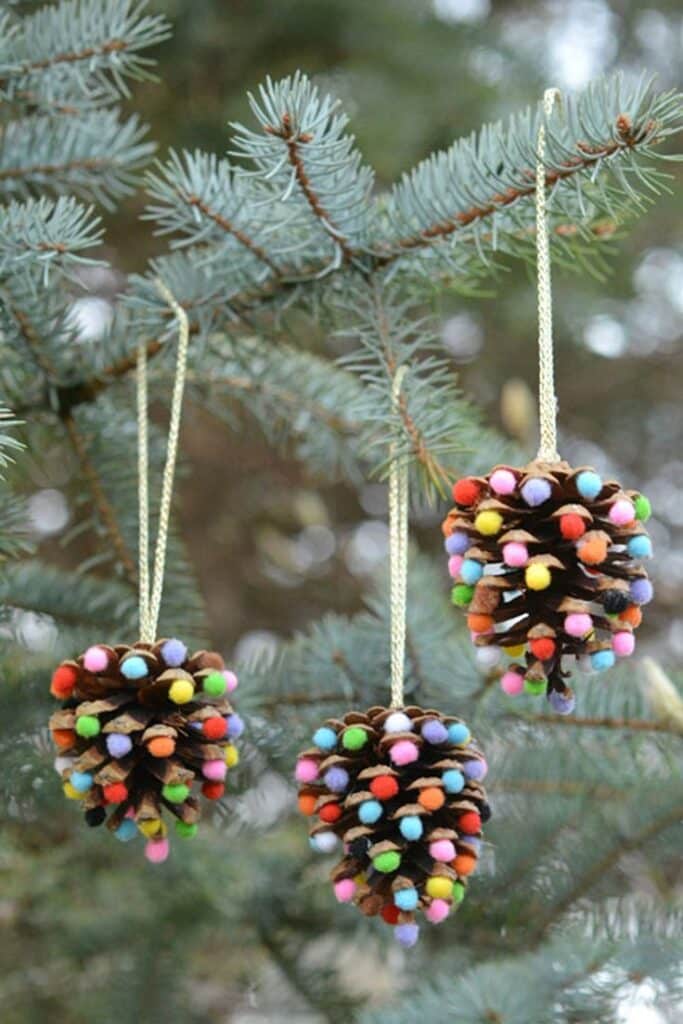
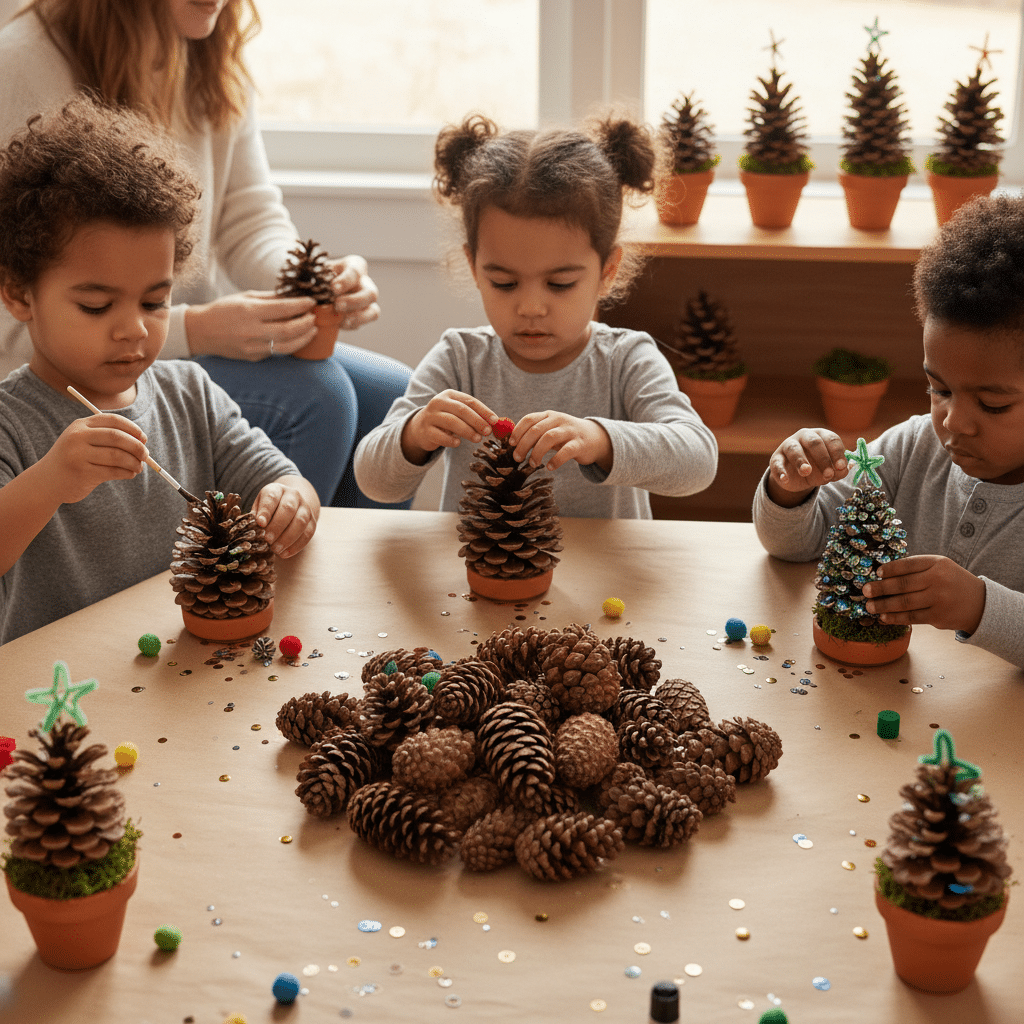
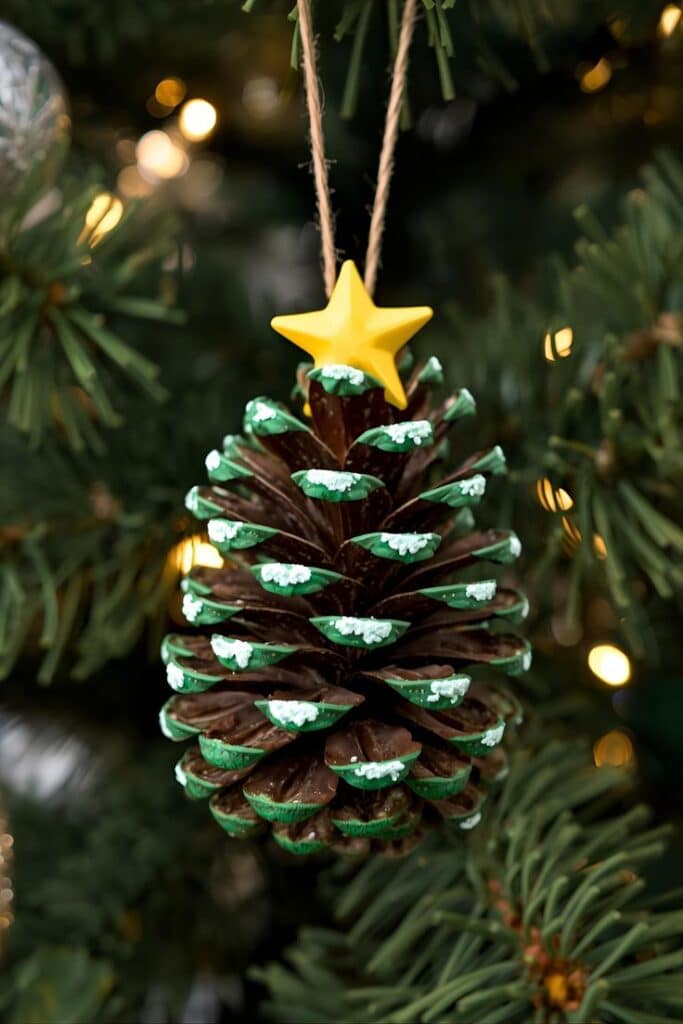
Transforming natural elements into festive decorations provides a grounding, sensory experience for preschoolers. Pinecone Christmas trees are a fantastic way to utilize found objects, encouraging observation of nature while fostering creativity through decorating. This craft is tactile, colorful, and relatively mess-free, making it ideal for young children.
Developmental Benefits
Engaging with pinecone trees offers a multitude of developmental advantages:
- Sensory Exploration: Children interact with the unique texture of pinecones (rough, bumpy), the softness of pom-poms, and the stickiness of glue. This diverse sensory input is vital for cognitive development.
- Fine Motor Skills: Picking up small pom-poms, applying glue, and carefully placing the decorations onto the pinecone scales requires precision grip and controlled movements. This refines the pincer grasp, essential for holding pencils and other tools.
- Hand-Eye Coordination: Aligning the pom-pom with the chosen spot on the pinecone and applying the right amount of pressure to stick it down strengthens hand-eye coordination.
- Color Recognition and Sorting: Working with an array of colorful pom-poms allows children to identify, name, and potentially sort colors, reinforcing early mathematical concepts.
- Spatial Awareness: Children learn to arrange the pom-poms on the pinecone, understanding concepts like “on top,” “next to,” and “filling the space.” They also get a sense of balance and distribution.
- Creativity and Design: Deciding where to place each “ornament” and how to decorate their unique tree fosters individual artistic expression and basic design principles.
- Problem-Solving: If a pom-pom doesn’t stick or falls off, children implicitly engage in simple problem-solving (e.g., “I need more glue,” “I should hold it longer”).
Materials Needed
- Pinecones of various sizes (collected and cleaned; baking them at a low temperature can open them up and kill any small bugs).
- Assorted small pom-poms (various sizes and festive colors: red, green, white, gold, silver).
- Craft glue (PVA glue) or low-temperature hot glue gun (for adult use only). Tacky glue also works well.
- Small star toppers (optional, can be cut from felt or glitter cardstock).
- Glitter or glitter glue (optional).
- Small wooden rounds or cardboard bases (optional, to make trees stand steadily).
Step-by-Step Instructions
- Pinecone Preparation: Ensure pinecones are clean and dry. If using fresh ones, bake them on a foil-lined baking sheet at 200°F (90°C) for about 30-60 minutes to open them and sterilize them. Let them cool completely.
- Set Up the Station: Provide each child with a pinecone. Arrange pom-poms in small bowls for easy access. Have glue ready.
- Applying Glue: Show children how to apply a small dot of glue to the base of a pom-pom or directly onto a pinecone scale. For younger preschoolers, an adult might apply the glue, and the child places the pom-pom.
- Decorating the Tree: Children then carefully press the pom-poms onto the open scales of the pinecone, resembling colorful ornaments on a Christmas tree. Encourage them to decorate all sides.
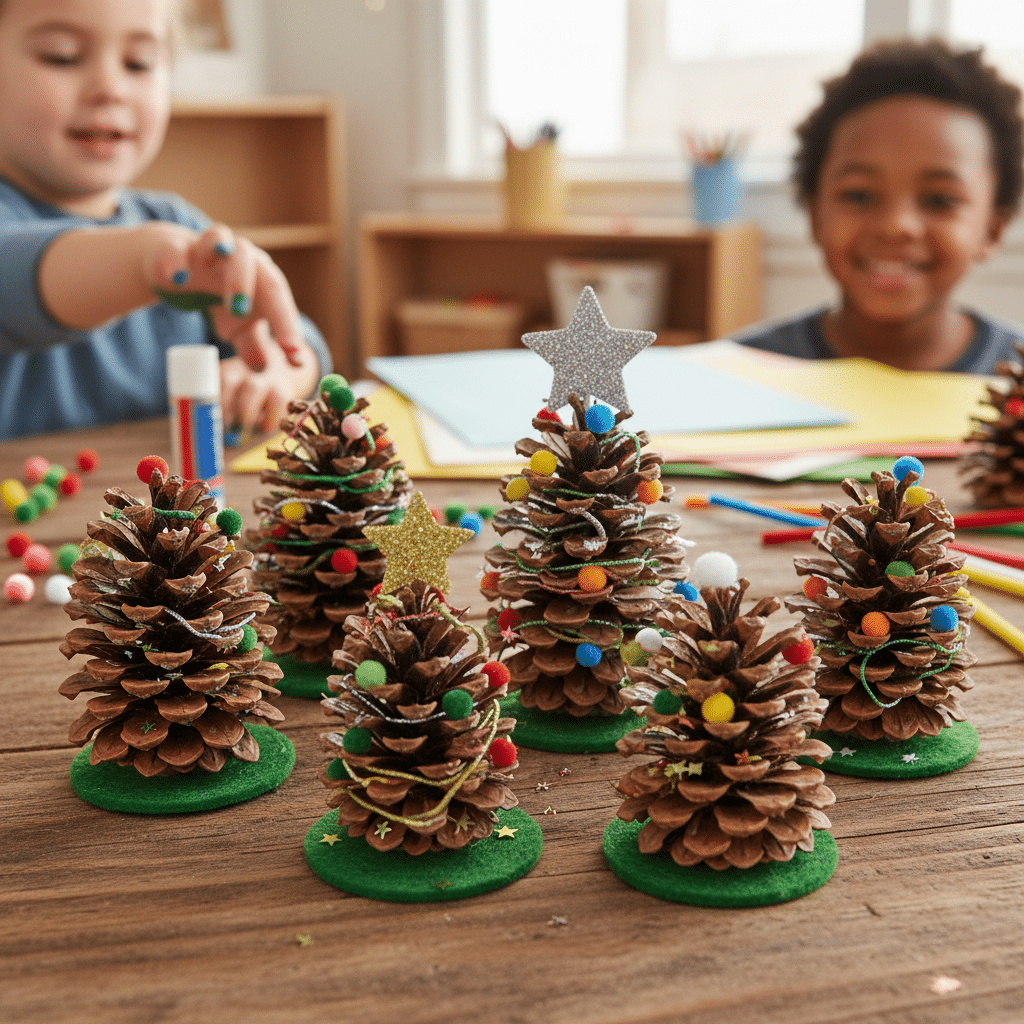
- Adding the Star (Optional): Once the pom-poms are largely in place, an adult can help glue a small star topper to the very top of the pinecone.
- Glitter Finish (Optional): If using glitter, lightly dust it over the wet glue or apply glitter glue after the pom-poms are secure.
- Drying: Allow the pinecone trees to dry completely, ideally overnight, to ensure all decorations are firmly attached.
- Stabilizing (Optional): For pinecones that don’t stand well, an adult can hot-glue them to a small wooden round or sturdy cardboard base.
Tips for Engagement and Adaptation
- Nature Walk Connection: Before the craft, go on a “pinecone hunt” with the children. Discuss the natural world and how we can use its treasures. This enhances appreciation for nature.
- Open-Ended Exploration: Let children experiment with color patterns or random placement. There’s no “right” way to decorate their tree.
- Focus on the Process: Emphasize the fun of decorating rather than achieving a perfect result. Each child’s unique tree is beautiful.
- Sensory Bin Addition: Consider adding pinecones and various craft supplies to a sensory bin for free exploration before the structured craft, allowing children to manipulate materials freely.
- Displaying the Art: Once dry, proudly display these mini trees on windowsills, shelves, or as part of a holiday centerpiece. They make lovely gifts. For other unique craft ideas, consider exploring Loves Creations: Unique Craft Ideas for a Personalized Valentine’s Day for inspiration on personalized crafts that extend beyond Christmas.
3. Handprint Wreaths
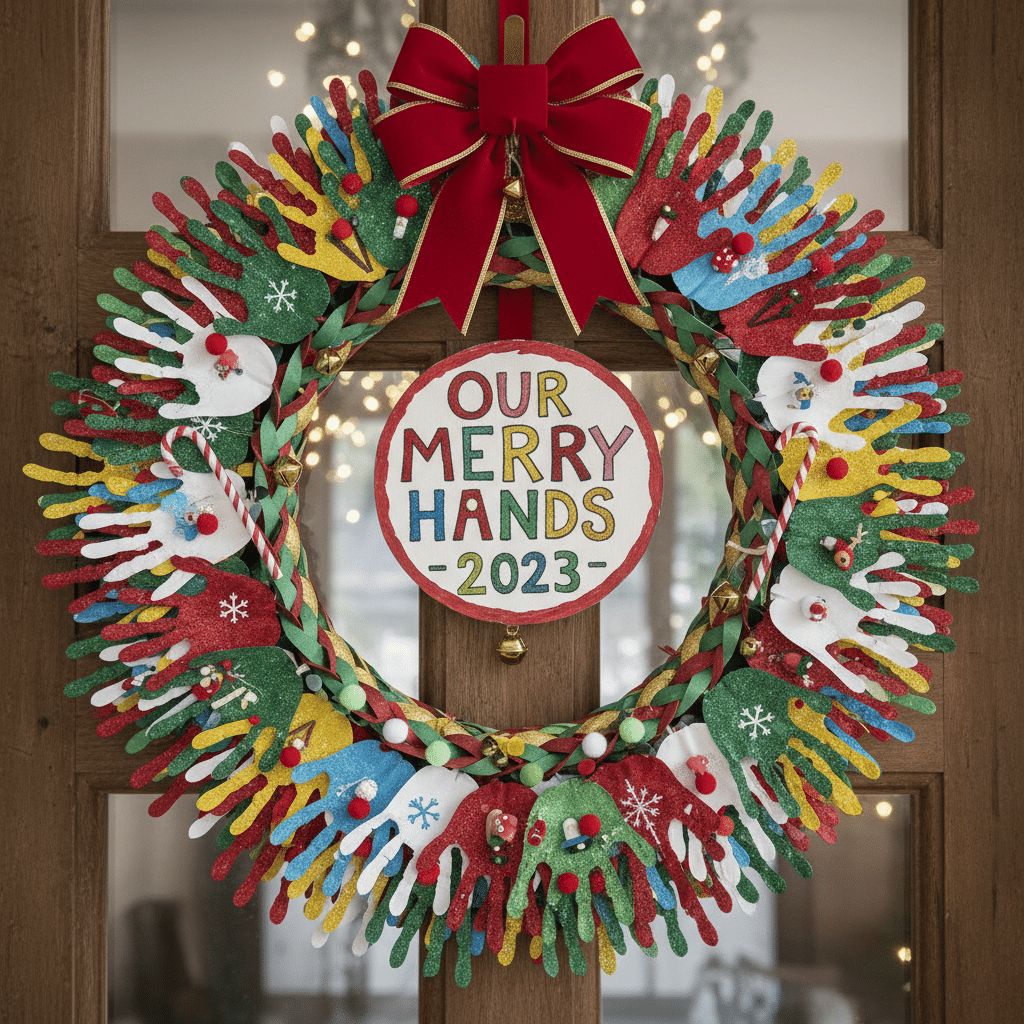
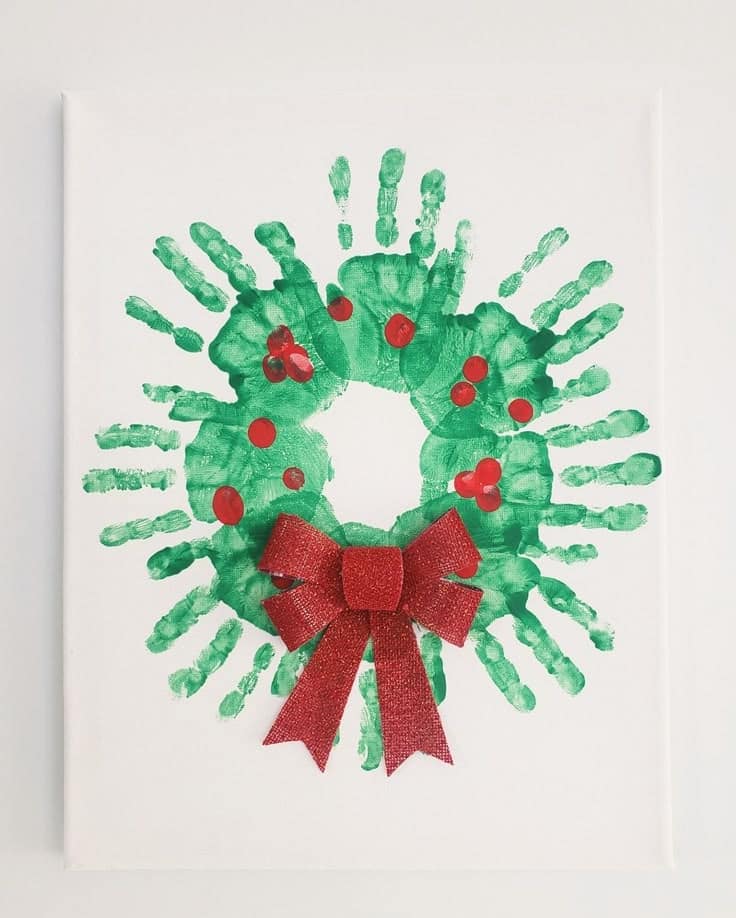
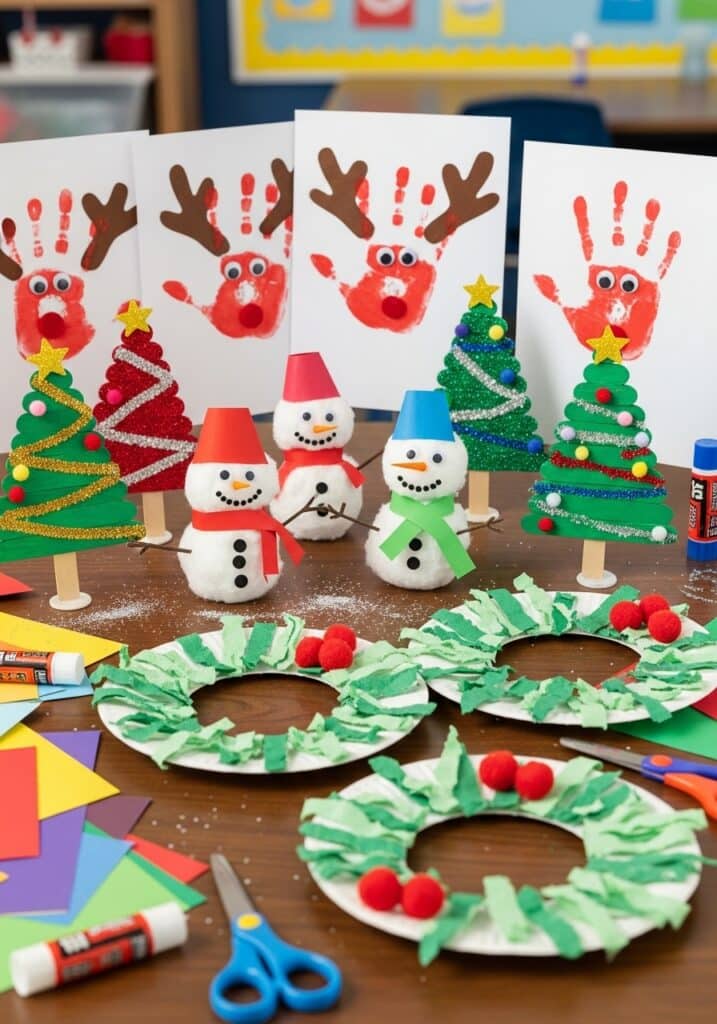
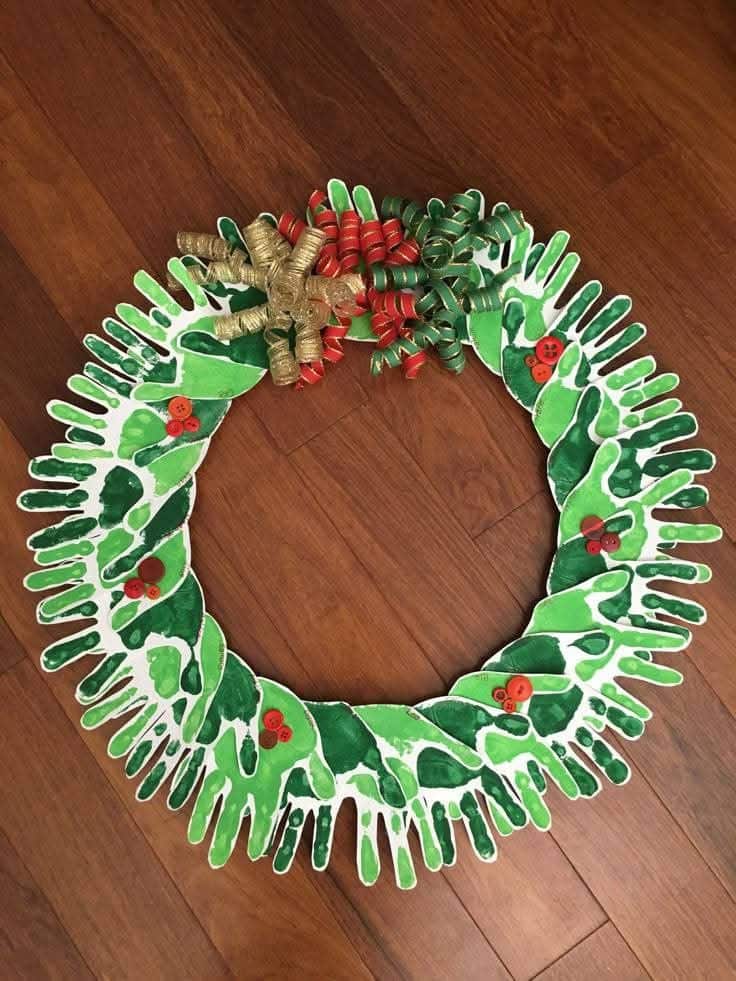
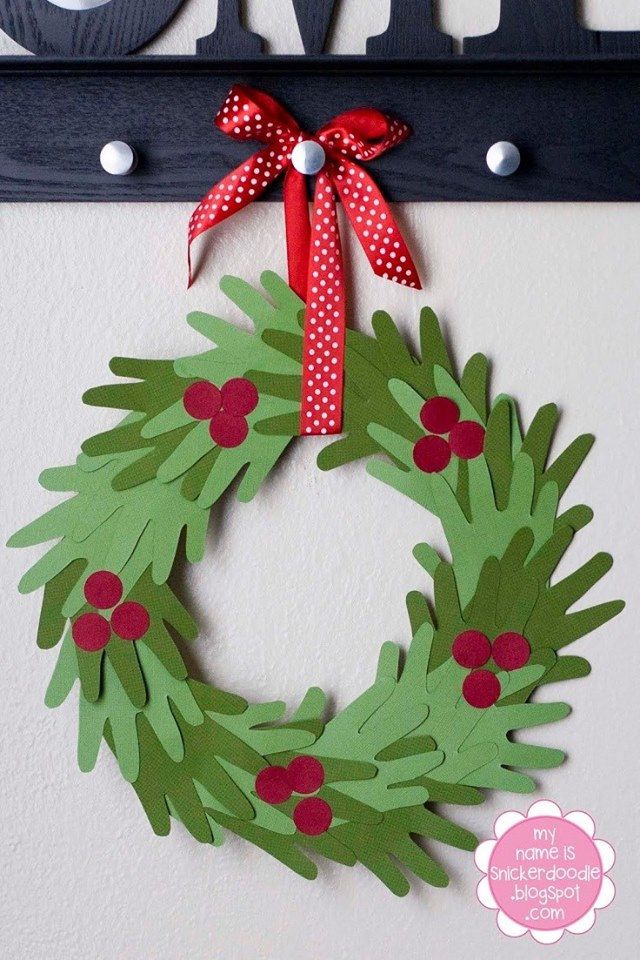
Handprint crafts are enduring keepsakes that capture a child’s growth and infuse personal charm into holiday decorations. The handprint wreath is a collaborative and highly visual project that allows preschoolers to engage with cutting, gluing, and repetitive actions, all contributing to a festive, collective display.
Developmental Benefits
Creating a handprint wreath offers significant developmental advantages:
- Fine Motor Skills: Tracing around their hand, cutting out the handprints (with assistance for younger children), and applying glue precisely are excellent exercises for developing fine motor control, grip strength, and scissor skills.
- Scissor Skills: For children ready for scissors, this craft provides repeated practice in cutting along lines, improving their coordination and control. For those not yet ready, tracing and tearing paper can be an alternative.
- Pre-Writing Skills: The act of tracing helps develop the muscle memory and coordination needed for holding a pencil and forming letters.
- Color Recognition: Working with various shades of green, red, and potentially other colors reinforces color identification.
- Following Instructions: The sequential steps of tracing, cutting, and gluing require children to listen to and follow multi-step instructions.
- Pattern and Repetition: The repetitive nature of creating multiple handprints introduces concepts of patterns and sequences, important for early mathematical thinking.
- Sense of Accomplishment: Seeing their individual handprints come together to form a beautiful wreath fosters a strong sense of pride and accomplishment.
- Collaboration: If done as a group, children learn about working together to create a larger piece, understanding that their individual contribution is vital to the whole.
Materials Needed
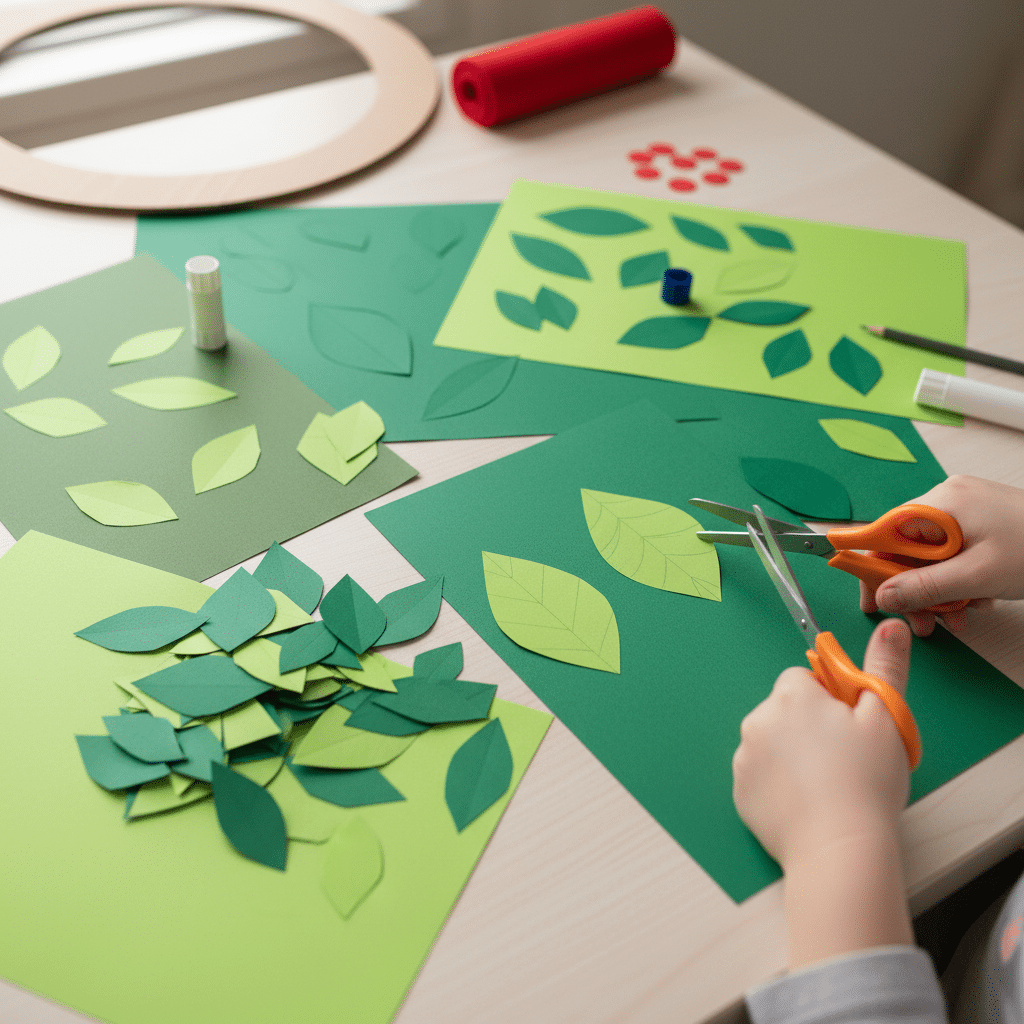
- Green construction paper (various shades of green for depth).
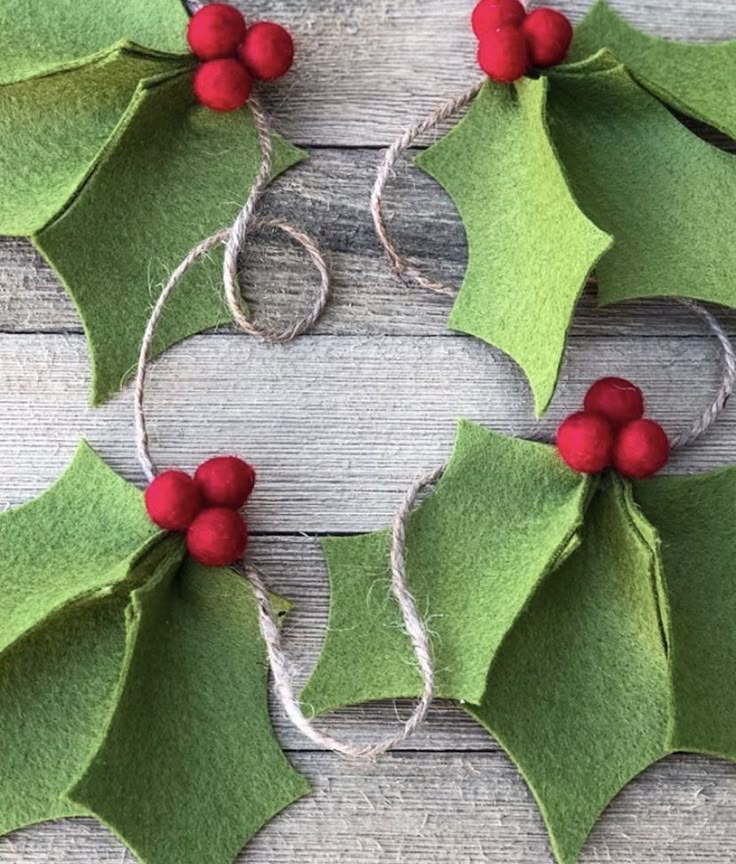
- Red construction paper or felt for berries and a bow.
- Pencil.
- Kid-safe scissors.
- Craft glue (PVA glue) or glue sticks.
- Large paper plate with the center cut out, or a cardboard ring (approx. 8-10 inches diameter) as the wreath base.
- Ribbon for hanging (optional).
Step-by-Step Instructions
- Trace Handprints: Have each child trace their hand several times onto green construction paper. Aim for at least 8-10 handprints per child, or more if doing a collaborative classroom wreath. Encourage them to trace different hands (left and right) for variety.
- Cut Out Handprints: Carefully cut out each traced handprint. For younger preschoolers, an adult may need to do the cutting or provide partial cuts for children to finish. Emphasize safe scissor usage.
- Prepare the Wreath Base: Take a paper plate and cut out the center to create a ring. This will serve as the sturdy base for the wreath. Alternatively, cut a ring from cardboard.
- Glue Handprints to the Base: Starting from the outer edge of the cardboard ring, instruct children to glue their green handprints down, overlapping them slightly. Point the fingers outward to create the “leafy” appearance of a wreath. Continue layering the handprints around the ring until it’s completely covered.
- Add Berries and Bow: From red construction paper or felt, cut out small circles for “berries” and a bow shape. Children can glue these onto the wreath. Cluster the berries in groups of three for a traditional look.
- Dry and Display: Allow the wreath to dry completely. Once dry, attach a loop of ribbon to the back for hanging.
Tips for Engagement and Adaptation
- Personalization: Encourage children to write their names on the back of their handprints before gluing them down.
- Texture Exploration: Use different types of green paper (e.g., cardstock, tissue paper, felt scraps) to add tactile variety to the wreath.
- Group Project: This craft is excellent for a classroom setting. Each child contributes their handprints, and together they create a large, impressive wreath for the classroom door. This teaches cooperation and visualizes the sum of individual efforts.
- Artistic Extension: Before gluing, children can decorate their individual handprints with glitter glue or small drawings, adding another layer of creativity. Exploring various artistic expressions, like those in 7 Inspiring Sketching Ideas for Your Sketchbook, can further spark their imagination.
- Seasonal Variation: This concept can be adapted for other seasons using different colors (e.g., fall leaves with orange, red, yellow handprints).
4. Cotton Ball Snowman Collages
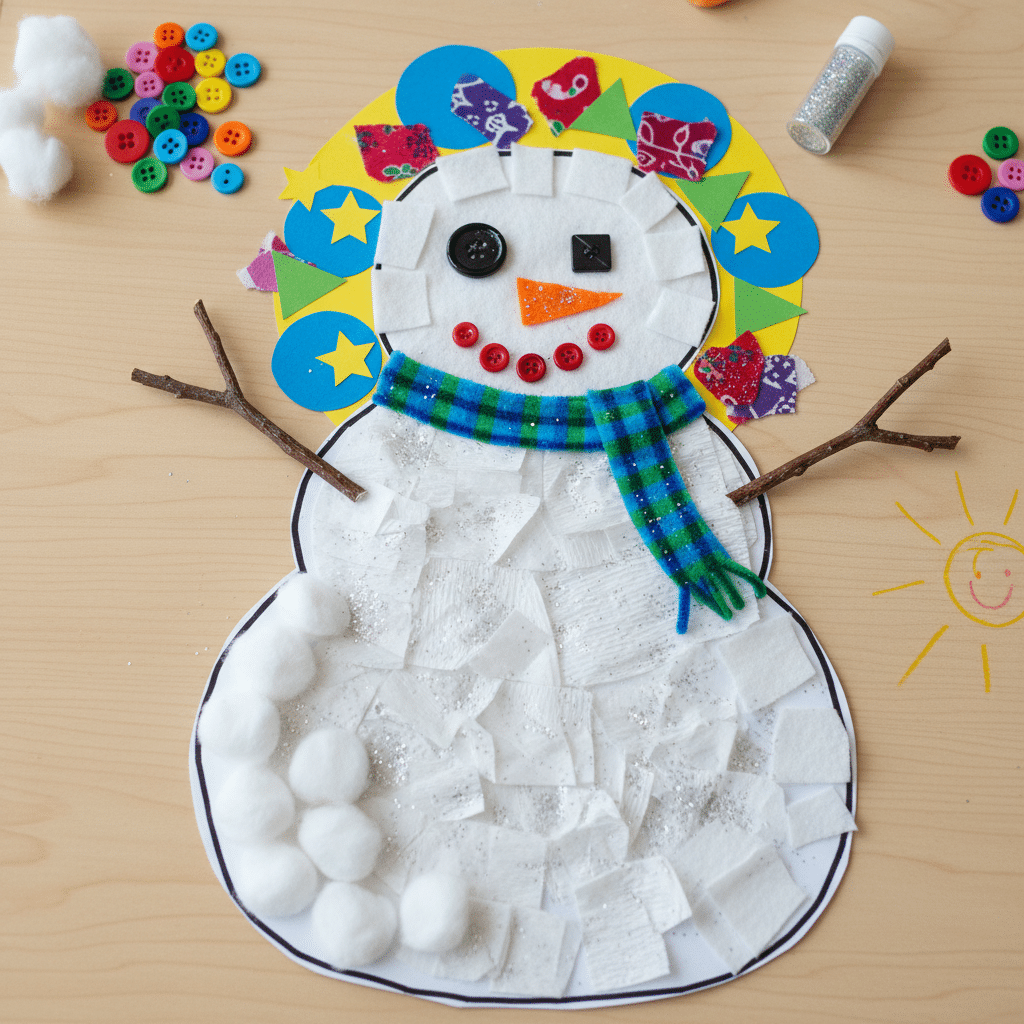
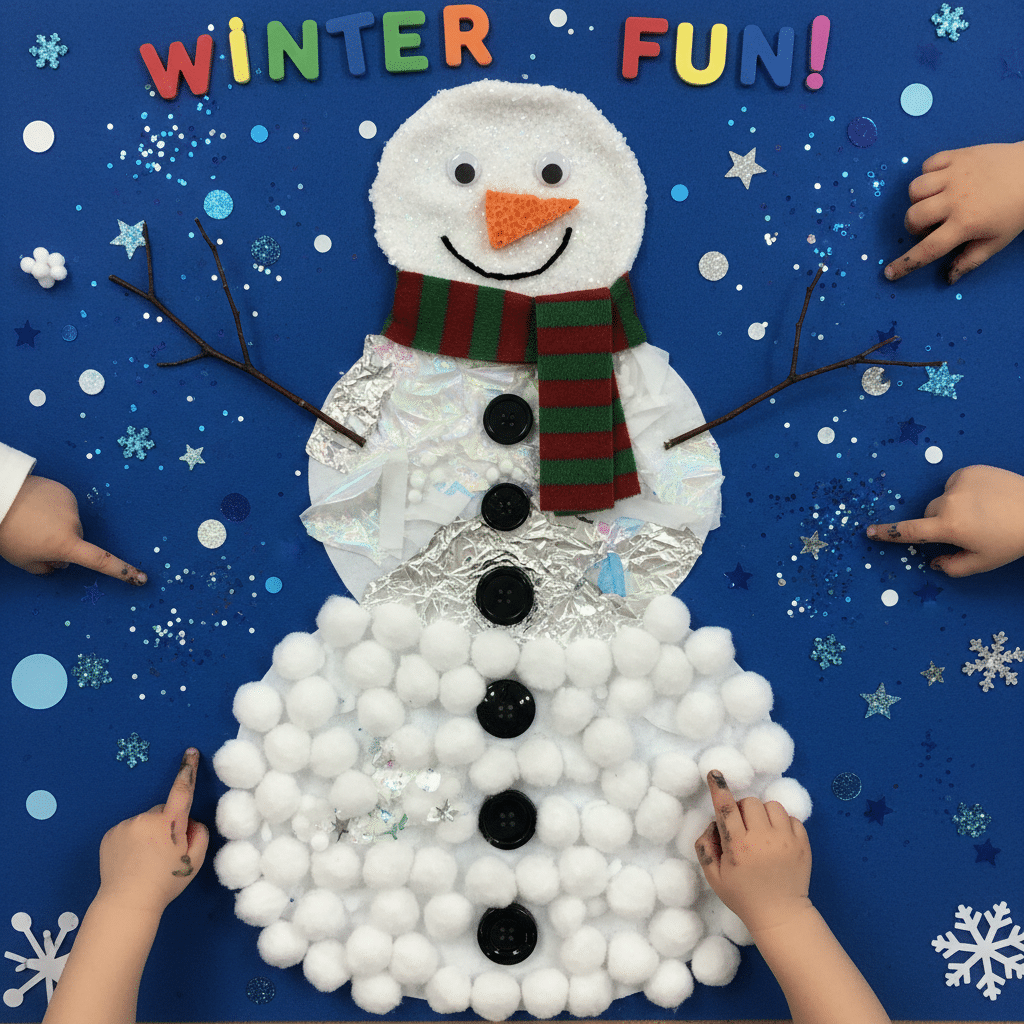
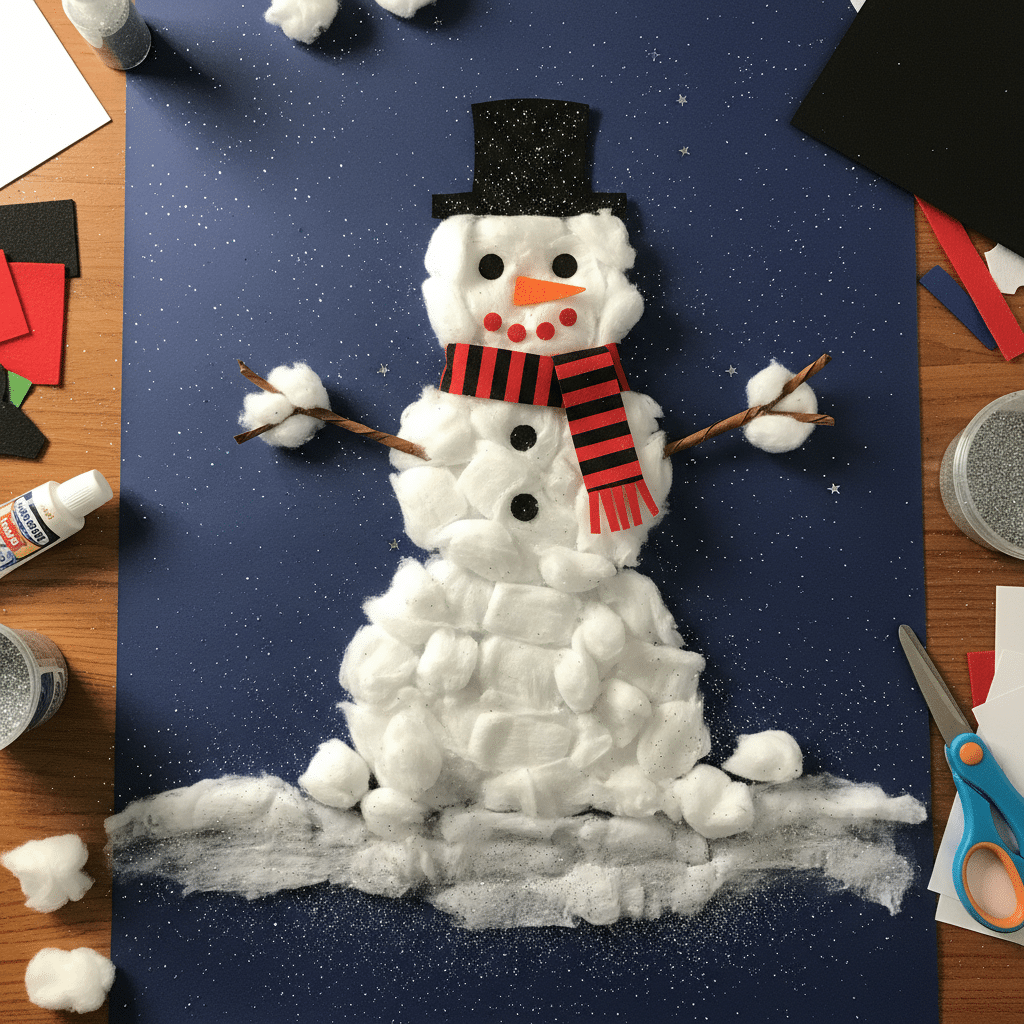
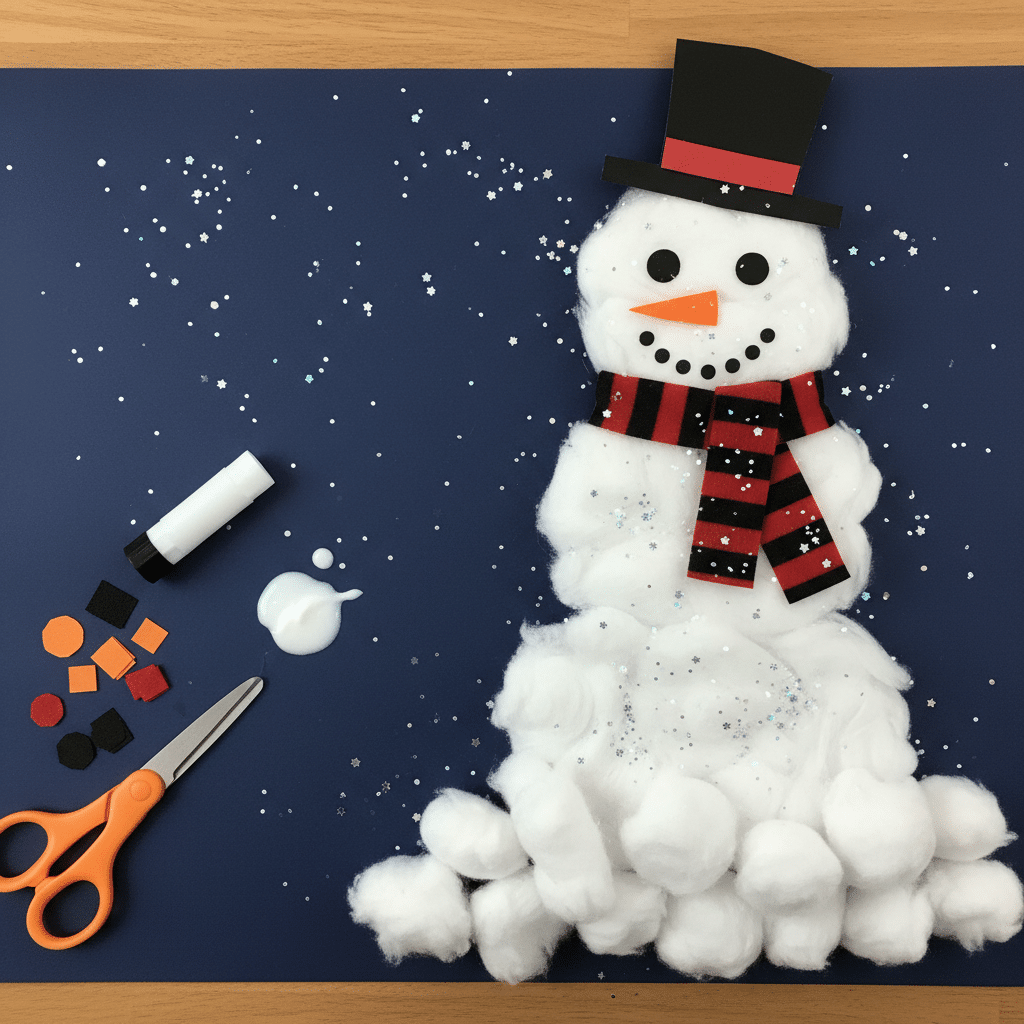
A snowman collage is a delightful, sensory-rich craft that allows preschoolers to create their version of a frosty friend without battling the winter chill. This activity is perfect for developing fine motor skills through manipulation of various textures, while also encouraging creative expression and shape recognition.
Developmental Benefits
This craft offers a wide array of benefits for young learners:
- Fine Motor Skills: Picking up individual cotton balls, gluing them, and arranging small facial features demand precise finger movements and a developing pincer grasp. This strengthens hand muscles crucial for writing and drawing.
- Sensory Exploration: The tactile experience of cotton balls (soft, fluffy), paper (smooth, rough), and glue provides stimulating sensory input, aiding in sensory integration and exploration of different textures.
- Shape Recognition: Children identify and manipulate basic shapes like circles (for the snowman’s body, eyes, buttons) and triangles (for the carrot nose), reinforcing early geometry concepts.
- Spatial Reasoning: Deciding where to place the snowman’s body parts and features on the paper helps children develop an understanding of space, proportion, and arrangement.
- Creativity and Imagination: Children imagine their snowman’s personality and design, choosing expressions and accessories. This fosters imaginative play and self-expression.
- Following Simple Directions: The step-by-step nature of building the snowman, from body to features, helps children practice following instructions.
- Color Identification: While primarily white, the craft can introduce other colors through construction paper accessories (e.g., black for eyes, orange for nose, red for scarf).
Materials Needed
- Blue or black construction paper (for the background, representing night or sky).
- Cotton balls (plenty!).
- Craft glue (PVA glue) or glue sticks.
- Small pieces of orange, black, and red construction paper or felt for facial features (nose, eyes, mouth) and accessories (scarf, hat).
- Kid-safe scissors (for adult pre-cutting or child use, depending on skill).
- Glitter or glitter glue (optional, for “snow”).
Step-by-Step Instructions
- Prepare the Background: Give each child a piece of blue or black construction paper. This will be their winter sky.
- Draw Snowman Outlines (Optional): For younger children, an adult might lightly draw two or three overlapping circles on the paper to guide where the cotton balls should go, forming the snowman’s body.
- Glue the Snowman’s Body: Instruct children to apply glue within the drawn circles or directly onto the paper in a snowman shape (one large circle for the bottom, a medium one for the middle, and a smaller one for the head).
- Attach Cotton Balls: Have children pick up cotton balls one by one and press them onto the glued areas, completely filling in the snowman’s body. Encourage them to be thorough to create a fluffy effect.
- Create Facial Features and Accessories:
- Eyes: Cut two small black circles for eyes.
- Nose: Cut a small orange triangle for a carrot nose.
- Mouth: Cut several tiny black circles or a curved line for the mouth.
- Hat/Scarf: Cut strips of red or other colored paper/felt for a scarf and a simple hat shape.
- Add Features: Once the cotton ball body is complete, children can glue the pre-cut facial features and accessories onto their snowman.
- Optional “Snow”: If desired, apply small dots or lines of glue around the snowman and sprinkle with glitter for falling snow.
- Dry and Display: Allow the collages to dry flat for several hours or overnight. These make charming winter decorations. When considering ways to make a room more engaging for children, remember that creating dedicated spaces for art and play is key, as highlighted in Functional and Fun Kids Room Design Tips.
Tips for Engagement and Adaptation
- Vary Textures: Introduce other white textured materials like crumpled tissue paper, white felt scraps, or even shredded paper for additional sensory input.
- Expressive Faces: Encourage children to make their snowman happy, silly, or surprised by arranging the mouth and eye shapes differently. This promotes understanding of emotions.
- Story Time Connection: Read a book about snowmen (e.g., “The Snowman” by Raymond Briggs) before or during the activity to inspire their creations.
- Group Mural: Instead of individual snowmen, work together on a large sheet of paper to create a snowy scene with multiple cotton ball snowmen.
- Clean-up Strategy: Have a designated “cotton ball catcher” container and remind children that cotton balls can stick everywhere, so gentle handling is best.
5. Pipe Cleaner Candy Canes
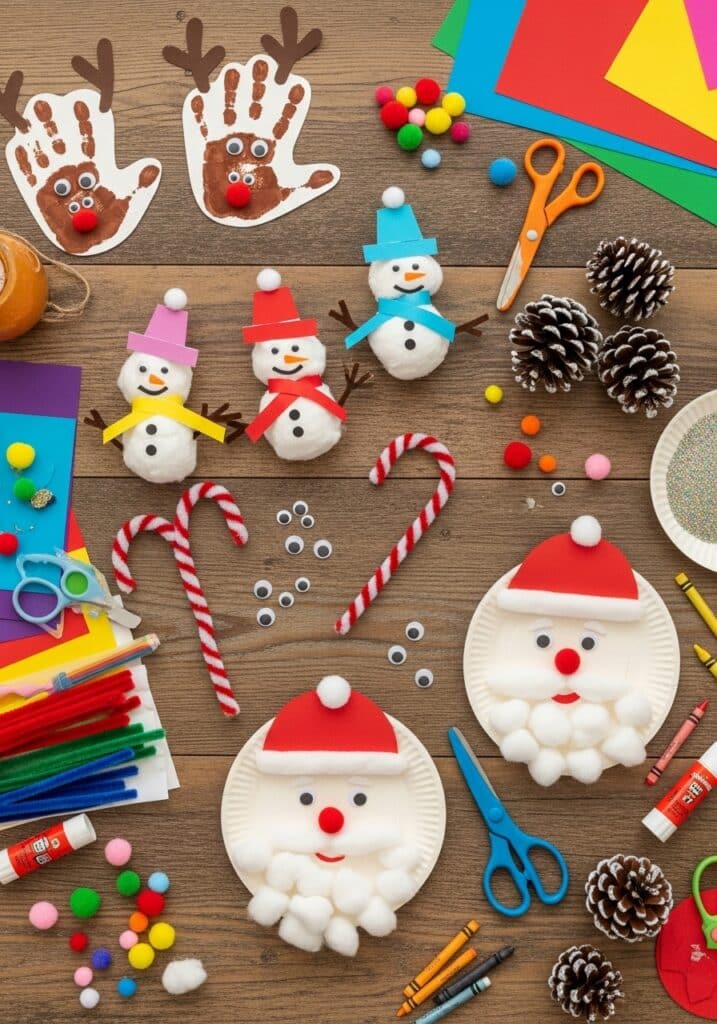
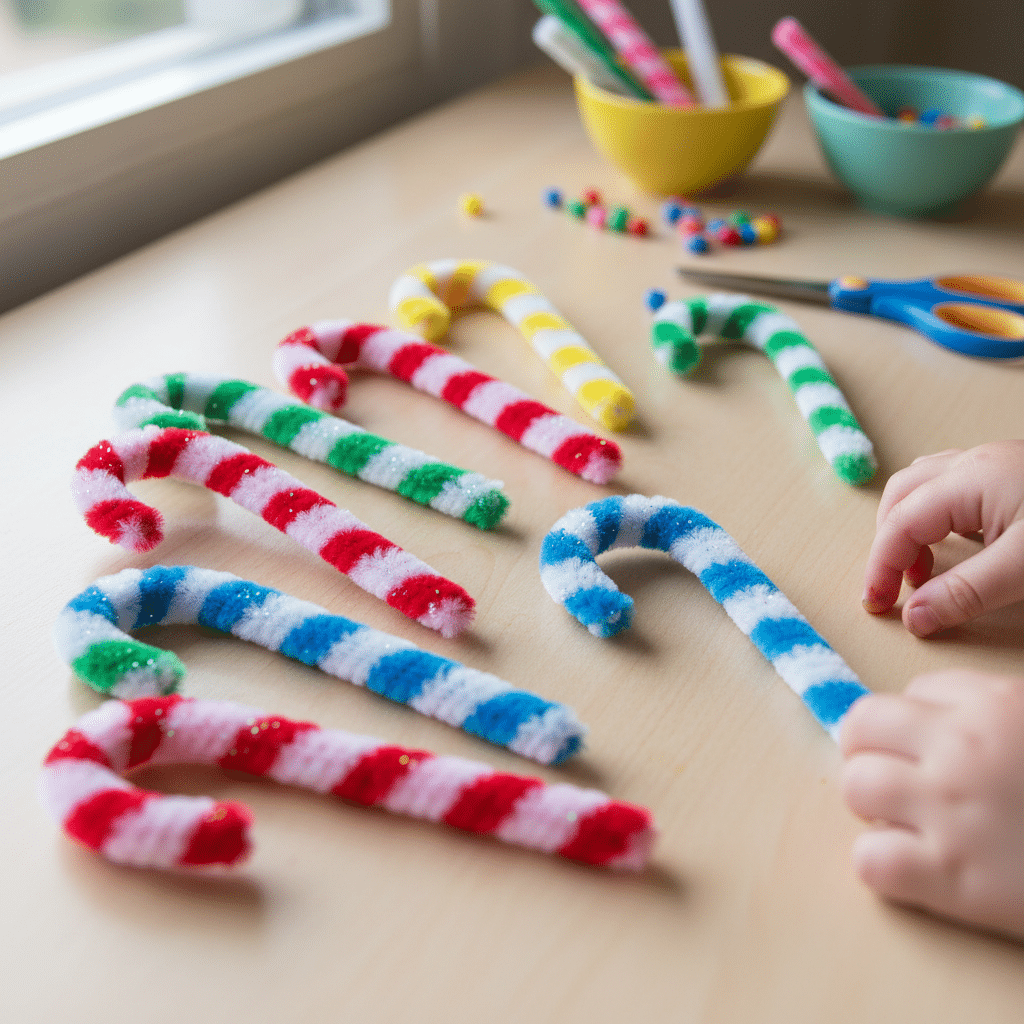
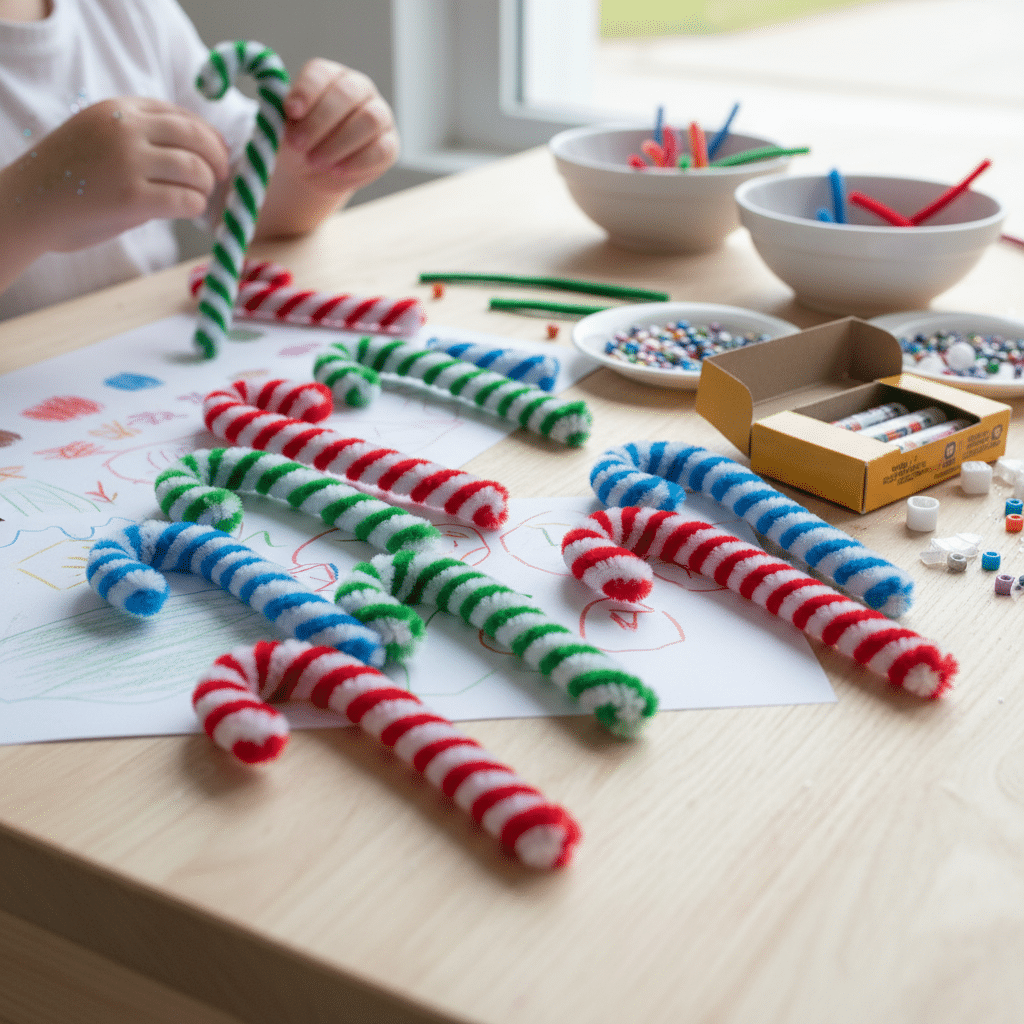
Pipe cleaner candy canes are a delightful and simple craft that offers significant benefits for developing fine motor skills, color recognition, and pattern creation in preschoolers. This activity is not only visually appealing but also provides a wonderful tactile experience, making it highly engaging for young hands.
Developmental Benefits
Crafting pipe cleaner candy canes contributes to several key developmental areas:
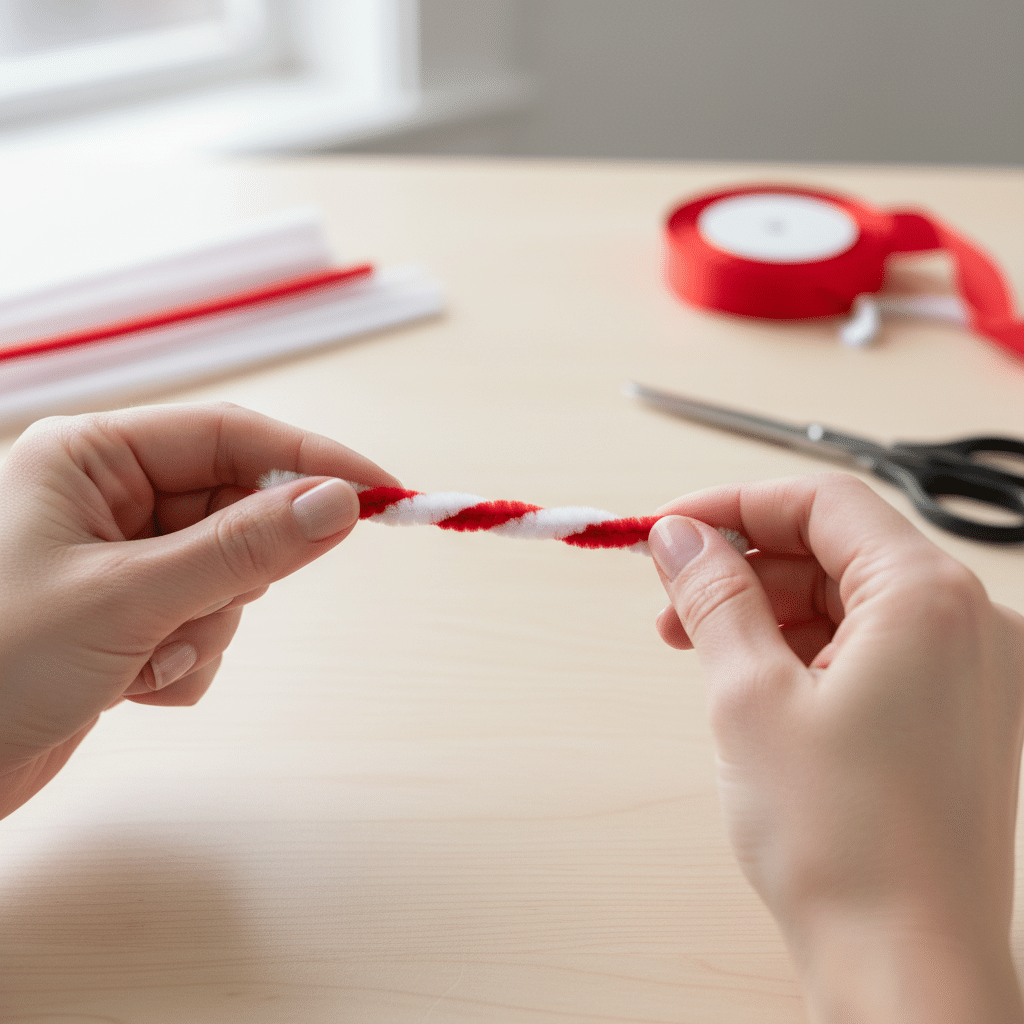
- Fine Motor Skills: Twisting two pipe cleaners together, especially in a spiral, requires dexterity and coordinated movements of both hands. This strengthens the small muscles in the fingers and hands, crucial for tasks like buttoning clothes, zipping, and writing.
- Bilateral Coordination: The act of holding one pipe cleaner steady while wrapping another around it demands the simultaneous use of both sides of the body, enhancing bilateral coordination.
- Color Recognition and Patterning: Children work with specific colors (traditionally red and white) and learn to alternate them to create a striped pattern. This introduces basic concepts of sequencing and repetition, foundational to early math and literacy.
- Shape Recognition: Bending the twisted pipe cleaner into a “J” shape reinforces the recognition of simple forms and curves.
- Problem-Solving: If the pipe cleaners don’t twist smoothly or unravel, children learn to adjust their grip and technique to achieve the desired outcome.
- Spatial Awareness: Understanding how the two pipe cleaners intertwine to create a unified object helps develop spatial reasoning.
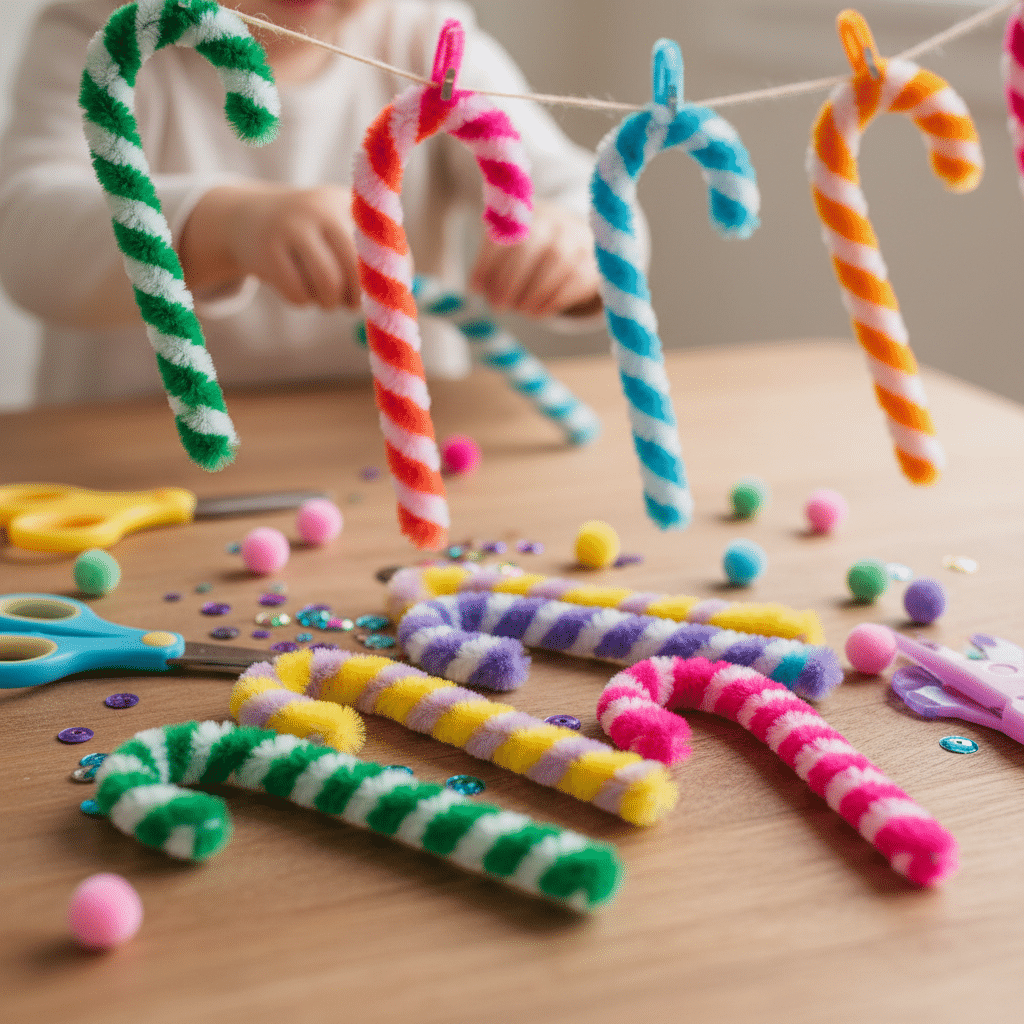
- Creativity and Choice: While traditional candy canes are red and white, children can experiment with different color combinations, expressing their individuality and design preferences.
Materials Needed
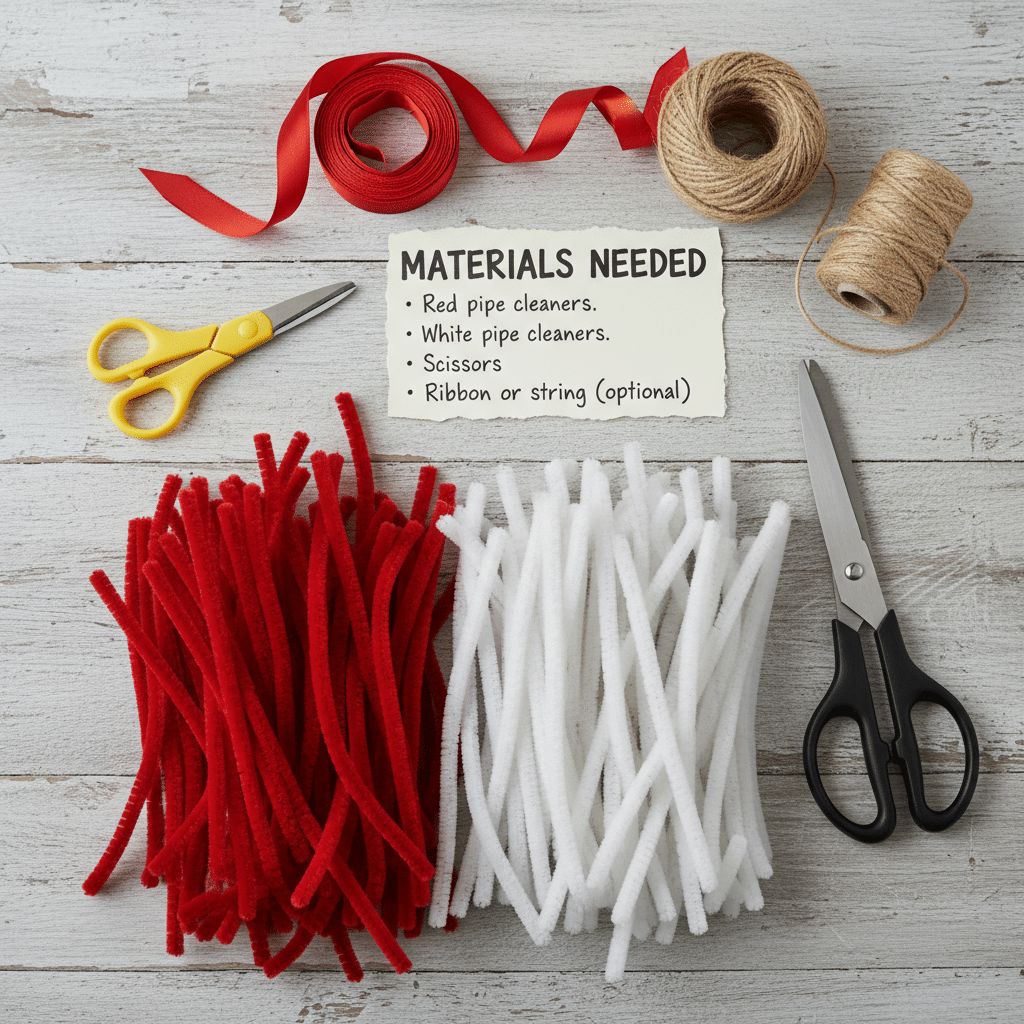
- Red pipe cleaners.
- White pipe cleaners.
- Scissors (for adult use, or child-safe scissors if children are capable of cutting pipe cleaners).
- Ribbon or string (optional, for hanging).
Step-by-Step Instructions
- Select Colors: Give each child one red and one white pipe cleaner. You can offer other festive colors if you wish to encourage more creative variations.
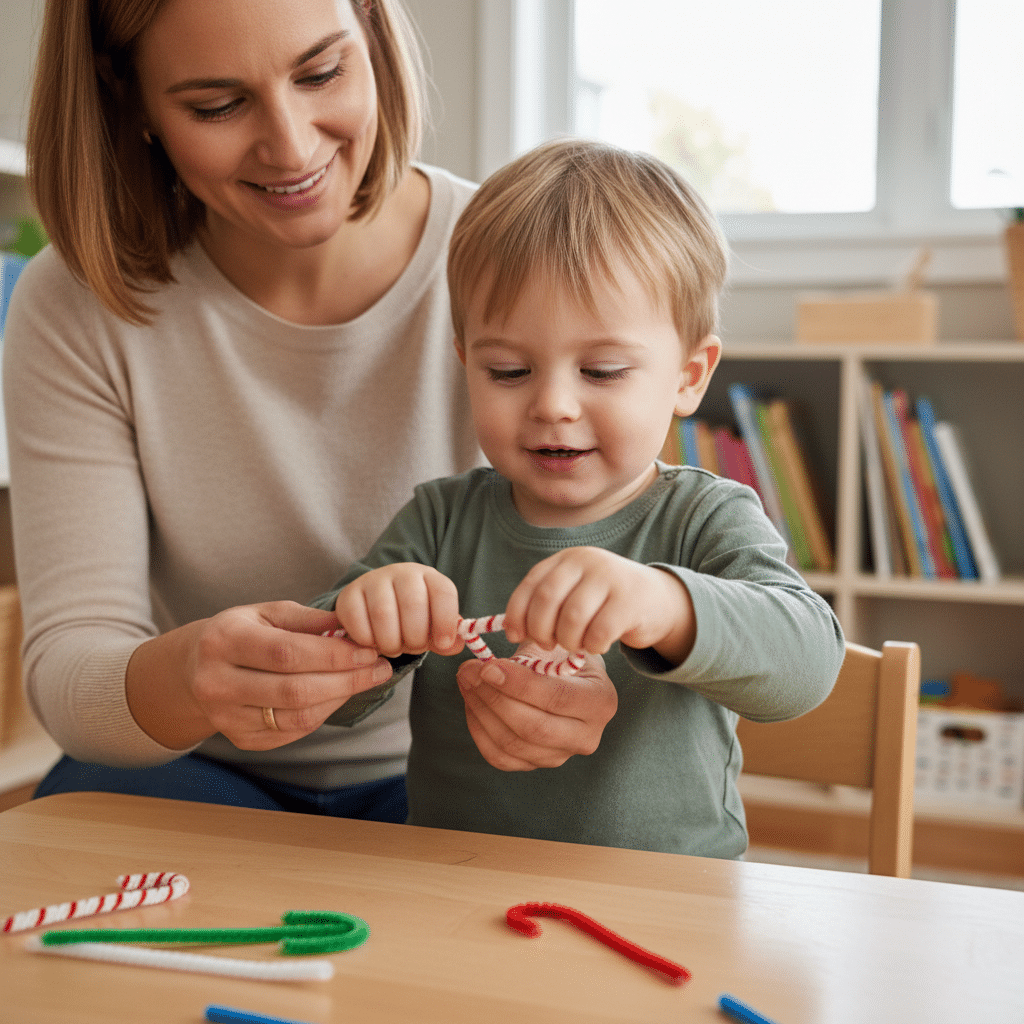
- Prepare for Twisting: Place the two pipe cleaners side-by-side. For younger children, an adult might twist the first half-inch together to get them started, or secure one end with a twist tie.
- Twist Together: Instruct children to hold both pipe cleaners at one end with one hand. With the other hand, they should start twisting the two pipe cleaners around each other, moving down their length. Encourage them to keep the twists tight and even to create a clear striped pattern.
- Form the Cane Shape: Once the entire length is twisted, help children bend one end of the twisted pipe cleaner into a hook shape, forming the iconic candy cane “J.”
- Finishing Touches (Optional): If desired, tie a small loop of ribbon or string to the top of the candy cane for hanging on a tree or as a festive decoration.
- Display: These pipe cleaner candy canes can be hung on a Christmas tree, used as package toppers, or simply displayed as a testament to their crafting efforts. They also make wonderful additions to gift bags or as small tokens of appreciation. For displaying various creations, thinking about 5 DIY Wall Design Ideas might inspire ways to showcase children’s artwork prominently and proudly.
Tips for Engagement and Adaptation
- Pre-Twist for Beginners: For very young preschoolers (2-3 years old), adults can pre-twist the pipe cleaners partially, allowing the child to complete the easier middle section.
- Color Exploration: Encourage children to use non-traditional colors (e.g., green and white, blue and silver) to create unique candy canes. Discuss how different colors make them feel.
- Counting: Have children count how many twists they make, or count the stripes, incorporating early math skills.
- Sensory Bin Addition: Add pipe cleaners of various colors and textures to a sensory bin alongside other craft items for free exploration.
- Create a Garland: Make multiple pipe cleaner candy canes and string them together to create a festive garland.
- Safety First: Supervise children when cutting pipe cleaners, if they are using scissors. The wire inside can be sharp if not cut cleanly.
Conclusion
Engaging preschoolers in Christmas crafts is a delightful way to celebrate the holiday season while simultaneously nurturing their holistic development. Each of these five crafts—from the personalized charm of fingerprint ornaments to the tactile experience of pinecone trees, the collaborative effort of handprint wreaths, the fluffy fun of snowman collages, and the fine motor challenge of pipe cleaner candy canes—offers a unique blend of learning and festive joy.
These activities are carefully chosen to enhance fine motor skills, hand-eye coordination, cognitive development, sensory exploration, and creative expression. They provide opportunities for children to make choices, follow instructions, and take pride in their unique creations. Beyond the developmental benefits, these crafts create cherished memories and tangible keepsakes that families will treasure for years to come.
So, gather your supplies, set up a cozy crafting corner, and prepare to “unwrap joy” this holiday season. Encourage experimentation, celebrate every effort, and embrace the beautiful imperfections that make each child’s craft truly special. The true gift lies not just in the finished product, but in the shared laughter, the concentrated effort, and the spirit of creativity that fills the air. Let the crafting begin, and watch as your preschoolers shine with holiday cheer and newfound skills.
- 483shares
- Facebook0
- Pinterest480
- Twitter3
- Reddit0


