Understanding face anatomy is key for any artist who wants to create realistic and expressive portraits. Knowing the structure of the bones, muscles, and skin helps artists capture accurate shapes and subtle details that bring faces to life. This knowledge builds a solid foundation for drawing or painting faces with confidence.
Many artists find that studying the skull and muscle forms first allows them to improve depth and realism in their work. By breaking down the face into simple parts, they can better see how features fit together and change with different angles or expressions. This approach helps make every portrait feel unique and believable.
Fundamentals of Face Anatomy Art
Understanding face anatomy art means knowing the key parts that make up the face, how those parts relate in size and distance, and how to break down complex shapes into simpler forms. This helps artists create realistic, balanced, and expressive portraits.
Key Facial Structures
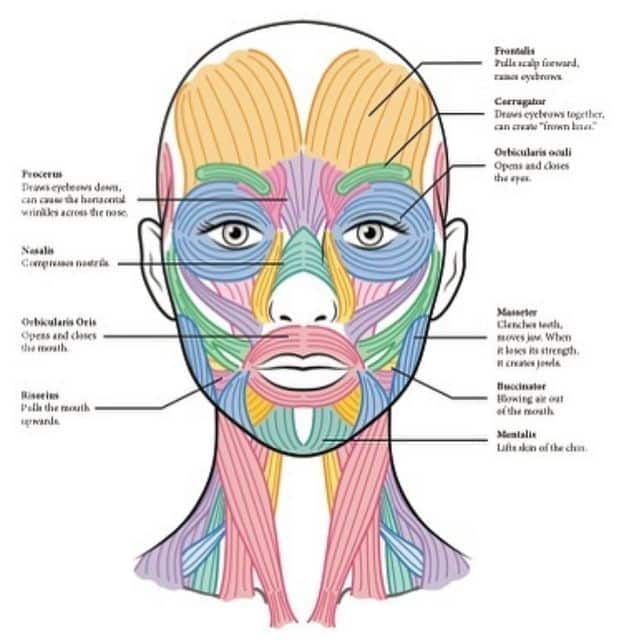
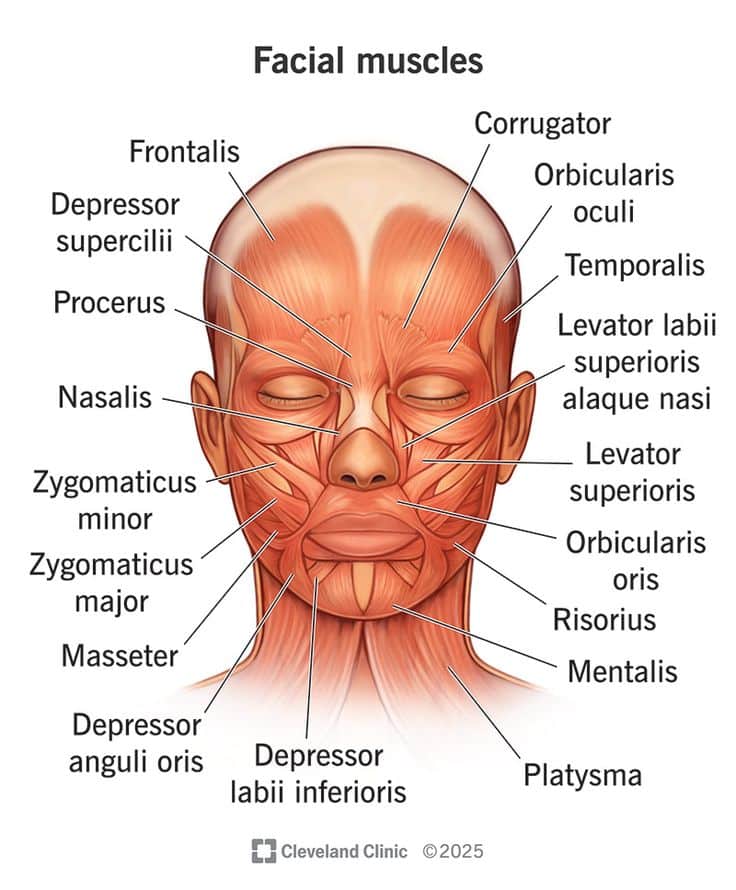
The face includes bones, muscles, and soft tissues that create its shape. The skull forms the base, especially the cheekbones, jawline, and eye sockets. These bones give the face its main contours.
Muscles control facial expressions. Important ones include the orbicularis oculi around the eyes and the zygomaticus muscles that lift the cheeks. Fat pads add fullness and smooth transitions in areas like the cheeks and under the eyes.
Artists should focus on placing eyes, nose, mouth, and ears correctly, as these are the most recognizable features. Knowing the underlying structure helps avoid mistakes, like making eyes too wide or a nose too flat.
Proportions of the Face
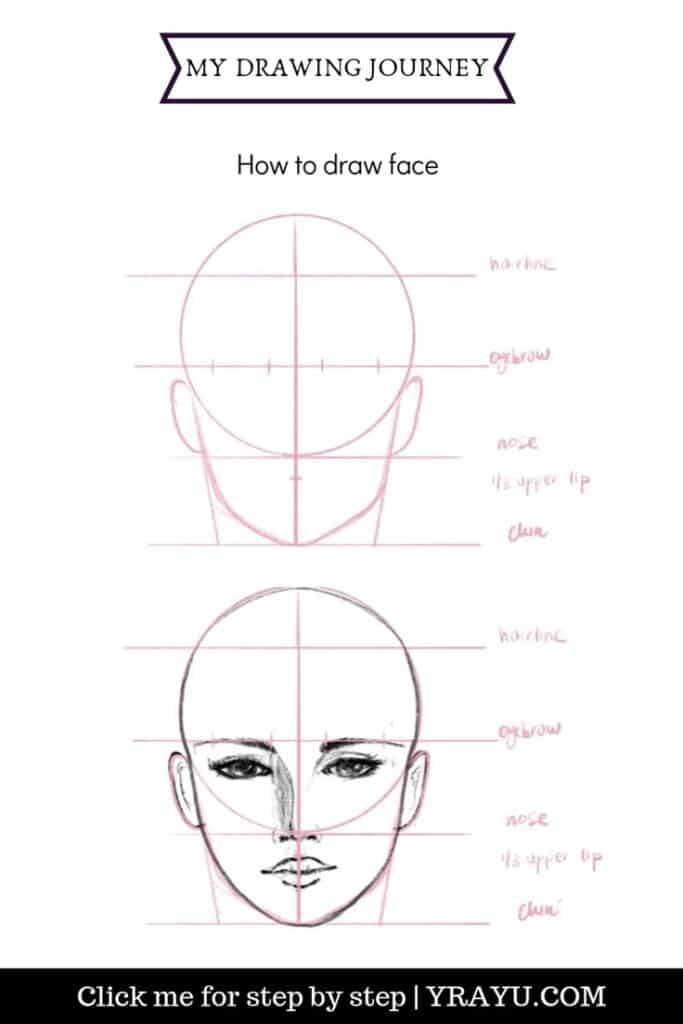
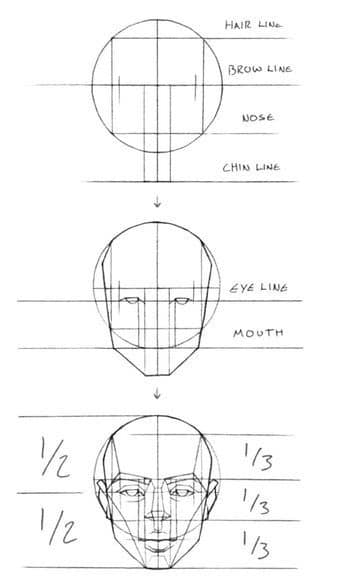
Proportions guide the placement and size of facial features. A common rule is to divide the face into three equal parts:
- From the hairline to the eyebrows
- From the eyebrows to the bottom of the nose
- From the nose to the chin
The eyes usually sit halfway down the head. The space between the eyes is about one eye’s width. The mouth is typically aligned with the pupils.
Understanding these proportions helps the face look natural and balanced. Small changes can change the character’s mood or age.
Planes and Volumes
Breaking the face into planes means seeing it as flat surfaces that catch light and shadow differently. This technique helps artists understand how light shapes the face.
The face has major planes like the forehead, cheeks, nose, and chin, each slanting in different directions. Recognizing these planes simplifies complex curves.
Volume means thinking of the face in 3D shapes like spheres, cylinders, and boxes. This view helps artists build the face from simple forms before adding details, making drawings more solid and believable.
Drawing Facial Features
Drawing facial features starts with understanding their shapes, placement, and how they connect to the face. Each feature has unique details that bring a portrait to life. It helps to observe carefully and practice layering basic shapes before adding details and shading.
Eyes and Eyebrows
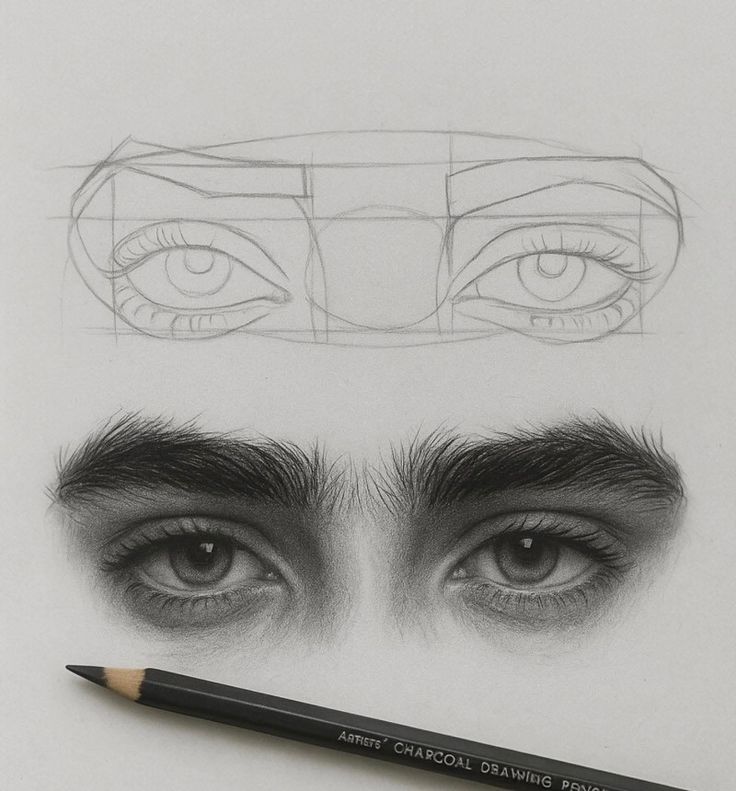
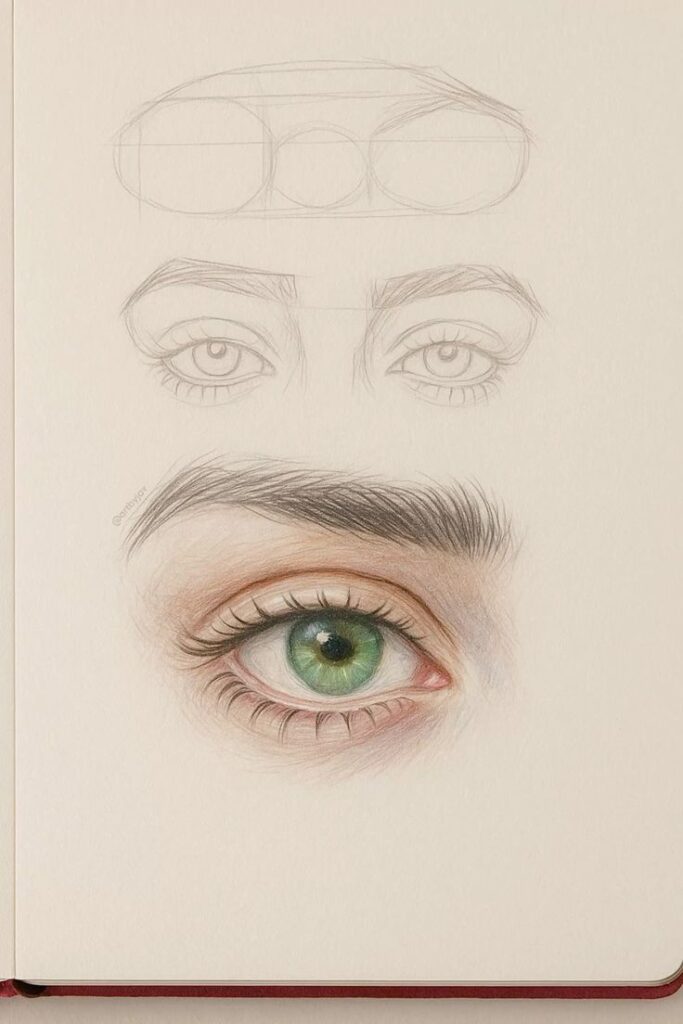
The eyes are usually the first features to draw because they strongly express emotion. Start by sketching the eye shape as an almond, keeping the top lid thicker than the bottom. The iris is a circle, often hidden partially by the eyelids.
Eyebrows sit above the eyes and frame them. Their shape changes with facial expression and differs from person to person. Use soft lines to block in the eyebrow’s general shape before adding individual hairs.
Shading around the eyes helps show depth. Pay attention to how light hits the eyeball and the shadows under the lids. Highlights on the iris make the eyes look alive.
Nose Structure
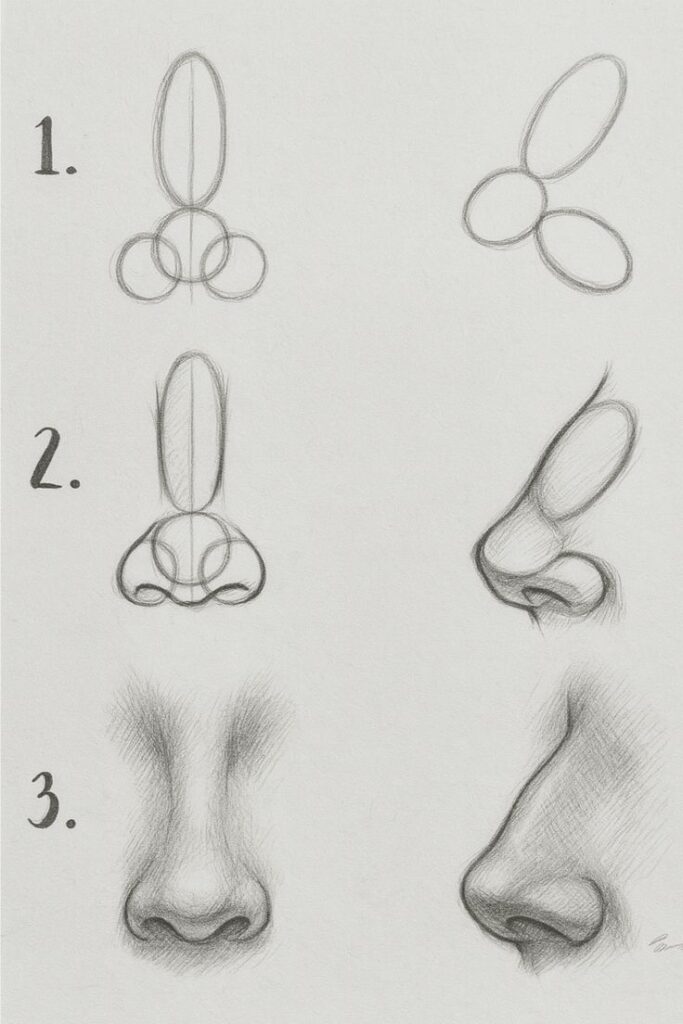
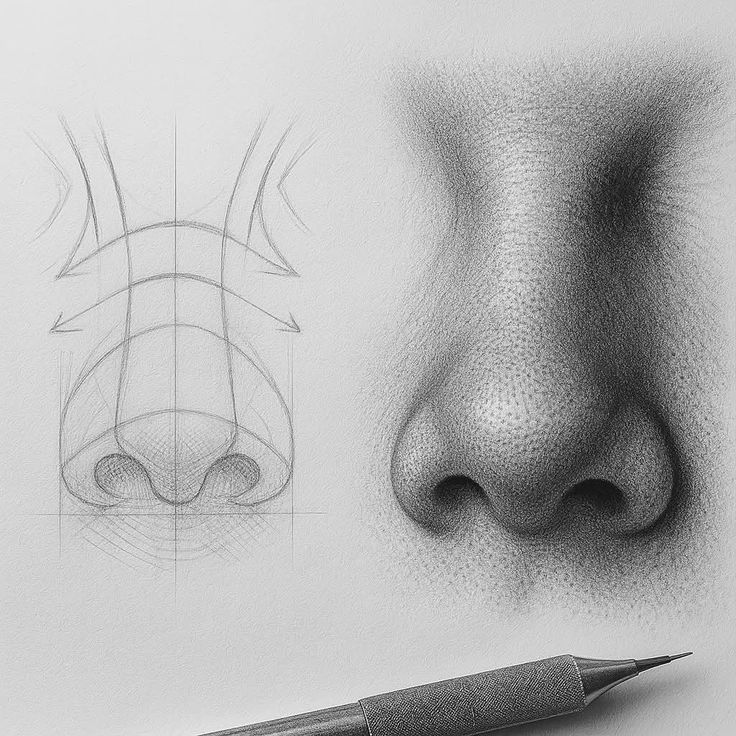
The nose has a three-dimensional form made of simple shapes. Begin with a basic outline of the bridge and nostrils. The nose tip is rounded, while the nostrils are shaped like small ovals or curves.
Focus on how light falls on the nose’s bridge and sides. Shadows under the nose and around the nostrils create depth. Avoid hard lines; the nose’s edges blend softly into the face.
Remember, the nose changes shape depending on the angle. Practice drawing it from the front, side, and three-quarter views to understand its form well.
Lips and Mouth
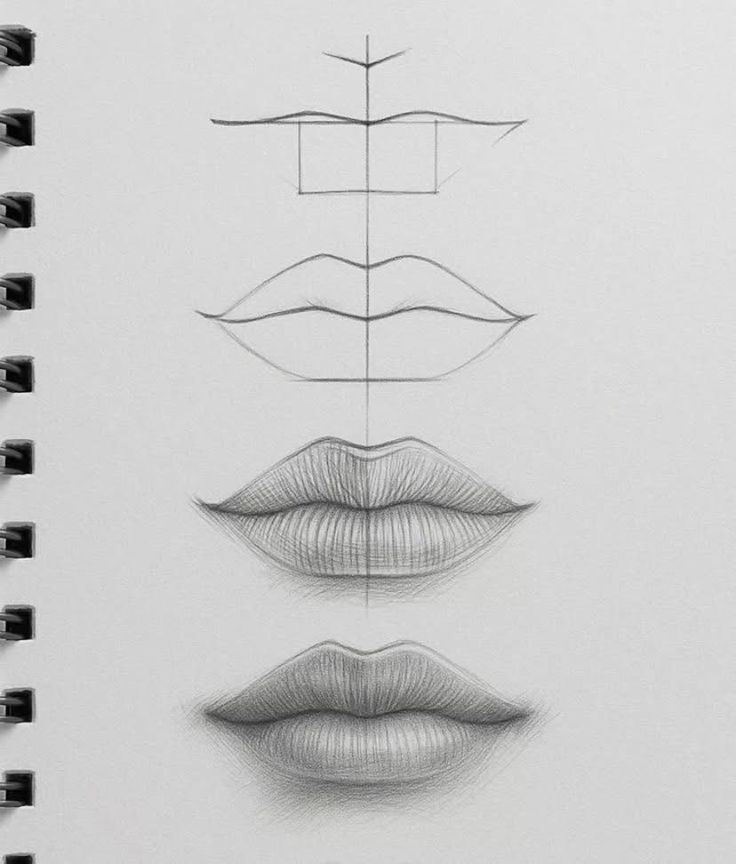
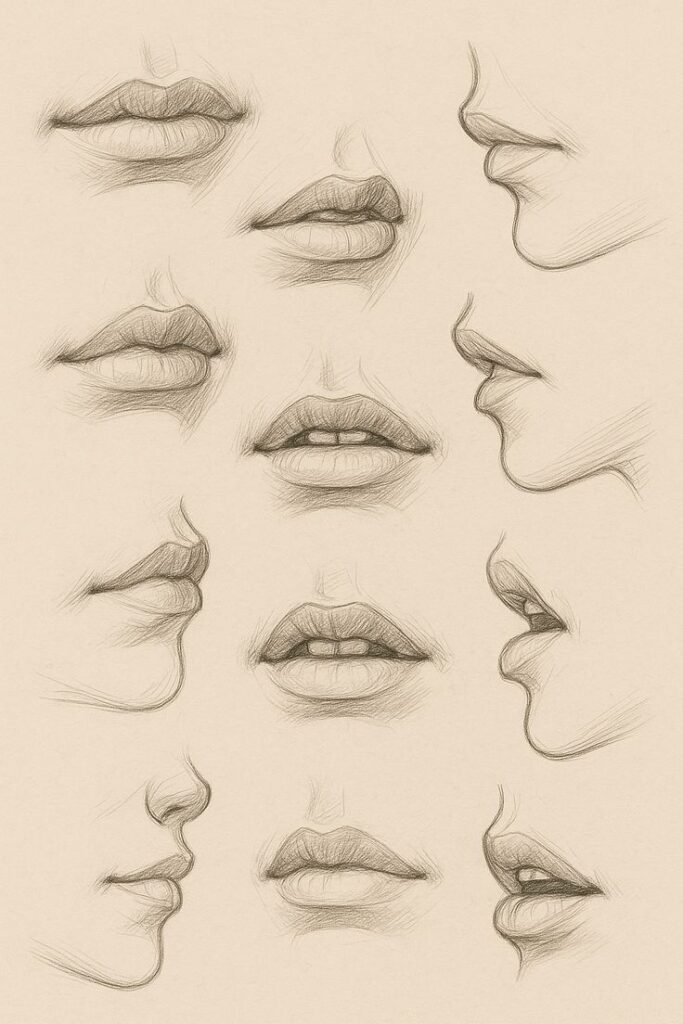
Lips have a distinct structure with the upper lip usually thinner and the lower lip fuller. Start by drawing a soft “M” shape for the top lip and a wider curve for the bottom.
The corners of the mouth are important for showing emotion. They can lift or drop depending on the expression. Lightly sketch these areas before defining the lips’ edges.
Shadows under the lower lip and around the mouth give volume. Use smooth shading to avoid harsh lines and show the lips as part of the face’s round shape.
Understanding Head Shapes
The shape of the head is built from distinct parts working together. These parts include the skull, jawline, and cheekbones. Each part affects how light and shadow play across the face. Artists use these shapes to create realistic and lifelike portraits.
Cranial Structure
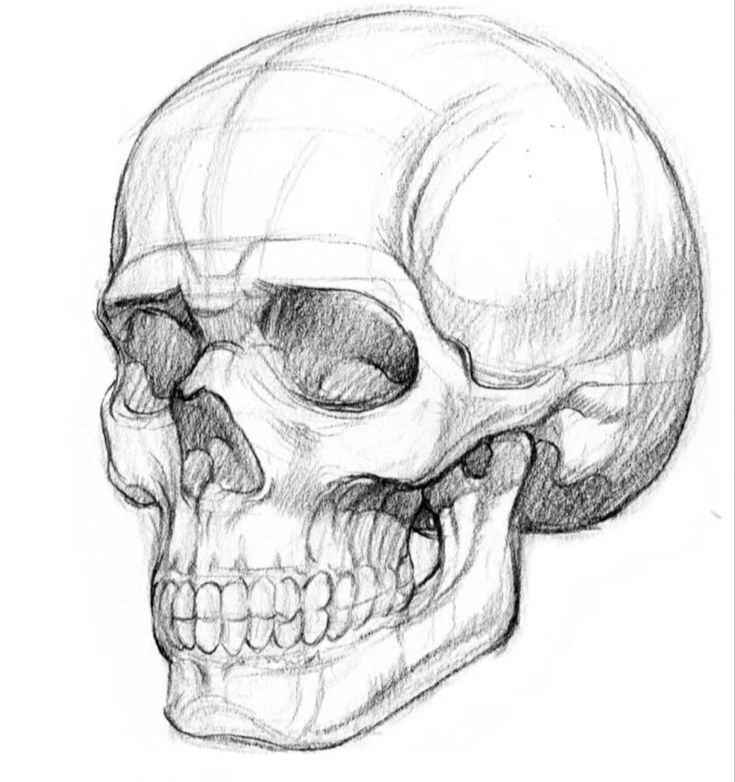
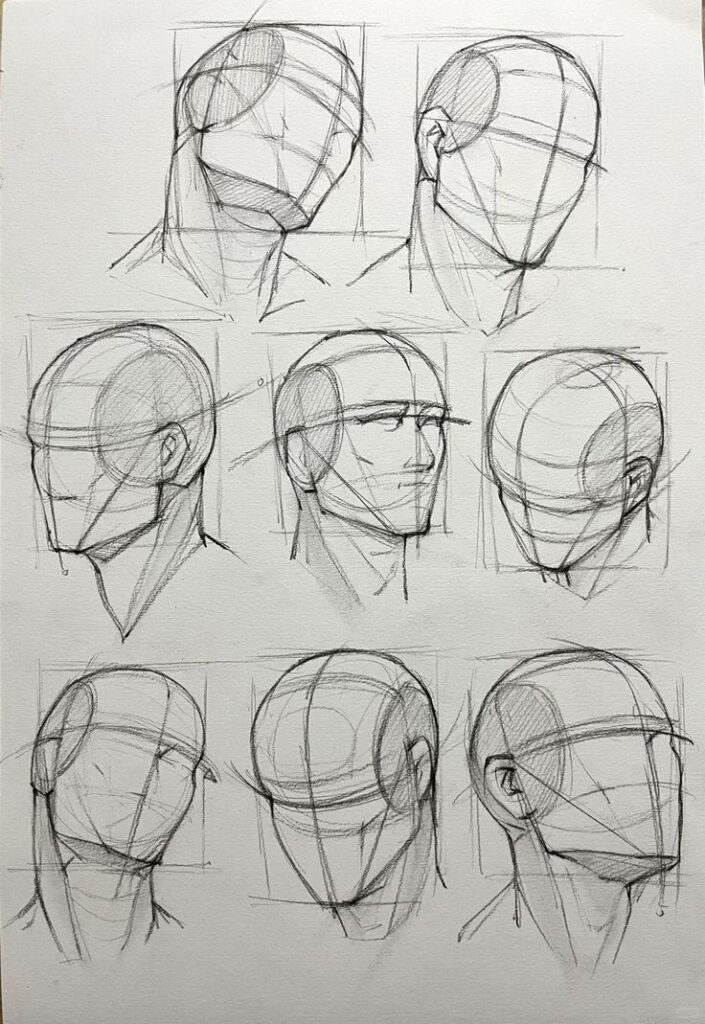
The cranial structure forms the main shape of the head. It includes the rounded part that holds the brain and provides the basic form the face sits on. The forehead shape can be broad or narrow, and its slope varies between people.
Understanding the skull’s proportions helps artists build a believable head. The skull’s size in relation to the face controls how high or low features like the eyes and nose appear. It is often thought of as an egg shape, but artists add subtle planes to show form more clearly.
Jawline Anatomy
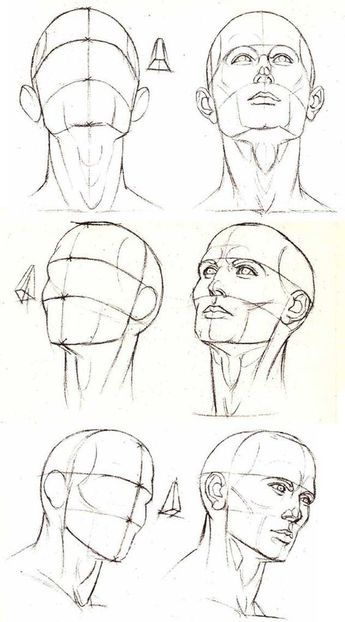
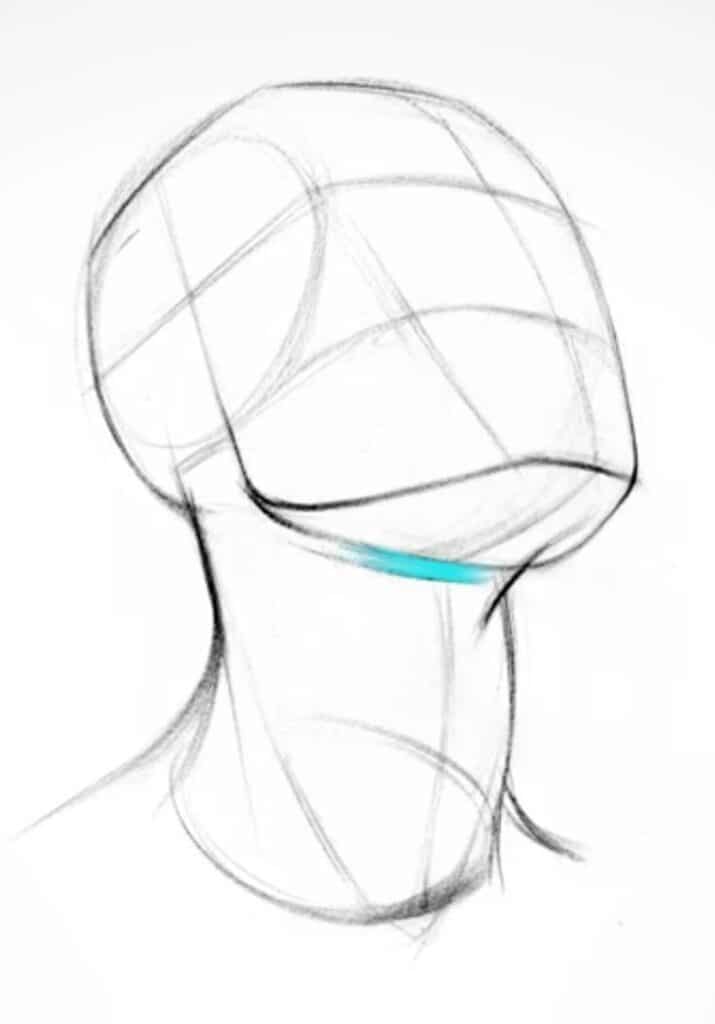
The jawline shapes the lower face and defines the overall head silhouette. It can be strong and angular or soft and rounded. A sharp jawline gives a face a more masculine or defined look, while a softer jawline often reads as more feminine.
Artists study the jaw’s angle, width, and length to capture likeness. The jaw connects to the skull at the ear area, where the hinge moves the mouth. Knowing this helps in drawing different expressions and poses accurately.
Cheekbones and Contours
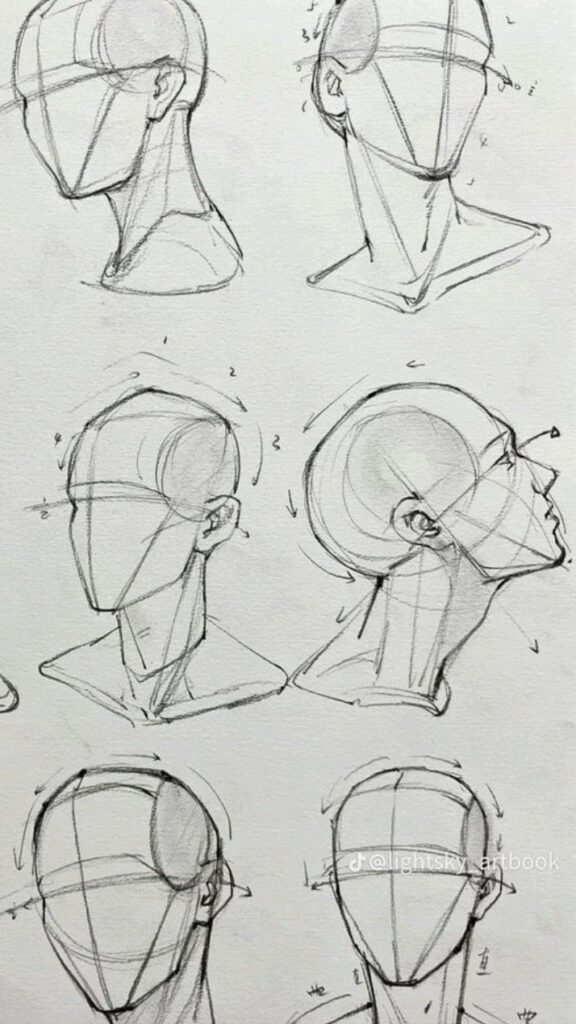
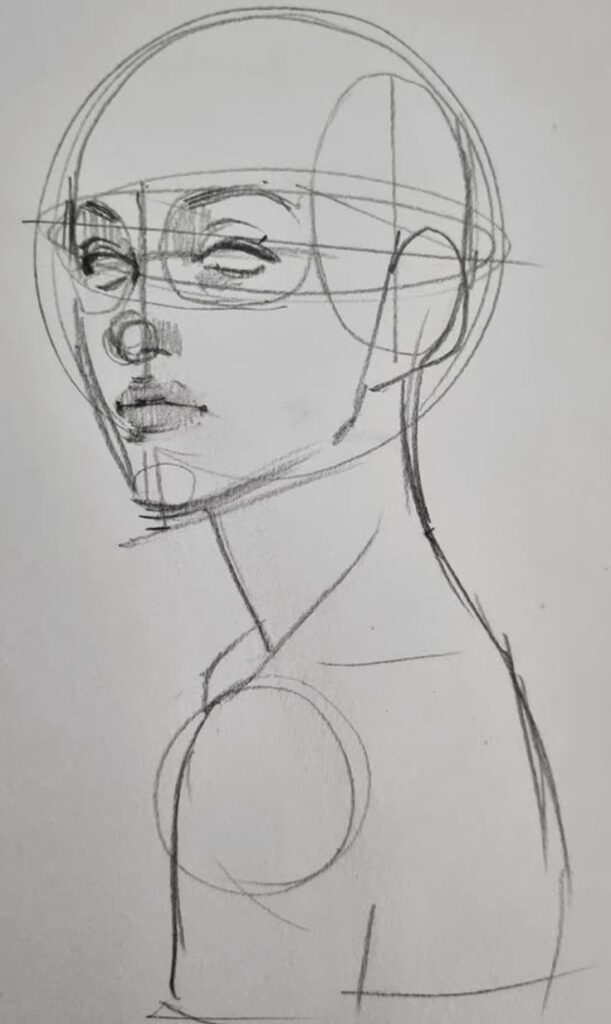
Cheekbones create the curves and planes on the face between the eyes and jaw. They cast shadows and catch highlights, adding depth and character. High cheekbones often stand out more and create sharp contours.
The prominence of cheekbones changes the face’s shape and affects the overall silhouette. Artists pay attention to how light falls on these areas to show volume. Soft or rounded cheekbones make a face look fuller, while pronounced ones add structure and definition.
Facial Muscles and Expressions
Facial muscles control how the face moves and changes shape to show emotions. These muscles work together to create expressions like smiling, frowning, and surprise. Studying their location and function helps artists draw realistic faces.
Primary Facial Muscles
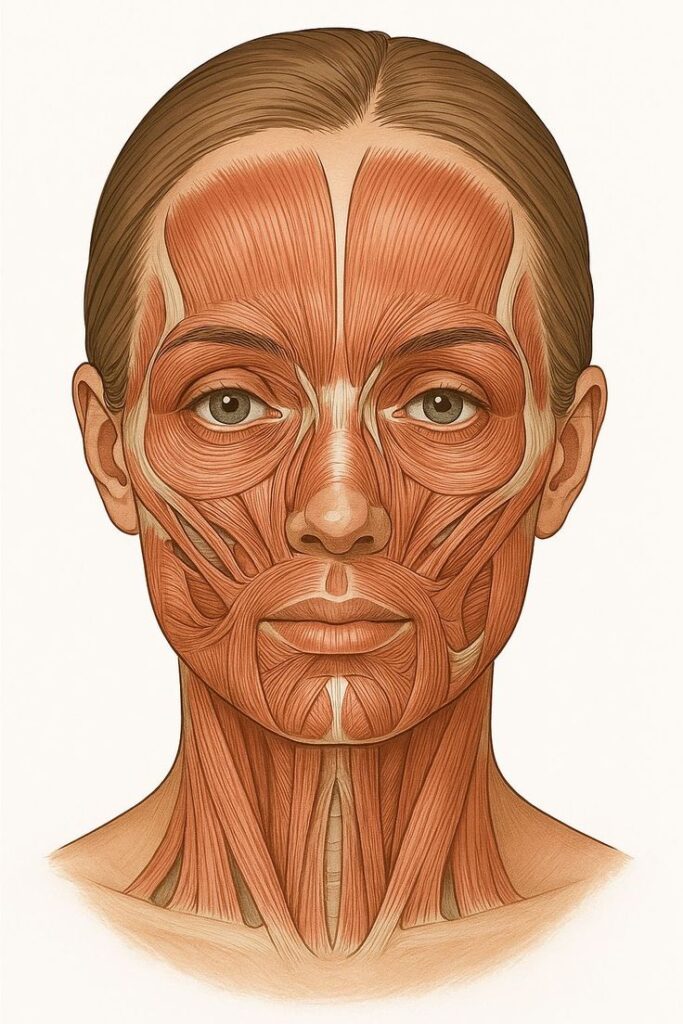
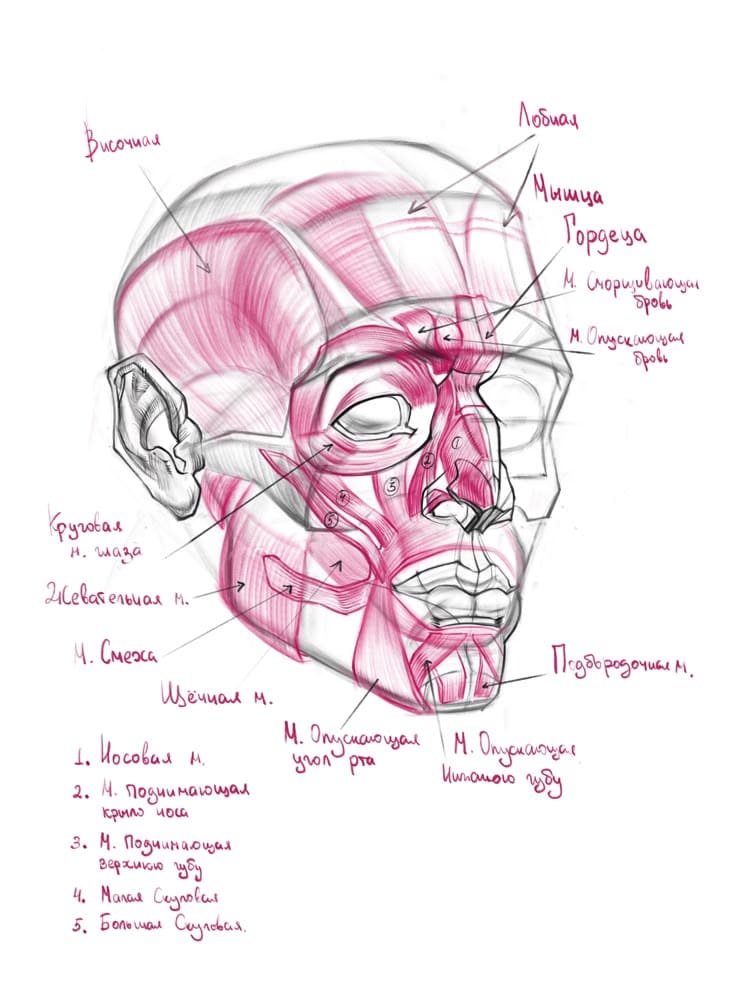
The face has many muscles, but some are key for expression. The orbicularis oris surrounds the mouth and helps shape lips for speaking or kissing. The zygomaticus major pulls the mouth corners up to form a smile. The frontalis raises the eyebrows, showing surprise or worry.
Other important muscles include the orbicularis oculi, which closes the eyelids, and the buccinator, which tightens the cheeks. These muscles attach mostly to the skin, not bones, allowing subtle movements.
Using a clear list helps keep track:
- Orbicularis oris: controls lips
- Zygomaticus major: lifts mouth corners
- Frontalis: raises eyebrows
- Orbicularis oculi: closes eyelids
- Buccinator: tightens cheeks
Dynamic Expression Studies
Expressions change quickly with muscle movement. Artists can watch faces in mirrors or photos to see how muscles shape emotions. For example, a genuine smile raises the cheeks and wrinkles the eyes.
Studying layers helps artists. First, sketch the skull, then add muscle shapes, and finally draw skin and details. This method shows how muscle motion affects surface features.
Simple tools like mirrors or short videos improve understanding. Watching how muscles contract helps capture natural expressions.
Aging and Wrinkles
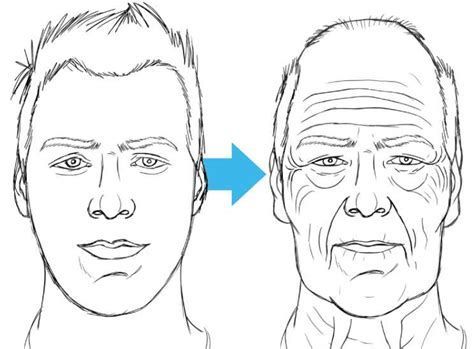
As people age, skin thins and loses elasticity. Muscles under the skin keep working but may cause wrinkles where skin folds repeatedly.
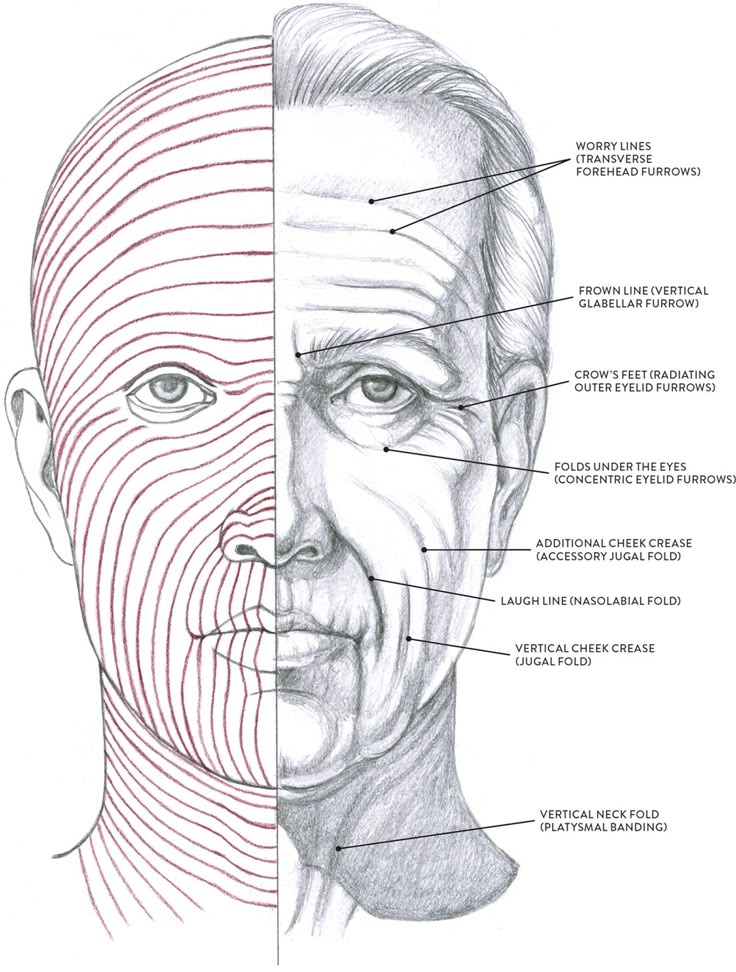
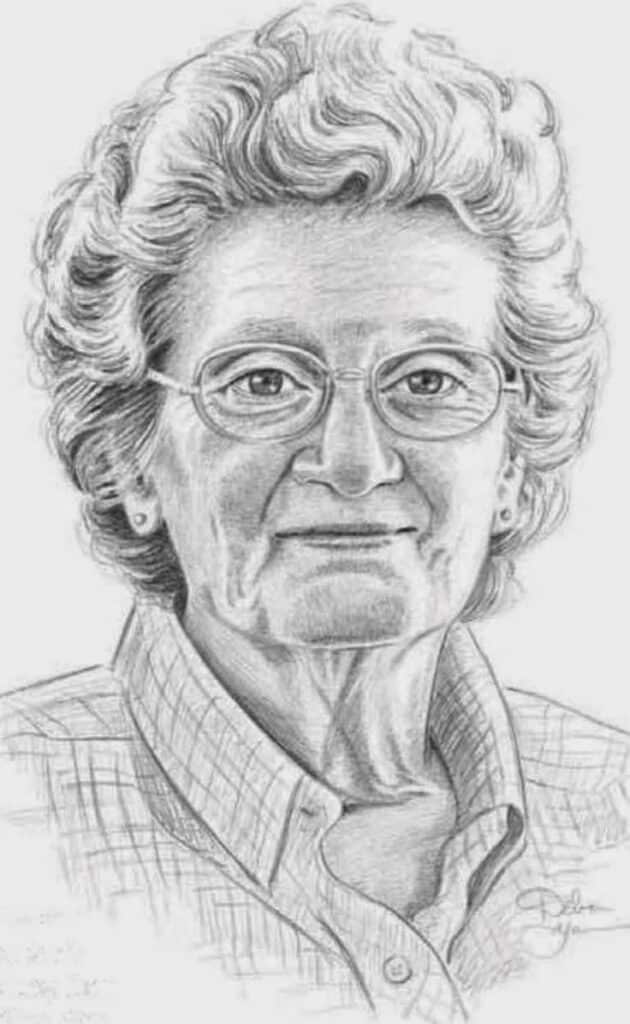
Common wrinkle areas include the forehead, around the eyes, and between the eyebrows. These are linked to repeated actions like frowning or squinting.
Understanding how muscles cause wrinkles helps artists add realistic signs of aging. Wrinkles are not random but follow muscle lines and movements. This detail adds life and depth to portraits.
Artistic Techniques for Face Anatomy
Artists use different methods to bring a face to life on paper or canvas. These techniques help show the shape, texture, and character of the face. Understanding the way light falls, how to use lines, and when to add personal style all shape the final portrait.
Shading and Lighting
Shading is key to making a face look three-dimensional. Artists study how light hits the face, creating shadows and highlights on the skin, muscles, and bones. Areas like the cheekbones and nose bridge catch more light, while eye sockets and under the chin have deeper shadows.
Light sources can be soft or hard. Soft lighting spreads gently over the face, creating subtle gradients. Hard light makes sharp, dark shadows. Choosing the right light helps artists show the face’s planes and contours clearly.
Using layering techniques with pencils or paint, artists build depth. Gradual changes from dark to light add volume. Understanding how light affects different face shapes brings accuracy and realism to the work.
Line Work and Detail
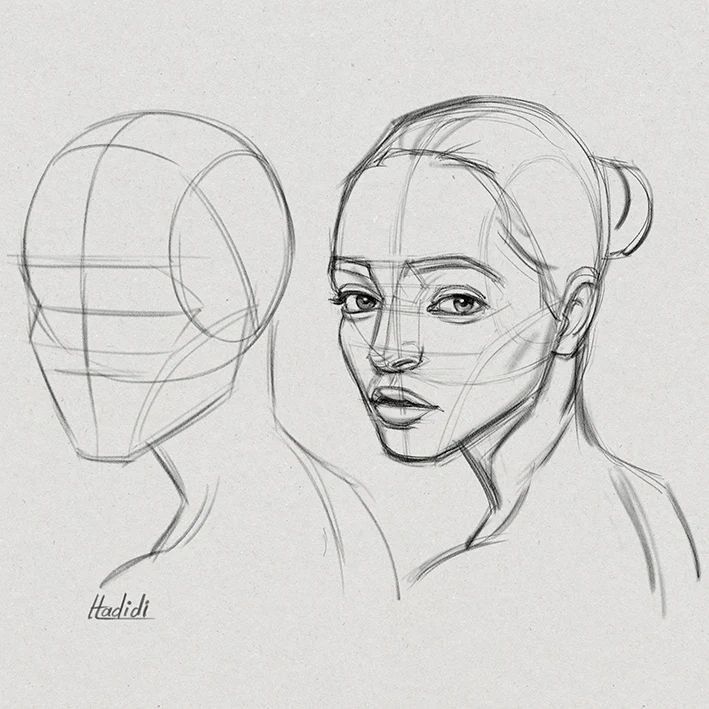
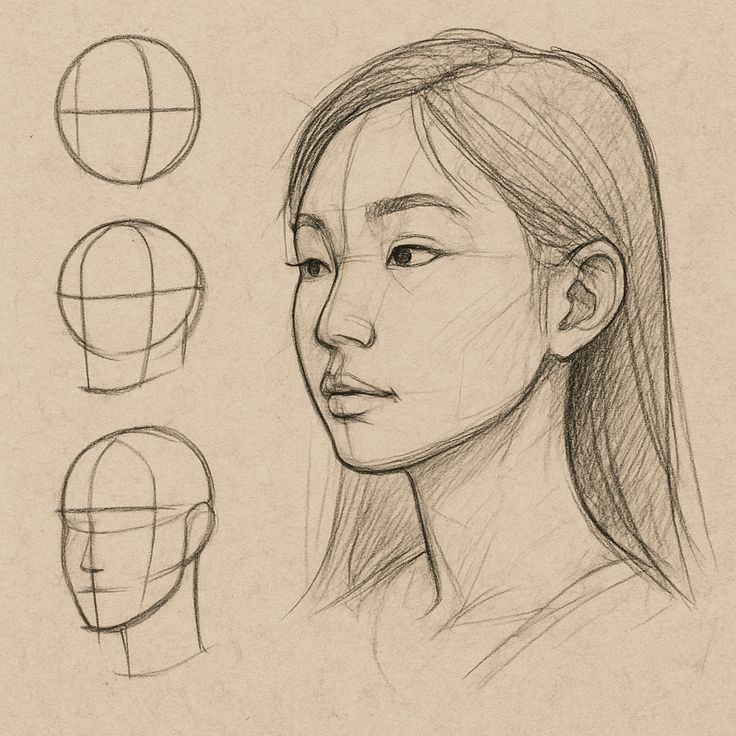
Line work outlines the face’s structure and adds texture. Strong, confident lines define important features like the jaw, eyebrows, and lips. Softer, thinner lines show gentle curves like the cheeks or eyelids.
Detailing muscles and skin folds helps create realism. Artists focus on small but distinct areas such as wrinkles or pores. These details tell a story about age and expression.
Artists also use cross-hatching and contour lines. Cross-hatching builds shadow through overlapping lines, while contour lines follow the shape of the face to show form. Both are useful for conveying depth and movement.
Stylization Approaches
Some artists choose to exaggerate or simplify features. Stylization lets them express ideas or emotions beyond exact likeness.
For example, a large eye might show innocence or wonder, while sharper cheekbones create a more dramatic effect. Simplified shapes can focus attention on a specific expression or mood.
Stylization often balances accuracy with creativity. Even when faces don’t look fully realistic, their anatomy still follows basic rules. This keeps the artwork believable while allowing unique personal style to shine.
Practicing and Improving Face Anatomy Art
Improving face anatomy art takes focused effort on key skills. It involves learning effective study methods, recognizing mistakes to avoid, and using good references and resources. Each part helps build a stronger understanding and skill set for drawing realistic and expressive faces.
Study Methods
Many artists start by drawing the skull from different angles to grasp the face’s basic structure. This helps them understand where muscles and skin sit on the bones. After that, they add muscle shapes, then build facial features on top.
Using a mirror or photos to watch how expressions change the face also helps. It shows how muscles move and shape the face in real life.
Practicing quick sketches and assembling them into full illustrations improves control and accuracy over time. Frequent, focused practice is more effective than drawing slowly without direction.
Common Mistakes
A common error is ignoring the skull’s shape, which leads to flat or unrealistic faces. Artists might draw eyes or noses too big or small without considering their placement on the skull.
Another mistake is focusing only on features like eyes or mouth without studying how muscles affect expressions. This causes faces to seem lifeless or stiff.
Rushing without reference or skipping practice on underlying anatomy also harms progress. Careful study and slow improvement are key.
Reference and Resources
Good resources include anatomy books, videos, and online tutorials that explain head structure and muscle groups clearly. Using reference photos or real-life observations supports better accuracy.
Some artists use step-by-step courses or guided exercises to get feedback and improve details. Others watch videos showing how faces change during different expressions.
Organizing references into categories like bone structure, muscles, skin layers, and expressions can help keep practice focused and effective.
- 1.3Kshares
- Facebook0
- Pinterest1.3K
- Twitter3
- Reddit0
