Drawing hands can feel tricky because of their many shapes and movements. Many artists struggle with making hands look natural and lively. The key to drawing better hands is to understand their simple structure and flow, starting with the palm and basic shapes before adding fingers and details.
By breaking down the hand into easy parts, like the palm and joints, anyone can improve. Practicing how the fingers bend and how the hand moves helps to avoid stiff or awkward poses. Learning these steps makes drawing hands less scary and more fun.
With a little patience and practice, anyone can draw hands that look more real and full of energy. This guide will show how to build those skills step by step.
Fundamentals of Hand Drawing
Drawing hands well starts with the right tools, a clear understanding of shape, and some basic techniques. Each part helps build confidence and accuracy in capturing the unique form of a hand.
Essential Materials and Tools
Using the right materials can make hand drawing easier and more enjoyable. Many artists start with a pencil because it allows for light sketching and easy corrections. A range of pencils from 2H (hard) to 6B (soft) is useful for creating different line weights.
Paper choice matters, too. Smooth paper works well for fine details, while textured paper can add character to sketches. An eraser, especially a kneaded one, helps with subtle changes.
Other helpful tools include a sharpener for clean lines, blending stumps for smooth shading, and a ruler for measuring proportions. Having basic supplies ready lets the artist focus on learning hand shapes and lines.
Understanding Lines and Shapes
Hands are made of simple shapes combined in complex ways. Starting with shapes like squares, rectangles, and ovals helps map out the palm and finger sections.
Lines guide the hand’s direction and movement. For example, curved lines show finger joints and knuckles. Straight lines mark finger position and length.
Using light, loose lines first lets the artist adjust shapes without pressure. After the design looks right, firmer lines define the hand’s final shape. Breaking the hand into these easy parts simplifies a tricky subject.
Basic Hand Drawing Techniques


Beginning with the overall shape of the palm is helpful. It can be drawn roughly as a square or rectangle. Then, the fingers are added with attention to their length and spacing.
Understanding proportion is key. The thumb usually starts at the side of the palm, and fingers taper in size from middle to pinky. The palm is wider at the top and narrows near the wrist.
Using gesture drawing, a quick sketch that captures hand movement, improves natural poses. Adding details like fingernails or knuckles comes after the basic forms are correct. This step-by-step approach builds more confident and realistic hand drawings.
Step-by-Step Guide to Drawing Hands
Drawing hands well takes practice and attention to shapes, movement, and details. It starts with understanding the bones and joints, then capturing natural poses, and finally adding shading and lines to bring life to the drawing.
Building Hand Anatomy

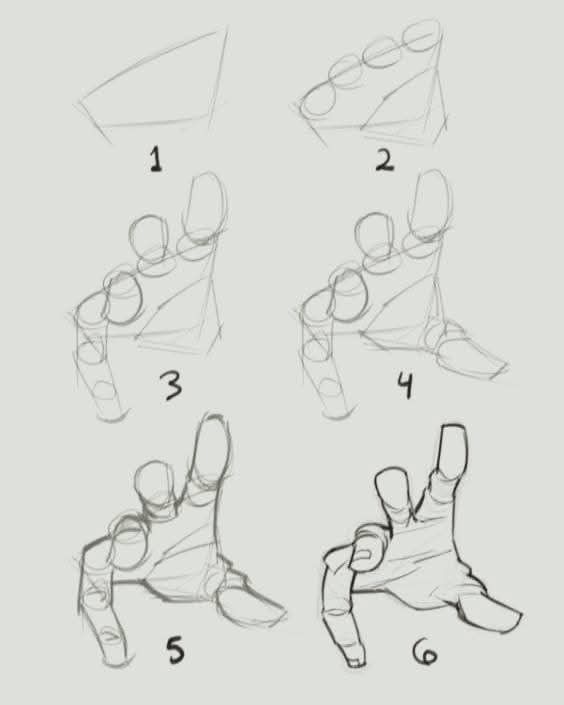
A hand has many parts, but it helps to break them down simply. Start with the palm as a basic block shape. Then, add the thumb on the side, which is at a different angle from the fingers. Each finger has three bones called phalanges, linked by joints.
Focus on the length and position of fingers. The middle finger is usually the longest, with the others tapering shorter. Notice how the fingers curve or bend at the joints. Sketch these lightly to get their directions right before finalizing.
Drawing Gestures and Poses
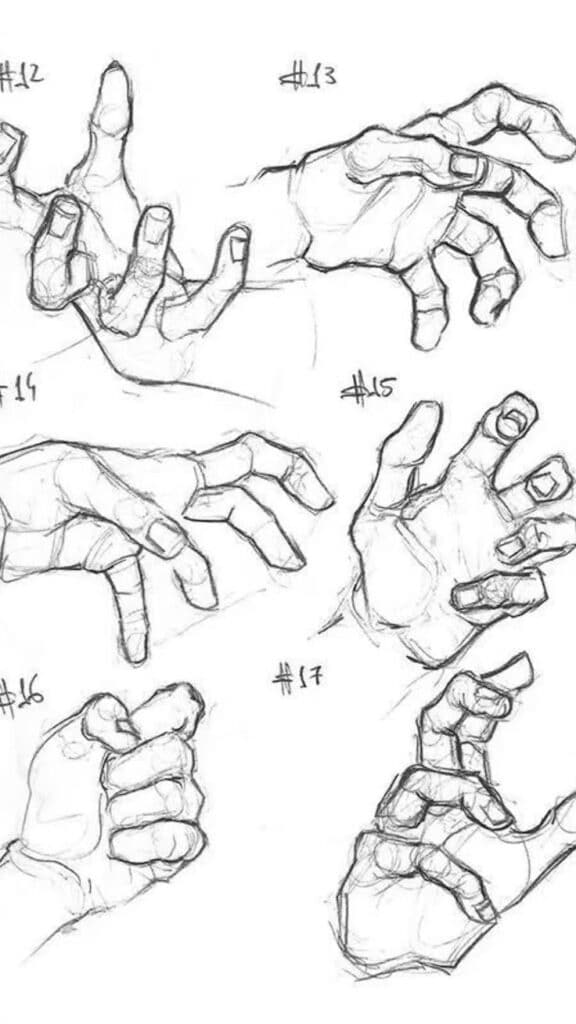

Hands move in many ways. To draw them naturally, begin with loose lines that show the hand’s gesture or movement. Think about what the hand is doing: holding, pointing, or resting.
Use simple shapes like ovals or cylinders to represent fingers and the palm. This helps keep the pose fluid. Avoid stiff or straight fingers; slight curves make the hands look more real. Practice quick sketches of different hand positions to build confidence.
Adding Realism and Details


After the basic shapes and poses, add details like nails, wrinkles, and skin folds. These make the hand look more lifelike. Shade areas where shadows fall, such as under fingers or around knuckles.
Pay attention to light and how it hits the hand. Shadows give depth. Use short, soft lines for skin texture. Fingers are not perfectly smooth; small creases appear around joints and the palm.
Common Mistakes and How to Avoid Them
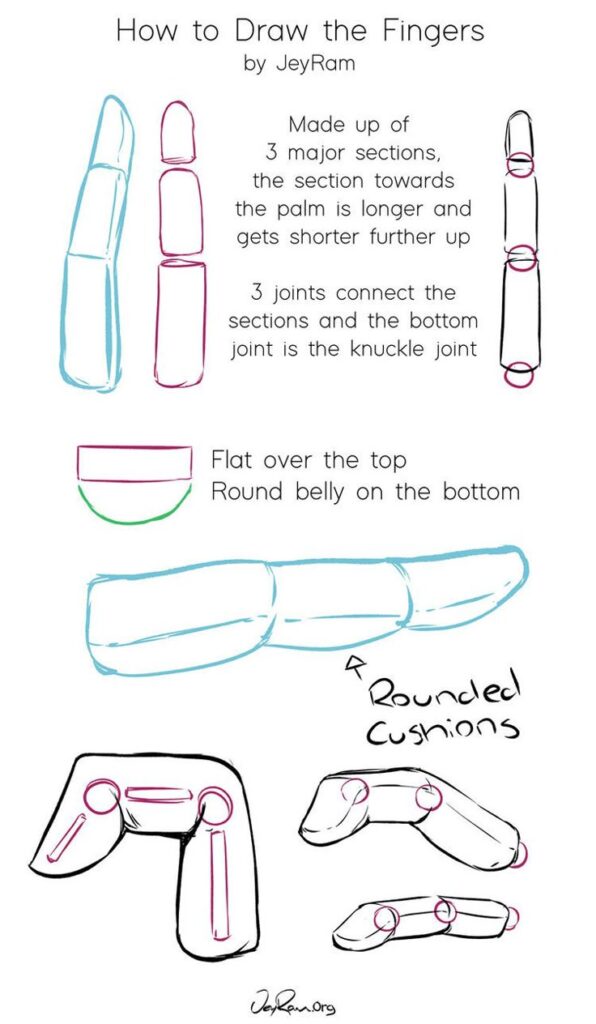

One mistake is making fingers too straight or the same length. Fingers vary in size and curve naturally. Another error is ignoring the thumb’s distinct angle, which often leads to flat-looking hands.
Avoid drawing the palm as a flat rectangle. It has curved forms and contours. Over-detailing too early can also confuse the drawing. Focus on basic shapes first, then gradually add detail.
Tip: Practice drawing hands from real life or photos to see how they move and look from different angles.
Improving Your Hand Drawing Skills
Building skill in drawing hands takes focused effort with simple exercises, good visual guides, and practical projects. Practicing basic shapes, studying real hands, and adding hand drawings into broader artwork can all help improve accuracy and confidence.
Practice Exercises for Beginners


Starting with basic shapes is important. Beginners should draw hands as simple blocks, cylinders, and circles to understand how fingers bend and connect. Repeating these shapes helps build muscle memory.
Daily quick sketches of different hand poses can improve flexibility in drawing. Keeping sketches loose and not worrying about perfection encourages better learning.
Using simple gestures like fist, open hand, or pointing helps practice common hand positions. Over time, adding details such as knuckles and nails becomes easier.
Using Reference Photos and Live Models
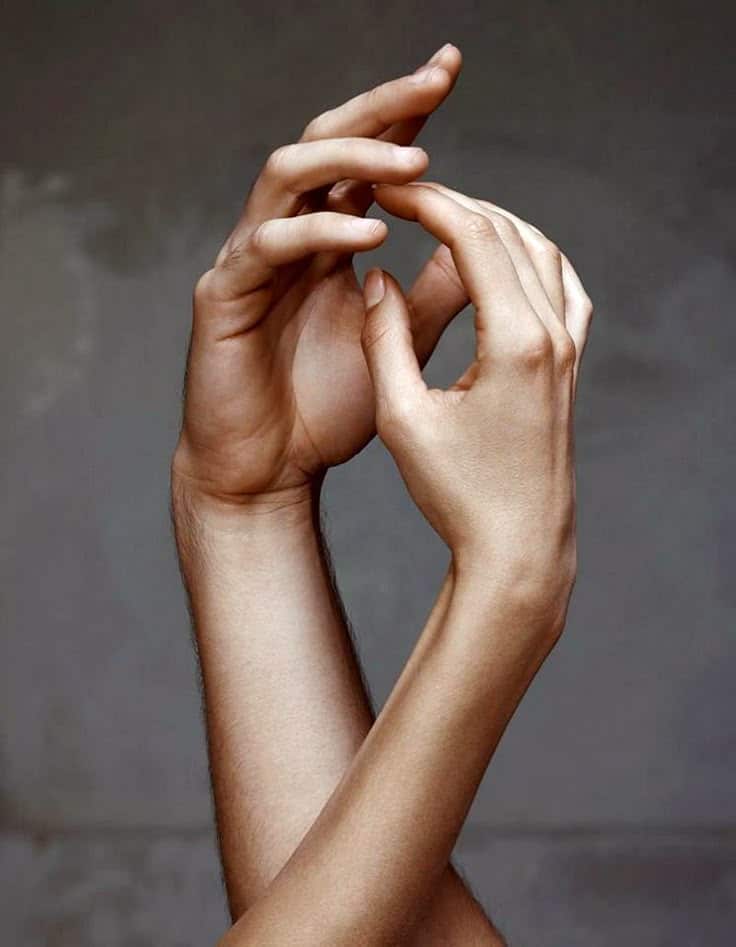
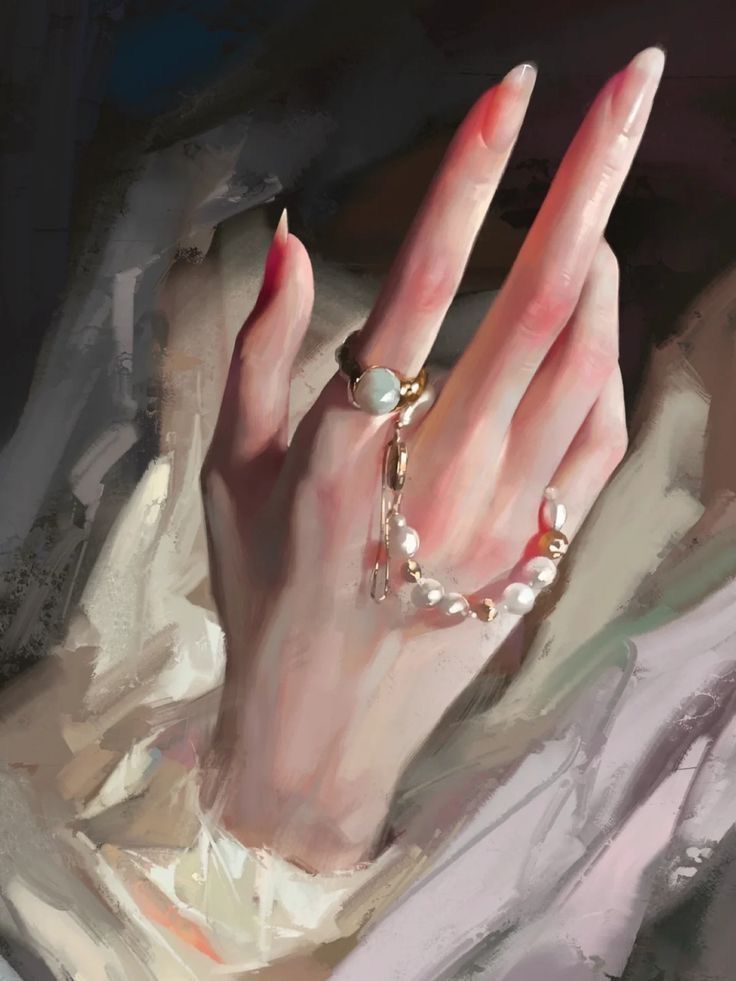
References help artists see real-life details and proportions. Photos allow study from many angles and lighting conditions.
Live models offer the chance to observe natural movement and subtle hand gestures. Watching how fingers curl and muscles tense gives insight.
It’s helpful to collect a variety of hand images showing different ages, skin types, and activities. This diversity sharpens understanding of form and texture.
Incorporating Hand Drawings into Art Projects
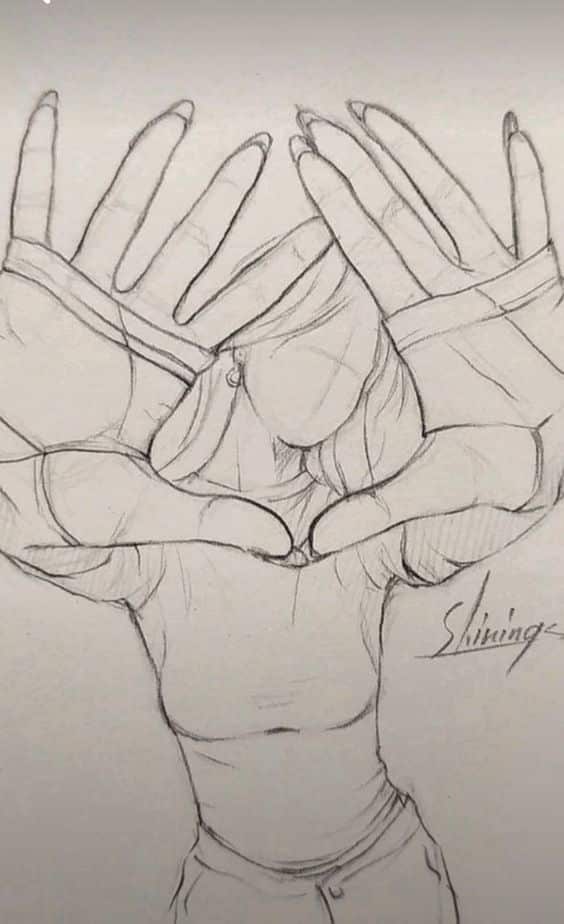

Including hands in larger drawings helps integrate skills into a finished piece. Hands can express emotions or actions, so practicing them in context is useful.
Artists can start by adding simple hand shapes to portraits or characters. Then, gradually adding detail makes the drawing more lifelike.


Using hands to show gestures or hold objects adds realism and story to art. This practice encourages attention to proportion and perspective.
- 524shares
- Facebook0
- Pinterest524
- Twitter0
- Reddit0


