Taking great pictures with a phone is easier than ever. The secret lies in mastering a few key techniques and settings. Many people carry a high-quality camera in their pocket every day, yet struggle to create the images they imagine. Knowing how to use the phone’s camera app can transform ordinary snapshots into captivating photos.


Phone photography is about understanding light, framing, and timing. By experimenting with different angles and perspectives, anyone can find the ideal shot. Even slight adjustments in light settings or focusing methods can make a big difference in the final image.
Remember to clean the camera lens often. A simple wipe can improve photo clarity. Explore the various features your phone camera offers, such as portrait mode or panorama. Using these settings creatively can make photographs stand out and tell a more vivid story.
Key Takeaways
- Use the phone’s features to enhance picture quality.
- Pay attention to light and framing for better shots.
- Regularly clean the camera lens for clear photos.
Understanding Photography Basics
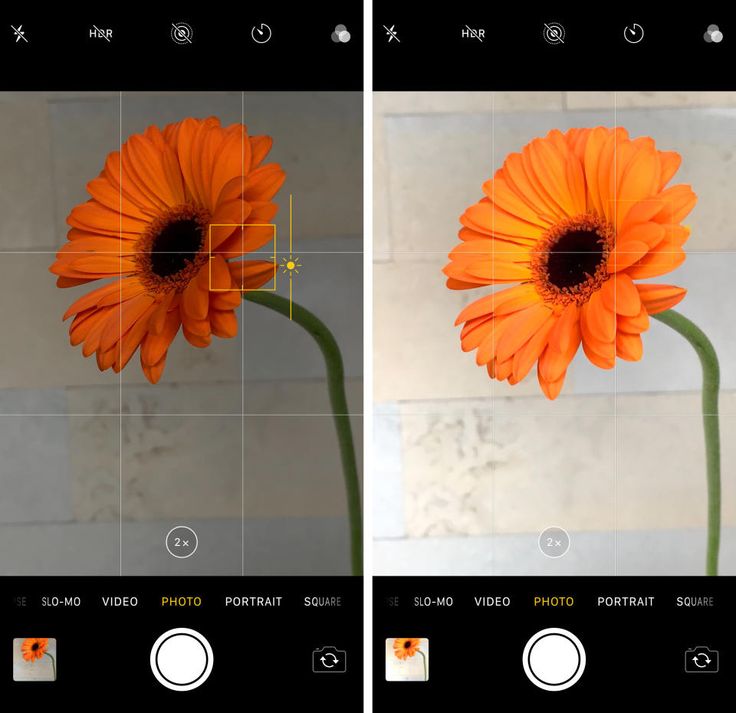
Taking great photos with a phone involves mastering some key photography basics. These basics include composition, lighting, and the rule of thirds. Each plays a vital role in transforming ordinary snapshots into stunning visual stories.
Composition Techniques
Composition involves arranging elements within a photo to create a pleasing image. It’s about deciding what to include and what to leave out. Central focal points can draw attention, while symmetry adds balance. Leading lines guide the viewer’s eye and add depth. Frames, like windows or doorways, create perspective.
Triangles and diagonals can add dynamism. Keeping the background simple helps the subject stand out. Experimenting with different angles, like crouching low or shooting from above, offers unique perspectives. Avoid clutter that distracts from the main subject. Each element in the frame should serve a purpose to maintain the viewer’s interest.
Lighting and Exposure
Lighting can make or break a photo. Good light helps highlight details, colors, and textures. Natural light often gives the best results, especially during the golden hour just after sunrise and before sunset. Harsh midday sun can create strong shadows that wash out details. Soft, diffused light is generally more flattering for subjects.
Exposure settings, such as ISO, shutter speed, and aperture, control how much light reaches the camera sensor. Most phones adjust these automatically, but manual settings can offer more control. Increasing exposure brightens the image but can cause overexposure if too high. Regularly check the histogram on your phone to ensure a balanced exposure.
Rule of Thirds
The rule of thirds is a simple yet powerful guideline in photography. By dividing the frame into a grid of nine equal parts, it helps in placing subjects at intersections or along lines. This technique creates more interest and balance than simply centering subjects. It guides the viewer’s eyes and enhances visual flow.
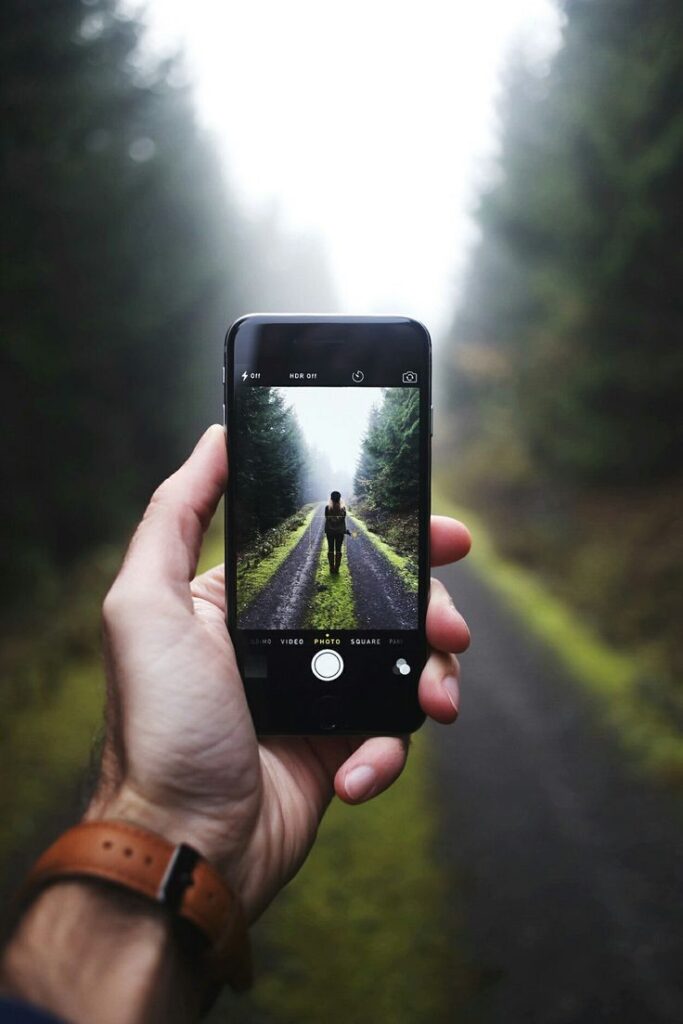
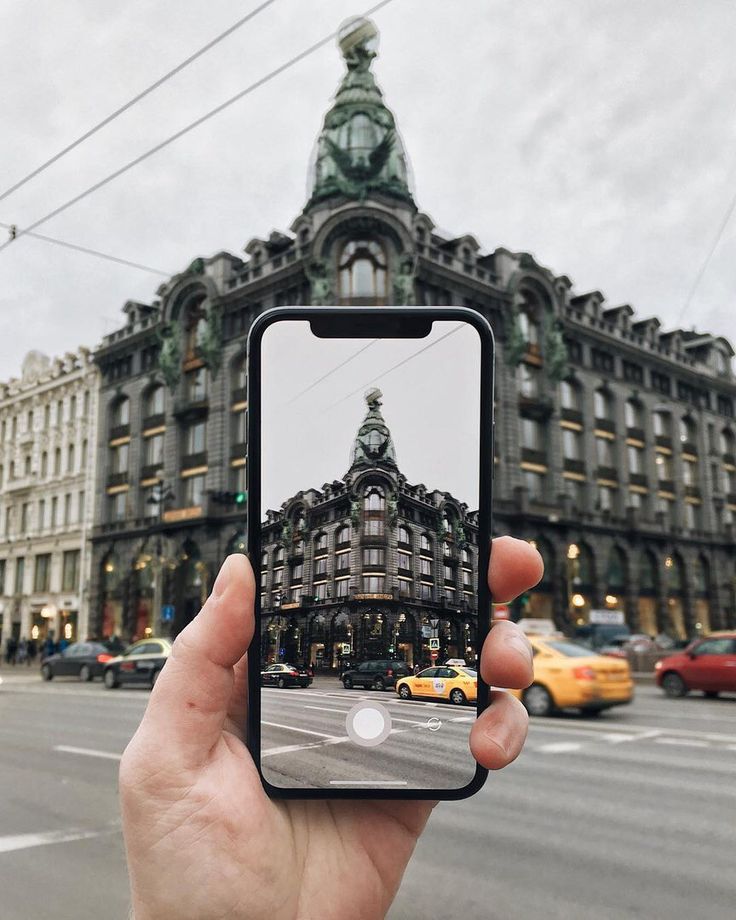
Horizons should align with the top or bottom third to create balance. Placing key elements off-center makes compositions dynamic. This avoids flat, overly static images. Many phone cameras offer a grid function to help visualize this rule while shooting. Practicing with the rule of thirds can significantly improve photo compositions over time.
Getting to Know Your Phone Camera
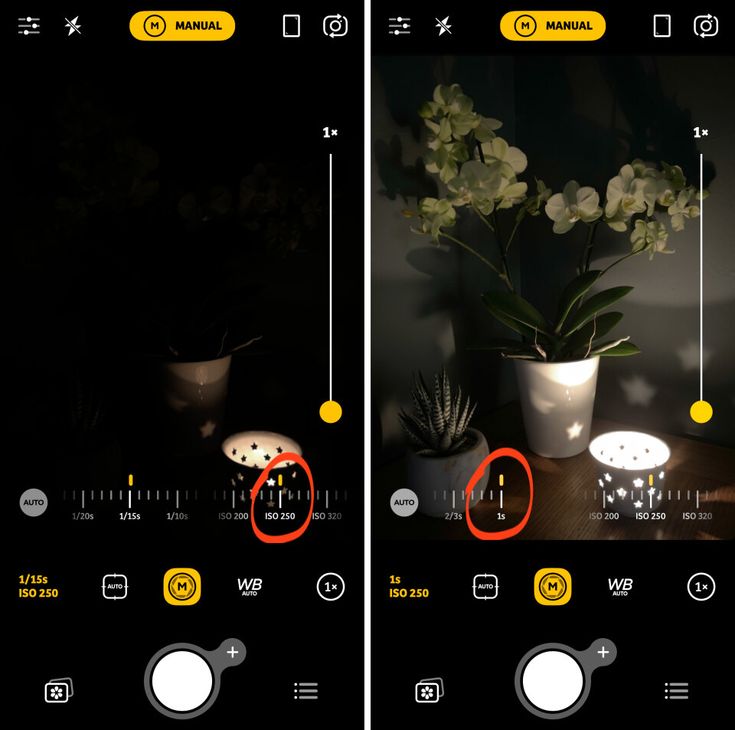
Understanding the basics of your phone camera can improve your photography skills. Key aspects include knowing camera specifications, using manual or auto mode, and exploring camera apps.
Camera Specifications
Camera specifications are essential to know. Important details include the megapixel count, aperture size, and sensor type. Megapixels affect the image quality and size, while the aperture controls how much light enters the lens.
A lens with a larger aperture can help in low-light conditions. Sensor size impacts image clarity and noise. Comparing these specs helps you select the best settings and conditions for capturing photos. Some phones also offer multiple lenses, like ultra-wide or telephoto, which can expand your photography options.
Manual Mode vs Auto Mode
Manual and auto modes offer different benefits. Auto mode is perfect for quick and effortless photos. It automatically adjusts settings like exposure, focus, and ISO.
Manual mode allows more control over each setting. You can adjust the shutter speed, ISO, and white balance to achieve specific effects or compensate for challenging lighting. Learning to use both modes is essential for adapting to different scenes. Switching between them when necessary can lead to better shots in varying conditions.
Camera Apps and Software
Camera apps enhance photography with more features and editing tools. Built-in apps are often limited, so exploring third-party apps can offer more creative options.
Many apps allow for advanced controls and filters, giving photos a unique look. Adobe Lightroom Mobile and VSCO are popular choices for editing. Additionally, some apps focus on specific styles, like vintage or black and white photography. Introducing new apps can help refine and diversify photographic skills.
Preparation for Photography


Before snapping photos, some key steps can make a big difference in image quality. Ensuring the camera lens is clean, choosing a great scene, and adjusting the settings can improve photos significantly. Paying attention to these details sets a strong foundation for capturing beautiful pictures.
Cleaning the Camera Lens
Keeping the camera lens clean is crucial. Dust, smudges, or fingerprints can blur images, making them appear hazy or unclear. It’s recommended to use a microfiber cloth to wipe the lens gently. Some people use lens-cleaning solutions for stubborn spots, but plain water on a cloth often works well.
Regular cleaning can make photos clearer. For best results, ensure the cloth is clean and dry. It’s also smart to check your lens before each photo session. A quick lens inspection can prevent common problems and save time during editing. Taking a few seconds to clean can lead to sharper, more vibrant photos.
Selecting the Right Scene


Choosing the right scene is essential. The background and surroundings impact how subjects appear in photos. Looking for areas with good lighting and interesting backgrounds can make images stand out. Natural light is often the best choice because it creates soft, flattering shadows.
Different times of day offer various lighting conditions. Early morning or late afternoon, known as the “golden hour,” provides warm, gentle light ideal for stunning photos. Avoid harsh overhead sunlight, which can create unwanted shadows. Exploring angles and positions can also add dynamics to a photo.
Adjusting Camera Settings
Optimizing camera settings can enhance photo quality. On smartphones, automatic settings can be useful, but manual adjustments often offer better results. Changing settings like focus, exposure, and white balance can make images more vivid and detailed.
Experimenting with these settings can reveal the best combinations for different situations. Some phones offer advanced options, like aperture and ISO adjustments. Customizing these can improve how light and colors are captured. It’s helpful to practice using different settings to become familiar with their effects.
Shooting Techniques


To take good photos with a phone, it’s important to explore angles and perspectives, capture motion effectively, and find the right focus. These skills can greatly improve the quality of your pictures.
Using Angles and Perspectives
Adjusting angles and perspectives can make photos more interesting. Instead of shooting straight on, try holding the phone at a lower angle or from above. This can highlight different parts of the scene.
Tilt the phone slightly for a dynamic composition. Leading lines, like roads or fences, can draw attention to the subject. Experiment with angles to find what works best. Changing the perspective can turn an ordinary scene into something special.
Capturing Motion


Photography isn’t just about still scenes. Capturing motion can bring energy to photos. Use the burst mode on your phone to take rapid shots, allowing you to pick the best one.
Motion blur can show speed. To achieve this, track the moving object with the phone camera while taking the photo. This technique, called panning, keeps the subject in focus while the background blurs.
Finding Focus
Proper focus is key to a sharp photo. Most phone cameras allow you to tap the screen to choose where to focus. Do this to ensure the subject is clear.
For close-up shots, use the macro mode if available, to capture small details. In group photos, try to focus on a middle person to ensure everyone is sharp. Adjusting the depth of field can also change how much of the scene is in focus. This is done by altering the phone’s aperture settings if available.
Post-Photography Tips


Enhancing photos after taking them can significantly improve their quality. By editing on your phone, using filters sparingly, and adjusting the photo’s cropping and framing, you can elevate your images to a new level.
Editing on Your Phone
Phones come equipped with powerful editing apps that are easy to use. These apps let users tweak brightness, contrast, and saturation. Adjusting these settings can make colors pop or create a balanced image.
Using tools to sharpen or smooth areas of a photo can also help clarify the subject. Many apps provide preset adjustments, which can speed up the editing process. It’s useful to experiment with these options to see what works best for each picture.
Fine-tuning small details often makes a big difference. Spend time on each photo and try out different edits to improve the final result.
Using Filters Sparingly
Filters can quickly change the look of a photo. They can add warmth, coolness, or a vintage feel. While filters are fun, using them in moderation is key to maintaining a photo’s original charm.
Applying a subtle filter can enhance photos without overpowering them. Overusing filters might make photos look unnatural and decrease their overall appeal. Select filters that complement the scene and the mood of the photo.
Experiment with various filters but dial back the intensity to keep the main subject clear. This careful approach enhances the image while keeping it true to life.
Cropping and Framing


Cropping helps remove distractions from a photo and focuses attention on the subject. It also lets users adjust the composition after the photo is taken. Zooming in slightly and centering the main object can significantly enhance the image.
Framing is about deciding what should be included and excluded in the final picture. A well-cropped image can tell a clearer story and highlight important elements.
Choosing the right aspect ratio, such as square or landscape, can also affect the photo’s impact. Doing so ensures that the subject is presented in the best way possible.
Improving Photography Skills


Enhancing photography skills involves consistent practice, learning from experts, and evaluating your own work. These steps help in developing a keen eye for detail and refining techniques.
Practicing Regularly
Practice is crucial in photography. Taking photos daily helps build intuition and sharpens skills. It’s important to focus on different subjects and settings to gain versatility. Experimenting with lighting, angles, and perspectives can reveal new insights. Using phone cameras in various conditions, like indoors or in low light, enhances adaptability. Setting small challenges, such as capturing motion or close-ups, encourages creativity. Consistent practice leads to noticeable improvements in capturing well-composed and focused images.
Learning from Professionals
Studying the work of seasoned photographers offers valuable insights. Observing their compositions, techniques, and use of color can inspire new ideas. Attending workshops and online courses provides practical tips and guidance, enhancing understanding and skill set. Books and videos from professionals also contribute to learning advanced techniques. Mentors and photography communities offer feedback and motivation, helping learners maintain progress. Implementing advice from experienced photographers fosters skill refinement and innovation.
Evaluating Your Work


Regularly assessing your own photos is vital for growth. Comparing recent work to past photos highlights progress and areas for improvement. Constructive criticism from peers or mentors can offer new perspectives. Keeping a portfolio allows photographers to track their journey and celebrate achievements. Note which techniques were successful and which need reworking. Online platforms can also offer feedback from a broader audience. Evaluating results aids in recognizing strengths and targeting specific areas that need attention for future shoots.
- 87shares
- Facebook0
- Pinterest84
- Twitter3
- Reddit0


