Creating engaging videos isn’t just about stunning visuals or an epic soundtrack; it’s about making your content accessible and relatable. Captions and subtitles have become essential, whether you’re reaching out to an international audience or ensuring inclusivity for viewers with hearing impairments. If you’re a fan of CapCut, the sleek, user-friendly video editing software, adding captions and subtitles is a breeze. This ultimate guide will not only teach you how to do it but also sprinkle some creativity into your subtitling game.
Why Add Captions and Subtitles?
Before diving into the how let’s talk about the why:
Accessibility: Subtitles make your content accessible to individuals who are deaf or hard of hearing.
Global Reach: With subtitles in different languages, you’re ready to conquer the world (or at least its YouTube algorithm).
Engagement: Studies show that captions increase viewer retention. Your audience stays hooked even while silently scrolling in a crowded café.
Open Your Project
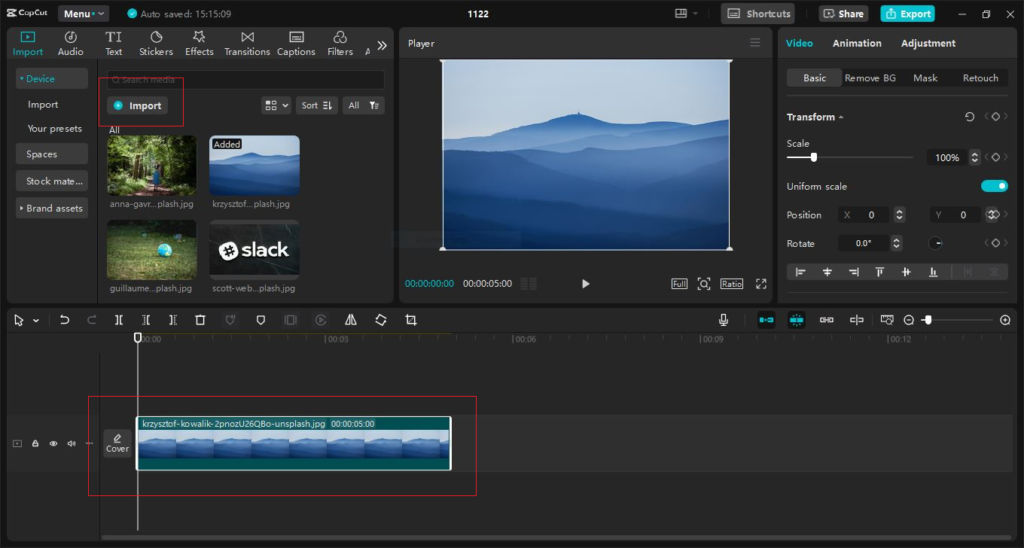
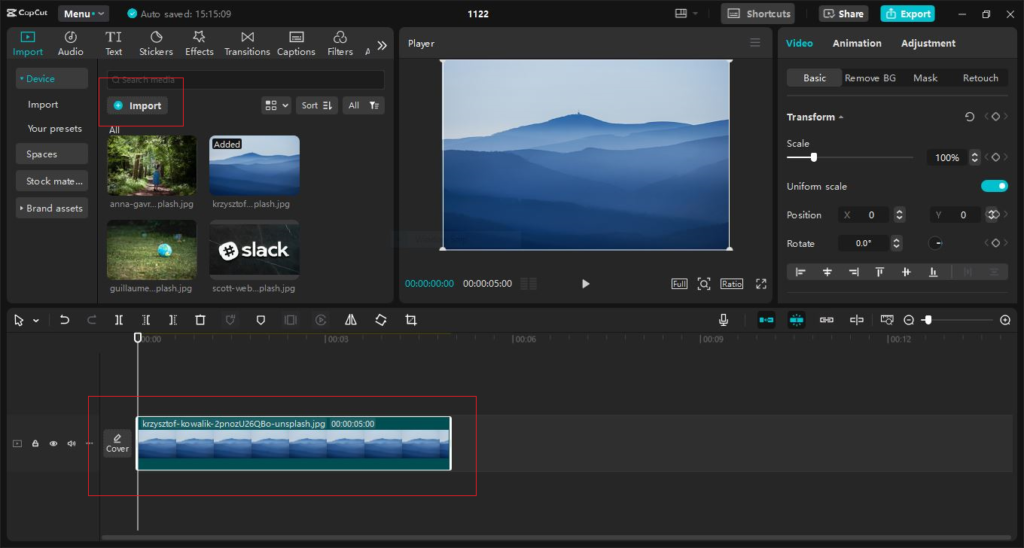
After downloading the CapCut video editor for pc, you can now upload your video. Drag it onto the timeline like a professional video editor. This timeline is going to be your playground, so sit comfortably while exploring it.
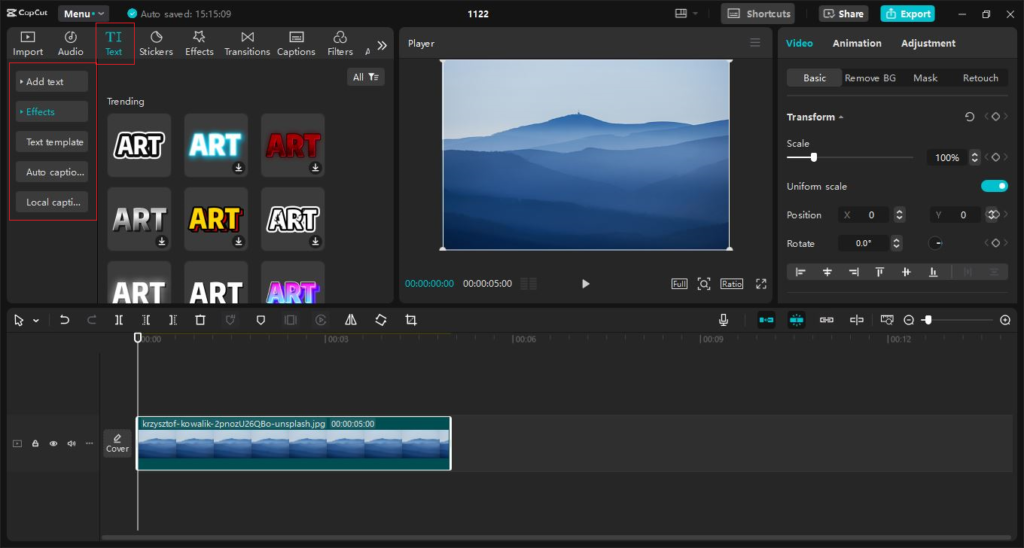
Navigate to the Text Tool
On the left-hand side of the screen, there is a button called ‘Text’. Click on it and tada! A whole universe of captioning options suddenly opens in front of you.
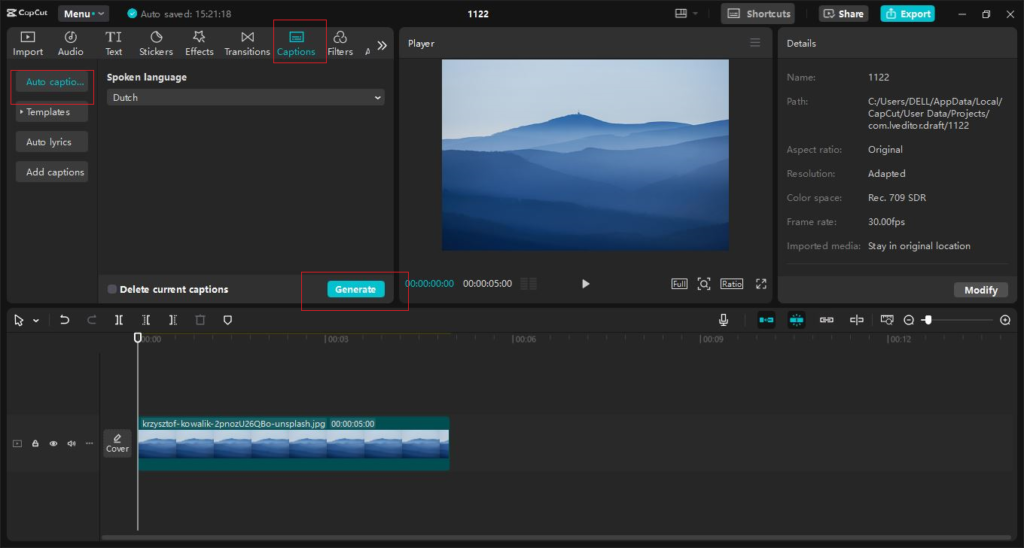
Auto Captions: This comes in handy, especially for videos that have a lot of spoken words. Automated captioning or AI caption generator is one of the features of CapCut where the application adds captions on your behalf using artificial intelligence.
Manual Captions: Prefer full control? This will involve manually typing the caption and synchronizing any particular caption with a specific point in the timeline. Ideal for putting some spice in your work, or comic timing.
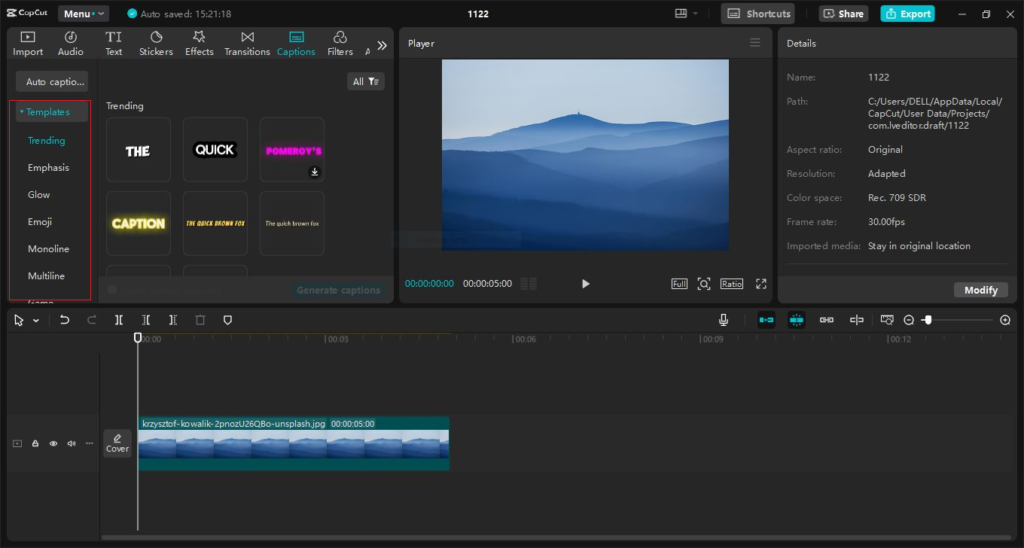
Using Auto Captions Like a Pro
Step 1: Activate Auto Captions
Under the “Text” tab, hit the “Auto Captions” option. CapCut will ask whether your video contains dialogue. Choose from:
- Original Sound: Ideal for spoken audio.
- No Sound: For those artsy, moody montages that scream for poetic overlays.
CapCut supports multiple languages, so whether you’re subtitling in English, French, or Klingon, it’s got your back. Select your language and click “Start.”
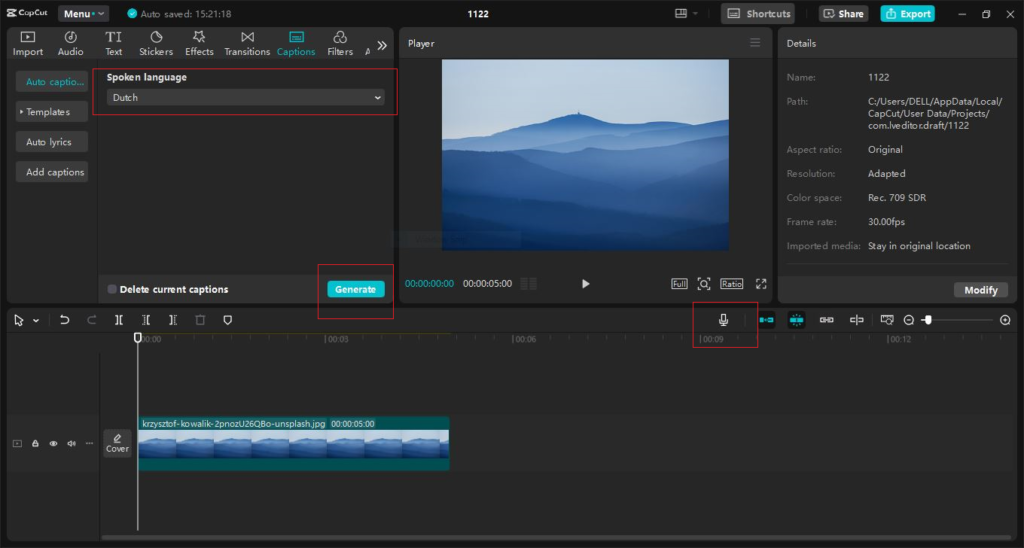
Edit the Captions
Auto-generated captions are like a well-meaning friend—they try their best but sometimes make hilarious mistakes. Review and edit each caption for accuracy.
Manual Subtitles for the Creative Souls
If you enjoy crafting each word, manual subtitles are your go-to. Here’s how:
Step 1: Add Text Layers
Go to the Text tab and then click on the “Add Text” button below it. You will be able to type your subtitles right on the video preview which will appear in a small text box.
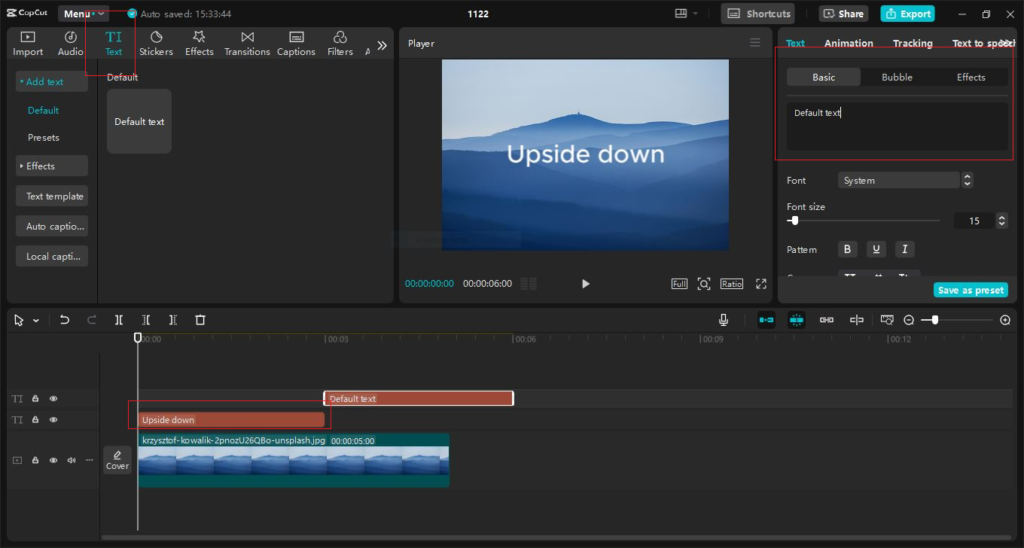
Step 2: Sync to the Timeline
Adjust the text layer by dragging and dropping it over the video’s audio. Rewind it to align it properly if need be. Choose your sources wisely, because even a small inaccuracy can significantly affect the result.
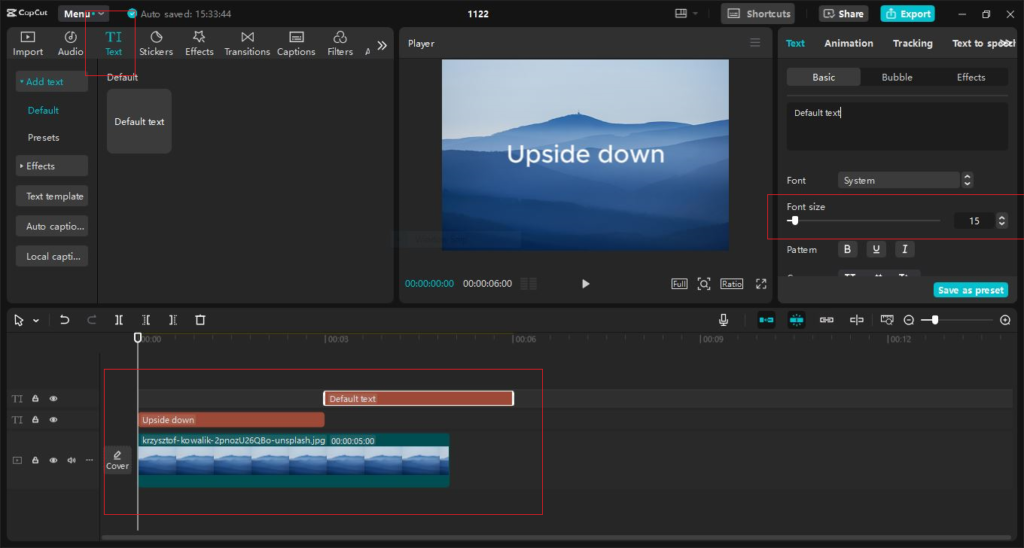
CapCut Desktop Video Editor is not only about the features – but also about being unique. Here’s how to take your captions from mundane to masterpiece:
Step 3: Customise Fonts
The font that is used also defines the mood or the feeling that the article wants to portray.
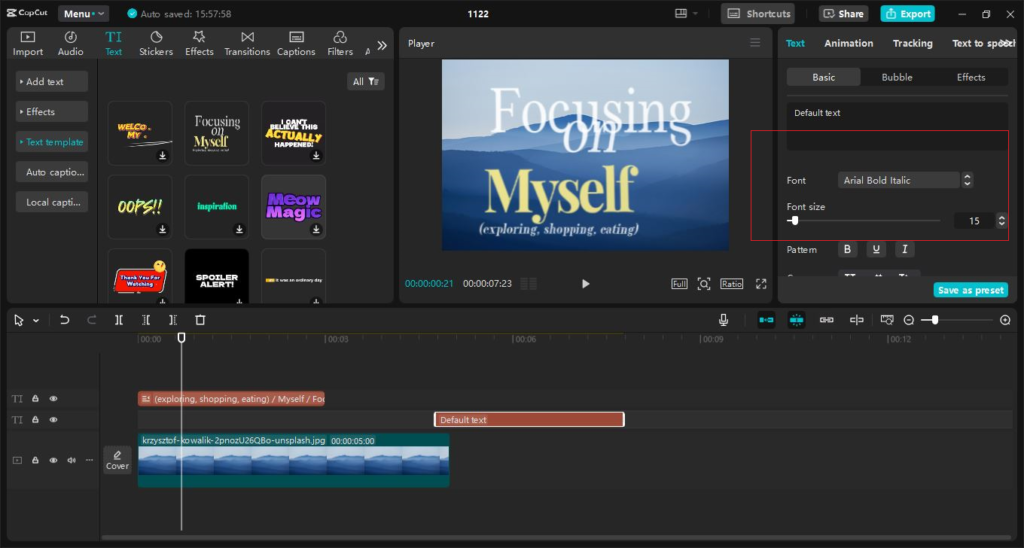
Sans-serif: For a modern, clean look.
Handwritten Styles: Ideal to be used in a vlog or to tell a beautiful story.
Bold & Loud: It’s perfect for funny moments, including sharing memes.
Make the subtitles stand out by playing with text size, colors, and even shadows where relevant.
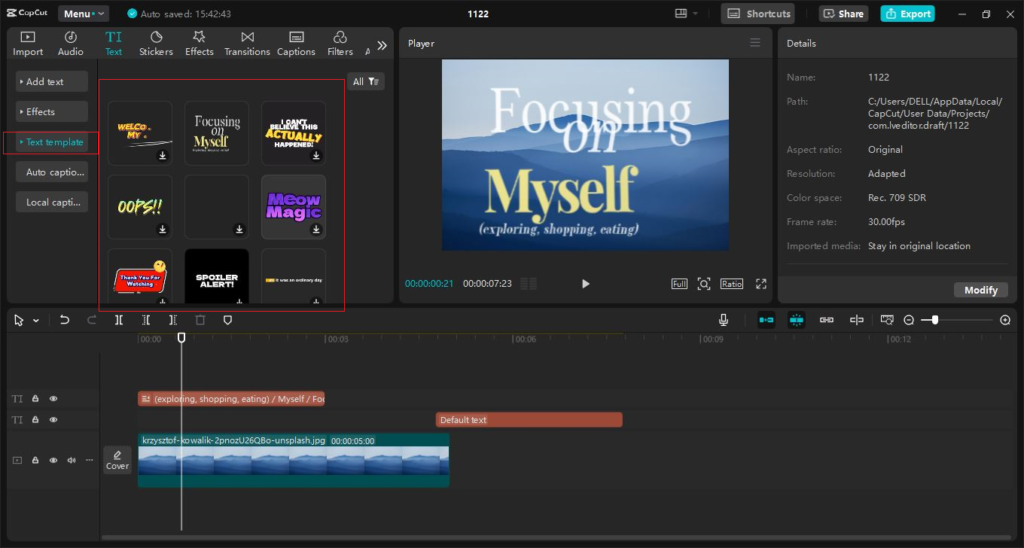
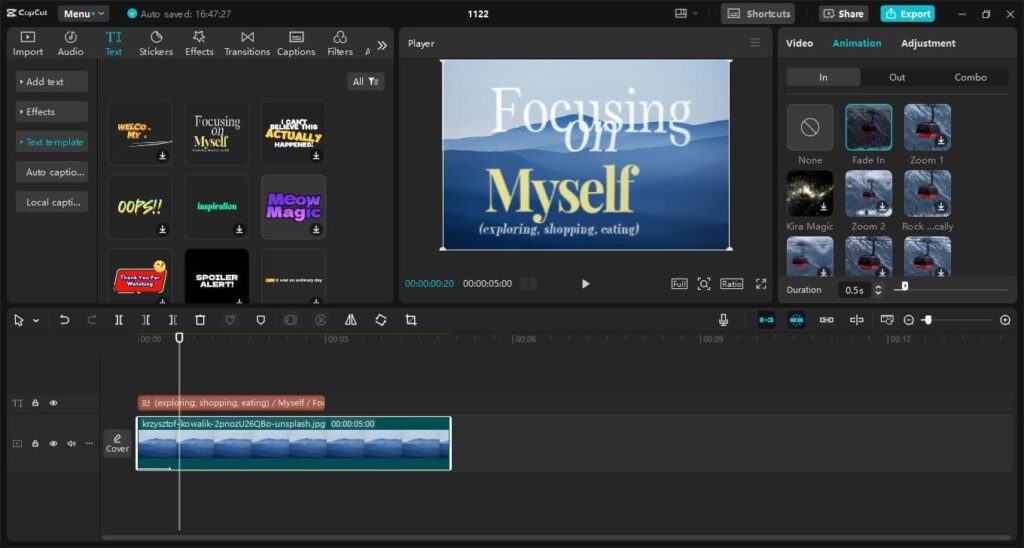
Step 4: Animate Your Captions
After writing the subtitles, utilize the animation tools provided by CapCut to make the subtitles slide, or fade in like a rockstar.
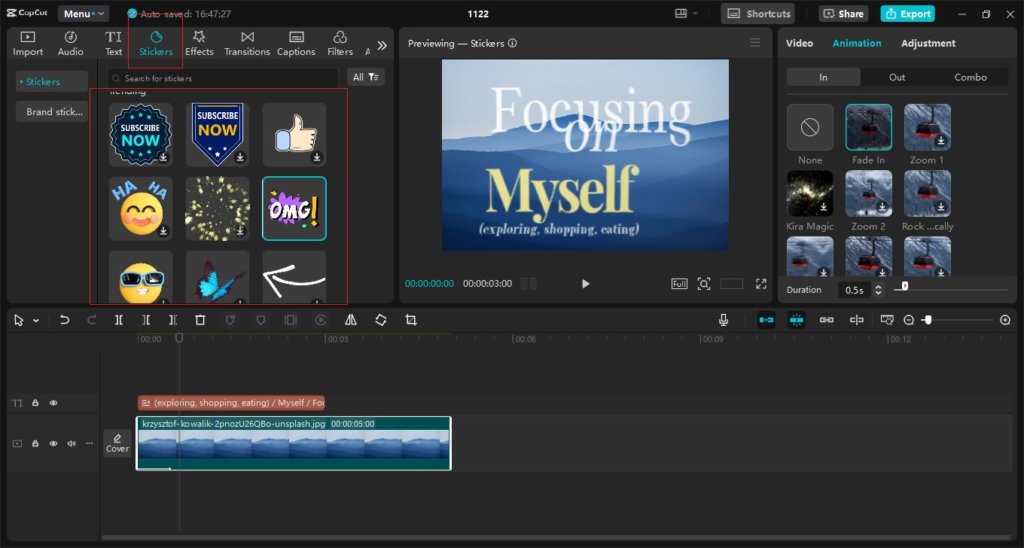
Step 5: Add Emojis
Want to connect with younger audiences? Sprinkle in emojis for extra flavor. Just don’t overdo it—this isn’t a WhatsApp group chat.
Pro Tips for Subtitles That Shine
1. Keep It Concise
Nobody likes reading a novel while watching a video. Keep your captions short and snappy—ideally, one to two lines.
2. Match the Tone
Subtitles aren’t just functional; they’re a storytelling tool. If your video is humorous, let the captions reflect that with playful language. For dramatic content, keep it serious and sleek. If you are looking for professional narrators, you can explore text-to-speech AI tools too.
3. Think About Placement
CapCut allows you to place captions anywhere on the screen. While the bottom center is the standard, don’t be afraid to experiment with placement if it enhances the scene.
Exporting Your Subtitled Masterpiece
When your captions are ready, it is time to show the world your creative work. Press the export button, choose the resolution you want, and let CapCut do its magic. Check the “Include Captions” box if you are adding them to the video.
Conclusion
Adding captions and subtitles isn’t just a technical task; it’s an art form. With CapCut’s tools and a sprinkle of your creativity, you can craft subtitles that complement your video’s narrative and make it unforgettable. Whether you’re aiming for laugh-out-loud moments or a heart-wrenching montage, subtitles are your secret weapon to connect with audiences worldwide.
So go ahead, unleash your inner storyteller, and let your captions speak volumes—literally.
- 0shares
- Facebook0
- Pinterest0
- Twitter0
- Reddit0


