Thinking about getting a tattoo sleeve? It’s a big project, for sure. You want it to look good, mean something, and last. It’s not just about picking a cool picture; it’s about planning, finding the right person to do the work, and then taking care of it. This guide is here to help you figure out how to create sleeve tattoo designs that you’ll love for a long time. We’ll go through everything from the initial ideas to the final healing.
Key Takeaways
Figure out your style and theme before you start designing.
Decide where on your arm the tattoo will go and how much coverage you want.
Find a tattoo artist whose work you like and who fits your style.
Be prepared for multiple sessions and know what to expect during them.
Follow aftercare instructions closely to make sure your tattoo heals properly.
Understanding Sleeve Tattoos: What They Are and Why People Get Them
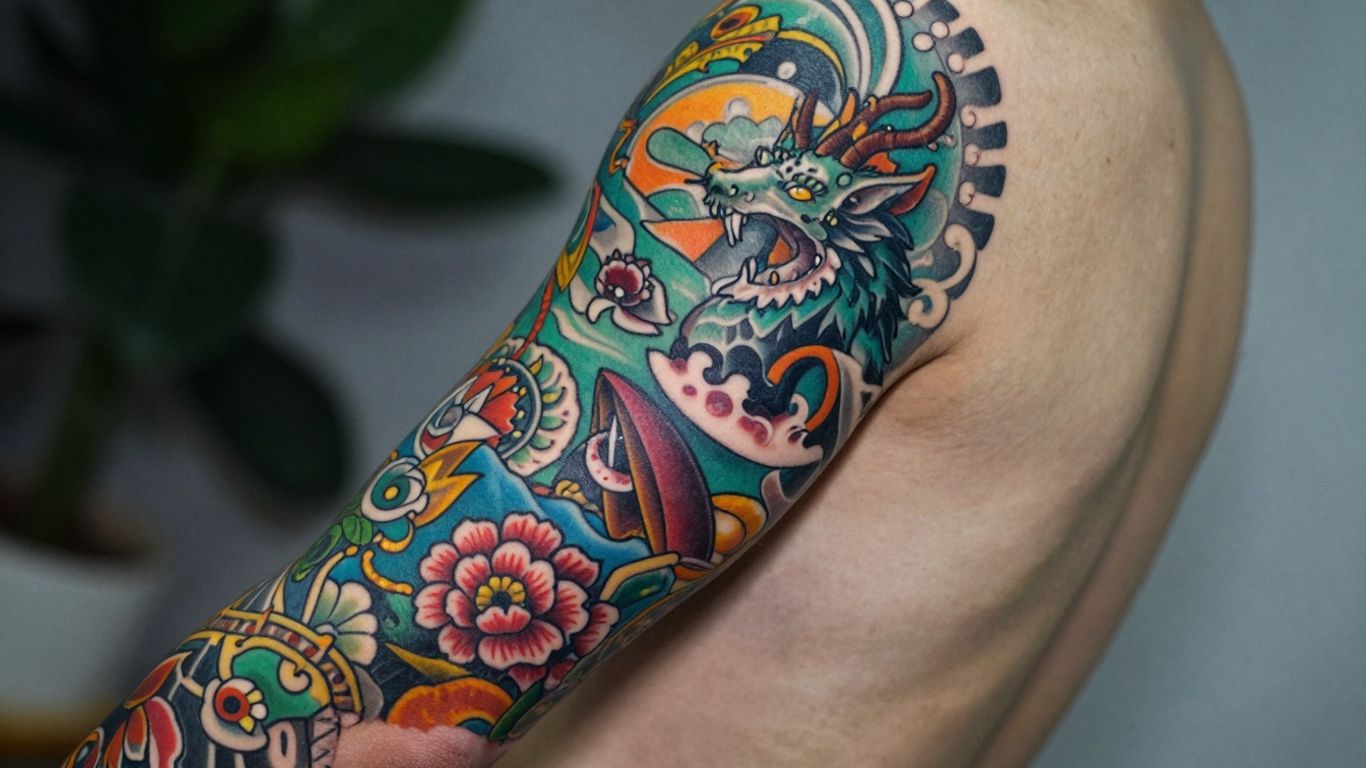
So, you’re thinking about a sleeve tattoo. Awesome. Basically, a sleeve tattoo is a big piece of art that covers a significant portion of your arm, usually from your shoulder all the way down to your wrist. It’s not just a bunch of random tattoos thrown together; the idea is to create a cohesive design that flows. Think of your arm as a canvas for a single, epic story or theme.
Why do people go for sleeves? Well, it’s a pretty powerful way to express yourself. You can tell a whole story, showcase your passions, or just create something visually stunning. It’s a commitment, for sure, but the result can be incredibly personal and meaningful. Some folks choose designs that represent their life experiences, their beliefs, or things they simply love. It’s a way to wear your heart on your sleeve, quite literally.
There are a few ways to approach sleeve designs:
Full Sleeve: Covers the entire arm, shoulder to wrist.
Half Sleeve: Covers either the upper or lower half of the arm.
Quarter Sleeve: Covers about a quarter of the arm, like the shoulder cap or forearm.
It’s all about creating a unified aesthetic across the entire arm. You can mix and match styles, too, as long as they work together. The key is planning and making sure it all fits your vision. If you’re looking for inspiration on how to piece together a beautiful tattoo sleeve, checking out professional tattoo parlors can give you some great ideas.
Getting a sleeve tattoo is a significant undertaking. It requires careful thought about the design, the artist, and the process itself. It’s more than just ink; it’s a personal statement that will be with you for a long time.
Planning Your Sleeve Tattoo: The Essential First Steps
So, you’re thinking about getting a full sleeve tattoo, huh? That’s a big commitment, but also a really cool way to express yourself. Before you even think about booking an appointment, you gotta do some serious planning. It’s not just about picking a cool picture; it’s about creating a cohesive piece of art that flows with your arm and tells a story.
Defining Your Style and Theme
First things first, what kind of vibe are you going for? Are you into bold, traditional designs with bright colors, or do you prefer the subtle shading of black and grey? Maybe you’re drawn to nature scenes, geometric patterns, or something completely abstract. Think about what truly speaks to you. This is your canvas, after all. You could look at different art styles or even cultural symbols that catch your eye. Some people like to incorporate personal experiences, like dates or symbols that mean something special to them. It’s all about finding that theme that feels right. Don’t be afraid to browse online, check out tattoo artist portfolios, and see what sparks your imagination. You might find inspiration in unexpected places, like different art styles.
Choosing the Right Placement and Coverage

Now, let’s talk about where on your arm this masterpiece is going to live. A full sleeve covers everything from your shoulder to your wrist, giving you the most space to work with. Then there’s the half sleeve, which can be either the upper or lower part of your arm. A quarter sleeve is a smaller option, maybe just the top or bottom. You also need to consider the inner arm, which is a popular spot for more personal designs. Think about how much of your arm you want covered and how the design will wrap around. It’s a good idea to talk to your artist about how different placements will affect the overall flow of the design.
Budgeting for Your Sleeve Tattoo
Let’s be real, sleeves aren’t cheap. Tattoo artists charge by the hour, and a full sleeve can take many, many hours spread over multiple sessions. You need to figure out what you can realistically afford. Don’t skimp on quality to save a few bucks; a good tattoo is an investment.
Here’s a rough idea of what to expect:
|
Coverage Type |
Estimated Hours |
Potential Cost Range |
|---|---|---|
|
Quarter Sleeve |
4-8 hours |
$400 – $1000+ |
|
Half Sleeve |
8-15 hours |
$800 – $2000+ |
|
Full Sleeve |
15-30+ hours |
$1500 – $5000+ |
Keep in mind these are just estimates. The final cost depends on the artist’s hourly rate, the complexity of the design, and how many sessions it takes. Always get a quote from your artist during the consultation.
Planning ahead is key. It helps you manage expectations, both artistically and financially. A well-planned sleeve looks better and is often more cost-effective in the long run because you avoid costly cover-ups or rework later on.
Finding the Perfect Tattoo Artist for Your Sleeve
So, you’ve got a killer idea for a sleeve tattoo. Awesome! But before you even think about ink hitting skin, you gotta find the right person to do the job. This isn’t like picking out a new shirt; it’s a big deal, and the artist you choose makes all the difference. Your sleeve is a story, and the artist is the one who’ll help you write it.
Researching Artists and Portfolios
First things first, start looking around. Don’t just walk into the first shop you see. Think about the style you’re going for. Are you into super realistic stuff? Bold traditional designs? Maybe something more abstract or geometric? Each artist has their own vibe and specialty. You can find tons of artists online, on social media, or even just by checking out tattoos you like on people you know. Look at their portfolios – that’s their collection of past work. See if their style matches what you want. Does their work look clean? Are the lines sharp? Do the colors pop (if you’re going for color)?
Here’s a quick checklist for reviewing portfolios:
Consistency: Does the artist do great work across multiple tattoos, or is it hit-or-miss?
Style Match: Does their typical style align with your sleeve concept?
Detail Level: Can they handle the intricate details you might want, or do they mostly do larger, simpler pieces?
Cleanliness: Does the healed work look as good as the fresh work?
Consulting with Your Chosen Artist

Once you’ve narrowed it down to a few artists, it’s time to talk. Most artists offer consultations, and this is super important. It’s your chance to chat about your ideas, see if you click with them, and get a feel for their process. Bring any reference pictures or sketches you have. Don’t be afraid to ask questions. You want to know how they approach designing a full sleeve, how they handle transitions between different elements, and what they think about your placement ideas. They might even have suggestions you hadn’t considered. For example, they might suggest adjusting the size of a particular element or placing it differently to make the whole sleeve flow better. It’s a collaboration, after all.
Remember, a good artist will also be honest with you. If your idea isn’t going to work well as a sleeve, or if it’s not in their style, they should tell you. It’s better to hear that upfront than to end up with a tattoo you’re not happy with.
Think about these questions to ask during your consultation:
How do you typically approach designing a full sleeve? Do you map it out digitally first?
What are your thoughts on how my existing tattoos (if any) could fit into a new sleeve design?
What’s your process for creating custom filler elements to connect different parts of the design?
How many sessions do you estimate this might take, and what’s your availability like?
Finding the right artist is a big step, but taking the time to do it right will pay off big time. You’re investing in a piece of art that will be with you forever, so make sure it’s done by someone you trust and whose work you absolutely love. You can find great resources for planning your dream tattoo sleeve online, but nothing beats a face-to-face chat with a pro.
The Tattoo Process: What to Expect During Your Sessions

So, you’ve got your design, you’ve picked your artist, and now it’s time for the actual tattooing. This is where the magic happens, but it’s also a marathon, not a sprint, especially for a full sleeve. It’s going to take multiple sessions, and each one needs some prep work and a clear head.
Preparing for Your Appointments
Getting ready for a tattoo session is pretty straightforward, but doing it right makes a big difference. First off, think about what you’re wearing. You want something loose and comfortable, like a t-shirt with sleeves you can easily roll up or shorts if the session is on your leg. This makes it easy for the artist to access the area without you feeling all bunched up. Also, try to hydrate your skin in the days leading up to your appointment; moisturized skin takes ink better. And this is a big one: avoid alcohol and any blood-thinning medications for at least 24 hours beforehand. Seriously, it helps minimize bleeding. Oh, and eat a solid meal before you go. You don’t want to be feeling faint halfway through.
Understanding Pain and Session Length
Let’s talk about the elephant in the room: pain. Yeah, it stings. But honestly, it’s more of a persistent discomfort than anything unbearable for most people. Pain levels really depend on where the needle is hitting. Bony areas or spots close to the armpit tend to be more sensitive than fleshy parts. Most people find the experience manageable, especially when they focus on their breathing and the incredible art being created. The length of each session can vary wildly. A small detail might take an hour, while a large section of shading or color could easily take four to six hours. Artists usually recommend not pushing it too far, as fatigue can set in for both you and them. It’s better to have shorter, more frequent sessions than one marathon that leaves you completely drained. You’ll want to space these out, too, giving your skin time to heal between visits. This isn’t just about comfort; it’s about the quality of the final tattoo. Rushing the process can lead to healing issues and affect how the ink settles. You can find some great examples of how artists plan out these multi-session projects by looking at portfolios from places like Remington Tattoo.
Building a tattoo sleeve is a journey. It requires patience, communication with your artist, and a good understanding of your own body’s limits. Don’t be afraid to take breaks during a session if you need them. Your artist wants you to have a great experience and a fantastic final piece of art.
Aftercare for Your Sleeve Tattoo: Ensuring Proper Healing
So, you’ve got this amazing sleeve inked, and now the real work begins – keeping it looking sharp. Think of aftercare like tending to a new plant; it needs the right conditions to thrive. Your artist will give you specific instructions, and honestly, it’s best to stick to those like glue. They know their work and your skin best.
Generally, the first few weeks are key. You’ll want to gently clean the tattooed area, usually with a mild, unscented soap and lukewarm water. Pat it dry – no rubbing! Then, apply a thin layer of the recommended moisturizer. This keeps the skin from getting too dry, which can mess with the healing and the ink.
Here’s a quick rundown of what to expect and do:
Keep it Clean: Wash your tattoo gently at least once or twice a day. Avoid soaking it in baths or pools.
Moisturize Regularly: Apply a thin layer of ointment or lotion as advised by your artist.
Protect from the Sun: This is a big one. Direct sun exposure is the enemy of vibrant tattoos. Keep your sleeve covered when you’re outside, especially during the initial healing phase. Once healed, always use a high SPF sunscreen on it.
Avoid Irritation: Don’t pick at scabs or scratch the healing skin. Also, try to wear loose clothing over the area to prevent friction.
Healing times can vary quite a bit from person to person. Factors like your overall health, how much sleep you get, and even your stress levels can play a role. Be patient with your body; it’s doing a lot of work to repair itself and set that ink in place.
Don’t be surprised if your sleeve looks a little dull or flaky during the healing process. That’s totally normal. It might take a few weeks for the initial healing to finish, and even longer for the skin to fully settle. If you notice anything concerning, like excessive redness, swelling, or discharge, don’t hesitate to call your artist or a doctor. And remember, down the road, touch-ups might be needed to keep those colors popping, so stay in touch with your artist for maintenance.
Wrapping It Up

So, you’ve made it through the whole guide on creating a killer sleeve tattoo. It’s a big project, for sure, but totally doable when you break it down. Think about what you want, find an artist who gets your vibe, and don’t rush the process. Whether you’re going for a patchwork look over time or a big, unified design from the start, the most important thing is that it feels like you. Take care of it, and your arm will be telling your story for years to come. Happy tattooing!
Frequently Asked Questions
What exactly is a sleeve tattoo?
A sleeve tattoo is a big tattoo that covers most of your arm, kind of like a long shirt sleeve. It can go from your shoulder all the way down to your wrist, or just cover part of your arm like a half or quarter sleeve.
Why do people get sleeve tattoos?
People get sleeve tattoos for all sorts of reasons! It’s a way to show off their personality, tell a story through pictures, or just because they love the art. It’s like wearing a masterpiece on your skin.
How do I pick a design for my sleeve?
Think about what you love! You can choose a theme like nature, animals, or even things that are important to you personally. It’s best to look at lots of different styles and ideas to see what speaks to you before you decide.
How long does it take to get a sleeve tattoo?
Getting a whole sleeve done takes time. It’s usually done in several appointments, which could take weeks or even months, depending on how detailed the design is and how fast the artist works.
Will getting a sleeve tattoo hurt a lot?
Tattooing can be a bit painful, and it depends on where on your arm the needle is working. Some spots hurt more than others, especially over bones. But most people find it’s a pain they can handle, and the amazing result is worth it.
What’s the most important thing after getting a sleeve tattoo?
Taking good care of it is super important! You’ll need to keep it clean and moisturized, just like your artist tells you. Protecting it from the sun is also key to keeping the colors looking bright for a long, long time.
- 18shares
- Facebook0
- Pinterest15
- Twitter3
- Reddit0