The crisp air, the gentle glow of lights, the anticipation of festive cheer – Christmas is just around the corner! While store-bought decorations are convenient, there’s something truly magical about transforming your outdoor space with diy outdoor christmas decorations. Imagine unique, handcrafted pieces that reflect your personal style and bring a heartwarming, homespun charm to your neighborhood. This isn’t just about saving a few bucks; it’s about igniting your creativity, creating cherished memories with loved ones, and making your home a beacon of festive spirit that stands out from the rest. Let’s dive into a world of sparkling possibilities, where everyday items are transformed into extraordinary holiday spectacles and your yard becomes a canvas for winter wonder.
Why Go DIY for Your Outdoor Christmas Decor?
Before we get our hands glittery, let’s explore why crafting your own outdoor Christmas decorations is such a fantastic idea. Beyond the obvious joy of creation, there are tangible benefits that make the effort worthwhile.
First off, it’s incredibly cost-effective. Christmas can be expensive, and outdoor decorations often come with hefty price tags. By choosing the DIY route, you can repurpose materials you already have, scour thrift stores, or buy inexpensive supplies, significantly slashing your holiday budget. Think about the money you’ll save for gifts or other festive treats!
Secondly, your decor will be one-of-a-kind. No more seeing the same plastic reindeer or string lights on every block. Your handmade creations will possess a unique character, telling a story of creativity and effort that mass-produced items simply can’t match. This personalization truly makes your home feel special.
It’s also an amazing family activity. Gathering loved ones to craft decorations builds traditions and creates lasting memories. Kids especially love getting involved, painting, gluing, and seeing their contributions light up the yard. It’s a wonderful way to bond and instill the spirit of giving and creation.
Finally, DIY decorations can be surprisingly eco-friendly. Repurposing old items, using natural materials, and avoiding excessive plastic waste contributes to a more sustainable holiday. You’re giving new life to forgotten objects and reducing your environmental footprint. It’s a win-win for your wallet, your family, and the planet.
Planning Your Outdoor Christmas Spectacle
Embarking on your DIY outdoor Christmas decoration journey requires a little planning. Think of your yard as a stage and your decorations as the props. A cohesive vision will elevate your display from a collection of individual pieces to a stunning holiday masterpiece.
Define Your Theme and Color Palette: Do you envision a traditional look with reds, greens, and golds? Or perhaps a whimsical wonderland of pastels and glitter? A rustic farmhouse feel with natural elements, or a modern, minimalist display? Deciding on a theme early will guide your material choices and project ideas. For instance, a rustic theme might lean into natural wood, pinecones, and burlap, while a whimsical theme could feature oversized candy canes and vibrant, non-traditional colors.
Assess Your Space: Walk around your yard, front porch, and even balconies. Where are your focal points? Do you have large trees, fences, railings, or a prominent entryway? Consider how passersby will view your decorations – from the street, from the sidewalk, or from close up. This helps you decide on scale and placement. What areas could benefit from a touch of festive flair? You might even consider how to enhance your outdoor living spaces like a patio for entertaining.
Consider Your Lighting Strategy: Lights are crucial for outdoor Christmas decor. Think about how your DIY pieces will interact with existing lighting or if they need their own illumination. Will you use battery-operated fairy lights, solar-powered accents, or traditional plug-in strands? Safety and power access are key considerations here.
Gather Your Materials (and Inspiration!): This is where the fun begins! Start collecting items you can repurpose: old tires, plastic bottles, tin cans, wooden pallets, fabric scraps, pinecones, branches, and even old holiday ornaments that need a refresh. Pinterest, Instagram, and craft blogs are treasure troves of inspiration. Don’t forget basic crafting supplies like paint, glue, glitter, wire, and zip ties. Looking for general ideas? Check out some easy craft ideas to get your creative juices flowing.

Classic & Timeless DIY Outdoor Decorations
Some decorations never go out of style. These projects offer that heartwarming, traditional Christmas feel, often with a DIY twist that makes them even more special.
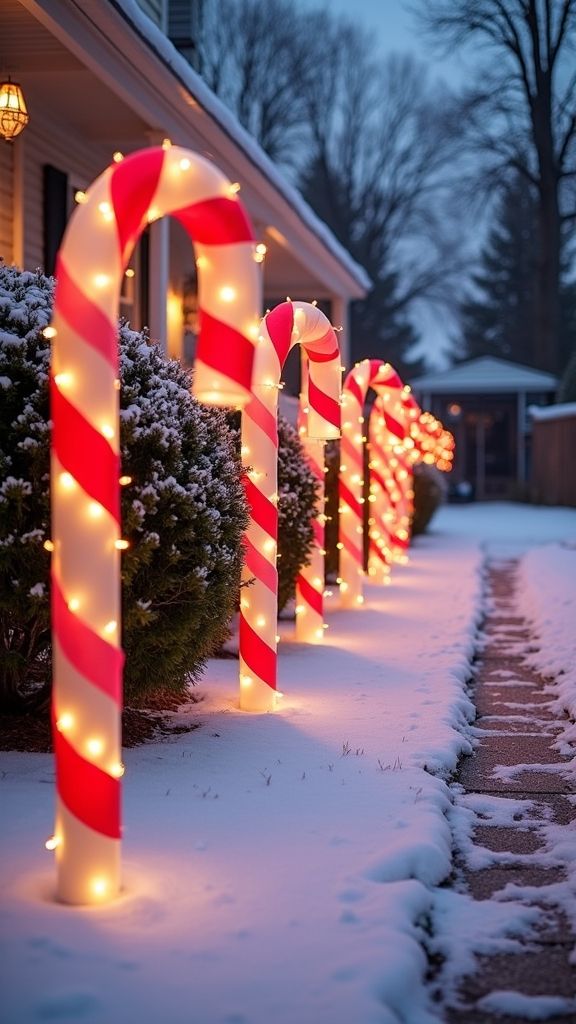
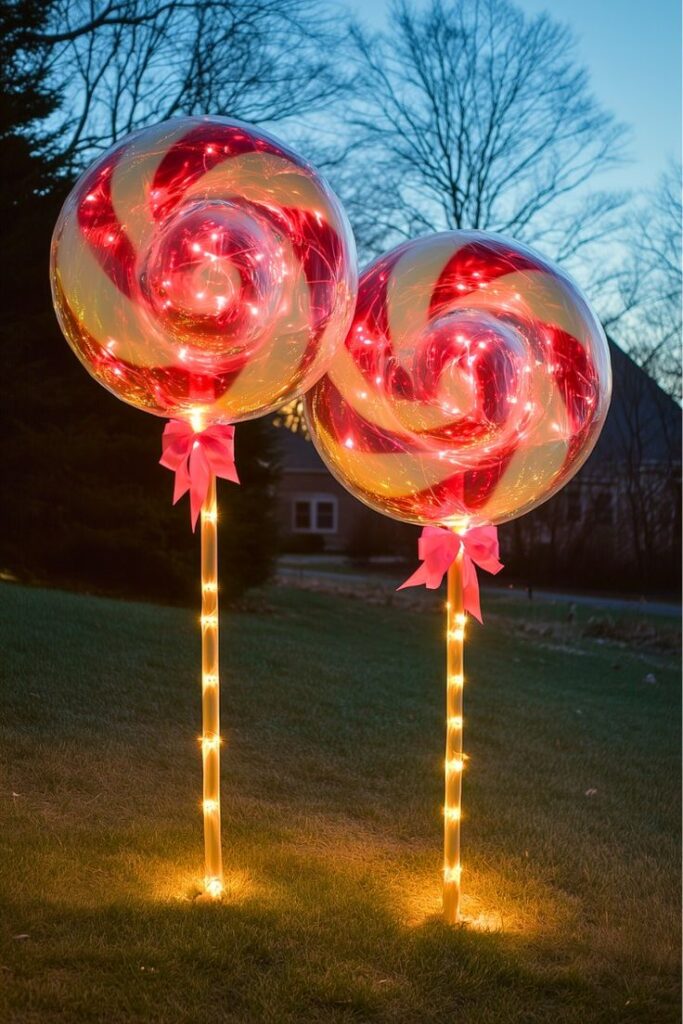
Giant Lollipops and Candy Canes: Imagine a pathway lined with oversized candy canes or lollipops. These are surprisingly easy to make!
- Materials: PVC pipes (for candy canes), sturdy wooden dowels (for lollipops), foam board or cardboard circles (for lollipops), red and white paint, clear sealant, plastic wrap, cellophane, ribbon.
- Candy Canes: Bend PVC pipes (you might need to heat them carefully, or buy pre-bent sections) into the candy cane shape. Paint them white, then add red stripes. Seal with a clear coat.
- Lollipops: Paint cardboard or foam board circles in a swirl of red and white. Attach a dowel as a stick. Cover the “lollipop” head with cellophane tied with a festive ribbon for that classic look.
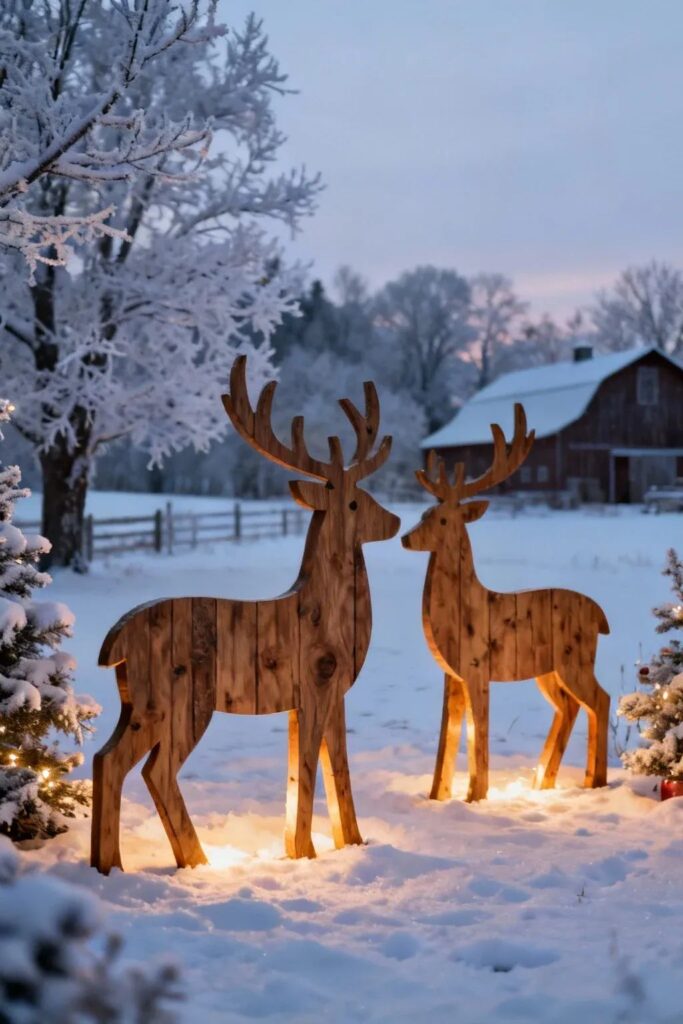
Rustic Wooden Sleigh or Reindeer: For a charming, rustic touch, wooden cutouts are fantastic.
- Materials: Plywood, jigsaw, exterior paint, wood stain, sealant, optional lights.
- Process: Find a template online or draw your own sleigh or reindeer shape. Carefully cut it out with a jigsaw. Sand the edges. Paint or stain your creation. You can add details with different colored paints or attach battery-operated fairy lights for a nighttime glow. These look great nestled among evergreen bushes or near your front door.
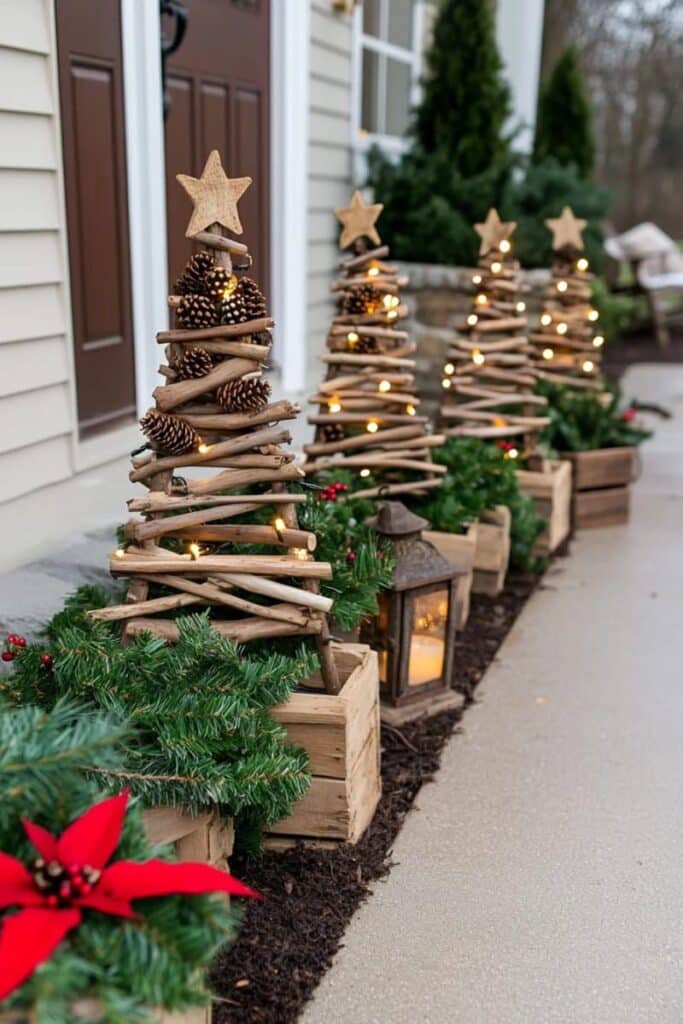
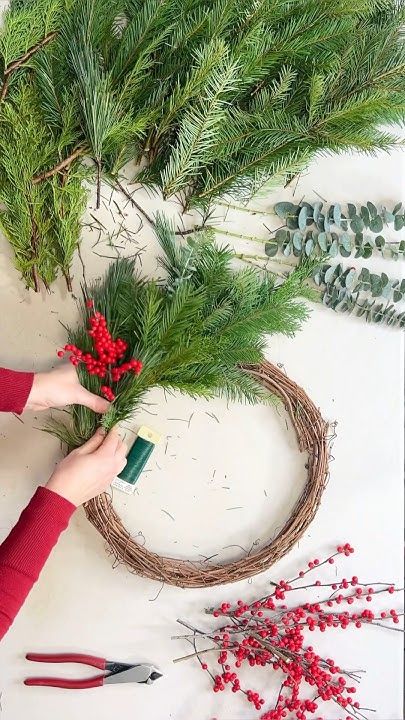
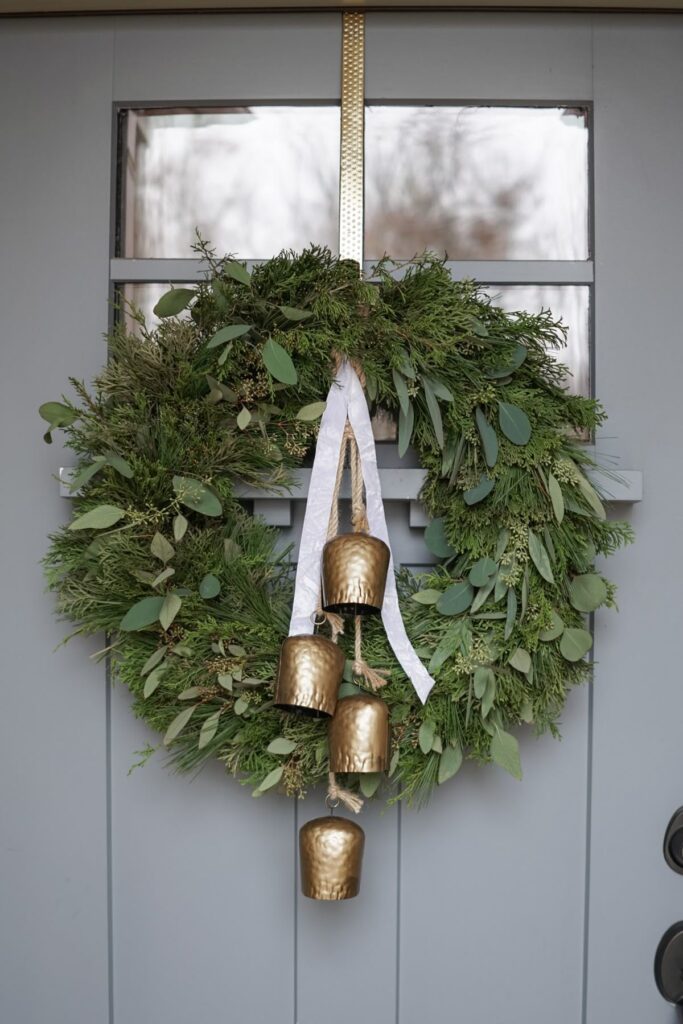
Natural Element Garlands and Wreaths: Bring the beauty of nature to your doorstep.
- Materials: Fresh evergreen branches (pine, cedar, fir), pinecones, berries (artificial or real, non-toxic), wire, floral tape, ribbon, hot glue gun.
- Garlands: Gather long sprigs of evergreens. Using floral wire, layer and bind them together along a central wire or rope, creating a lush garland. Weave in pinecones and berries with wire or hot glue.
- Wreaths: Use a wire wreath form. Attach evergreen sprigs, overlapping them in one direction, securing with floral wire. Embellish with pinecones, bows, and other natural elements. A simple, elegant wreath can truly define your entryway.
Whimsical & Fun DIY Outdoor Decorations
If your style leans more towards playful and imaginative, these projects will add a dose of fun and personality to your outdoor display.
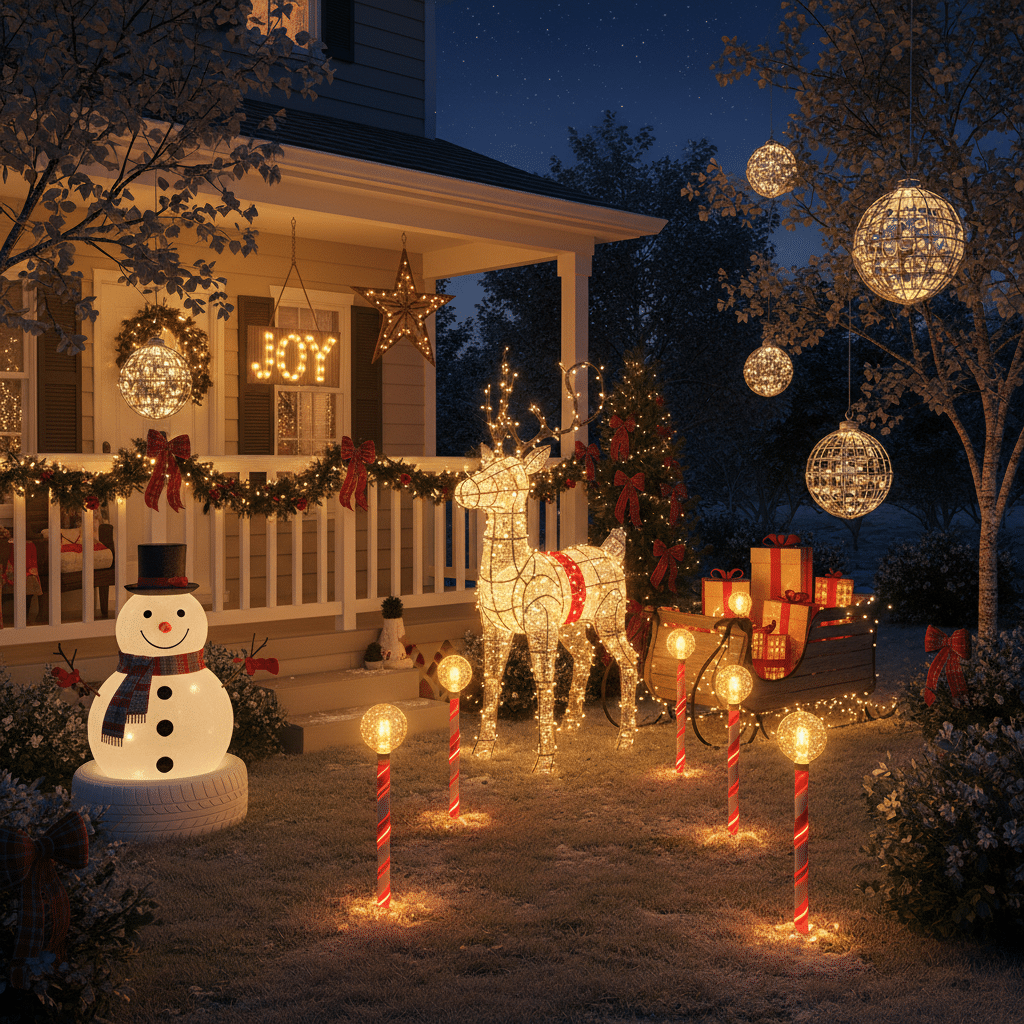
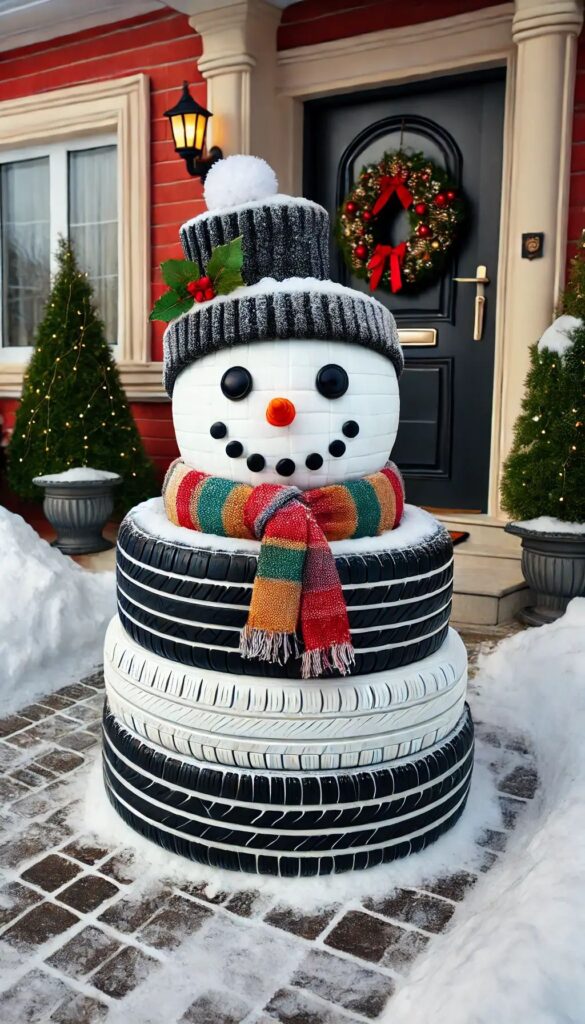
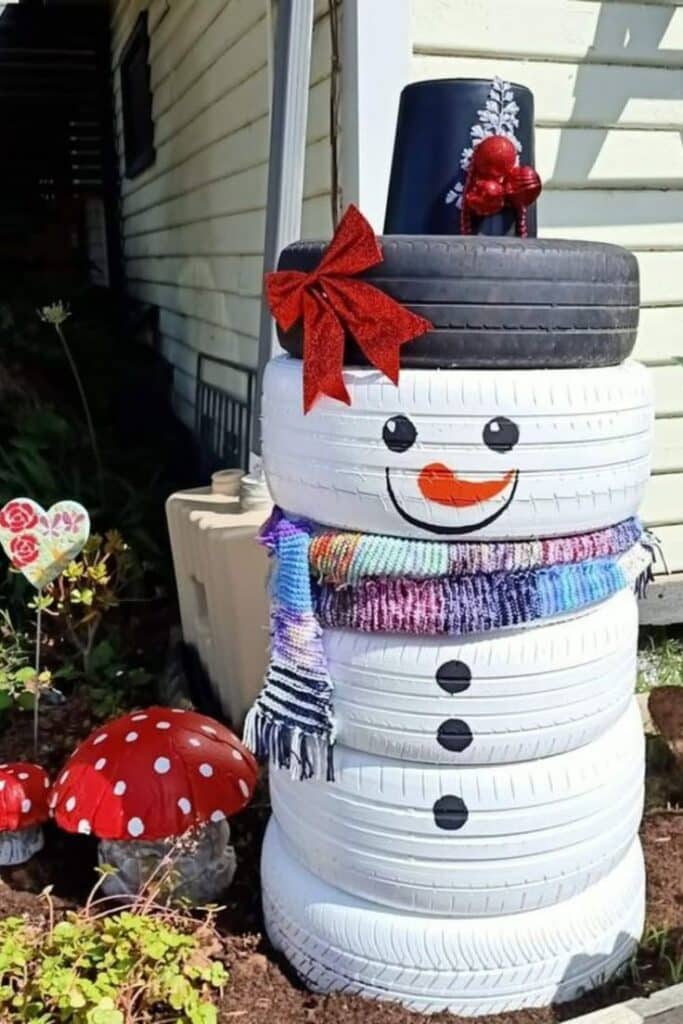
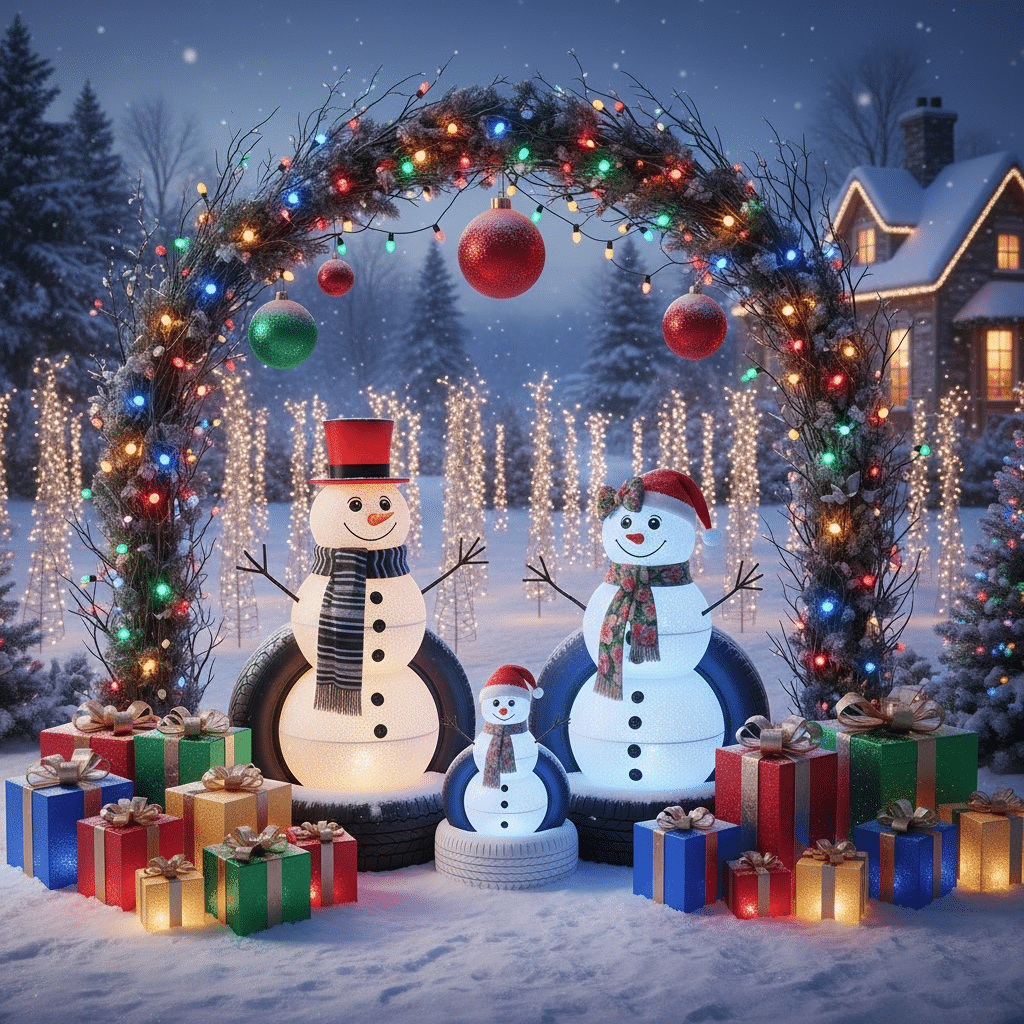
“Snowman” Family from Repurposed Materials: Forget the snow, make your own snowman family!
- Materials: Old tires (painted white), plastic buckets, painted gourds, or painted large plastic balls for heads; scarves, hats, sticks for arms, buttons for eyes/mouth, orange paint for nose.
- Process: Stack painted white tires in decreasing size for the body. For smaller snowmen, stack painted plastic buckets. Add a “head” (painted bucket or large ball). Accessorize with real or DIY scarves, hats, and stick arms. Paint on features. Secure everything so it won’t topple in the wind.
Oversized Outdoor Ornaments: These make a big impact without a big budget.
- Materials: Large inflatable beach balls, plastic play balls, old basketballs, bright exterior paint, glitter, ribbon, hot glue, large plastic caps (e.g., from milk jugs or spray cans).
- Process: Paint beach balls or plastic balls in vibrant Christmas colors (red, green, gold, silver). Once dry, apply glitter if desired. Hot glue a plastic cap to the top for the “hanger” part. Thread a loop of ribbon through a hole in the cap for hanging from trees or porch eaves. You can even secure them to the ground with stakes to prevent rolling.
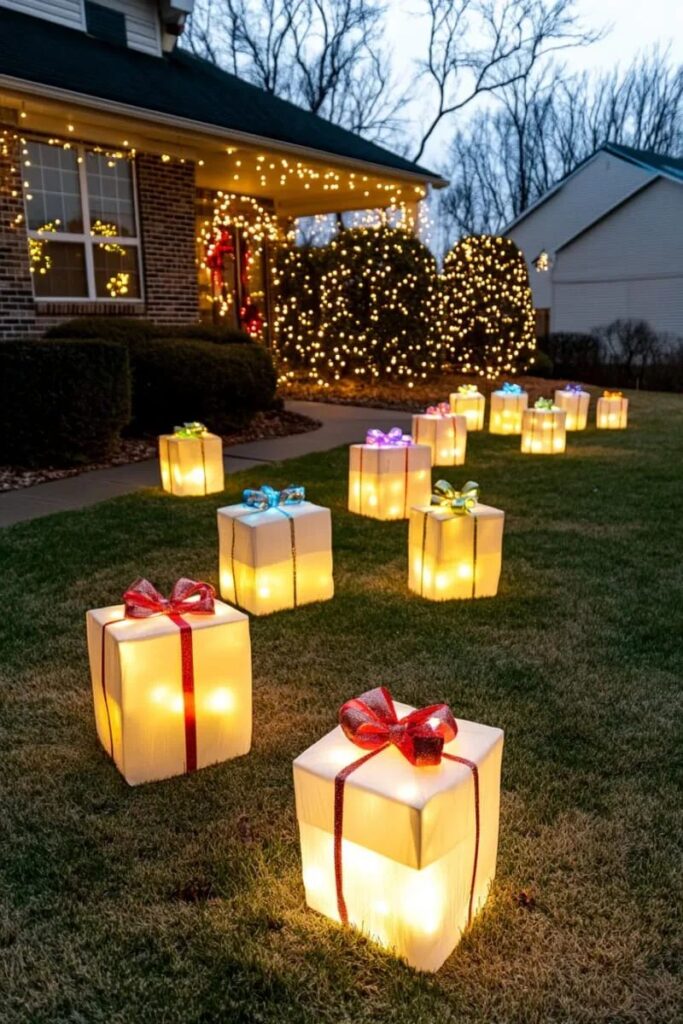
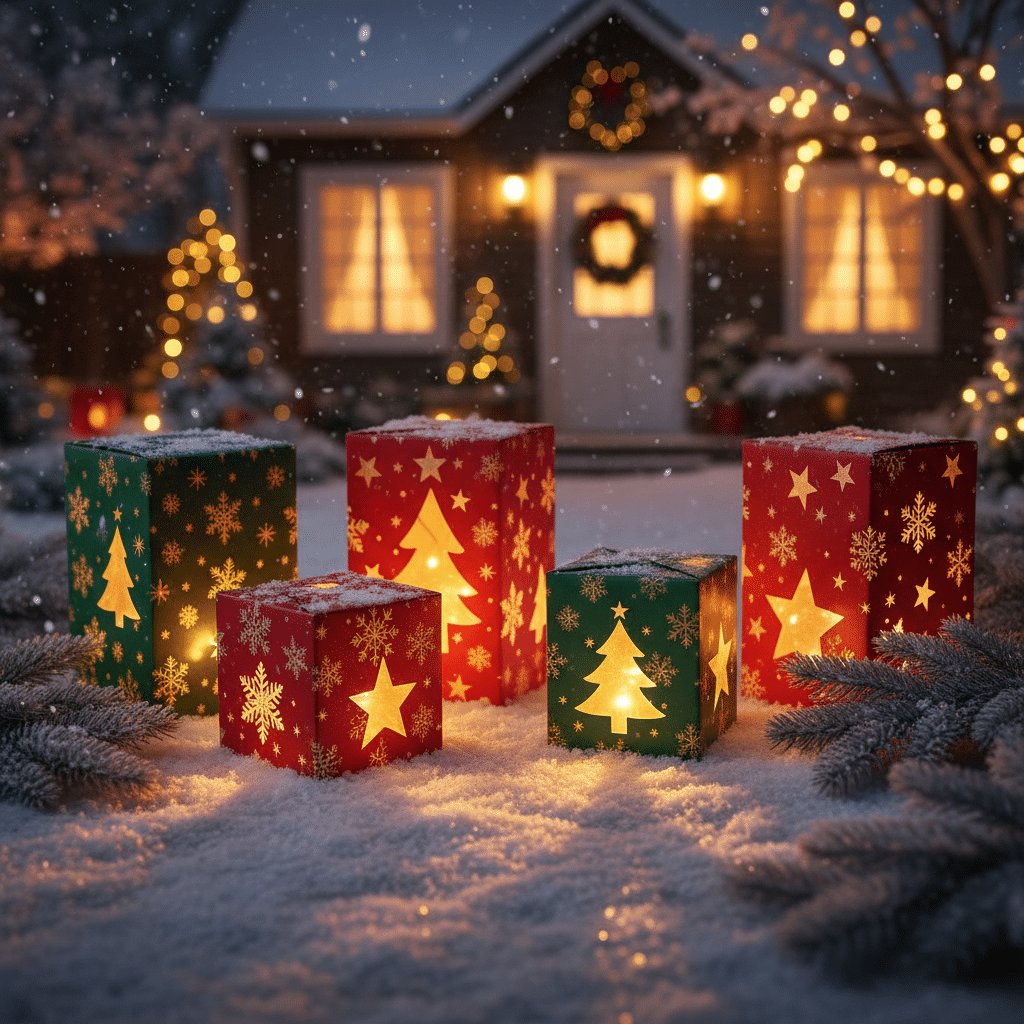
Glowing Present Boxes: These add a magical, illuminated touch.
- Materials: Cardboard boxes of various sizes, outdoor Christmas lights, weatherproof fabric (e.g., vinyl tablecloths, shower curtains) or exterior paint, clear sealant, large bows.
- Process: Cut openings in the sides of the cardboard boxes (if using lights inside) or just wrap the lights around the outside. Cover the boxes with waterproof fabric, securing with strong adhesive, or paint them with exterior paint and seal them thoroughly. Drape outdoor lights inside or around the boxes. Finish with oversized bows made from weatherproof ribbon. Place them near your front door or under a tree.
Upcycled Tire Wreaths: Give old tires a festive new life.
- Materials: Old car tires (cleaned), exterior spray paint (green, white, red), fake berries, large bows, tinsel, lights.
- Process: Thoroughly clean the old tires. Spray paint them green for a traditional wreath look, or white for a snowy effect. Once dry, decorate with weatherproof bows, artificial berries, tinsel, or even some outdoor LED string lights. You can lean them against a wall or hang them if they’re small enough. Repurposing old furniture and other items like tires is a fantastic way to give vintage items a second life.
Illuminating Your Yard: Creative Lighting DIYs
Lights are the heart of outdoor Christmas decor. Going beyond simple string lights, these DIY projects add unique sparkle and warmth.
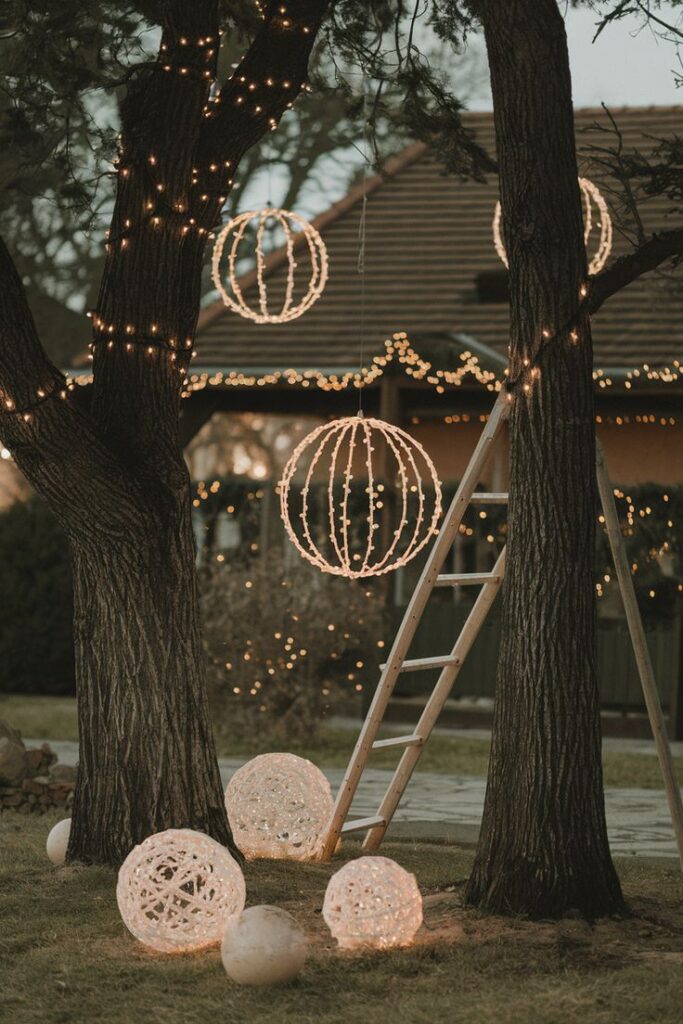
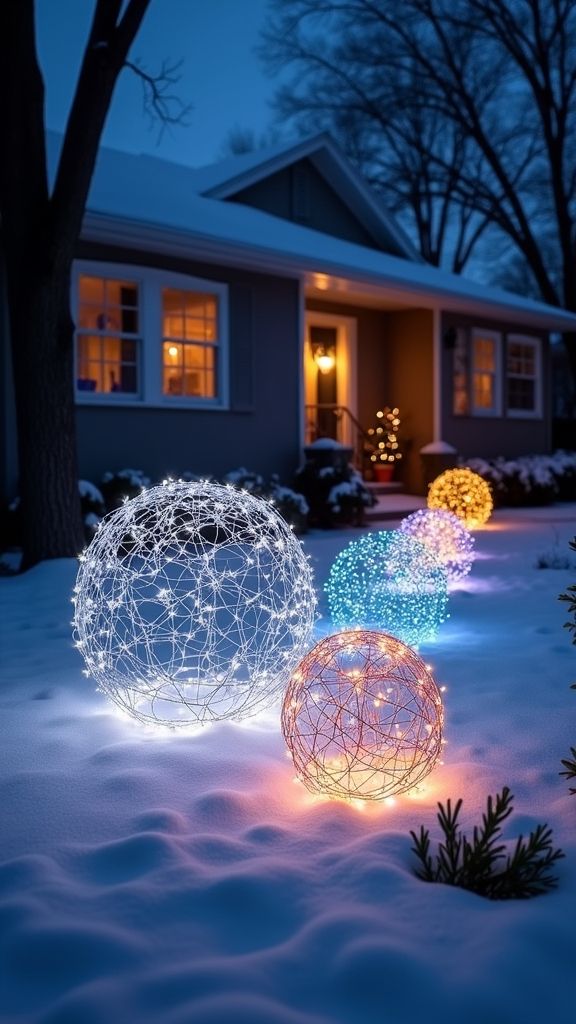
DIY Lighted Spheres (Chicken Wire Orbs): These glowing orbs are stunning when clustered in trees or on the ground.
- Materials: Chicken wire, wire cutters, work gloves, zip ties, string lights (LEDs are best for energy efficiency and durability).
- Process: Cut a section of chicken wire. Wearing gloves, carefully shape it into a sphere, securing the edges with wire or zip ties. The size is up to you! Once you have your sphere, carefully weave string lights through and around the inside and outside, ensuring even distribution of light. Plug them in, and watch your garden glow!
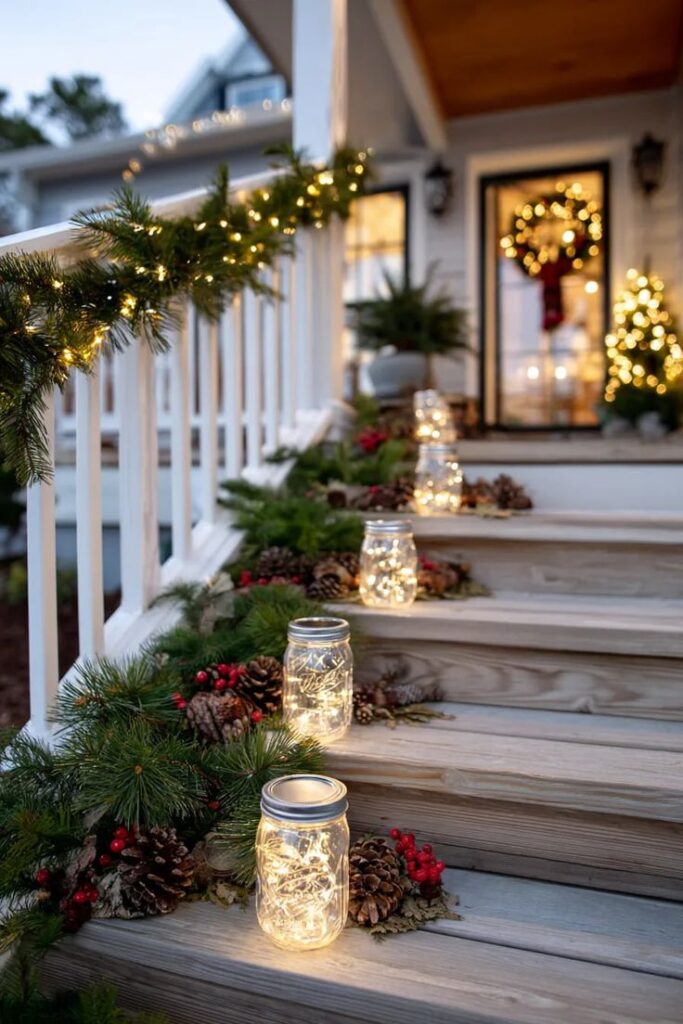
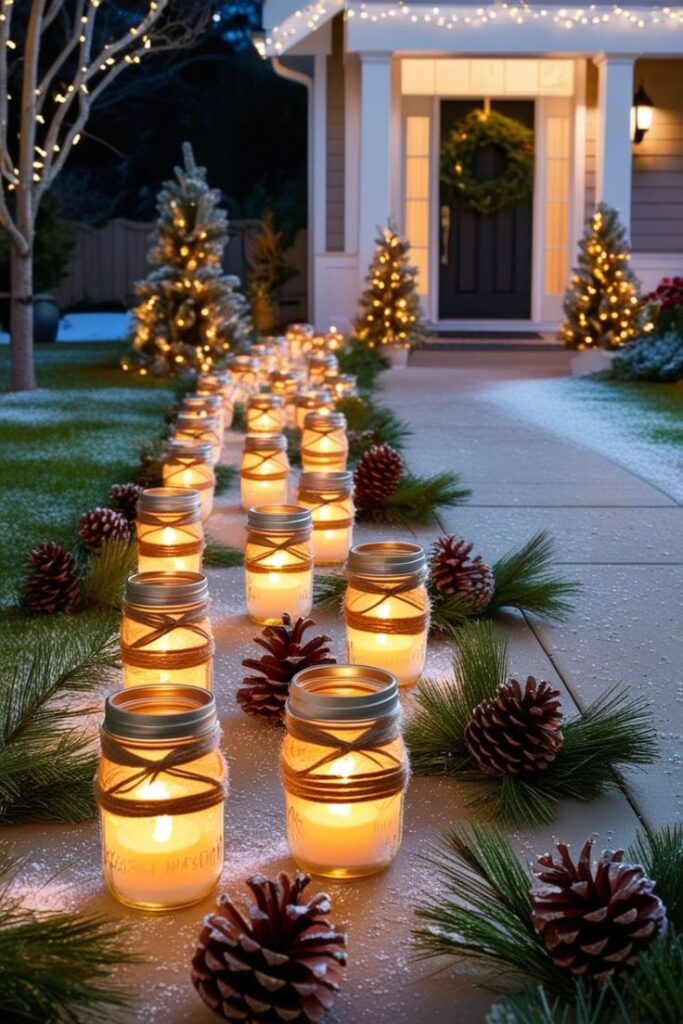
Mason Jar Lanterns & Pathway Lights: Simple, elegant, and versatile.
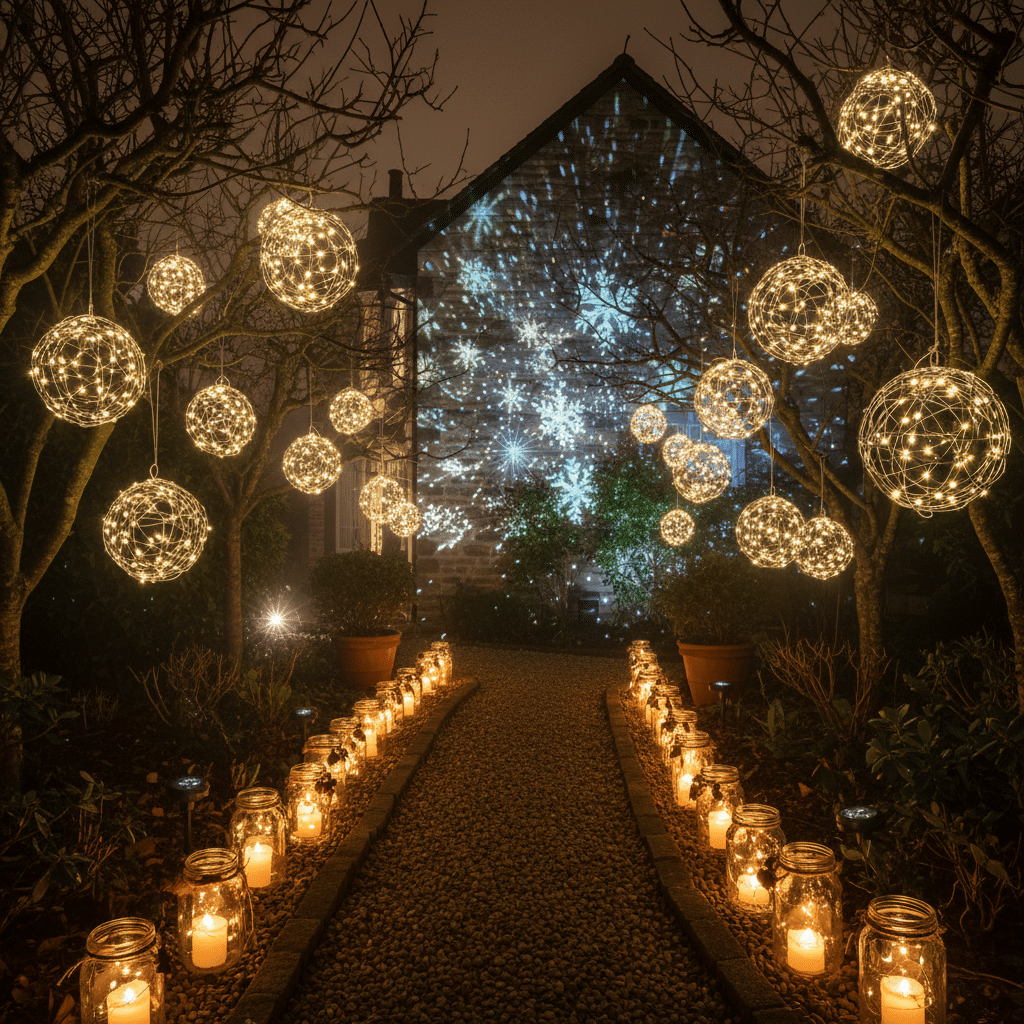
- Materials: Mason jars, battery-operated fairy lights, solar-powered tea lights, or small LED candles; wire or twine for hanging.
- Process: Place your chosen light source inside the mason jar. For hanging, wrap wire securely around the neck of the jar, creating a loop. Hang them from tree branches, shepherd hooks along a pathway, or cluster them on a porch railing. You can even paint the jars with festive designs or fill them with faux snow and small ornaments before adding the lights.
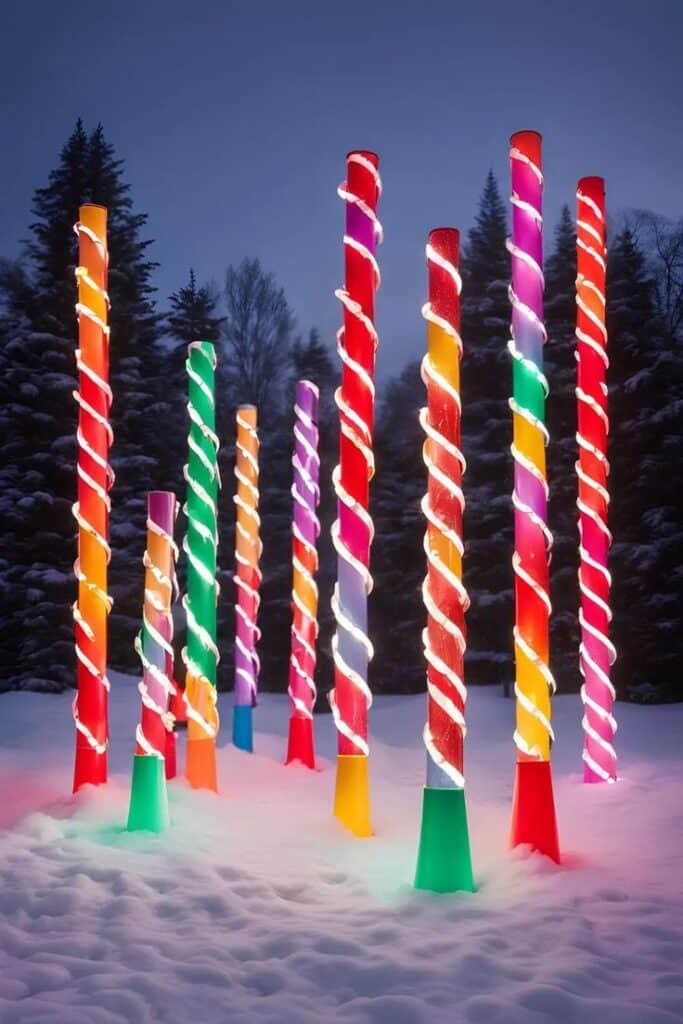
PVC Pipe Pathway Markers: Create elegant glowing markers for your walkways.
- Materials: PVC pipes (various diameters), caps for the tops, spray paint (white or metallic), clear acrylic sealant, outdoor string lights.
- Process: Cut PVC pipes to varying heights. Cap one end. Paint them desired colors and seal. Drill small holes in patterns around the pipes. Thread string lights up through the base of the pipe, allowing the light to shine through the holes. You can also create larger cutouts to mimic classic lampposts or candy stripes.
DIY Projector Effects (Gobo Lights): Cast festive shapes onto your home or lawn.
- Materials: An outdoor spotlight or floodlight, heat-resistant plastic sheets or thin metal, craft knife or small metal cutters, stencils (optional).
- Process: Create stencils of stars, snowflakes, or Christmas trees. Cut these shapes out of a heat-resistant material (like a special plastic sheet or thin metal). Secure your stencil over the lens of an outdoor floodlight. Position the light to project the pattern onto your house or a large outdoor surface. Always ensure the material is truly heat-resistant and positioned safely to avoid fire hazards.
Eco-Friendly & Upcycled Christmas Decor
Give new life to old items and celebrate the season sustainably with these clever upcycling ideas.
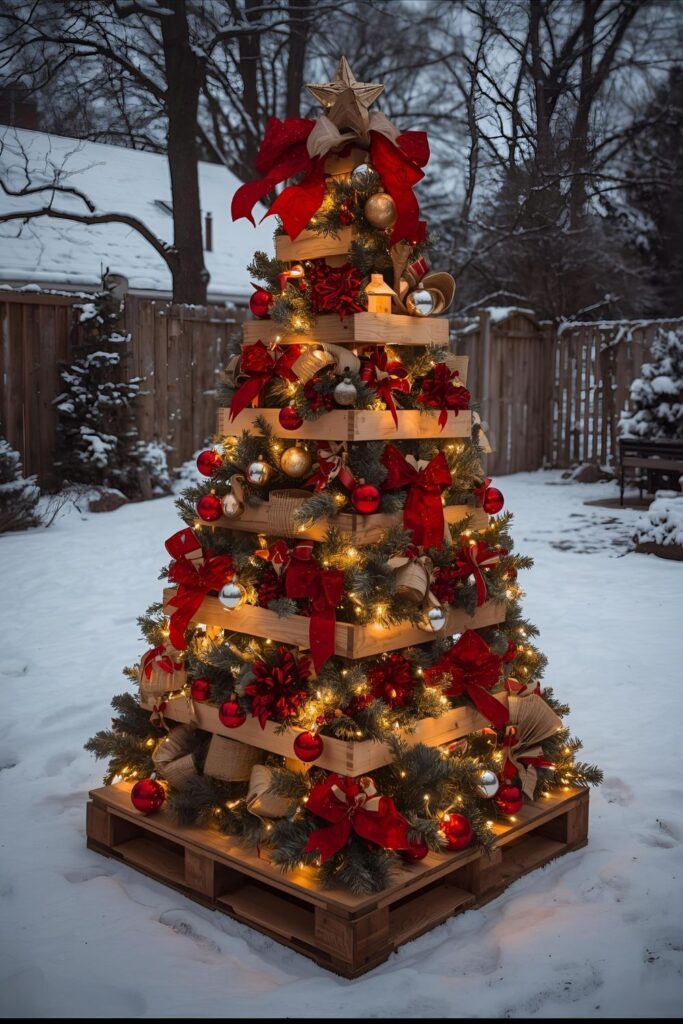
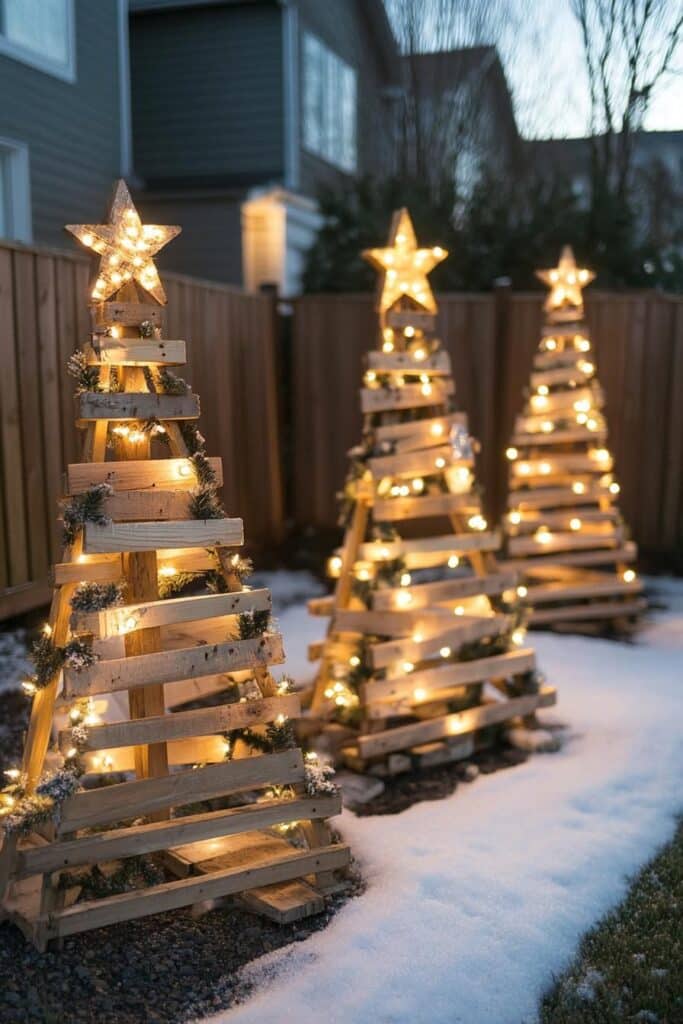
Pallet Christmas Trees: A rustic and eco-conscious alternative to traditional trees.
- Materials: Wooden pallets, crowbar, hammer, nails/screws, saw, green paint/stain, outdoor lights, ornaments.
- Process: Carefully dismantle pallets to get individual wooden planks. Cut planks into varying lengths to form a triangular tree shape. Nail or screw them onto a central vertical plank. Paint or stain your tree green, or leave it natural for a rustic look. Decorate with string lights and weatherproof ornaments. You can also create flat, two-dimensional pallet trees by cutting out a tree shape from a single large pallet board.
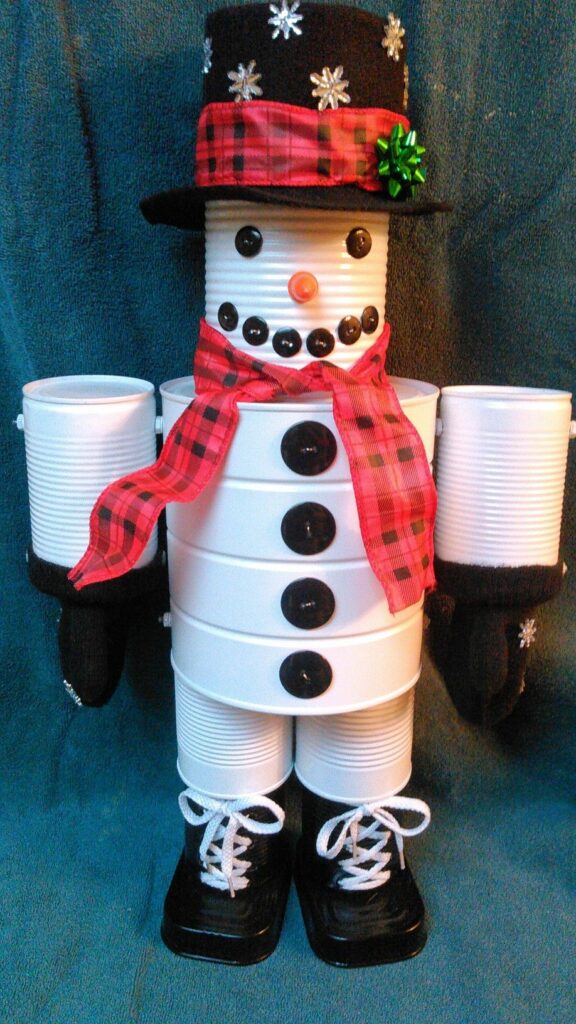
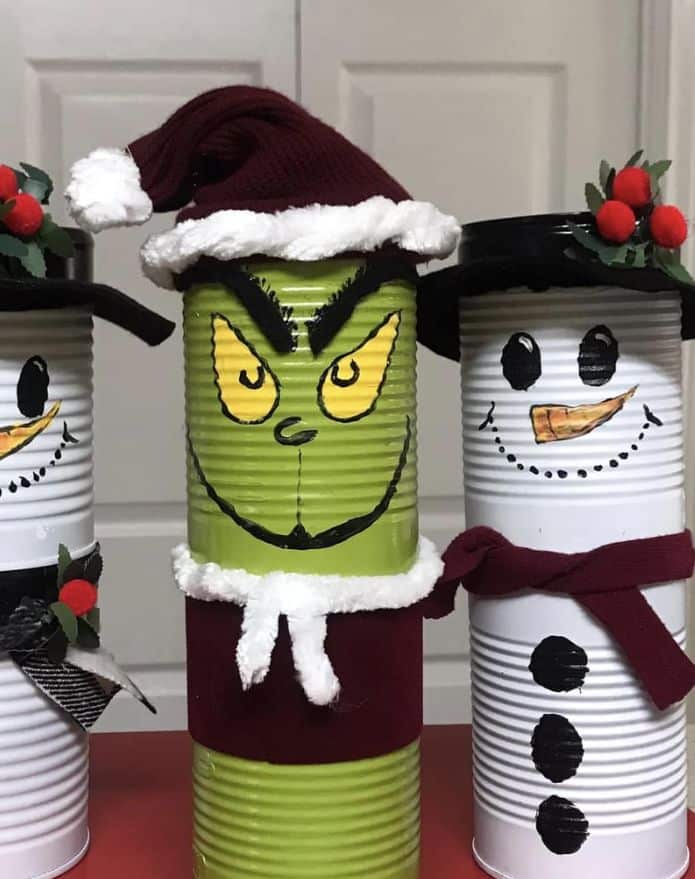
Tin Can Characters or Ornaments: Turn everyday cans into charming decor.
- Materials: Clean tin cans (various sizes), exterior paint, paintbrushes, clear sealant, embellishments (buttons, fabric scraps, googly eyes), wire or string for hanging.
- Process: Wash and dry tin cans thoroughly. Paint them with festive characters like snowmen, Santa, reindeer, or elves. Or paint them bright colors and decorate them as oversized ornaments. Seal with a clear coat. Attach embellishments. For hanging, punch two holes near the top rim of the can and thread wire or string through. These are perfect for hanging from trees or fences.
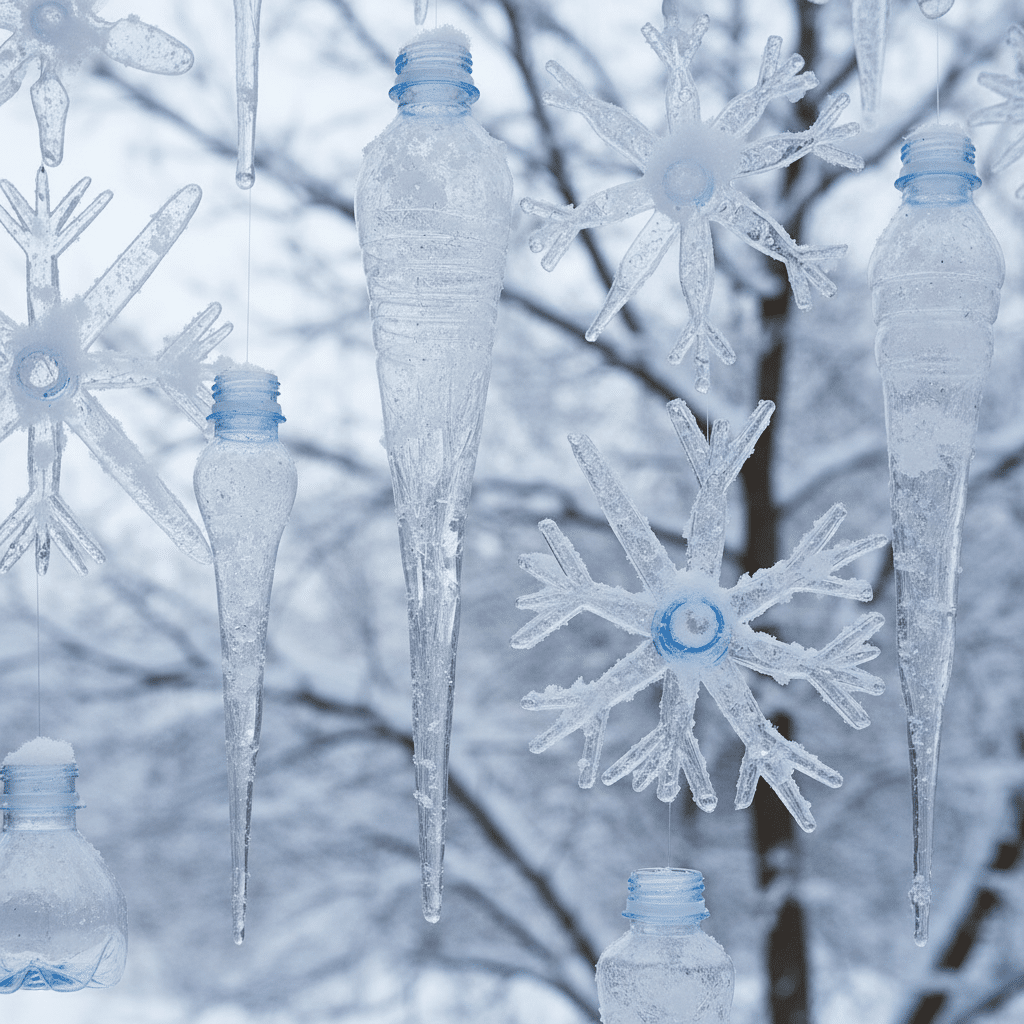
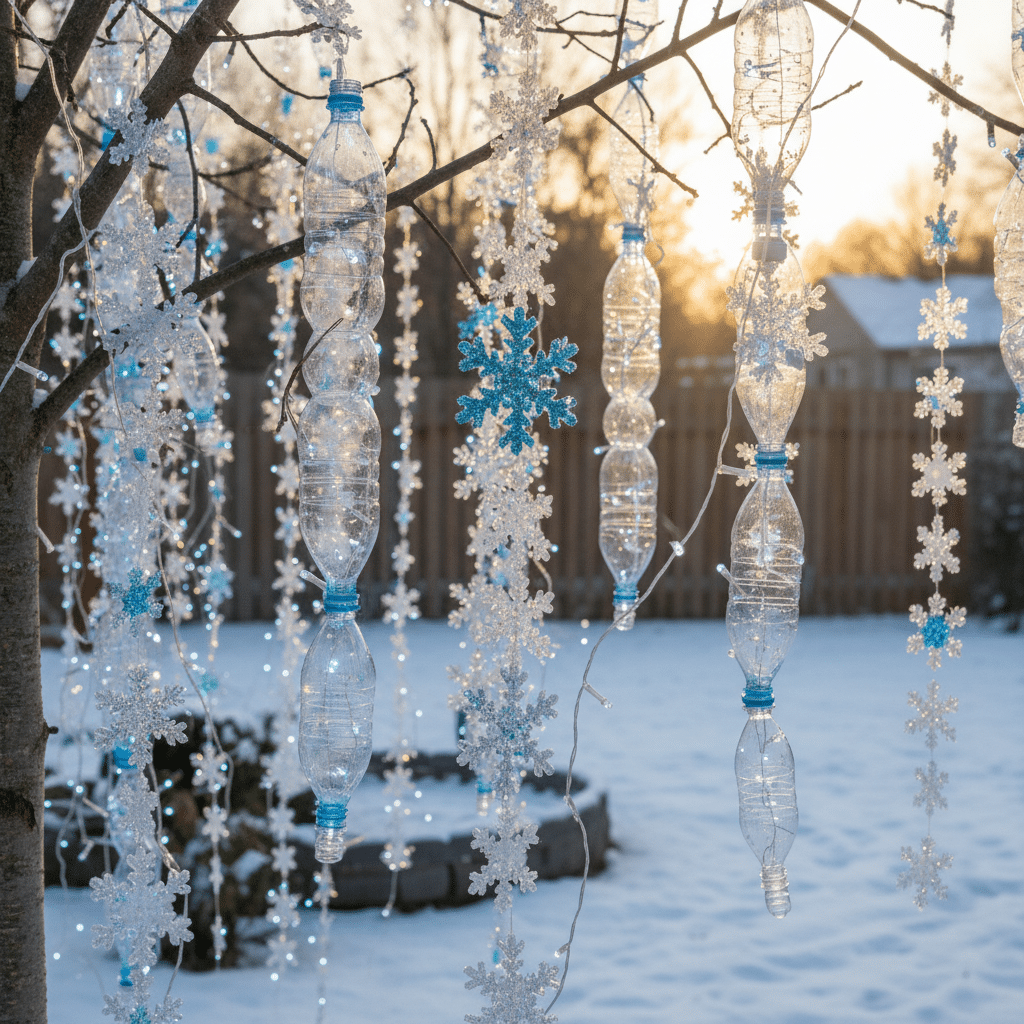
Plastic Bottle Icicles or Snowflakes: A sparkling way to reuse plastic.
- Materials: Clear plastic bottles (e.g., water bottles), craft knife/scissors, clear glitter, strong adhesive, fishing line or thin wire.
- Icicles: Cut the bottoms off plastic bottles. Cut the remaining cylindrical part into long spiral strips or jagged icicle shapes. Coat with glitter and glue. Hang with fishing line from tree branches or eaves.
- Snowflakes: Flatten plastic bottles and cut out snowflake patterns. You can use a stencil or freehand. Decorate with glitter. Hang them in clusters for a frosty effect.
Fabric Scraps and Burlap Accents: Soft touches for a cozy outdoor feel.
- Materials: Weatherproof fabric scraps (e.g., outdoor cushion fabric, old shower curtains cut up), burlap, strong outdoor adhesive or sewing machine.
- Process: Create oversized bows from burlap or festive weatherproof fabric. Drape fabric strips along railings or fences. Use scraps to add texture to other DIY projects. You can even stuff small weatherproof fabric bags with straw or plastic bags to create “gift” shapes to arrange in your yard.
Bringing it All Together: Installation & Display Tips
Once your beautiful DIY decorations are complete, it’s time to bring your vision to life in your yard. Proper installation ensures your display looks fantastic and stays put, even in unpredictable winter weather. You might also want to review general advice on how to decorate outdoor spaces for broader ideas.
Anchoring is Key: Wind, rain, and snow can quickly dismantle your hard work.
- Stakes: Use sturdy metal or plastic stakes to secure larger wooden cutouts, giant lollipops, or even the base of your pallet tree into the ground.
- Weights: For lighter items or displays on paved areas, use sandbags, bricks, or heavy rocks hidden behind decorations to prevent them from blowing away.
- Zip Ties & Wire: Secure garlands to railings, ornaments to tree branches, and lights to fences using weatherproof zip ties or strong garden wire.
Weatherproofing Your Masterpieces: Even if your materials are generally weather-resistant, an extra layer of protection goes a long way.
- Sealant: For painted wood or cardboard creations, multiple coats of outdoor-grade clear acrylic sealant or marine varnish are essential.
- Waterproof Fabric: Ensure any fabric elements are truly outdoor-grade or have been treated with a waterproofing spray.
- Elevation: Keep wooden or cardboard elements slightly off the wet ground using small blocks or stakes to prevent water absorption and rot.
Arrangement for Impact:
- Focal Points: Decide on one or two main focal points – perhaps a large illuminated reindeer or a stunning DIY archway – and arrange smaller decorations around them.
- Layering: Create depth by placing some items closer to the house and others further back. Vary heights for visual interest.
- Pathways: Use smaller, repetitive elements like mason jar lanterns or candy cane markers to define pathways and guide visitors.
- Rule of Three: Often, odd numbers of items (especially 3 or 5) look more aesthetically pleasing than even numbers when grouping similar decorations.
Smart Lighting Management:
- Timers: Invest in outdoor-rated timers for your lights. This saves energy (and hassle!) by automatically turning lights on at dusk and off at a set time. This can contribute to improving your home’s energy efficiency during the holidays.
- Extension Cords: Use heavy-duty, outdoor-rated extension cords. Ensure connections are secure and protected from moisture (e.g., using weatherproof covers or elevated off the ground).
Safety First! Important Considerations
While the joy of DIY is boundless, safety should always be your top priority, especially when working with electricity and outdoor elements.
Electrical Safety:
- Outdoor-Rated Only: Only use extension cords, lights, and electrical accessories specifically labeled for outdoor use. These are designed to withstand moisture and temperature fluctuations.
- GFCI Outlets: Plug all outdoor lights and decorations into Ground Fault Circuit Interrupter (GFCI) protected outlets. GFCIs detect ground faults and shut off power to prevent electric shock. If you don’t have one, consider having an electrician install one or use a portable GFCI.
- Inspect All Wires: Before plugging anything in, inspect all light strands and extension cords for frayed wires, cracked insulation, or exposed copper. Discard damaged items.
- Avoid Overloading: Do not overload electrical circuits. Read the maximum wattage for your circuits and extensions and stay well within limits.
- Keep Connections Dry: Protect all electrical connections from snow and rain. Use waterproof covers or elevate connections off the ground. Never run cords through standing water.
Ladder Safety:
- Stable Surface: Always place ladders on a firm, level surface.
- Spotter: Have someone steady the ladder for you, especially when reaching high.
- Three Points of Contact: Maintain three points of contact (two hands and one foot, or two feet and one hand) with the ladder at all times.
- Don’t Overreach: Move the ladder rather than overreaching. Your belly button should stay between the side rails.
Securing Decorations:
- Wind and Gravity: Assume the worst. Wind can pick up surprisingly heavy objects, and decorations can become projectiles. Ensure everything is firmly anchored, tied down, or weighted.
- Sharp Edges: When working with chicken wire or other cut materials, always wear gloves to protect your hands from sharp edges. Ensure finished decorations don’t have exposed sharp points.
Child and Pet Safety:
- Small Parts: Ensure small ornaments or decorative pieces are out of reach of young children and pets, as they could be choking hazards.
- Non-Toxic Materials: If children or pets might interact with your decorations, ensure paints, glues, and other materials are non-toxic.
- Live Plants: If incorporating live plants or berries, ensure they are not poisonous to pets if ingested.
Maintaining Your Masterpieces & Storage
You’ve poured your heart into creating these amazing decorations; now let’s ensure they last for many Christmases to come! Proper maintenance and storage are key.
End-of-Season Cleaning:
- Wipe Down: Before packing away, gently wipe down all surfaces to remove dirt, dust, and any lingering moisture. Use a damp cloth for painted surfaces and a brush for natural elements.
- Check for Damage: Inspect each item for any wear and tear. Are paints fading? Is wood cracking? Are wires fraying? Note down any repairs needed for next year.
Organized Storage Solutions:
- Designated Bins: Invest in clear plastic storage bins. Label them clearly (e.g., “Outdoor Christmas Decor – Front Yard,” “Outdoor Christmas Decor – Lights”). Clear bins make it easy to see contents without rummaging.
- Protection: Wrap delicate items in bubble wrap or old newspapers. Store fabric items in breathable bags to prevent mildew.
- Disassemble When Possible: If a decoration is made of multiple parts (like a snowman family), disassemble it to save space and prevent damage during storage.
- Coil Lights: Carefully coil string lights around a piece of cardboard or a spool to prevent tangles and damage to wires.
Repairing for Next Year:
- Minor Fixes: For small chips in paint, touch them up with leftover paint and sealant. Re-glue any loose embellishments.
- Structural Repairs: For wooden items, reinforce loose joints or replace small damaged sections.
- Component Replacements: If a section of lights stops working, consider replacing just that section if possible, rather than the entire strand.
By taking a little extra time at the end of the season, you’ll ensure your DIY outdoor Christmas decorations are ready to bring joy again next year, saving you time and money.
Deck Your Halls (and Yard!) with Handmade Cheer
There’s truly nothing like the feeling of stepping back and admiring an outdoor Christmas display that you’ve crafted with your own hands. From the initial spark of an idea to the final placement of a glowing ornament, the journey of creating diy outdoor christmas decorations is filled with creativity, connection, and countless opportunities for personalized expression. You’re not just decorating; you’re infusing your home with a unique warmth and character that store-bought items simply can’t replicate.
Whether you opt for timeless elegance with natural garlands, whimsical charm with tire snowmen, or a sparkling wonderland with illuminated orbs, each handmade piece adds a layer of magic to the season. You’ve saved money, reduced waste, and most importantly, created cherished memories with those you love. So, gather your materials, rally your family, and let your imagination take flight. This holiday season, make your home a testament to festive creativity and spread joy one beautifully crafted decoration at a time. Go forth and deck your yard with fabulous, unforgettable cheer!
- 28shares
- Facebook0
- Pinterest25
- Twitter3
- Reddit0

