DIY toy projects can be a great way to spend time with your kids while creating something fun. Making toys at home lets you customize them to your child’s interests and skills.
These projects can help children develop creativity, problem-solving abilities, and fine motor skills. They also provide a sense of accomplishment when kids play with toys they helped make. DIY toys often use simple materials found around the house, making them budget-friendly options for families.
1) Sock Puppets
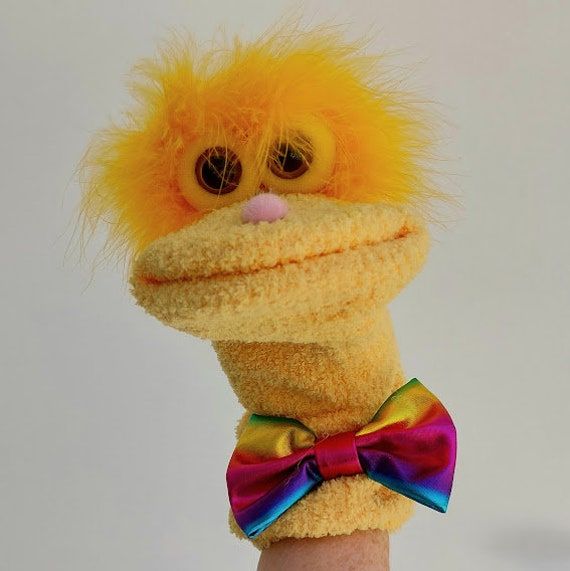
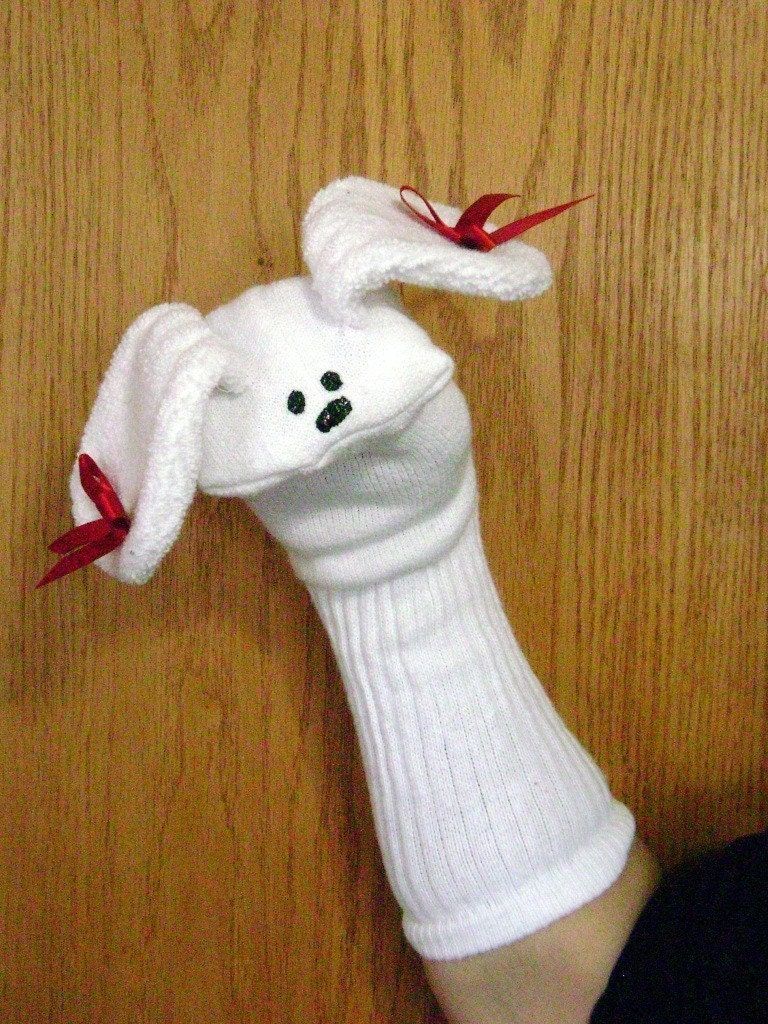
Sock puppets are a classic DIY toy that kids love. They’re easy to make and require few materials. Old socks, buttons, yarn, and glue are the main ingredients for this fun project.
To start, pick a clean sock and slip it onto your hand. This helps shape the puppet’s mouth. Next, choose eyes for your puppet. Buttons work well, but felt or googly eyes are good options too.
Glue the eyes in place. Add yarn for hair if desired. Cut small pieces of felt for ears, nose, or other features. Glue these on as well.
Let everything dry completely before playing. Once finished, kids can put on puppet shows or create stories with their new friends.
Sock puppets encourage creativity and imaginative play. They also help develop fine motor skills during the crafting process. Children can make a whole cast of characters using different socks and decorations.
This project is suitable for various age groups. Younger kids might need help with cutting and gluing. Older children can handle most steps on their own.
2) Cardboard Box Cars
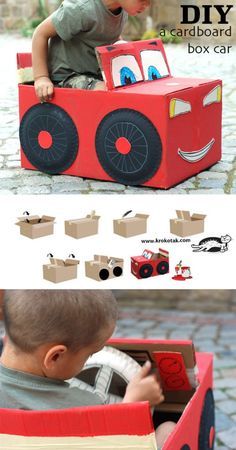
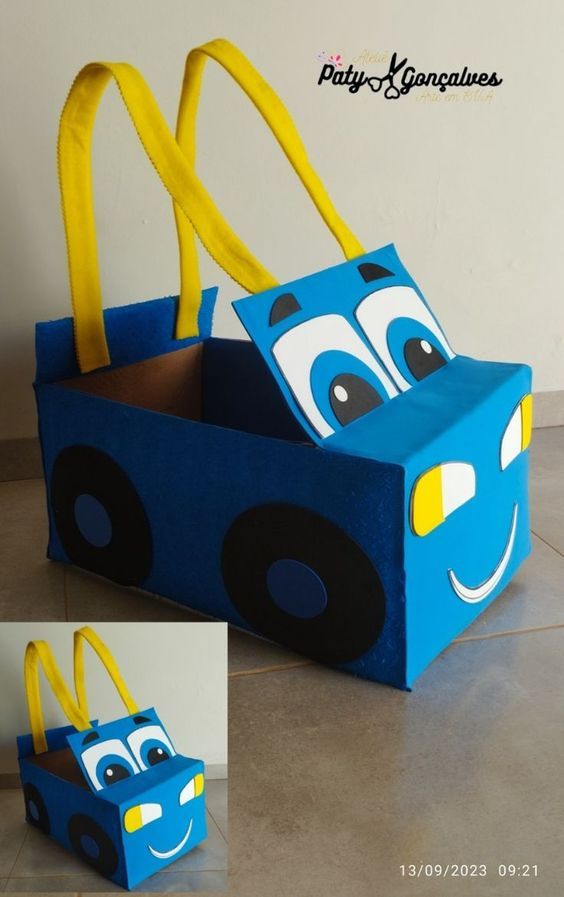
Cardboard box cars are a classic DIY toy project kids love. Start with a large cardboard box that’s big enough for a child to sit in. Cut out windows and a windshield to create the car shape.
Paint the box in bright colors or cover it with colored paper. Add details like headlights, taillights, and a grill using markers or cut-out shapes. Attach paper plates as wheels to complete the look.
For steering, cut a hole in the front and insert a paper plate or frisbee as the steering wheel. Kids can personalize their cars with stickers, racing numbers, or their names.
These homemade vehicles spark imagination and provide hours of playtime fun. Children can “drive” around the house or yard, pretending to go on adventures or run errands.
Cardboard box cars are easy to make, use simple materials, and can be customized to suit any child’s interests. They’re a great rainy day activity that combines creativity with active play.
3) Clay Dinosaur Models
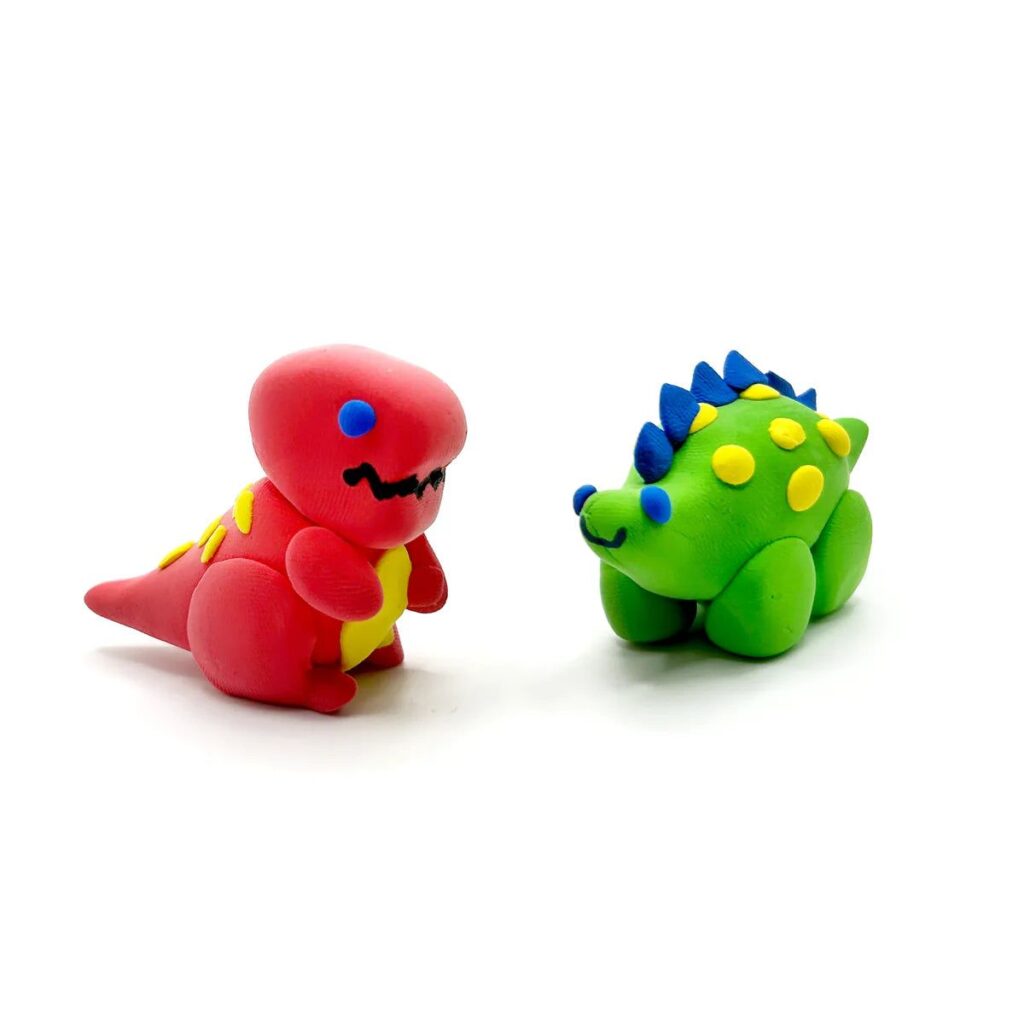
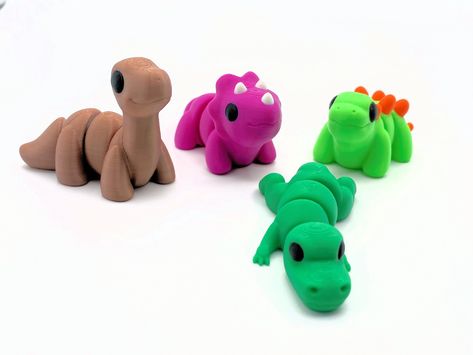
Clay dinosaur models are a fun and creative DIY toy project for kids. This activity lets children shape their own prehistoric creatures using modeling clay or air-dry clay.
To start, gather different colors of clay and some basic sculpting tools. Kids can roll, pinch, and mold the clay to form dinosaur bodies, legs, tails, and heads.
Adding details like scales, spikes, and teeth brings the dinosaurs to life. Children can use toothpicks or plastic knives to create textures on the clay surface.
For inspiration, kids can look at pictures of dinosaurs in books or online. They might choose to make a T-Rex, Stegosaurus, or Triceratops.
Once finished, the clay models can be left to dry. Air-dry clay hardens on its own, while oven-bake clay needs to be cured in the oven.
After drying, kids can paint their dinosaurs with acrylic paints for extra color and detail. This project combines sculpting, painting, and learning about prehistoric animals.
The finished clay dinosaurs make great decorations for a child’s room or can be used in imaginative play scenarios.
4) Origami Animals
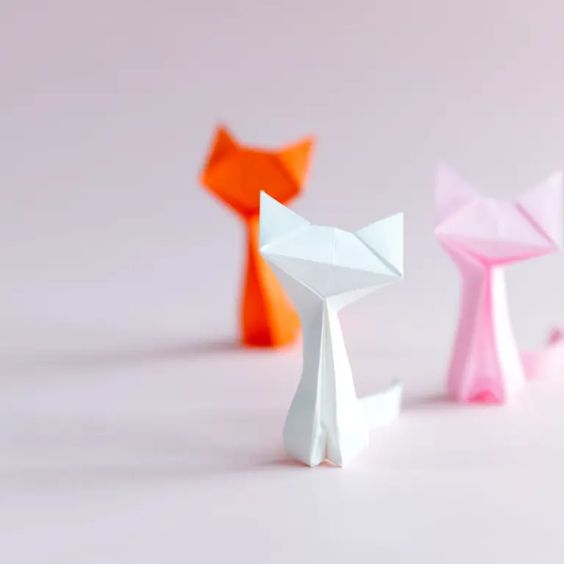
Origami animals are a fun and easy DIY toy project for kids. This ancient Japanese art of paper folding creates cute creatures using just paper and folding techniques.
To start, gather colorful origami paper or cut regular paper into squares. Begin with simple designs like dogs, cats, or birds. As skills improve, try more complex animals like elephants or giraffes.
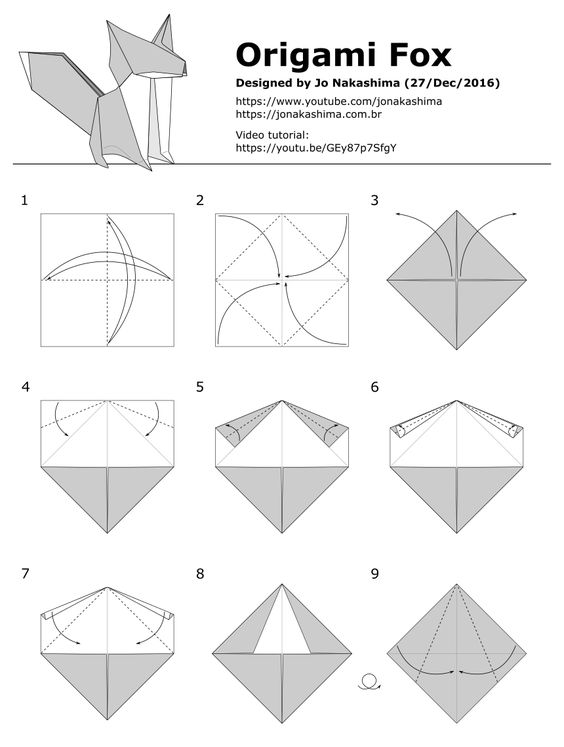
Many free origami tutorials are available online. These show step-by-step folding instructions with pictures. Kids can follow along to make their favorite animals.
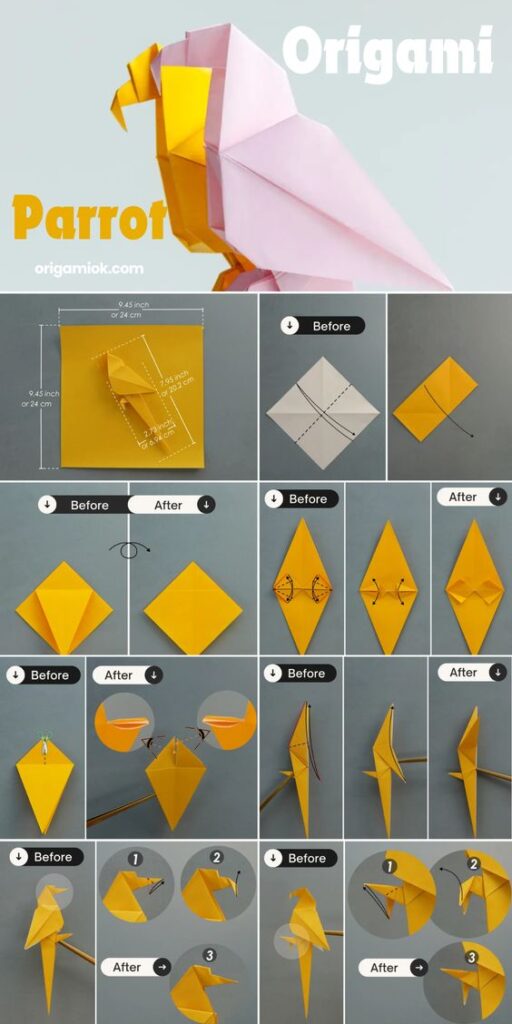

Origami is great for developing fine motor skills and patience. It also teaches kids about geometry and spatial relationships. The finished origami animals make nice decorations or toys.
Try making a zoo of paper animals. Kids can create habitats from cardboard boxes for their origami creatures. This extends the play value of the project.
Origami animals are portable too. Kids can make them anywhere with just a sheet of paper. It’s an ideal activity for car rides or waiting rooms.
5) Paper Plate Masks
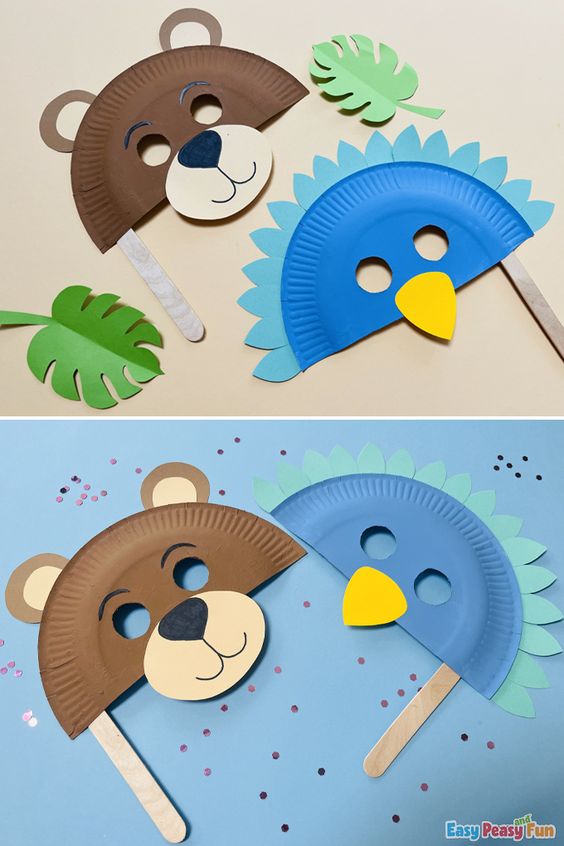
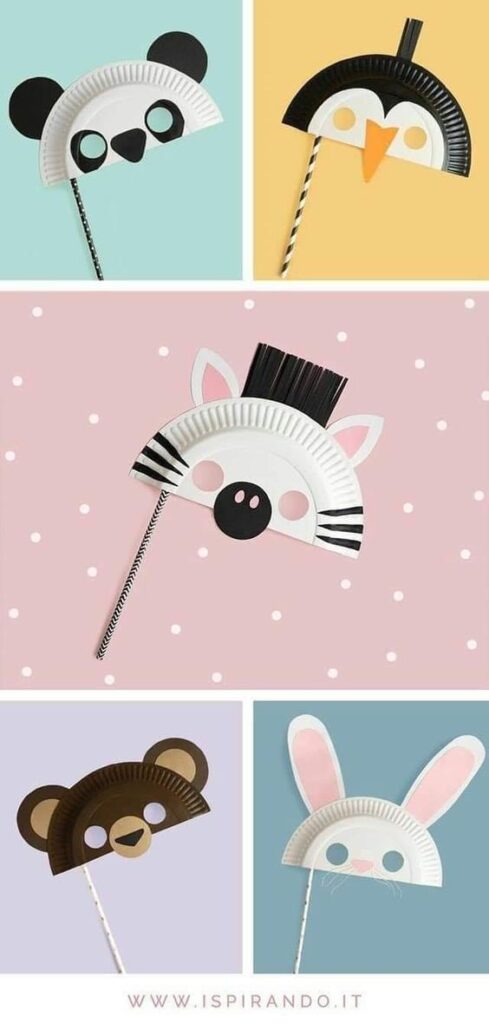
Paper plate masks are a fun and easy craft project for kids. They’re cheap to make and allow for lots of creativity. All you need are paper plates, scissors, elastic, and decorating supplies.
Start by cutting eye holes in the plate. Next, punch small holes on each side to attach the elastic. This lets the mask stay on comfortably.
Kids can decorate their masks in many ways. Paint works well on paper plates. Markers, crayons, and colored pencils are good choices too.
Gluing on items adds texture and interest. Try feathers, sequins, or bits of colorful paper. Kids might want to make animal faces or silly characters.
This project works for many ages. Younger kids may need help cutting holes, but can still enjoy decorating. Older children can design and create masks on their own.
Paper plate masks are great for pretend play or parties. Kids can act out stories or use them for dress-up time. They also make fun wall decorations in a child’s room.
6) Tin Can Drums
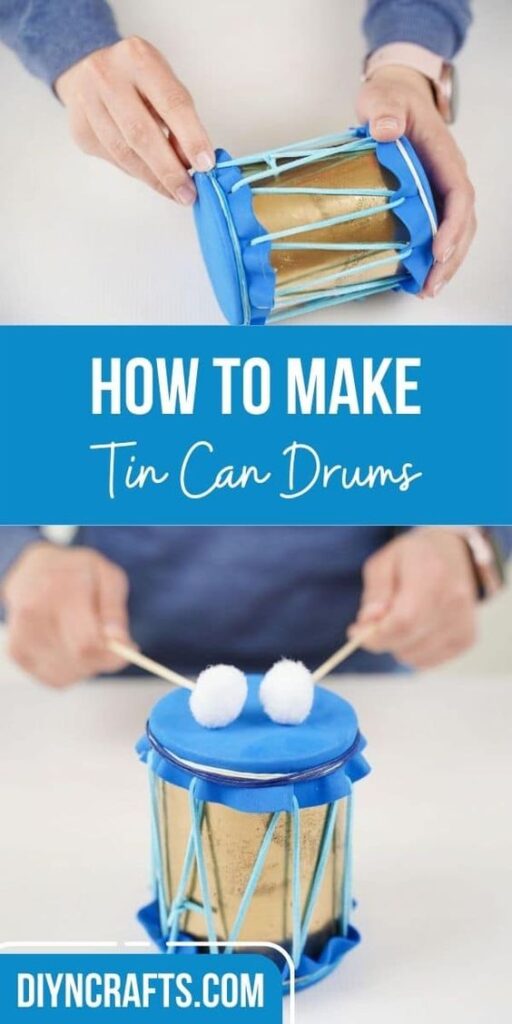
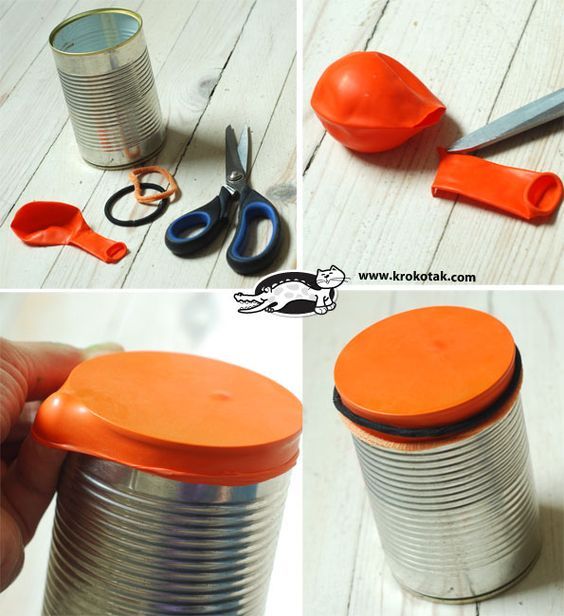
Tin can drums make for a fun and easy DIY toy project. Kids can create their own musical instruments using empty cans and a few simple materials.
To make tin can drums, start with clean, empty cans of various sizes. Remove any labels and sharp edges for safety. Cover the open end of each can with a piece of thick paper or thin fabric.
Secure the covering tightly with rubber bands or tape. This creates the drumhead. Decorate the cans with paint, stickers, or colorful tape to make them visually appealing.
For drumsticks, use wooden spoons or chopsticks. Kids can experiment with different sounds by tapping different parts of the drum or using various striking objects.
This project teaches children about recycling and music. It also helps develop their creativity and fine motor skills. Tin can drums are perfect for indoor play or backyard concerts.
7) Popsicle Stick Catapults
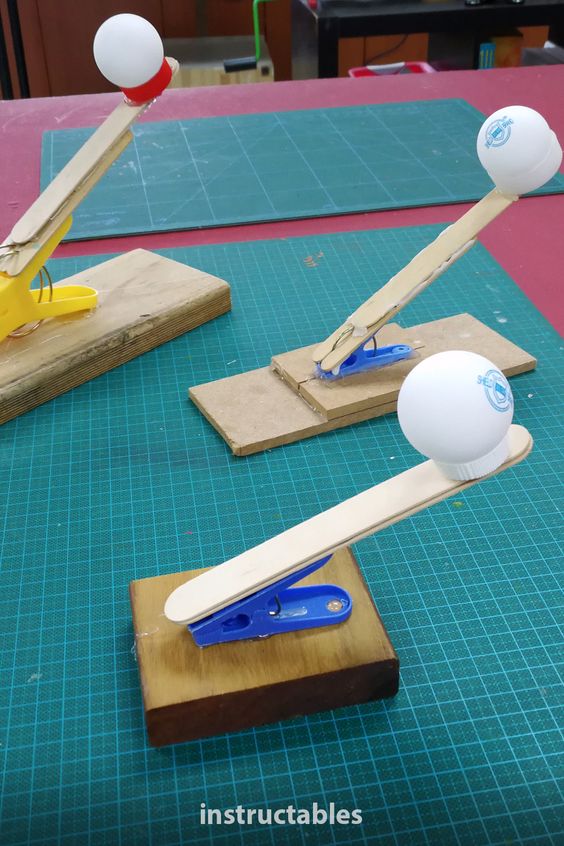
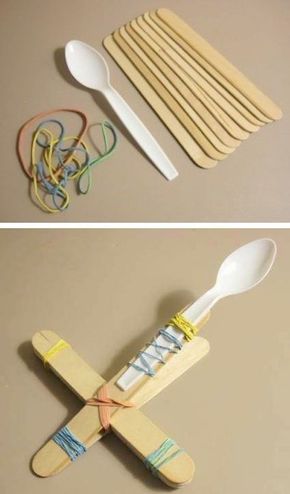
Popsicle stick catapults are simple yet exciting DIY toys kids can build and play with. These miniature siege weapons offer a fun way to learn about physics and engineering.
To make a basic catapult, kids need popsicle sticks, rubber bands, and a plastic spoon. They stack and bind sticks together to form a base and arm. The spoon acts as a launch pad for small, soft projectiles.
Building these catapults teaches children about leverage and stored energy. They can experiment with different designs to see how changes affect distance and accuracy.
For added fun, kids can set up targets and have friendly competitions. This encourages them to refine their catapult designs and improve their aiming skills.
Parents should supervise catapult play and set clear safety rules. Using soft items like mini marshmallows or pom-poms as ammo helps prevent accidents.
Decorating the catapults with paint or stickers lets kids personalize their creations. This project combines crafting, science, and play in one engaging activity.
8) Tissue Box Monsters
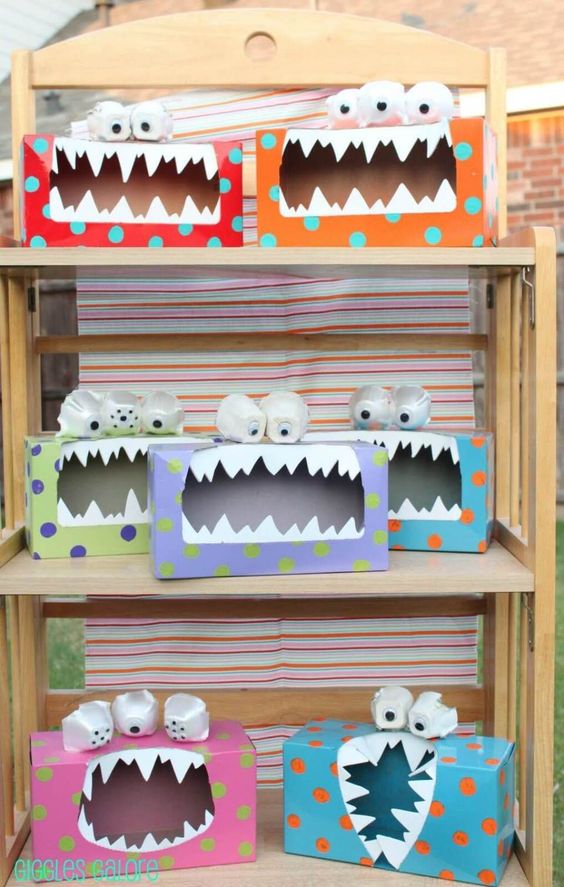
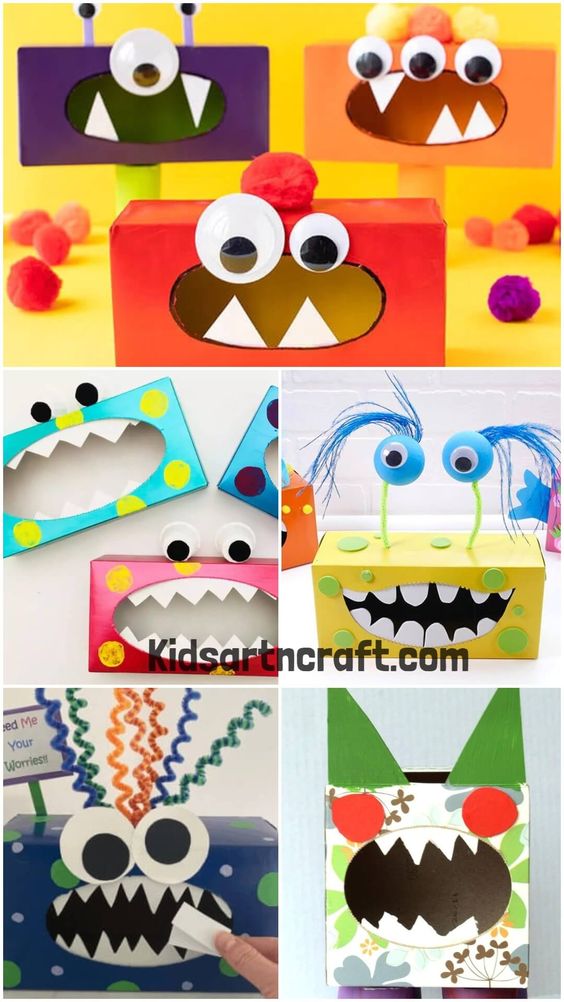
Tissue box monsters are a simple and fun DIY toy project for kids. Empty tissue boxes can be transformed into cute and quirky creatures with just a few basic supplies.
To make tissue box monsters, start with empty cardboard tissue boxes. Cover them with colorful paper or paint them in bright shades. Add googly eyes, pom-poms, pipe cleaners, or felt pieces to create faces and features.
Cut holes or slits in the boxes for monster mouths. These openings can be used as coin slots or card holders. Kids can feed their monsters small objects or notes.
Encourage children to get creative with decorations. They can add teeth, horns, antennae, or hair made from yarn or paper. Each monster can have its own unique personality.
This project is great for recycling empty tissue boxes. It’s also an opportunity for kids to practice cutting, gluing, and decorating skills. The finished monsters make fun desk organizers or bedroom decorations.
Tissue box monsters are suitable for various ages. Younger kids may need help with cutting and assembly, while older children can design more complex creatures.
9) Yarn Dolls
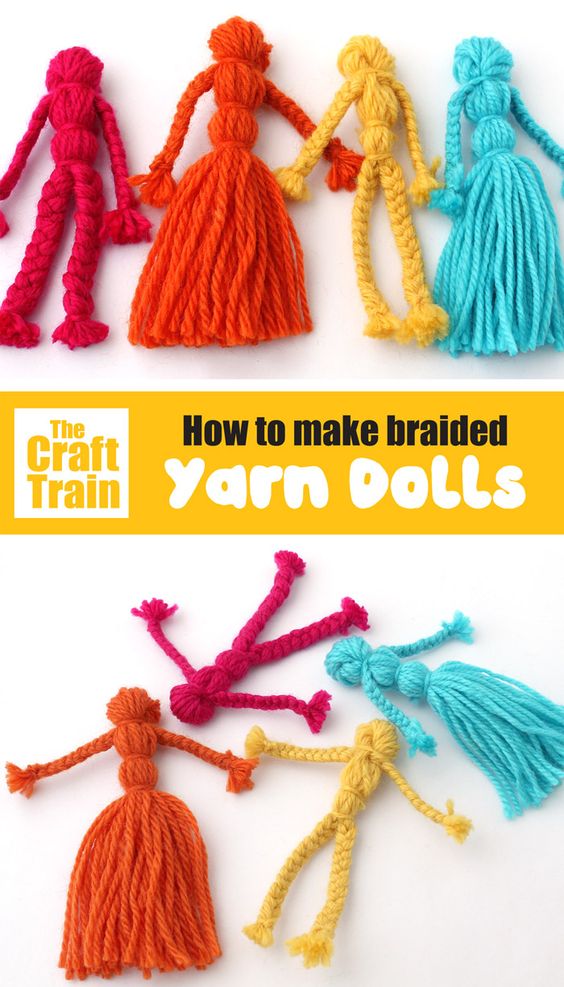

Yarn dolls are a classic craft project that kids love to make. They’re simple, fun, and require only a few basic materials. To create a yarn doll, start with a ball of yarn in your chosen color.
Cut several long strands of yarn and tie them together in the middle. This forms the body and arms of the doll. Take another piece of yarn and tie it around the bundle to create the head.
Separate the yarn strands into two sections for the legs. Braid or twist each section to form the legs and tie off the ends. For the arms, cut the loops at the top of the bundle.
Add hair by tying additional yarn to the head. Cut the loops to create a hairstyle. Dress up the doll with small pieces of fabric or felt for clothes.
Kids can customize their yarn dolls with different colors, hairstyles, and outfits. This project encourages creativity and fine motor skills. Yarn dolls make great toys or decorations for a child’s room.
10) Bottle Cap Magnets
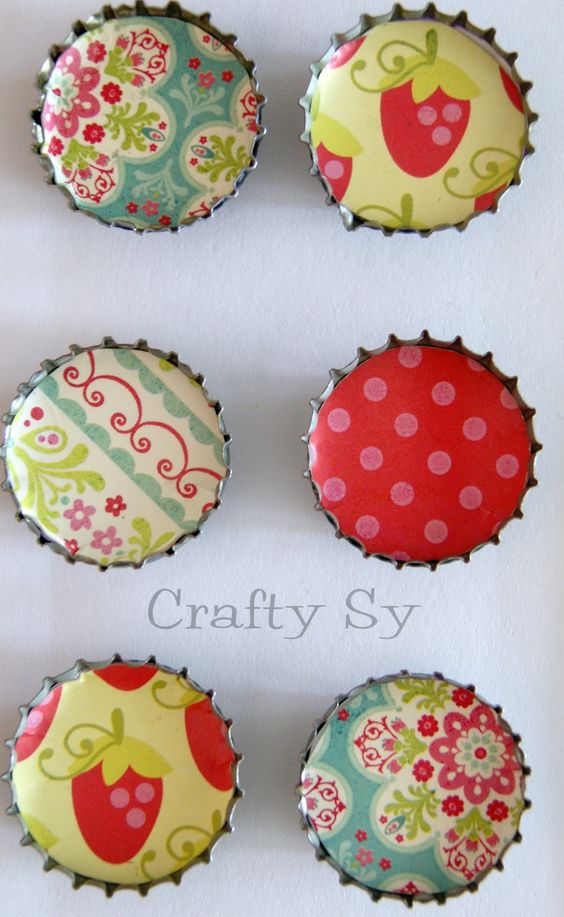
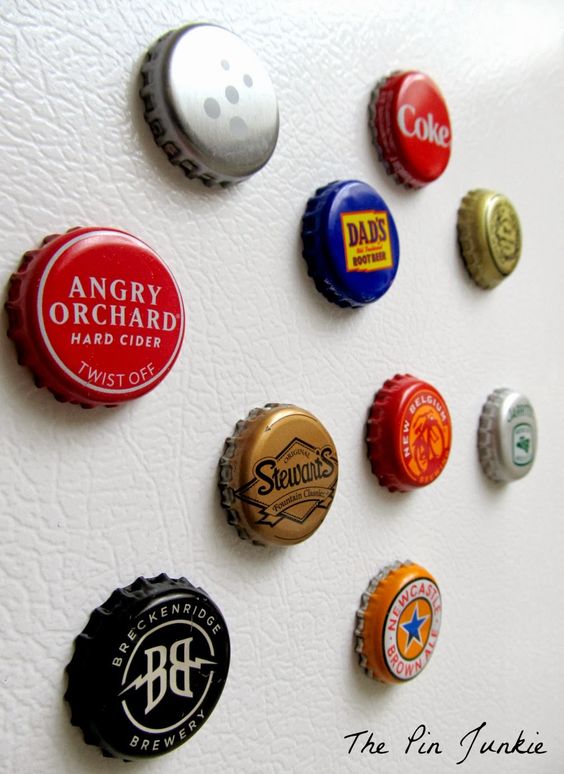
Bottle cap magnets are a simple and fun craft project for kids. They turn ordinary bottle caps into colorful fridge decorations. This project is easy to do and uses materials found around the house.
To make bottle cap magnets, you’ll need bottle caps, small magnets, and strong glue. Paint or decorate the inside of the bottle caps with markers, stickers, or small pictures. Let the decorations dry completely.
Next, glue a small magnet to the back of each bottle cap. Make sure to use glue that’s strong enough to hold the magnet securely. Allow the glue to dry fully before using the magnets.
Kids can get creative with their designs. They might draw tiny faces, make mini landscapes, or use cut-out photos. The finished magnets are perfect for holding up artwork or notes on the fridge.
This project teaches kids about recycling and helps develop their artistic skills. It’s also a great way to use up bottle caps that might otherwise be thrown away. The finished magnets make nice gifts for family and friends too.
11) Homemade Playdough
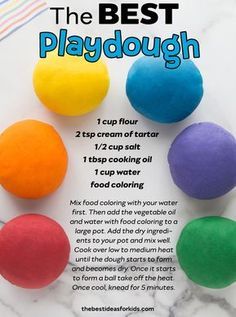
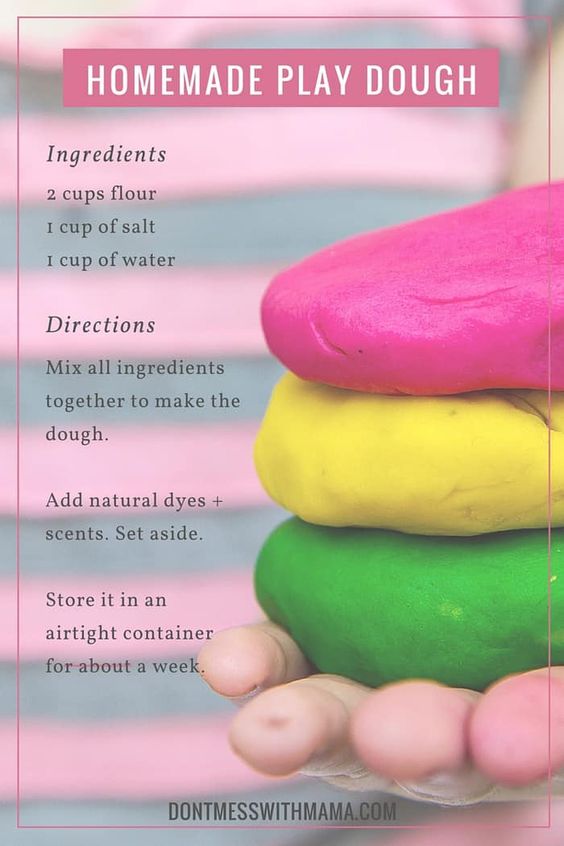
Playdough is a classic toy that kids love to squish, shape, and mold. Making it at home is easy and fun. Parents and children can work together to create this colorful dough.
The basic recipe uses common kitchen ingredients. Flour, salt, water, and food coloring are the main components. Some recipes add oil for smoother texture.
Mixing the ingredients is simple. First, combine the dry items in a bowl. Then add water and food coloring. Stir until the dough forms. Knead it with hands to get the right consistency.
Kids can help measure ingredients and mix colors. They’ll enjoy watching the dough come together. The whole process takes about 15 minutes.
Homemade playdough is safe and non-toxic. It’s also cheaper than store-bought versions. Parents can make large batches in different colors.
This DIY toy encourages creativity and imagination. Kids can make shapes, pretend foods, or small sculptures. It’s a great indoor activity for rainy days.
12) Egg Carton Caterpillars
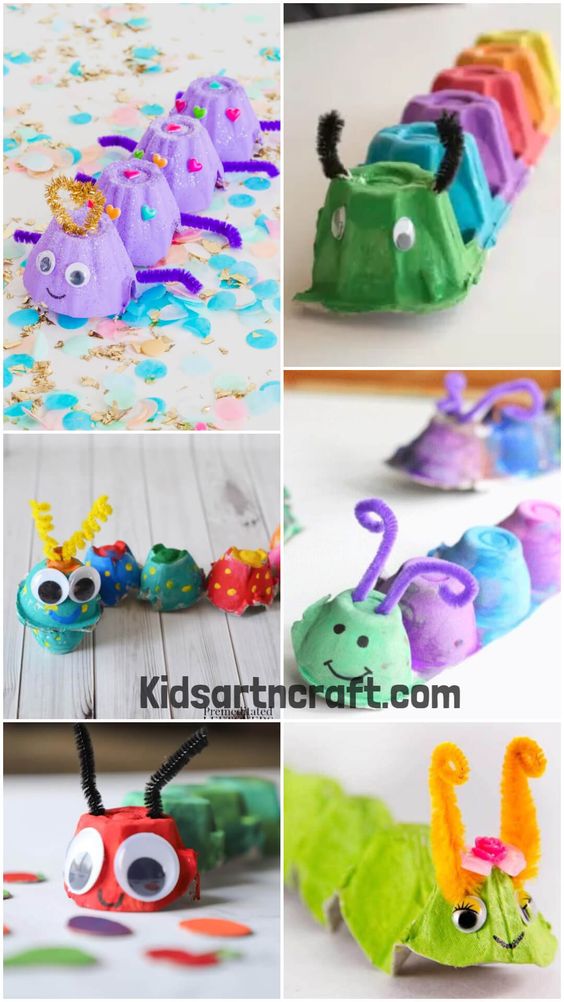
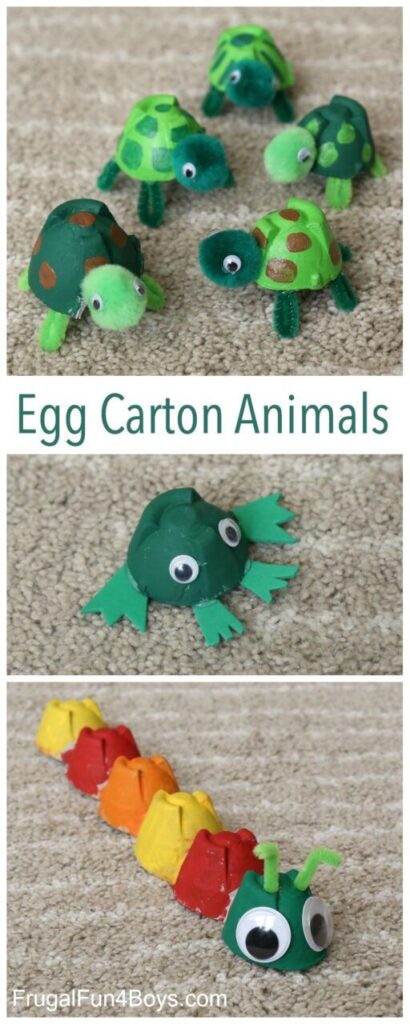
Egg carton caterpillars are a simple and fun craft project for kids. To make these cute critters, gather an empty egg carton, paint, googly eyes, and pipe cleaners.
Cut the egg carton into segments, leaving three or four connected cups for each caterpillar. This forms the body of the insect.
Let kids paint their caterpillar bodies in bright colors. They can choose one solid color or create patterns with different shades.
Once the paint dries, help children glue on googly eyes to give their caterpillars personality. Two eyes per caterpillar work well.
For antennae and legs, cut small pieces of pipe cleaner. Poke holes in the egg carton and insert the pipe cleaners.
Kids can make a whole family of caterpillars in different sizes and colors. This project teaches children about insects while encouraging creativity.
The finished caterpillars make great decorations for a child’s room or playspace. They’re also fun to use in pretend play scenarios.
13) Button Art
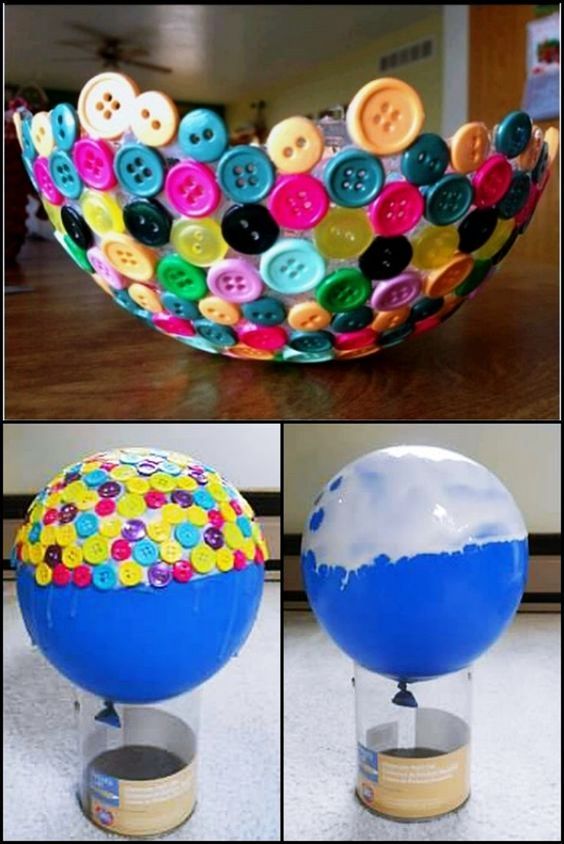
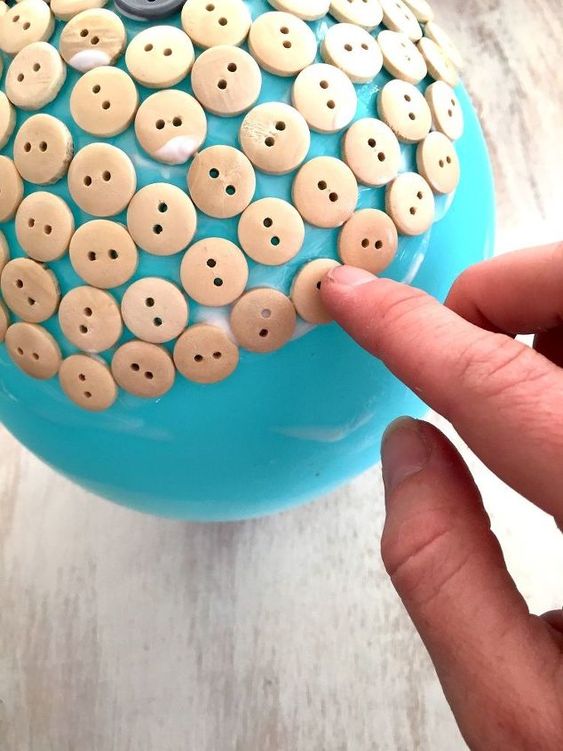
Button art is a fun and creative DIY project for kids. This activity uses colorful buttons to make unique pictures and designs.
To start, gather different sizes and colors of buttons. You’ll also need paper, glue, and markers. Draw a simple outline on the paper as a guide.
Next, let kids choose buttons and arrange them on the paper. They can fill in shapes or create patterns. Once they’re happy with the layout, help them glue the buttons in place.
Button art can be used to make greeting cards or wall decorations. Kids might create flower gardens, animals, or abstract designs. The possibilities are endless with this versatile craft.
This project helps develop fine motor skills and color recognition. It also encourages kids to be creative and express themselves through art.
Button art is suitable for children of various ages. Younger kids may need help with gluing, while older ones can work more independently. It’s a great rainy day activity that keeps kids engaged and entertained.
14) Indoor Kite
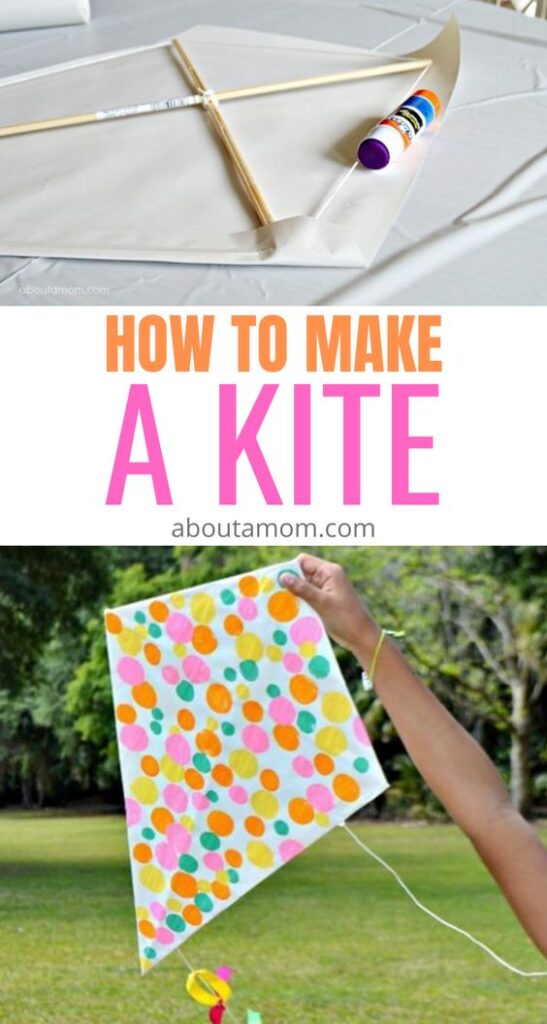
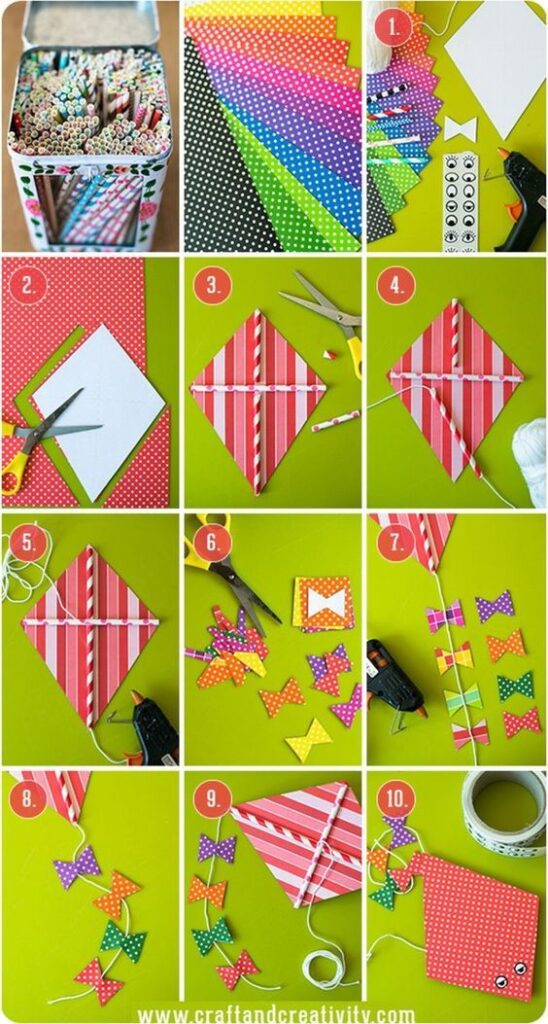
Indoor kites are a fun toy project that kids can enjoy year-round. Unlike traditional kites, these don’t need wind to fly. They use the air currents created by movement to stay aloft.
To make an indoor kite, start with lightweight materials. Tissue paper or thin plastic work well for the sail. Bamboo skewers or thin dowels can form the frame.
Cut the sail into a diamond shape. Attach the frame to the sail using glue or tape. Add a tail made from ribbon or streamers for stability.
The key to flying an indoor kite is movement. Kids can run while holding the kite string to create lift. They can also use a fan to generate air flow.
Indoor kites are great for rainy days or cold winters. They provide a way for children to experience kite flying without going outside. This project teaches kids about aerodynamics and physics in a hands-on way.
15) Customized T-Shirts
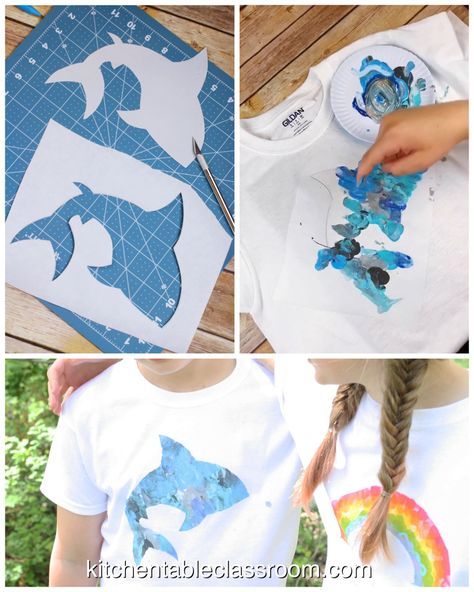

Kids love wearing shirts that show off their personality. Making custom t-shirts is a fun project that lets children express themselves through clothing.
To start, gather plain t-shirts, fabric paint, and stencils. Let kids choose their favorite colors and designs. They can use stencils to create shapes or freehand their own artwork.
Fabric markers are another option for easy customization. These allow for more detailed drawings and writing on shirts. Kids can add their names, favorite characters, or cool designs.
Iron-on transfers work well for adding photos or complex images to t-shirts. Print the design on special paper, then use an iron to transfer it onto the fabric.
Also strengthen your bond with your children and create lasting memories by designing and customizing unique baseball jersey together, allowing your kids to express their creativity
For a unique twist, try tie-dye. This classic technique creates colorful swirls and patterns. Kids enjoy twisting and tying the shirts before adding dye.
Encourage children to be creative with their designs. They might make shirts for special events, holidays, or just for fun. Custom t-shirts also make great gifts for friends and family.
Materials and Tools
Making DIY toys requires some basic supplies and tools. Having the right items on hand will help you create fun projects for kids.
Essential Materials for DIY Toys
Cardboard is a key material for many toy projects. It’s cheap, easy to cut, and sturdy enough for play. Save boxes from packages to use.
Felt, fabric scraps, and yarn are great for soft toys. Look for colorful options to make toys more appealing to kids.
Popsicle sticks, pipe cleaners, and craft foam sheets are versatile craft supplies. They can be used to make all kinds of toys.
Non-toxic glue, tape, and child-safe paint are important for putting toys together and decorating them. Make sure to choose washable options.
Recommended Tools for Toy Making
Scissors are a must-have for cutting materials. Get a good pair of sharp scissors for adults and safety scissors for kids to help.
A hot glue gun can securely attach parts quickly. Always supervise kids around hot glue.
Markers, crayons, and colored pencils let kids add details to their toys. Washable versions are best for easy cleanup.
Rulers and pencils help with measuring and marking before cutting. This leads to neater finished toys.
A craft knife is useful for detailed cuts in cardboard or foam. Only adults should use craft knives.
Safety Guidelines
Prioritizing safety is crucial when making toys for children. Proper materials and precautions help create enjoyable, risk-free playthings.
Safe Materials for Children
Choose non-toxic, child-friendly materials for DIY toys. Opt for untreated wood, food-grade silicone, and natural fibers like cotton or wool. Avoid small parts that could pose choking hazards for young kids.
Use water-based, non-toxic paints and finishes. Check labels carefully to ensure products are safe for children. Steer clear of materials containing lead, phthalates, or BPA.
For stuffed toys, pick hypoallergenic fillings like polyester fiberfill. Wash fabric components before assembly to remove any chemicals or irritants.
Toy Making Safety Tips
Always supervise children during playtime with homemade toys. Regularly inspect DIY creations for wear and tear, replacing or repairing as needed.
Sand wooden surfaces smooth to prevent splinters. Round off sharp edges and corners. Securely fasten all parts to avoid detachment during play.
Keep toys age-appropriate. Consider a child’s developmental stage when designing playthings. Avoid strings or cords longer than 12 inches for young children to prevent strangulation risks.
Clean toys regularly with mild soap and water. Allow them to dry completely before use to prevent mold growth.
Test toy stability before giving it to a child. Ensure it can withstand normal play without breaking or coming apart.
Benefits of DIY Toys
Making toys at home offers many advantages for kids and parents. DIY toys spark imagination and help children learn new skills.
Encourages Creativity
DIY toys give kids a chance to use their imagination. They can design and build their own playthings. This process lets children think outside the box and come up with unique ideas.
Kids can pick colors, shapes, and materials they like best. They get to make choices and see their ideas come to life. This boosts confidence and self-expression.
Creating toys also teaches problem-solving. If something doesn’t work, kids learn to find solutions. They might need to change their design or try a different approach.
Promotes Learning
Making toys helps kids learn in fun ways. They pick up new skills without even realizing it.
DIY projects can teach basic math. Kids might need to measure materials or count pieces. They learn about shapes, sizes, and proportions.
Science concepts come into play too. Children can explore gravity, balance, and motion through their creations. They see cause and effect in action.
Fine motor skills improve as kids work with different tools and materials. They practice cutting, gluing, and assembling parts.
DIY toys can also teach about recycling and reusing items. Kids learn to see value in everyday objects.
Frequently Asked Questions
Parents and caregivers often look for fun, easy craft ideas to do with kids at home. These projects can use simple materials and spark creativity.
What are some easy crafts to do at home with kids?
Kids can make colorful finger paintings using washable paints. Building block towers with wooden cubes or plastic bricks is another simple activity. Cutting and pasting paper collages lets children explore shapes and textures.
How can I make toys using waste materials?
Empty cardboard boxes become pretend cars or houses with some paint. Plastic bottles turn into piggy banks or planters when cut and decorated. Old socks make great puppets by adding button eyes and yarn hair.
What are some cool DIY craft ideas for children?
Kids enjoy making slime using glue, water, and borax. Friendship bracelets woven from embroidery floss are fun to create and share. Painting rocks to look like animals or monsters sparks imagination.
Can you suggest simple DIY projects for 10-year-olds?
Ten-year-olds can build bird feeders from milk cartons and popsicle sticks. Making tie-dye shirts using fabric dye is a colorful project. Creating comic books by folding paper and drawing stories taps into creativity.
What are creative things to build for kids for fun?
Children like constructing forts from blankets and furniture. Building marble runs using paper towel tubes and tape is exciting. Making puppets from paper bags and craft supplies leads to imaginative play.
What homemade crafts can kids make easily at home?
Kids can create paper airplanes and test different designs. Decorating picture frames with buttons, sequins, or stickers is simple. Making play dough from flour, salt, and water allows for endless sculpting fun.
- 3.8Kshares
- Facebook0
- Pinterest3.8K
- Twitter3
- Reddit0
