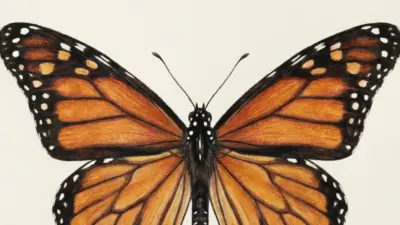
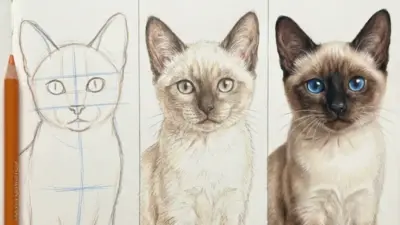
Drawing flowers can be a rewarding and relaxing activity for artists of all skill levels. With just a few basic techniques, anyone can learn how to bring vibrant flowers to life on paper. Whether someone is a beginner or looking to refine their skills, the journey of flower drawing offers endless possibilities for creativity and expression.
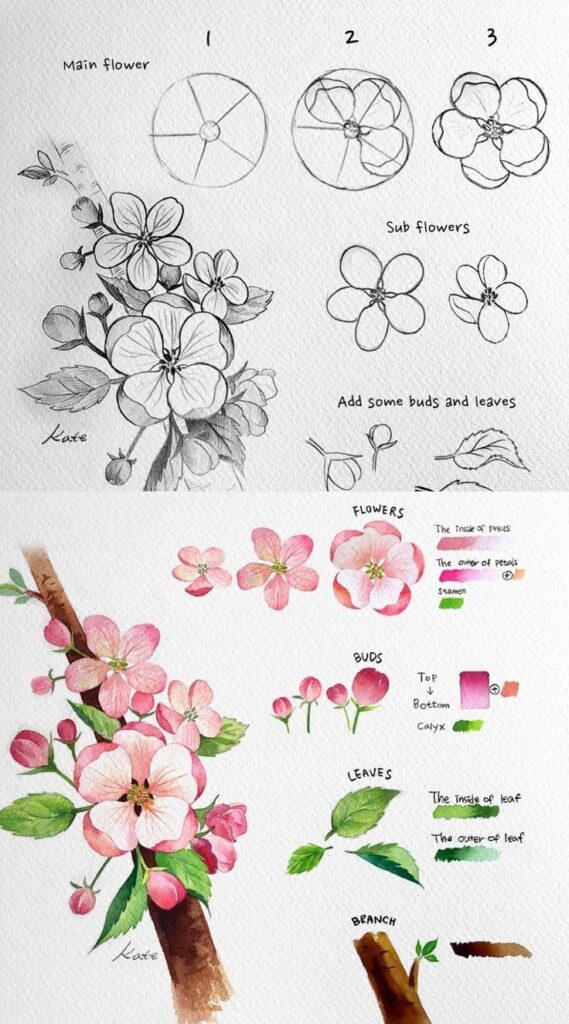
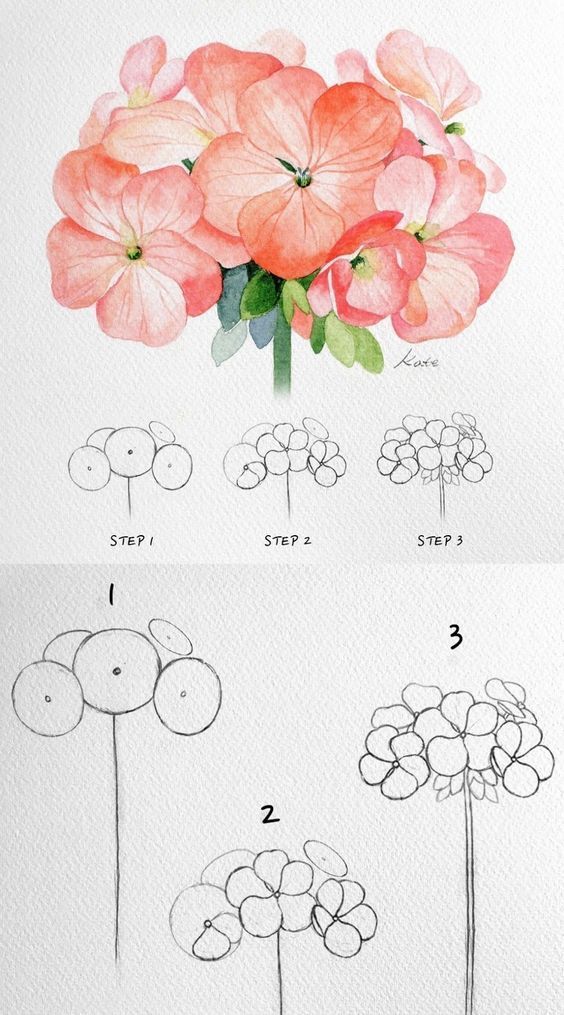
Starting with simple shapes and gradually incorporating more details allows for a smooth learning curve. As one gains confidence, experimenting with different mediums, from pencils to watercolors, can add unique flair. Embracing personal style further elevates flower art, making each piece distinct.
Key Takeaways
- Basic shapes serve as the foundation for flower drawings.
- Experimenting with different materials enhances creativity.
- Personal style makes flower art unique and expressive.
Getting Started with Flower Drawings
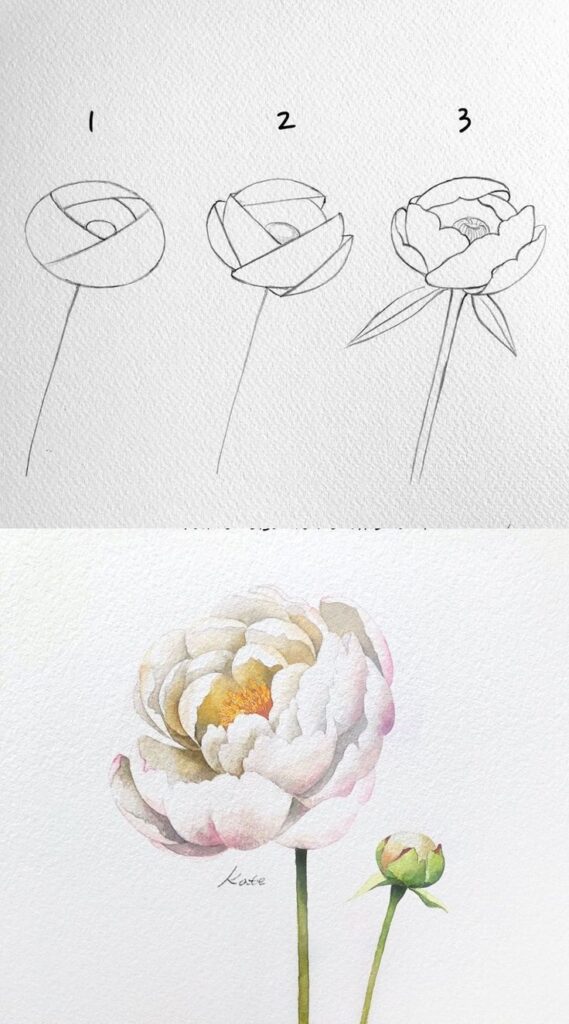
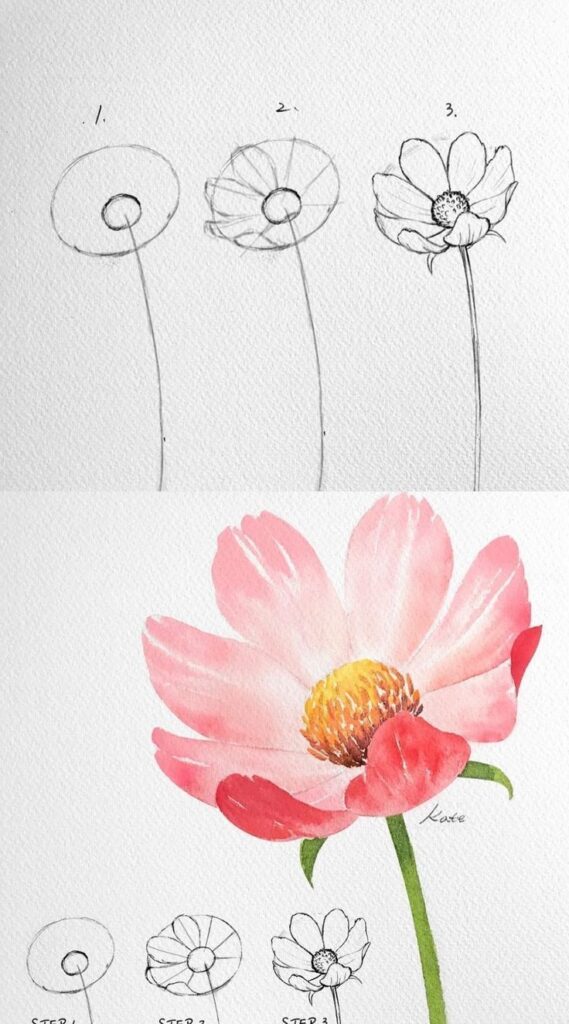
Starting with flower drawings can be both fun and rewarding. This section covers the essential tools, basic flower anatomy, and some warm-up exercises to help anyone interested in floral art get started.
Choosing Your Tools
Selecting the right tools is crucial for successful flower drawing. A few essential items for beginners include:
- Pencils: Graphite pencils in various hardness (e.g., HB, 2B) help create a range of light to dark lines.
- Paper: Choose smooth, high-quality drawing paper that can handle erasing and reworking.
- Erasers: A kneaded eraser is perfect for subtle corrections, while a regular rubber eraser works for more obvious marks.
- Color Mediums: Colored pencils, markers, or watercolors can add vibrancy to flower sketches.
It’s also useful to have a sketchbook to keep practice drawings organized. Having the right tools enables smoother workflow and better results.
Understanding the Basics of Flower Anatomy
Grasping basic flower anatomy is vital for accurate representations. Flowers generally consist of several key parts:
- Petals: These are often colorful and attract pollinators. They come in various shapes and sizes.
- Leaves: Leaves provide support and nourishment to the flower. Understanding leaf shapes will enhance the overall drawing.
- Sepals: These protect the flower bud before it blooms. They often resemble small leaves and are typically found at the base of the flower.
Familiarizing oneself with these components allows for better drawing accuracy. Sketching them from different angles can help develop a good eye for proportions and forms.
Warm-Up Sketching Exercises
Before diving into detailed flower sketches, warm-up exercises can help loosen up drawing skills. Here are a few effective practices:
- Simple Shapes: Start with basic shapes like circles and ovals, mimicking the form of petals and leaves.
- Gesture Drawing: Spend a few minutes sketching quick outlines of flowers to capture their essence without focusing on details.
- Repetition: Draw the same flower multiple times to understand variations in shape and structure better.
These exercises help build muscle memory and confidence in drawing flowers. They encourage experimentation and make the transition to more complex sketches smoother.
Exploring Simple Flower Drawings
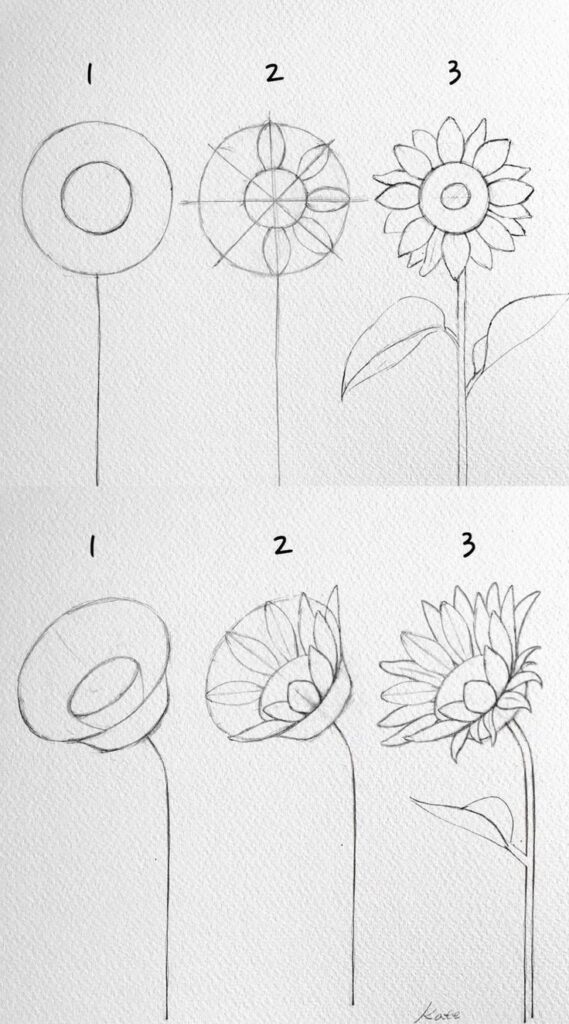
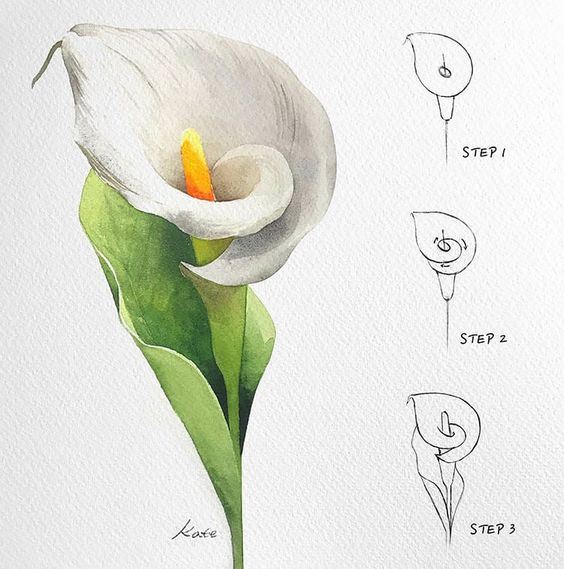
Simple flower drawings can be both fun and rewarding. They allow for creativity while providing a basic understanding of flower shapes and forms. Here are a few popular flowers to draw that are perfect for beginners.
Creating a Simple Rose
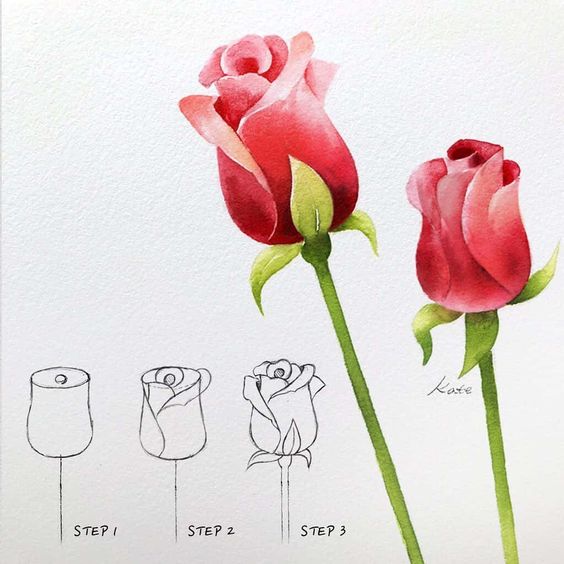
A simple rose drawing starts with a small circle for the center. From there, draw slightly curved lines radiating outward. These lines represent the petals. It helps to create overlapping petal shapes to give depth. Use soft, rounded edges for a natural look.
Add a stem by drawing two parallel lines underneath the rose, ending with a simple leaf at the base. Shading can enhance the flower’s appearance; just apply gentle strokes in the petal layers to create dimension.
Sketching Daisies and Sunflowers
For daisies, begin with a small circle for the center and add elongated oval shapes around it to form the petals. Vary the size of the petals for a more realistic effect.
Sunflowers feature a larger center circle and broader petals. Start with a central circle and fill it with small dots to depict seeds. Then, add long, pointed petals that radiate outwards.
Both flowers can be grouped together on the same page to create a friendly floral composition. Simple details like a few leaves can provide a balanced look.
Drawing Tulips and Daffodils
Tulips have a simple, bell-like shape. Begin with an oval at the top for the blossom, and add pointed curves from the sides to form the petals. Extend two lines down for the stem, and round out the base with leaf shapes.
Daffodils, on the other hand, have a unique trumpet shape. Start with a small circle for the center and draw petal-like shapes around it, making sure to add a flared opening resembling a trumpet. The long, slender stem can curve gently to give an organic feel.
Both flowers are great for practicing symmetry and balance in flower drawings.
Intermediate Flower Drawing Techniques
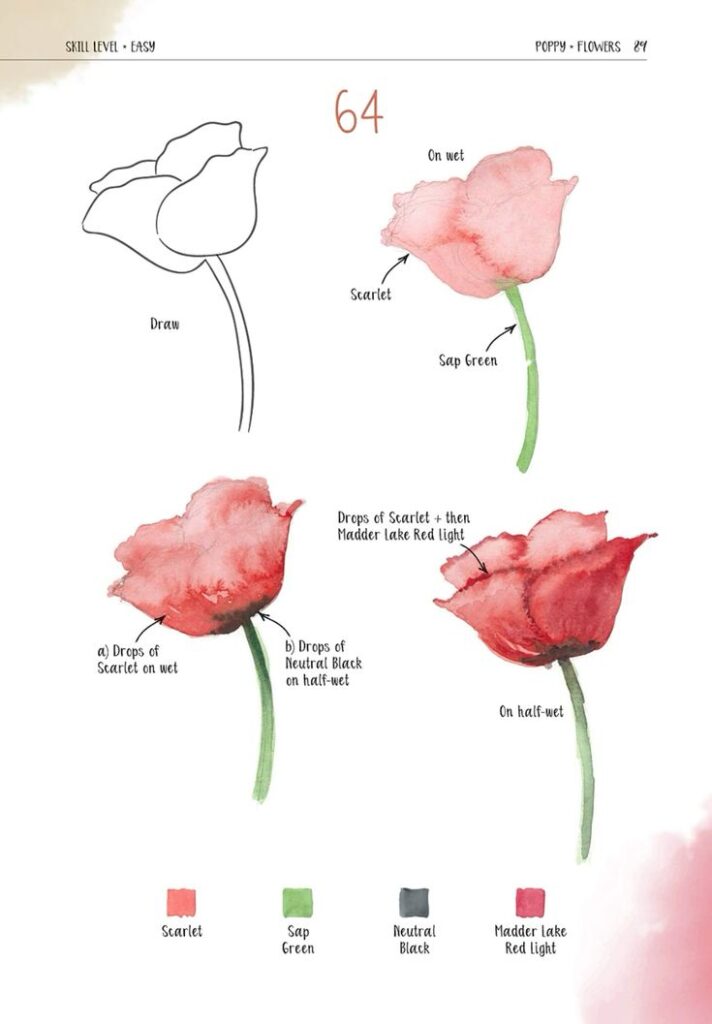

To enhance flower drawing skills, focusing on petal outlines, shading, and complex flowers is essential. These techniques help bring depth and character to the artwork.
Mastering Petal Outlines and Shapes
Petal outlines define the character of a flower. Begin by sketching simple shapes; they can be oval, teardrop, or circular.
- Observation: Look at real petals. Notice their unique shapes and how they overlap.
- Variations: Experiment with variations in petal shapes for different flowers. For example, peony petals are fluffy and rounded, while cosmos petals are slender and elongated.
- Line Quality: Use varying pressure when drawing outline lines. Softer lines can create a sense of delicacy.
Take time to refine petal shapes until they feel natural. This step is crucial for realistic flower drawings.
Adding Realism with Shading and Texture
Shading brings flowers to life. It adds depth and defines shapes.
- Light Source: Start by determining where the light comes from. Shade in the opposite areas to create depth.
- Gradient Techniques: Use a gradient effect by applying light pressure with a pencil. Build layers slowly for richer texture.
- Texture Details: Use small strokes or dots to mimic the texture of petals. For instance, create soft shadows on the peony’s layers.
Following these steps ensures that the flower appears lively and dimensional.
Drawing Complex Flowers like Peonies and Cosmos
Complex flowers require a step-by-step guide for successful representation.
Peony Drawing:
- Start with individual petals, sketching from the center outward.
- Focus on overlapping petals to capture the flower’s fullness.
Cosmos Drawing:
- Draw a central circle for the core, then add long, slender petals around it.
- Pay attention to the spacing and symmetry for balance.
Both flowers benefit from attention to detail and patience. Practice these methods for better representation in artwork.
Drawing Flowers in Different Mediums
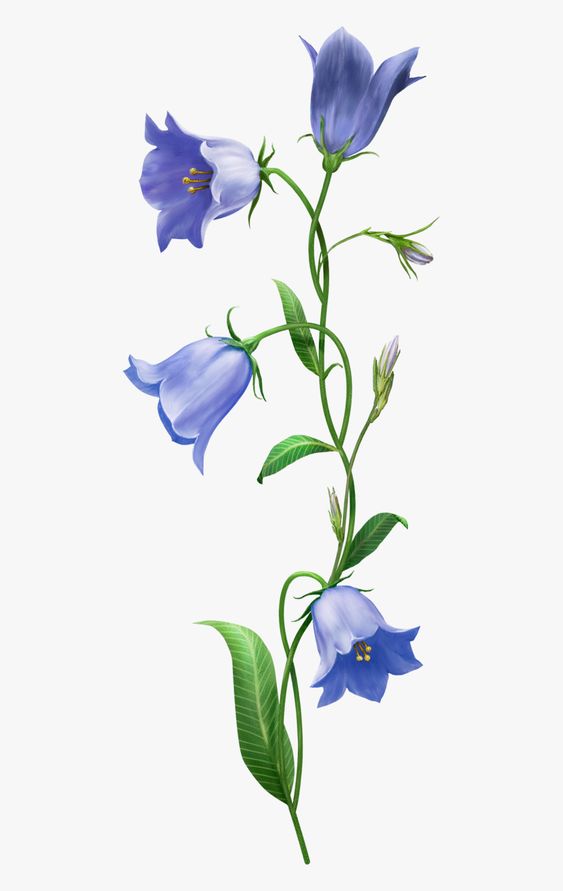
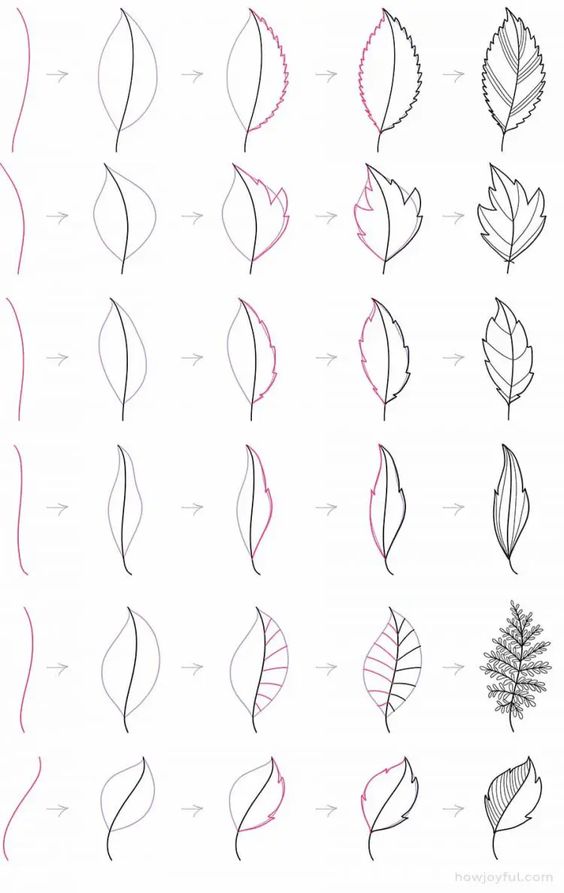
Artists can explore various mediums when drawing flowers, each offering unique textures and effects. Choosing the right medium can elevate the representation of flowers while enhancing the overall artistic experience.
Using Ink and Watercolors
Ink and watercolors create a striking combination for flower drawings. Using ink for outlines gives a strong, defined structure, while watercolors can introduce softness and blending.
- Materials Needed:
- Fine-tip pens or brushes
- Watercolor paints
- Watercolor paper
To start, outline the flower shape with ink. After the ink dries, layer watercolors in light washes. Build depth gradually by adding more pigment.
Experiment with techniques, such as wet-on-wet for diffusion or dry brush for texture. Flower drawing tutorials often highlight this method for its vibrant and flowing results. An art journal can be the perfect place to practice and refine these skills.
Experimenting with Colored Pencils
Colored pencils are versatile for flower drawings, allowing for detailed textures and smooth shading. They are excellent for fine detail and subtle color transitions.
- Tools to Use:
- A set of colored pencils
- Blending tools (e.g., tortillons, cotton swabs)
- Sketch paper or colored paper
Begin by sketching the outline of the flower lightly. Use various pressures to create different shades. Layer colors to build richness; start with lighter tones and progress to darker ones for depth.
Blending can create a realistic appearance, especially with petals. Tutorials often emphasize layering techniques and color mixing, ensuring that shadows and highlights enhance the flower’s form.
Digital Flower Drawing Techniques
Digital drawing opens a realm of possibilities for creating flower illustrations. It allows for easy corrections and diverse effects through various software.
- Software to Consider:
- Adobe Photoshop
- Procreate
- Clip Studio Paint
Starting with basic shapes, artists can use digital brushes to simulate different textures. Layers are essential; they allow for experimentation without damaging the original drawing.
Incorporating blending modes can produce unique lighting effects. Many artists share digital flower drawing techniques through online tutorials, showcasing step-by-step processes that inspire creativity. An art journal can be digital too—keeping sketches organized within the same platform.
Creating Flower Art with Personality
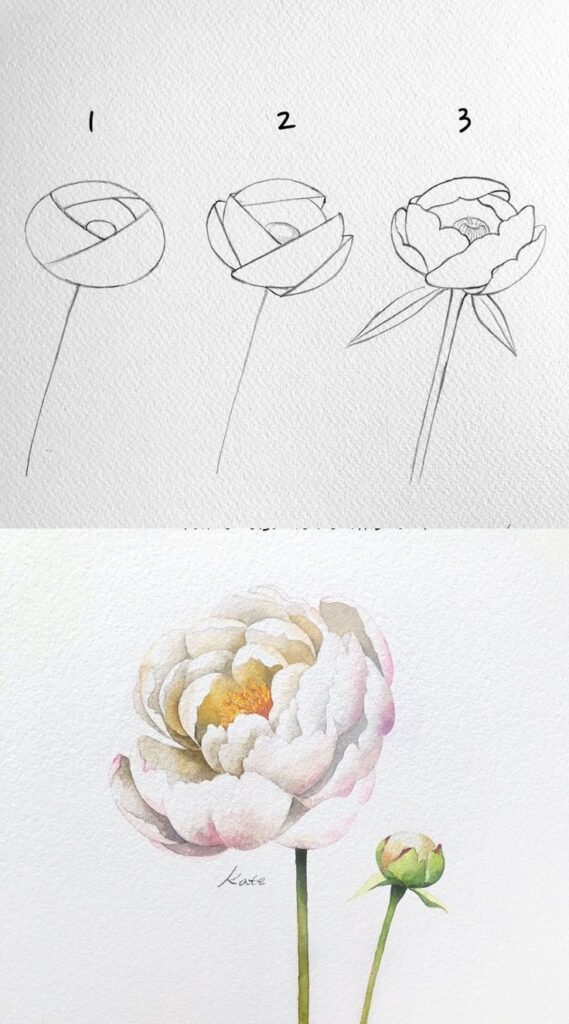
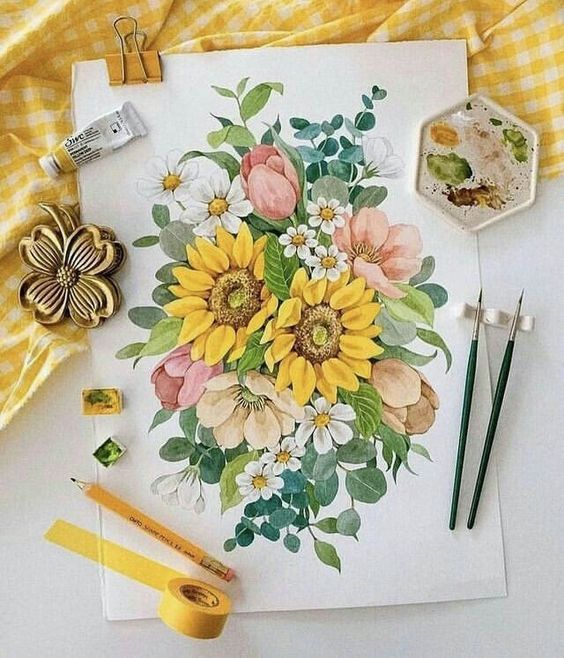
Adding personality to flower art can transform simple designs into captivating pieces. By exploring styles like cartoon flowers, character-driven designs for art journals, and infusing emotional depth, artists can create unique expressions that resonate with viewers.
Incorporating Flowers into Cartoon Art
Cartoon flowers bring a playful vibe that can make artworks stand out. Artists can exaggerate shapes, colors, and features for a fun approach. Think about using large petals and bright hues that catch the eye.
- Shape Variation: Create flowers with unconventional shapes. Round, spiraled, or jagged petals can add uniqueness.
- Facial Features: Adding eyes and mouths can infuse personality. A smiling flower can convey joy, while a frowning flower can depict sadness.
- Background Elements: Include other cartoon elements like insects or whimsical landscapes to create engaging scenes.
This style allows for creative freedom and encourages a lighthearted tone in art.
Designing Flowers with Character for Art Journals
Art journals provide a space for self-expression. Incorporating flowers with character can tell stories or convey emotions.
- Character Traits: Define traits for each flower. A shy flower could have drooping petals, while a bold one might stand tall and vibrant.
- Color Psychology: Use color to reflect emotions. Warm colors can evoke happiness, while cooler tones can suggest calmness.
- Interaction with Other Elements: Flowers can interact with symbols, like a sun to represent joy or a raincloud for melancholy.
This blend of character and design makes the artwork personal and engaging.
Adding Emotional Depth to Flower Artwork
Infusing emotional depth in flower art can create a connection with the audience. Different techniques can help achieve this.
- Textured Techniques: Using different brush strokes or materials adds dimension. For example, rough textures can convey turmoil, while smooth strokes can represent tranquility.
- Symbolism: Choose specific flowers that symbolize emotions—roses for love, daisies for innocence. This creates layers in the narrative.
- Personal Stories: Reflect personal experiences through flower design. Each piece can tell a unique story, resonating with viewers on multiple levels.
This approach allows flower art to transcend mere aesthetics, opening a dialogue with the audience.
Advanced Flower Drawing Projects
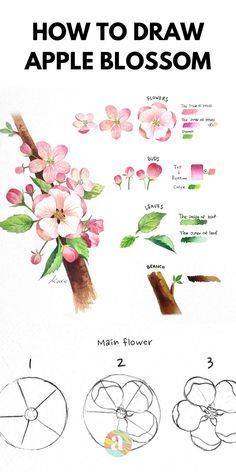
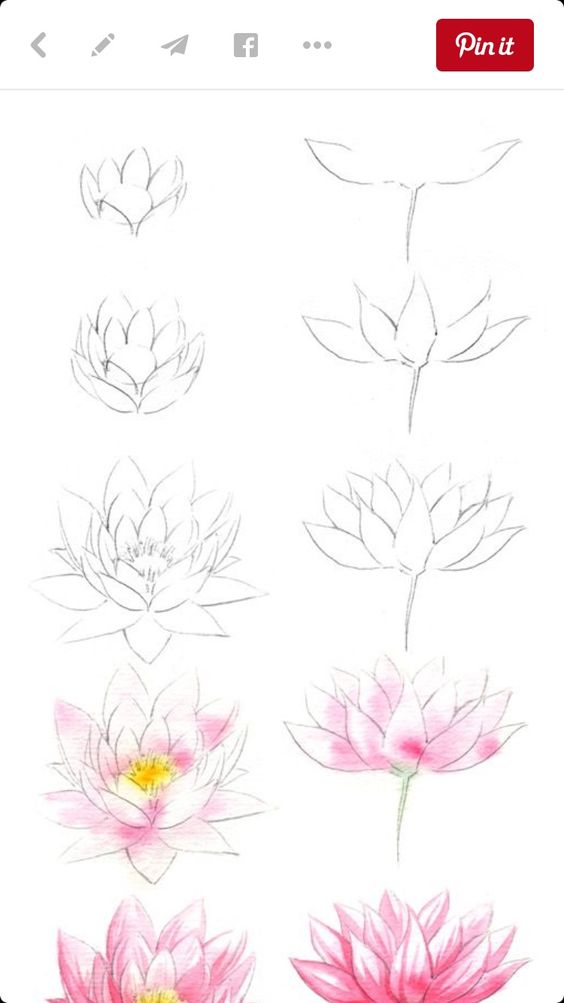
Exploring advanced flower drawing projects can significantly enhance an artist’s skills. These projects encourage creativity and allow for the application of techniques learned in simpler drawings. Here are a few engaging ideas to elevate the practice.
Crafting an Intricate Lotus Flower Drawing
To create a stunning lotus flower drawing, start by sketching the basic shape. Use soft lines to outline the petals, focusing on their unique curves. Lotus petals often overlap, so layering is essential.
- Layering Petals: Draw the outer petals first and work inward. This method gives depth and complexity.
- Details: Once the shape is set, add intricate details like veining for realism. Use fine liners or a sharp pencil for delicate lines.
- Coloring: Use soft pastels or watercolor to emphasize the flower’s natural beauty. Shades of pink, white, or blue work well.
Utilizing reference images can greatly assist in achieving accuracy.
Drawing a Lively Sunflower Field
A sunflower field drawing captures a vibrant scene. Start by sketching guidelines for the horizon and arrangement of sunflowers. Use a mix of large and small sunflowers for variety.
- Basic Shapes: Draw circles for sunflower heads and long rectangles for stems. Keep the proportions in mind.
- Detailing: Once the shapes are established, focus on the textures. Add seeds in the center, and draw jagged edges on the petals.
- Creating Atmosphere: Adding a blue sky and green grass can enhance the lively feeling. Play with color contrasts to make the sunflowers pop.
This project encourages the use of color techniques, making it a fun challenge.
Designing a Bouquet of Different Flower Types
Designing a bouquet involves combining various flower types. Begin by deciding which flowers to include, such as roses, daisies, and tulips. Sketch them in a harmonious arrangement.
- Composition: Start with the largest flowers at the back and smaller ones in the front.
- Variety in Shapes: Focus on the unique characteristics of each flower. This can involve different petal shapes and cluster formations.
- Final Touches: Use colored pencils or markers to bring the bouquet to life. Pay attention to shading and highlights for added depth.
This project not only challenges drawing skills but also enhances composition and color coordination.
Finishing Touches
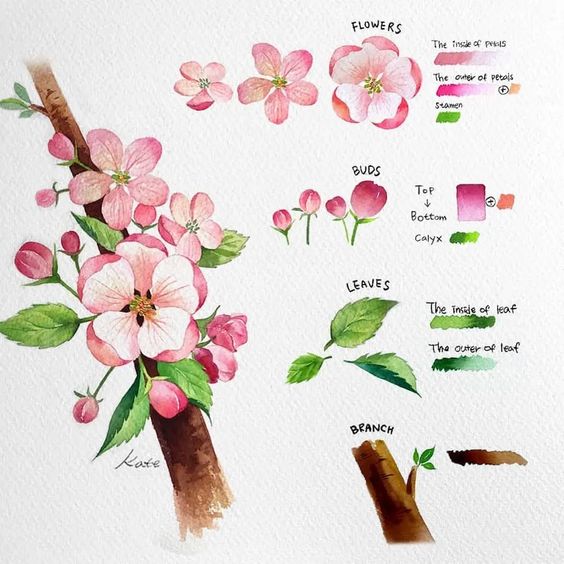
At this stage, it’s time to enhance the flower drawing with backgrounds and finalizing details. This process can elevate the artwork significantly and bring it to life.
Adding Backgrounds and Settings
A simple background can add depth to the flower drawing. Start with light washes of color or soft gradients to create a subtle atmosphere.
Consider adding elements like grass, a garden, or even abstract shapes that complement the flower. For instance, drawing leaves beside the flower can help frame it nicely.
Using colored pencils or watercolors, vary the pressure and layering techniques to achieve different textures. This creates contrast and makes the flower pop against its surroundings. Remember, the background should support the main subject without overpowering it.
Polishing Your Drawings with Final Details
Refining the details can make a significant difference. Focus on adding shadows and highlights to petals and leaves. This trio of tones—light, mid-tone, and dark—creates realism.
Using fine pens for outlines helps define the edges sharper. Adding veins on leaves and texture on petals will enhance the organic feel.
Small touches, like dew drops on petals, can bring charm. Consider using a white gel pen for highlights to create that lifelike sparkle.
Attention to these last elements showcases dedication and elevates the entire composition.
Tips and Tricks for Beginners
When starting to draw flowers, it’s easy to get overwhelmed. Focusing on avoiding mistakes and practicing consistently can boost skills significantly.
Avoiding Common Mistakes
Beginners often rush through the initial stages of drawing a flower. Taking time to outline the basic shape is crucial. For instance, when drawing a rose, it’s helpful to start with light pencil marks to sketch the overall shape before adding details.
Another common mistake is neglecting proportions. A rose has multiple layers of petals that should gradually overlap. Ensuring each petal is proportionate to the others can enhance the overall appearance.
Using reference images can be invaluable. They provide a real-life perspective on the flower’s structure and color, which helps in understanding how to draw a rose accurately.
Practicing Consistently to Improve
Consistency is key in honing drawing skills. Setting aside time daily, even for just 10 minutes, can lead to noticeable improvement. Repeating the process of drawing a rose helps solidify understanding of its intricacies.
Additionally, experimenting with different styles or techniques keeps the practice fresh. Trying various mediums, like pencils or watercolors, can also enhance creativity.
Joining a drawing group or online forum provides a supportive environment. Sharing progress and receiving constructive feedback helps beginners learn from each other and stay motivated. Regular practice and community engagement can transform initial shaky lines into confident strokes.
- 14.7Kshares
- Facebook0
- Pinterest14.7K
- Twitter0
- Reddit0
