Ever wanted to capture the essence of a friend’s smile or the unique character in a stranger’s eyes, but felt intimidated by the idea of drawing a portrait? You’re not alone! Many aspiring artists shy away from faces, seeing them as the ultimate artistic challenge. But what if I told you that drawing expressive, beautiful portraits doesn’t have to be a daunting task reserved for the masters? This ultimate casual portrait drawing guide is all about making the process fun, easy, and, most importantly, expressive. We’re going to ditch the pressure of perfection and embrace the joy of simply observing and sketching. Whether you’re a complete beginner or looking to loosen up your style, you’ll discover techniques to bring those unique faces to life on paper without the stress. Let’s embark on this exciting journey to unlock your inner portrait artist!
Why Casual Portrait Drawing is Your New Favorite Hobby
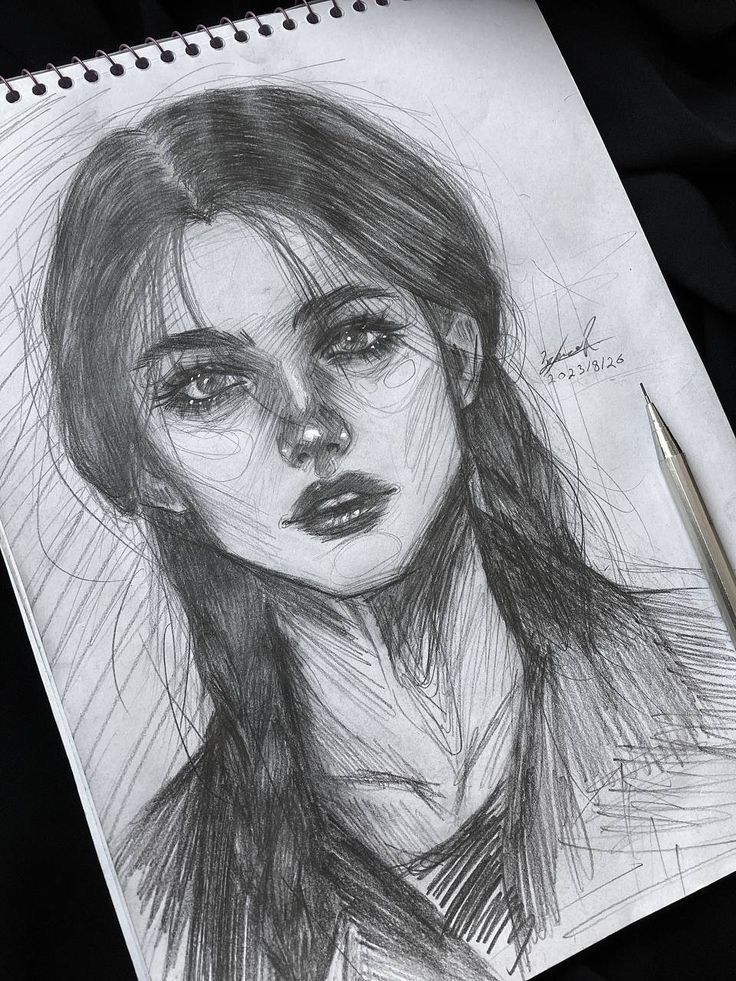
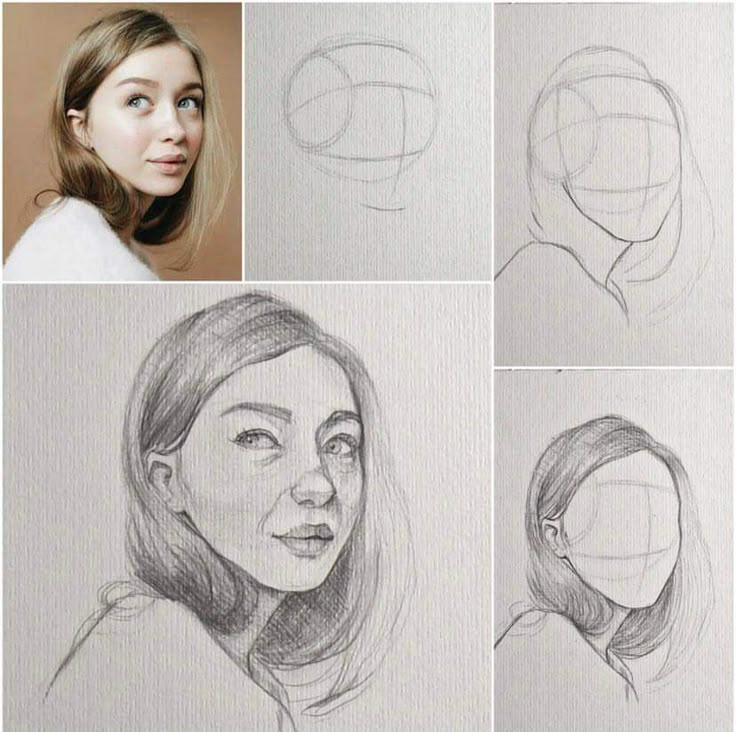
There’s a special magic in drawing a portrait. It’s not just about replicating features; it’s about capturing a moment, an emotion, a personality. But often, the formal approach to portraiture can feel overwhelming. We worry about perfect symmetry, photographic likeness, or rendering every pore. Casual portrait drawing, however, flips that script. It’s about focusing on the big picture, the gesture, the unique quirks that make a face truly captivating. It’s less about anatomical precision and more about expressive interpretation.
Think of it this way: you’re not trying to create a passport photo; you’re creating a heartfelt sketch, a quick study, or a character portrait that tells a story. This approach encourages experimentation, reduces self-criticism, and helps you fall in love with the process rather than just fixating on the outcome. It’s incredibly therapeutic and a fantastic way to sharpen your observational skills, which are crucial for any form of art.
| Pros | Cons |
|---|---|
| – Low pressure, high enjoyment | – May not achieve hyper-realistic results |
| – Encourages unique artistic style | – Less emphasis on strict anatomy |
| – Boosts observational skills rapidly | – Can lead to oversimplification if not balanced |
| – Requires minimal, inexpensive tools | – Might be less suitable for formal commissions |
| – Builds confidence in drawing people | – Some find initial results less “perfect” |
Your Essential Toolkit: Keeping it Simple and Sweet
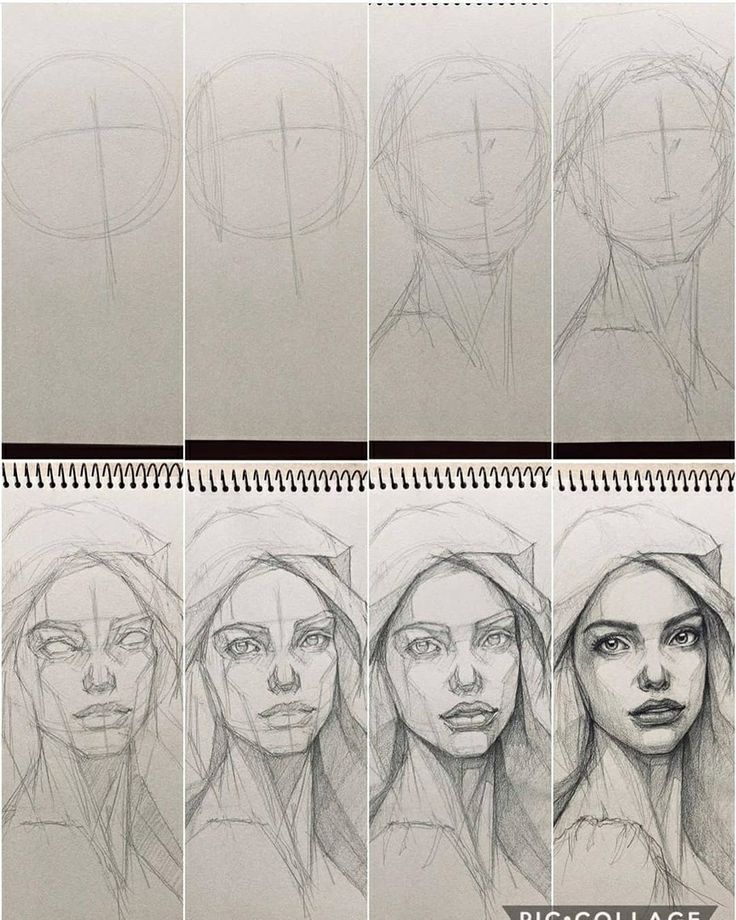
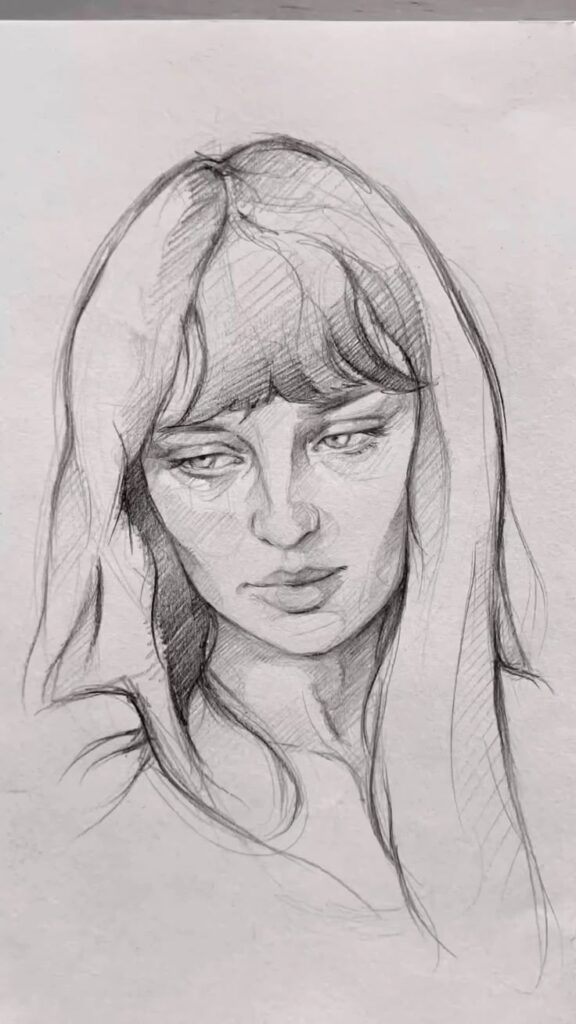
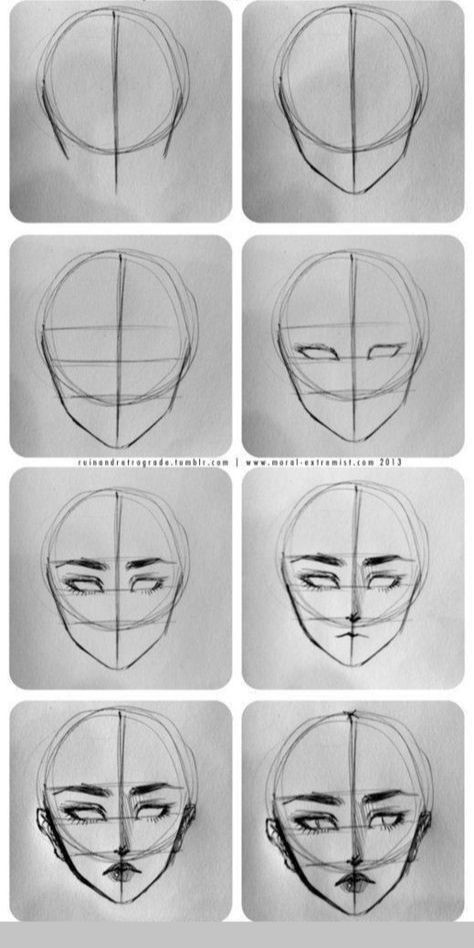
You don’t need a fancy art studio or expensive supplies to start drawing portraits. In fact, a minimalist approach often helps you focus on the fundamentals rather than getting bogged down by too many options. Here’s what I recommend for your casual portrait drawing adventures:
Pencils: Your Go-To Companions
Forget those huge sets of 20 pencils. For starters, you really only need a few:
- HB Pencil: This is your all-rounder. Great for initial sketches, light lines, and general drawing. It’s right in the middle, not too hard, not too soft.
- 2B or 4B Pencil: These are softer, darker pencils. Perfect for adding shadows, creating depth, and making your lines pop. They glide smoothly and create rich tones.
- 6B or 8B (Optional): If you really want to dive deep into dark shadows and dramatic contrast, a super-soft pencil like a 6B or 8B is fantastic. But it’s not strictly necessary for casual drawing.
Paper: Any Surface Will Do
- Sketchbook: A simple sketchbook (A4 or A5 size) with decent quality paper is ideal. It keeps all your practice in one place and makes it easy to carry around. Look for paper that’s at least 80-100gsm (grams per square meter) to prevent bleed-through and withstand erasing.
- Printer Paper: Don’t underestimate regular printer paper! It’s cheap, readily available, and perfect for quick studies where you don’t want to waste your “good” paper. The goal here is practice, not perfection, so don’t be precious about your materials.
- Toned Paper (Optional): If you’re feeling a bit adventurous, drawing on toned paper (like light grey or tan) can be really fun. You can use white charcoal or pastel pencils for highlights, adding another dimension to your work.
Erasers: Your Best Friends (and Teachers!)
- Kneaded Eraser: This squishy, pliable eraser is a game-changer. You can mold it into different shapes to lift specific areas of graphite, lighten lines, or clean up smudges without damaging the paper. It’s non-abrasive and leaves no crumbs.
- Plastic/Vinyl Eraser: A standard white block eraser is great for completely removing mistakes or cleaning up larger areas. Just use it gently!
Optional Tools for Extra Fun
- Blending Stump/Tortillon: These are tightly rolled paper tools used to smudge and blend graphite, creating smooth transitions and soft shadows. A cotton swab or even your finger can also work in a pinch!
- Charcoal Pencil: For a different texture and super dark blacks, a charcoal pencil can be exciting. Be warned, it’s messy but rewarding!
- Digital Tablet: If you’re more digitally inclined, a drawing tablet paired with software like Procreate (iPad) or Photoshop/Clip Studio Paint (PC) opens up a whole new world of possibilities. You can achieve similar effects with digital brushes and layers. If you’re curious about diving into the digital realm, check out some drawing tablet recommendations to find the perfect fit for you.
Breaking Down the Face: Simple Shapes and Proportions

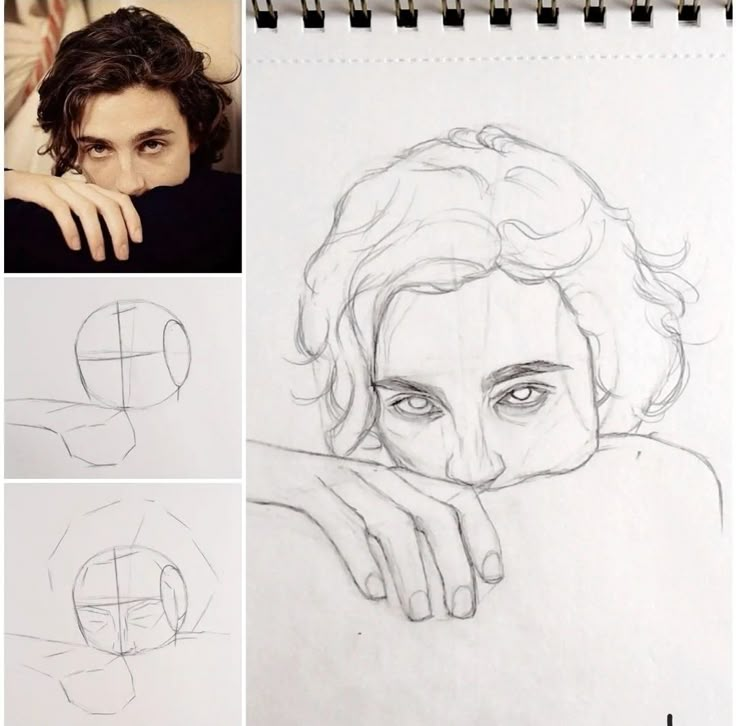
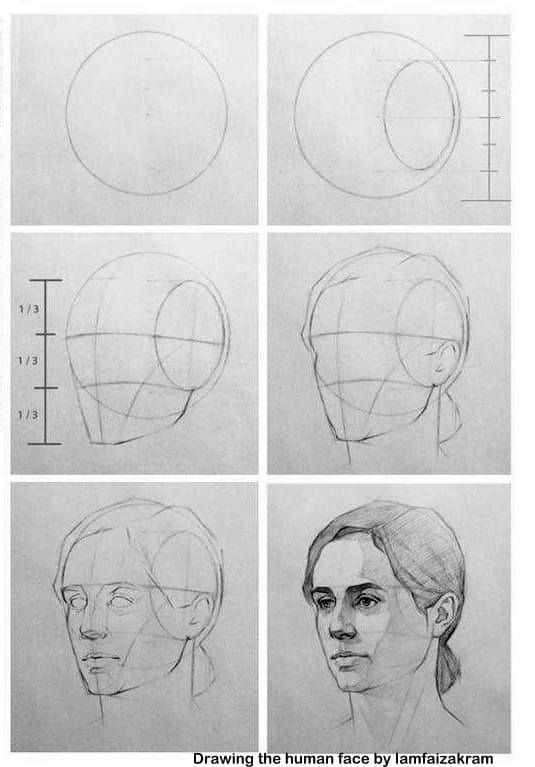
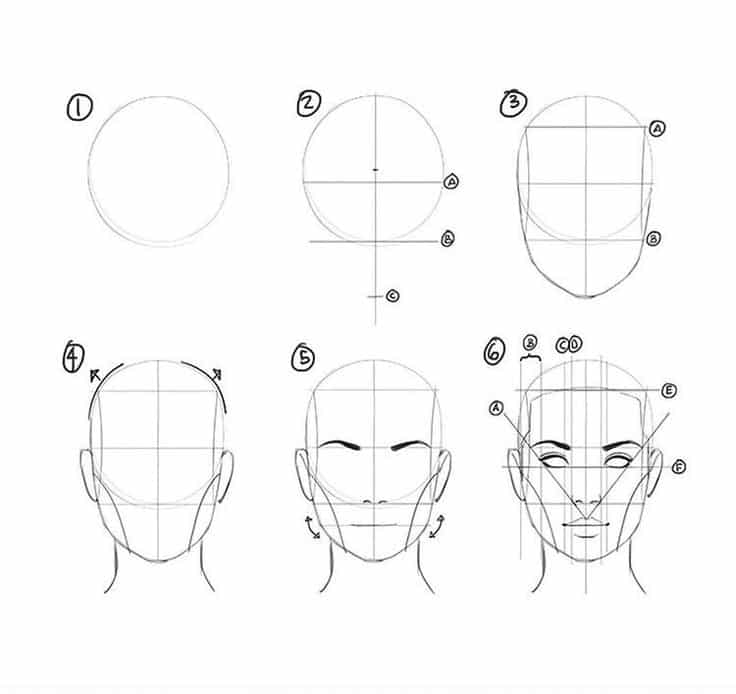
The biggest secret to drawing a convincing face isn’t talent; it’s understanding basic proportions. Once you grasp these simple guidelines, everything else falls into place. Think of the face as a canvas built upon a fundamental structure, not a jumble of random features.
The Basic Egg Shape
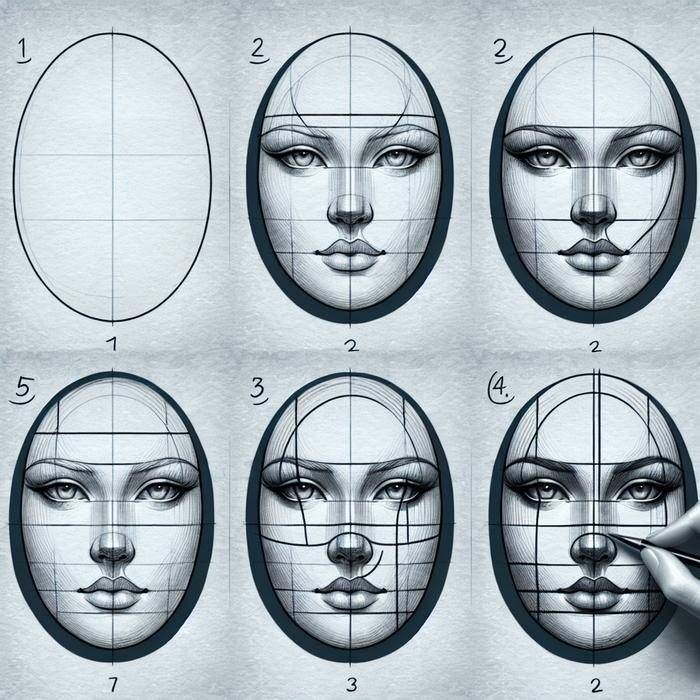
Start with the simplest form: an egg or an oval. This will be the skull. Make it slightly wider at the top for the cranium and tapering towards the chin. Don’t worry about perfection; this is just your starting point.
The Center Line
Draw a vertical line down the middle of the egg. This divides the face in half and helps you ensure symmetry (or intentional asymmetry for character!).
Horizontal Guidelines: The Key to Placement
Now, let’s divide the face horizontally. This is where the magic happens:
- Eye Line: This is often the most surprising one for beginners. The eye line typically sits halfway down the entire head. Yes, not higher! This placement accounts for the top of the head and the hairline. Draw a horizontal line here.
- Nose Line: Find the halfway point between the eye line and the bottom of the chin. That’s roughly where the bottom of the nose will sit.
- Mouth Line: The mouth is generally located halfway between the nose line and the bottom of the chin.
So, you’ve got your egg, divided by a vertical line, and three main horizontal lines for eyes, nose, and mouth. This simple framework, often referred to as a simplified “Loomis Method,” is your bedrock. It’s a fantastic way to establish a believable structure before you get lost in the details.
Proportional Relationships: Beyond the Lines
These guidelines aren’t rigid rules; they are flexible starting points that vary slightly from person to person. However, they give you a strong foundation:
- Eyes: Generally, there’s one “eye width” of space between the two eyes. The corners of the mouth often align with the pupils when looking straight on.
- Nose: The width of the nose at its widest part is roughly the same as the distance between the eyes.
- Ears: The top of the ears typically aligns with the eyebrows, and the bottom aligns with the base of the nose. These will shift significantly with head tilts and angles, but it’s a good starting point for a frontal view.
Remember, these are guides, not laws. As you draw more, you’ll develop an intuitive sense for these relationships. The goal is to get a general placement that feels right, then adjust based on your specific subject.
Feature Focus: Bringing Eyes, Nose, Mouth, and Ears to Life
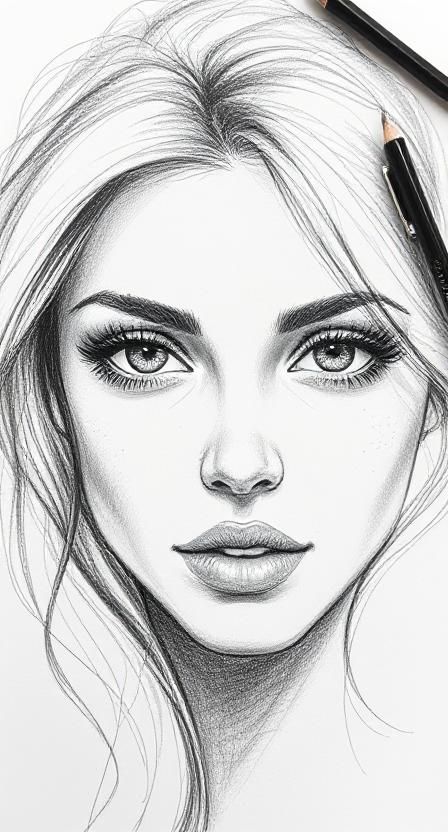
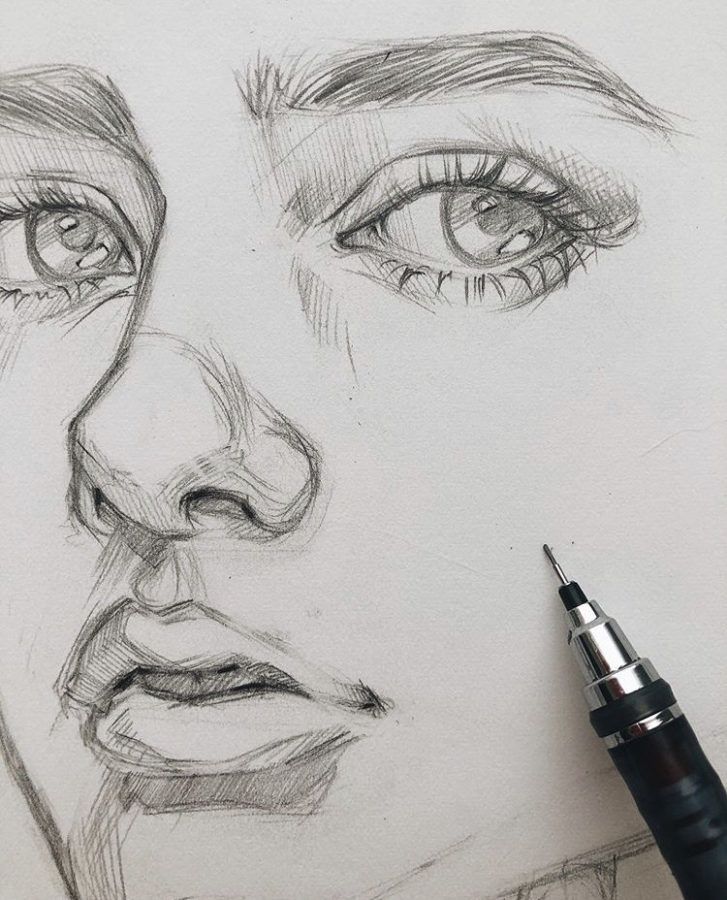
Once you have your basic structure, it’s time to add the features. Approach each feature as a distinct shape, thinking about its planes and how light interacts with it, rather than just drawing an outline.
Eyes: The Windows to the Soul
Eyes are often the most captivating part of a portrait. Don’t just draw an almond shape. Think about:
- The Eyeball: It’s a sphere! This understanding helps you visualize how the eyelids wrap around it and how light hits its curved surface.
- Eyelids: These are crucial. The upper lid is usually thicker and casts a slight shadow on the eyeball. The lower lid is often lighter.
- Pupil and Iris: The pupil is the black center, and the iris is the colored ring. Notice how the upper eyelid often covers a small part of the iris.
- Light: A tiny highlight in the pupil or iris can bring an eye to life.
- Expression: The tilt of the eyes, the scrunch of the brow, the crow’s feet – these all contribute to expression. Squint slightly at your reference to see the key lines of expression.
Nose: More Than Just a Triangle
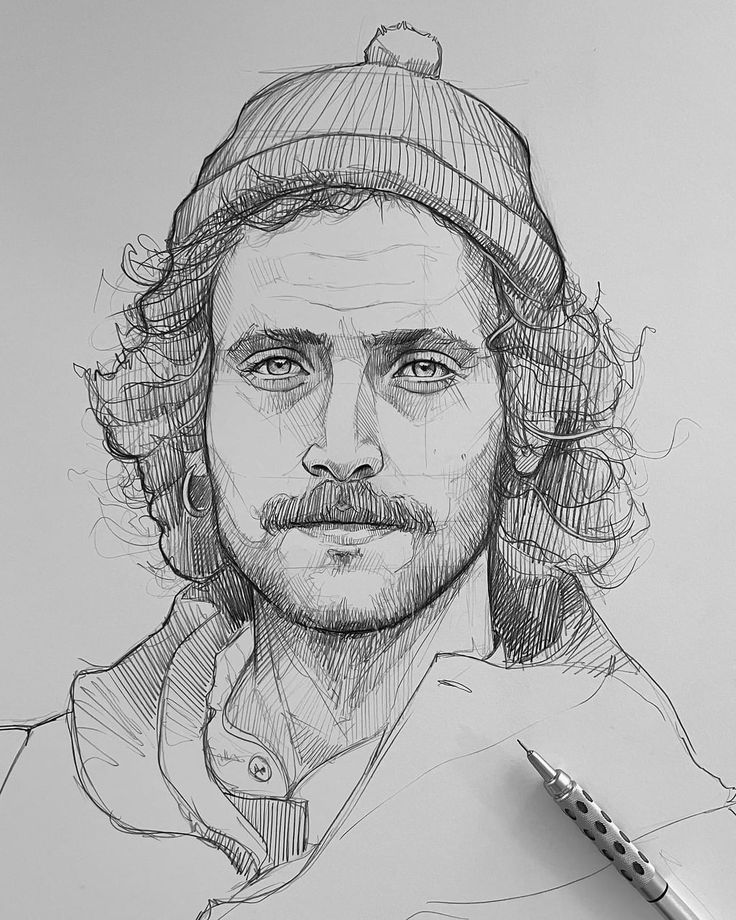
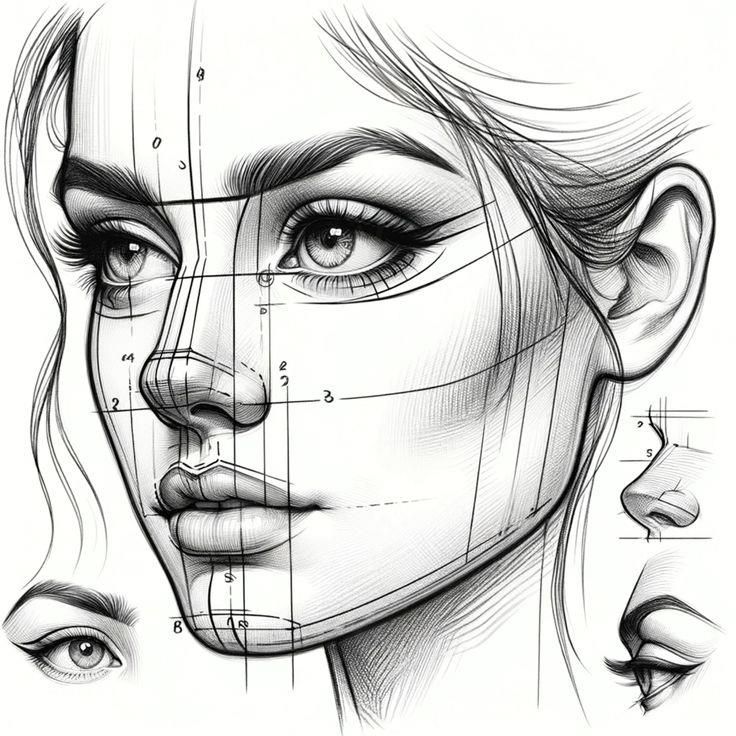
Many beginners draw the nose as a simple triangle. Instead, think of it in terms of simple planes:
- Bridge: The flat or slightly curved area between the eyes.
- Tip: Often a slightly rounded form.
- Nostrils: These are often the darkest parts of the nose and are rarely perfect circles from the front. They have a specific shape that varies from person to person.
- Shadows: The nose protrudes, so it always has a distinct shadow underneath it and often on one side, depending on the light source. Use these shadows to define its form rather than just drawing hard outlines.
Mouth: Express Yourself!
The mouth is incredibly expressive, but also notoriously tricky.
- Basic Shape: Start with a simple line for the division between the lips. Then add the upper and lower lip shapes. The philtrum (the groove between the nose and upper lip) is an important, subtle detail.
- Corners: Pay close attention to the corners of the mouth. Do they turn up, down, or stay neutral? This instantly communicates emotion.
- Volume: Lips aren’t flat. The upper lip is often slightly darker and less plump than the lower lip. Use subtle shading to give them volume.
- Teeth (Careful!): Only draw teeth if absolutely necessary and very subtly. Over-drawing teeth can make a portrait look unnatural or cartoonish. Focus on the shadow behind the teeth if the mouth is open.
Ears: Often Overlooked, but Important
Ears can be complex, but for casual portraits, keep them simple.
- Placement: As mentioned, they typically align between the eyebrow line and the nose line.
- Shape: Look for the overall outer shape first, then identify the main folds and curves inside. Don’t get lost in every tiny detail.
- Perspective: Remember that ears change dramatically in appearance as the head turns. When drawing faces from different angles, you’ll notice how the ear foreshortens or disappears. Understanding how to simplify drawing faces from different angles is a great skill to develop for dynamic portraits.
Hair and Neck: Framing the Face

A portrait isn’t just a floating head! The hair and neck provide crucial context and complete the overall form.
Hair: Drawing Masses, Not Strands
Beginners often try to draw every single strand of hair, which quickly becomes overwhelming and unrealistic. Instead, think of hair as:
- Masses and Shapes: Identify the main bulk of the hair. Does it flow down, curl up, or sit in a specific style? Block in these large shapes first.
- Light and Shadow: Where does the light hit the hair, creating highlights? Where are the darker, shadowed areas? Use these values to define texture and volume.
- Flow and Direction: Observe the direction the hair grows and falls. Use your pencil strokes to mimic this flow, rather than drawing straight, stiff lines.
- Hairline: Pay attention to where the hair meets the forehead. It’s rarely a perfectly straight line.
Hair adds so much character to a portrait, so don’t rush it! Taking the time to observe its movement and volume will make a big difference.
Neck and Shoulders: Anchoring the Head
The neck connects the head to the body, and its structure is important for grounding your portrait.
- Cylindrical Form: Think of the neck as a cylinder, connecting to the base of the skull.
- Trapezius Muscles: Notice how the trapezius muscles rise from the shoulders to meet the base of the skull, forming a subtle curve that defines the width of the neck from the back.
- Collarbones: Even if you’re only drawing a bust, suggesting the collarbones and the top of the shoulders helps give the head a solid foundation. You don’t need to draw a full figure, but understanding the relationship between the head and the rest of the body, as explored in figure drawing resources, can greatly enhance your portrait work. Even just hinting at the broader structure creates a more believable and complete image.
Capturing Likeness and Expression: The Heart of the Portrait
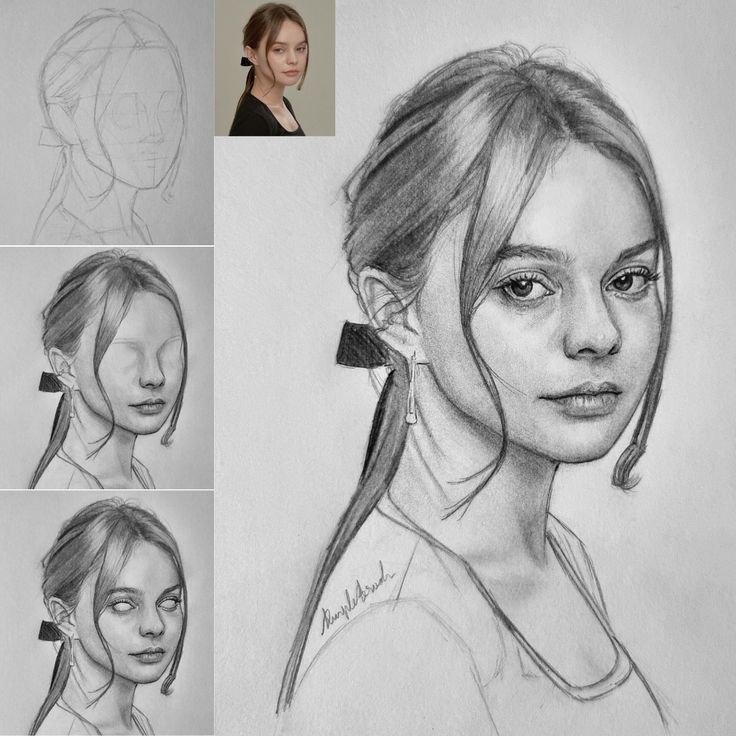
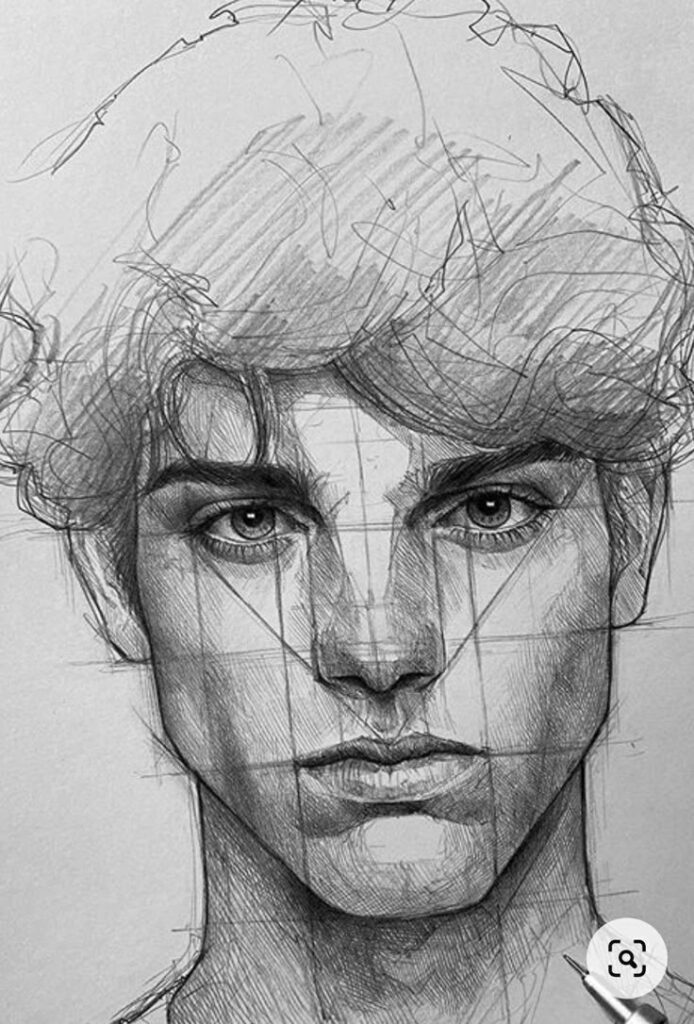
This is where the magic truly happens! Capturing likeness and expression is what makes a portrait more than just a drawing of a face.
Observation is Your Superpower
The most crucial skill in portrait drawing is observation. Slow down and truly look at your subject or reference photo.
- Notice the Uniqueness: What makes this face different? Is the nose a bit wider? Are the eyes set closer together? Is there a particular curve to the lips? These subtle differences are what create likeness.
- Negative Space: Look at the shapes around the features. The space between the nose and mouth, or between the eyes and the hairline, can often reveal more about the proportions than looking directly at the features themselves.
- Angles and Tilts: Few people stand perfectly straight-on. Notice the slight tilt of the head, the angle of the jaw, or how one shoulder might be higher than the other.
Exaggerate for Effect (Subtly!)
For casual, expressive portraits, don’t be afraid to slightly exaggerate a prominent feature or expression. If someone has particularly striking eyes, make them a focal point. If they have a characteristic smirk, lean into it. This isn’t about caricature (unless you want it to be!), but about emphasizing what makes that person unique and recognizable.
Using Reference Photos Wisely
Reference photos are your friends!
- Multiple Photos: If possible, use several photos of the same person from different angles and with different expressions. This helps you build a more complete understanding of their face.
- Analyze Light: Pay attention to how the light hits the face in your reference. This will be vital for shading.
- Don’t Trace: While tracing can be a learning tool for understanding shapes, for developing your observational skills, try to draw freehand from the photo. You can draw a light grid over both your reference and your paper if you need help with placement, but eventually, try to wean yourself off it.
Shading and Value: Bringing Life to Your Portraits
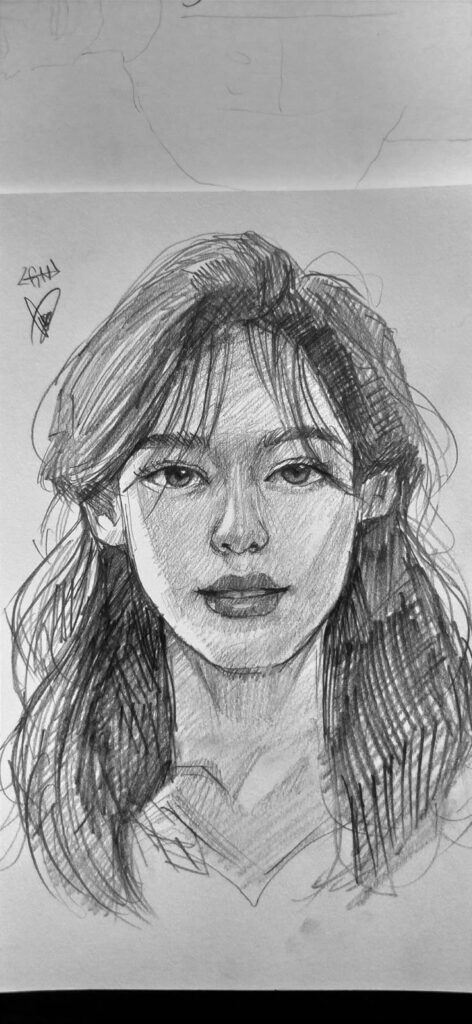
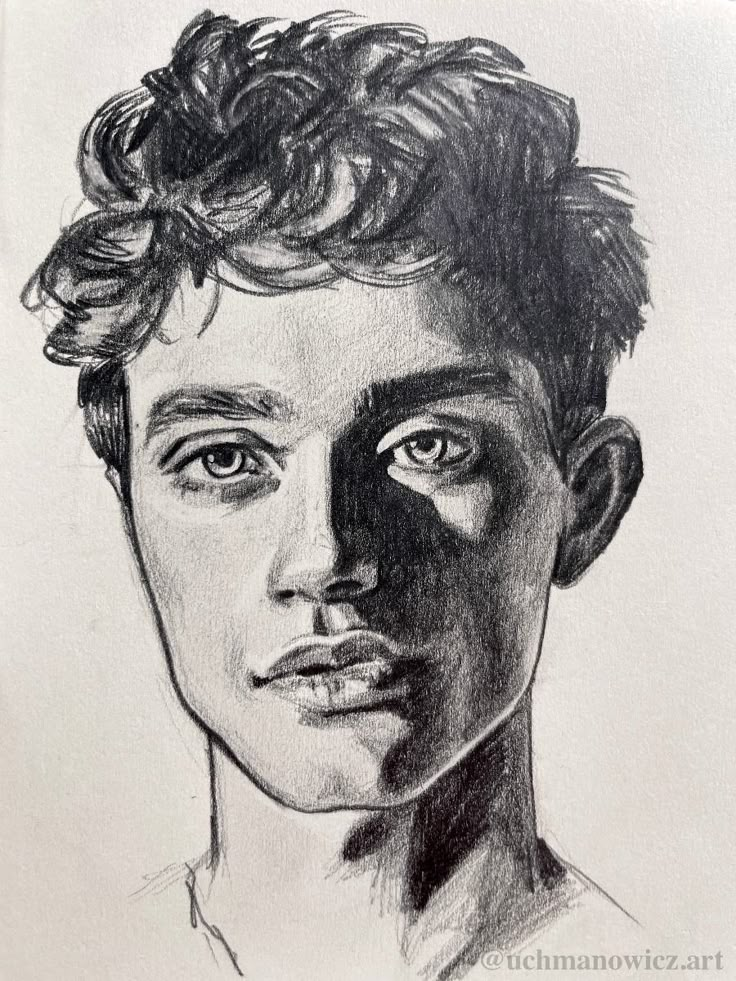
Shading transforms a flat outline into a three-dimensional form. It’s where your portrait truly comes to life. “Value” refers to the lightness or darkness of a color or tone.
Understanding Your Light Source
This is fundamental. Imagine where the light is coming from.
- Key Light: The main light source that illuminates the face.
- Shadow Side: The side of the face opposite the key light, which will be darker.
- Form Shadows: Shadows that describe the form of the features themselves (e.g., the shadow under the nose, the shadow cast by the upper lip).
- Cast Shadows: Shadows cast by one object onto another (e.g., the shadow of the nose cast onto the upper lip, or the shadow of the head cast onto the neck).
Once you identify your light source, you can logically apply shadows and highlights.
Building Up Tones Gradually
Don’t jump straight to your darkest darks. Build up your shading in layers:
- Light Base Layer: Start with a very light layer of shading over the entire face to establish the overall tone.
- Mid-Tones: Gradually add darker values to the shadowed areas, focusing on the form shadows. Use your HB or 2B pencil for this.
- Darkest Darks (Accents): Reserve your softest pencils (4B, 6B) for the deepest shadows – areas like the nostrils, the pupils, the crease of the eyelids, or under the chin. These accents create contrast and depth.
- Highlights: Don’t draw highlights; preserve them! Leave areas of the paper untouched (or lightly erased with your kneaded eraser) where the light directly hits. Think about the forehead, the bridge of the nose, the cheekbones, and the lower lip.
Blending (or Not Blending!)
- Smooth Blending: If you want a softer, more realistic look, use a blending stump, cotton swab, or even your finger (carefully!) to smooth out your graphite.
- Hatching/Cross-Hatching: For a more expressive, textured look, use hatching (parallel lines) or cross-hatching (intersecting lines) to create your values. This adds a unique artistic flair and can be quicker for casual sketches.
- Vary Your Pressure: Experiment with how hard you press your pencil to control the lightness or darkness of your strokes.
Common Mistakes and How to Fix Them (Casually!)

We all make mistakes, especially when learning something new. The key is to see them as learning opportunities, not failures!
Obsessing Over Symmetry
No face is perfectly symmetrical! One eye might be slightly higher, one side of the mouth might curve a bit more. Trying to force perfect symmetry often results in a stiff, lifeless portrait. Embrace the subtle differences; they add character!
Too Much Detail Too Early
Don’t start with the eyelashes before you’ve got the overall head shape right. Work from big to small:
- Overall head shape and placement.
- Major guidelines.
- Basic shapes of features.
- Adding shadows and values.
- Refining details.
If you jump to details, you might find your beautifully drawn eye is in the wrong place!
Fear of Making Mistakes
This is the biggest killer of creativity. Your sketchbook is your playground, not a gallery. Make mistakes! Draw badly! Erase, redraw, experiment. The “bad” drawings are often the most valuable because they teach you what not to do or what you need to practice more. That’s what a “casual” approach is all about.
Over-Reliance on Outlines
While outlines define shapes, true form comes from shading and values. Try to think of drawing less like coloring in a coloring book and more like sculpting with light and shadow. Use outlines lightly to establish position, then let your shading do the heavy lifting of defining the form.
Not Using Enough Contrast
A common issue for beginners is a lack of contrast, leading to “flat” drawings. Don’t be afraid to push your darks and preserve your lights. A full range of values, from pure white (paper) to rich black, makes a portrait dynamic and impactful.
Practice Makes Progress: Draw, Draw, Draw!
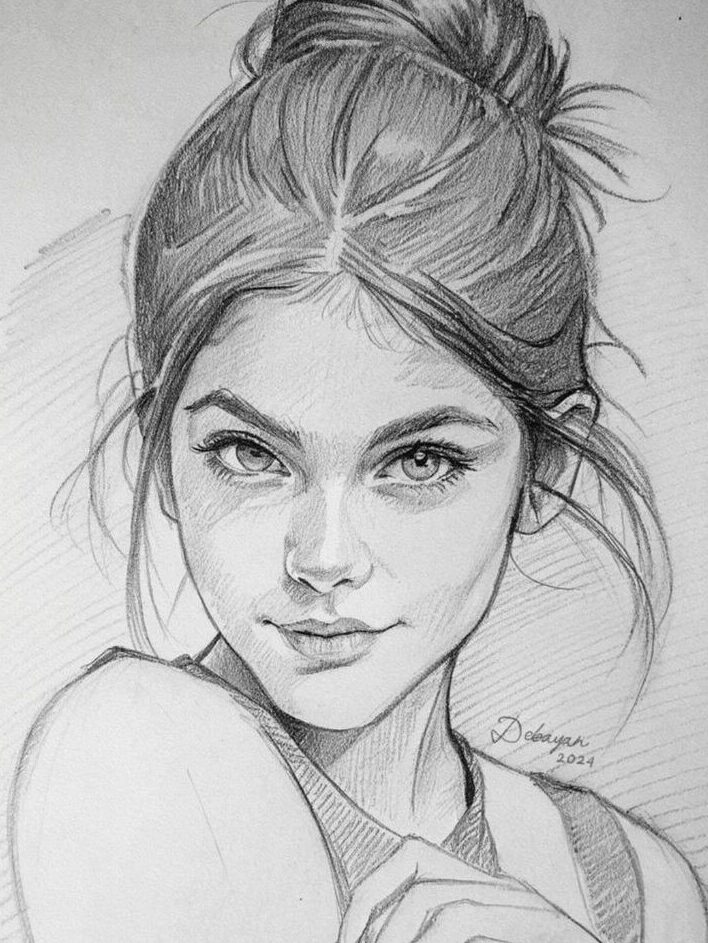
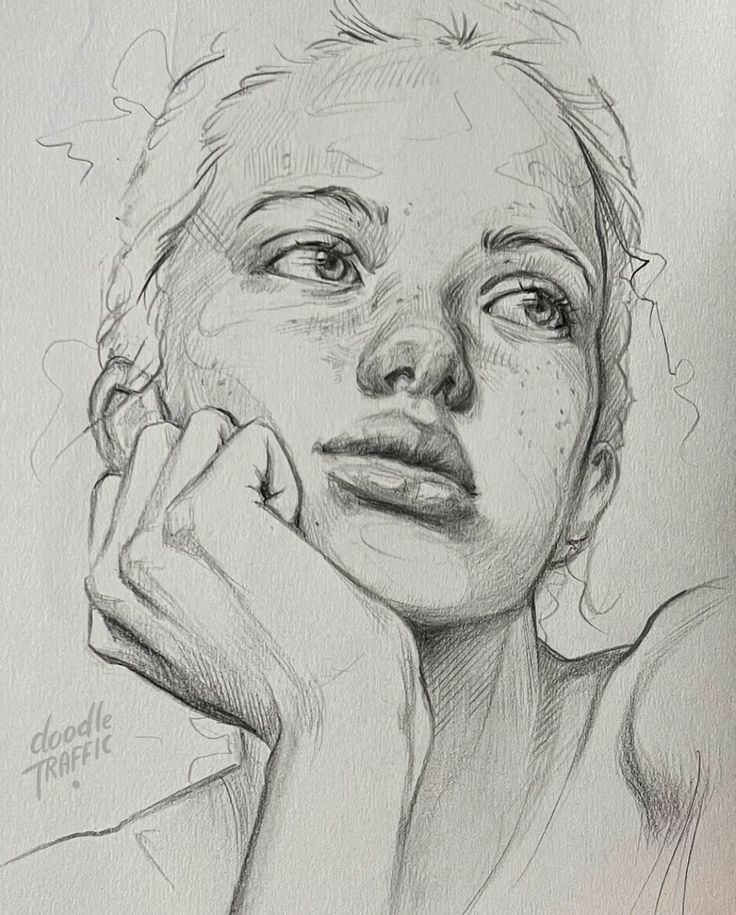
The absolute best way to improve your portrait drawing is to simply do it. Regularly.
- Quick Sketches: Spend 5-10 minutes sketching a face from a photo, a friend, or even your reflection. Don’t aim for perfection, just capture the essence.
- Draw from Life: If you can, draw people around you! At a coffee shop, on the train, or just a family member watching TV. Drawing from life helps you understand three-dimensional forms and movement in a way photos can’t.
- Use Selfies: Take selfies with different expressions and angles. You’re always available, and you’ll become very familiar with your own unique face!
- Don’t Be Afraid of “Ugly” Drawings: Every artist has them. They are part of the learning process. Celebrate your effort, not just the outcome.
- Experiment: Try different pencils, different papers, different styles. Doodle, scribble, hatch. Find what feels good and what works for you.
- Explore Other Artists: Look at other portrait artists whose style you admire. How do they handle features, shading, or expression? You can learn so much by simply observing and analyzing their work, including how to draw clothes which often goes hand-in-hand with portraiture.
Remember, artistic growth is a journey, not a destination. There will be days you feel frustrated, and days you feel like a genius. Both are normal! The key is to keep showing up, keep observing, and keep your pencil moving.
Your Journey Begins Now!

Congratulations, you’ve just unlocked the secrets to casual, expressive portrait drawing! We’ve covered everything from building your basic toolkit and understanding facial proportions to bringing features to life with simple shapes and effective shading. We’ve tackled common hurdles and learned to embrace the imperfections that make art so human.
The most important takeaway from this portrait drawing guide is this: art is about expression, exploration, and enjoyment. Ditch the fear of judgment, grab your pencil and paper, and just start drawing. Every line you put down, every shadow you render, every face you attempt, moves you forward. Your unique artistic voice is waiting to be discovered, and there’s no better way to find it than by drawing the incredible diversity of human faces around you. So go on, look around, find inspiration, and let your pencil do the talking. Happy drawing!
- 144shares
- Facebook0
- Pinterest144
- Twitter0
- Reddit0
