Key Takeaways
- Gather essential materials like quality paper, a range of pencils, erasers, and blending tools to ensure a smooth drawing process.
- Understand basic dog anatomy, focusing on proportions, shapes, and key features like ears, eyes, and fur texture for accurate representation.
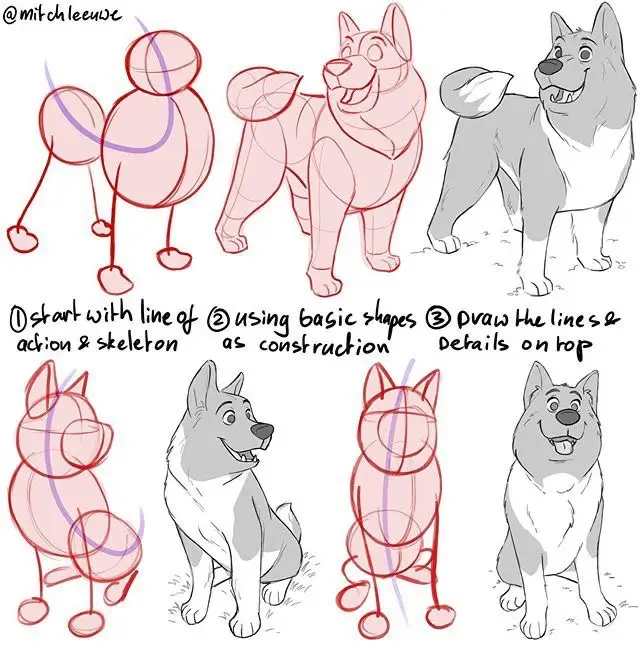
- Follow a step-by-step approach, starting with simple shapes and guidelines before refining outlines, adding facial details, and creating fur texture.
- Use shading and highlights to add depth and realism by observing light sources and applying appropriate pencil techniques for shadows and textures.
- Avoid common mistakes such as misaligned proportions or overworking details by using guidelines and maintaining balance throughout the sketching process.
- Experiment with different styles, from simplistic cartoon designs to detailed realistic portraits, to find your unique artistic expression.
I’ve always admired those who can bring a simple sketch to life, especially when it comes to drawing something as universally loved as a dog. But for someone like me, with zero artistic flair, the idea of capturing a dog’s essence on paper felt impossible—until I realized it doesn’t have to be perfect to be fun. From floppy ears to wagging tails, there’s something magical about translating their charm into lines and shapes.


Materials You Will Need
Gathering the right materials is essential how to draw a dog effectively. Each tool contributes to different aspects of the sketch, from outlines to shading.
- Drawing Paper
Use high-quality drawing paper that can handle erasing and layering. For beginners, standard sketch pads are sufficient, but heavier paper (e.g., 80-100lb) works well for detailed work.
- Pencils
Include a range of pencil grades: HB for outlines, 2B or 4B for shading, and lighter options like H pencils for highlights. Mechanical pencils provide consistent lines while traditional ones allow flexibility.
- Erasers
Soft kneaded erasers help lift graphite without smudging, while hard erasers remove precise lines cleanly.
- Sharpener
A quality sharpener keeps pencil tips fine for intricate details like fur or eyes.
- Blending Tools
Tortillons or blending stumps smooth out shaded areas to create realistic gradients in fur texture.
- Reference Image
Select a clear image of the dog you want to draw with visible features such as eyes and fur patterns.
- Ruler (Optional)
A small ruler helps maintain proportions when outlining the dog’s body or face structure accurately.
Organizing these materials before starting ensures an uninterrupted creative flow during your drawing process.
Understanding Basic Dog Anatomy
A fundamental understanding of dog anatomy forms the backbone of creating accurate and expressive drawings. By focusing on proportions, shapes, and key features, it becomes easier to capture a dog’s unique structure.
Proportions And Shapes
Dogs’ bodies often resemble a dynamic triangle or elongated shape depending on the breed. For instance, German Shepherds lean towards triangular builds with sloping backs, while Labrador Retrievers have more rectangular frames. The rib cage occupies a significant portion of the torso and remains rigid; bending it unnaturally distorts realism in your drawing.
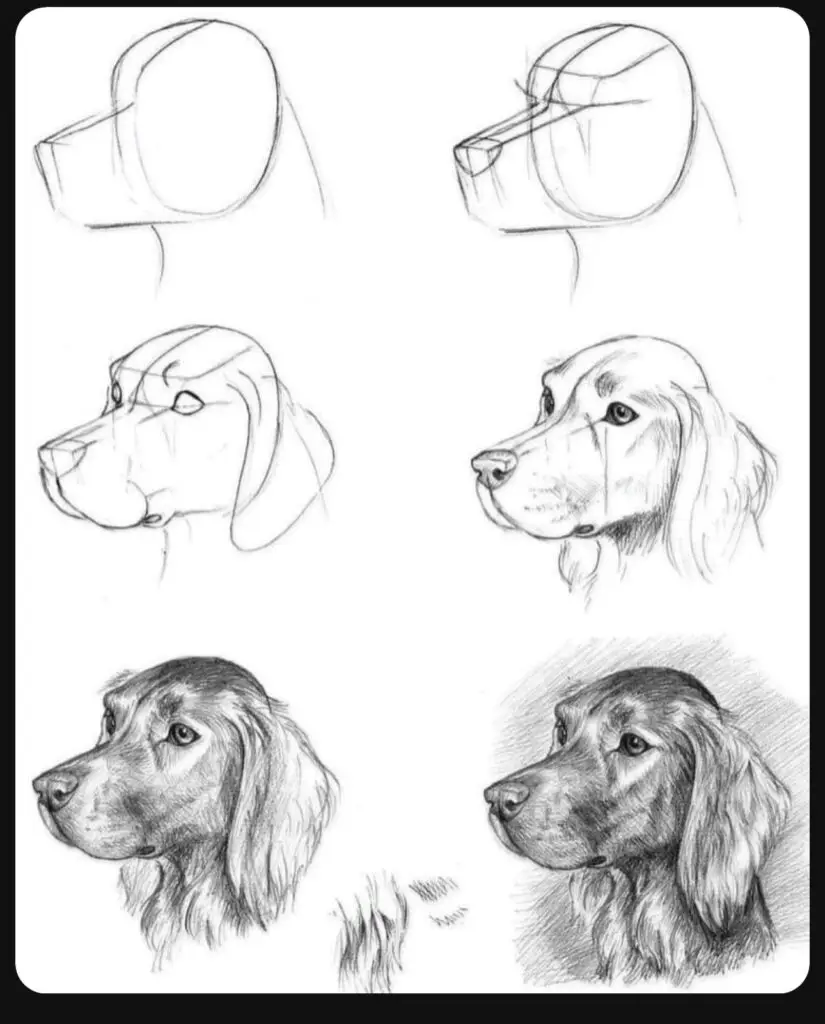
Leg anatomy is distinct because dogs walk on their toes instead of flat feet like humans. Knees and elbows sit much higher than expected when compared to human anatomy. Legs should appear longer with clearly defined joints for accuracy—use reference images to understand these nuances better.
Tails extend directly from the spine rather than sitting lower on the back. Their length varies by breed but typically aligns with the back’s length. Misplacing or misproportioning tails disrupts anatomical flow.
Key Features To Focus On
Heads are rounded with small eyes that convey emotion effectively when placed correctly. Thick necks angle forward slightly into cone-shaped muzzles—the only moving part being the bottom jaw. Practicing muzzle shapes helps refine this detail since poorly drawn muzzles can affect overall facial expression.
Ears range from floppy (like Golden Retrievers) to upright (as seen in German Shepherds). Paying close attention to ear placement ensures balance within head proportions.
Fur texture adds depth; short fur requires smoother shading while long fur benefits from directional strokes mimicking growth patterns observed in references like photographs or live models.
Step-By-Step Guide To Drawing A Dog
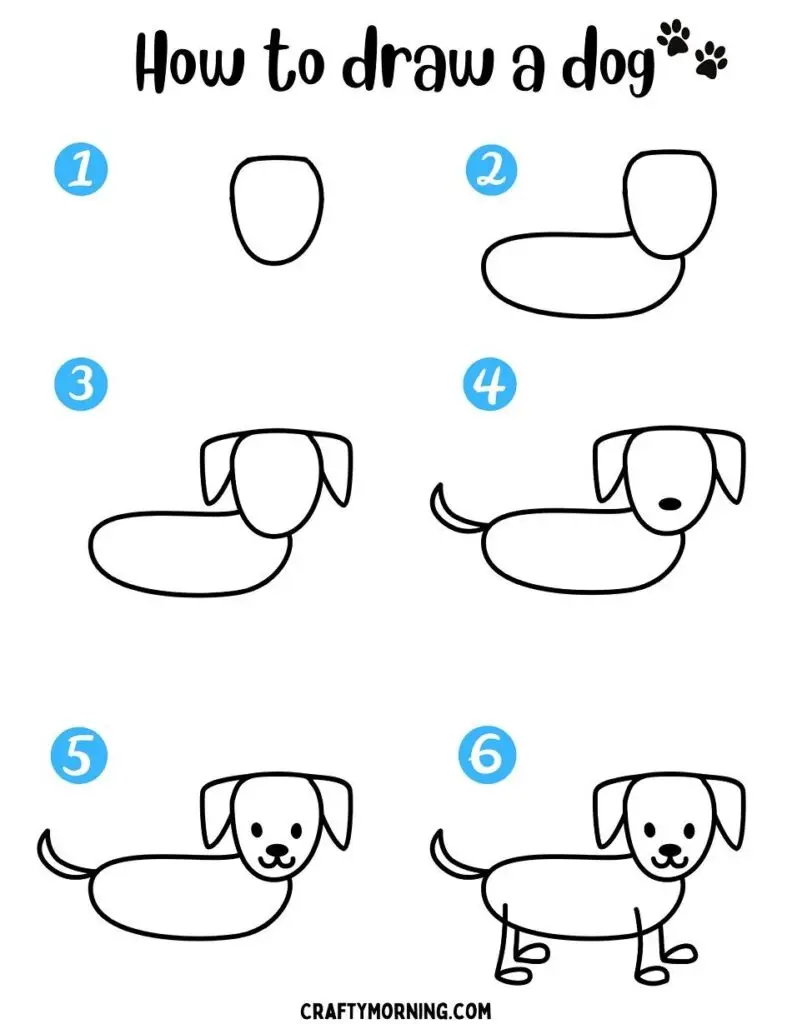

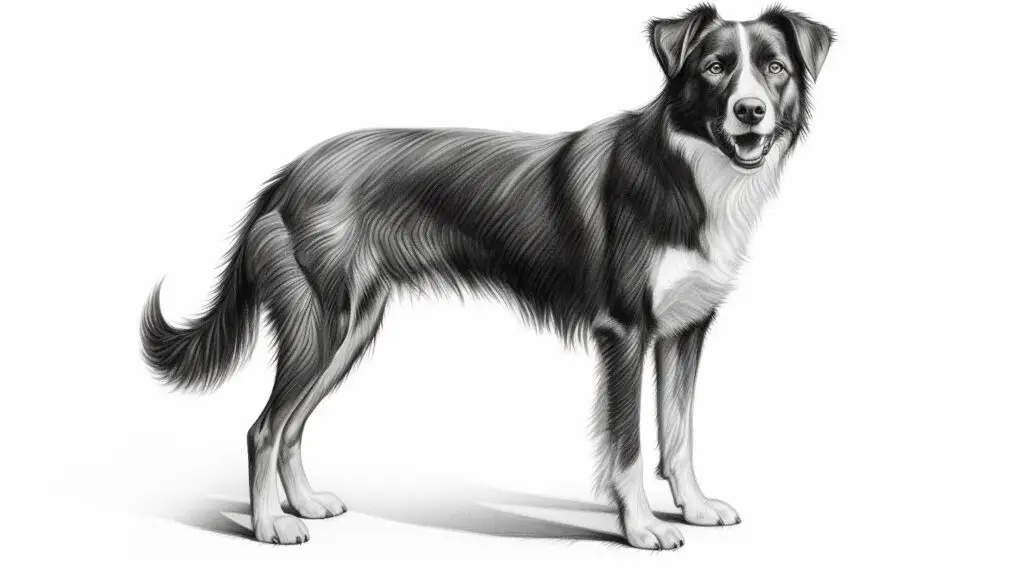
Breaking the process into manageable steps makes drawing a dog approachable, even for beginners. Following this structured guide helps create a charming and realistic sketch.
Step 1: Drawing Basic Shapes And Guidelines

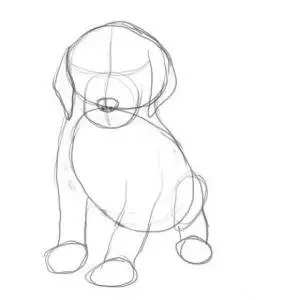
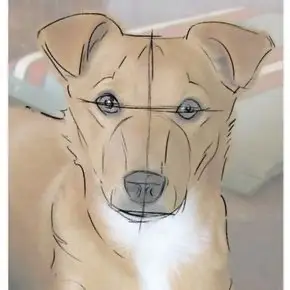
I start by lightly sketching simple shapes to outline my dog’s form. Circles and ovals work well for the head, body, and joints. For instance, I use an oval for the torso and a smaller circle for the head. Adding a centerline through these shapes ensures symmetry in features like eyes and ears. These guidelines act as a foundation that simplifies capturing proportions accurately.
Step 2: Sketching The Dog’s Body Structure
Using my initial shapes as reference points, I connect them with smooth lines to define the body structure. For example, if I’m sketching a Labrador Retriever, its broad chest flows into a muscular frame with slightly curved lines along its back and belly. Paying attention to breed-specific physical characteristics helps me capture unique traits like slender legs or stocky builds.
Step 3: Adding Facial Details – Eyes, Nose, And Mouth
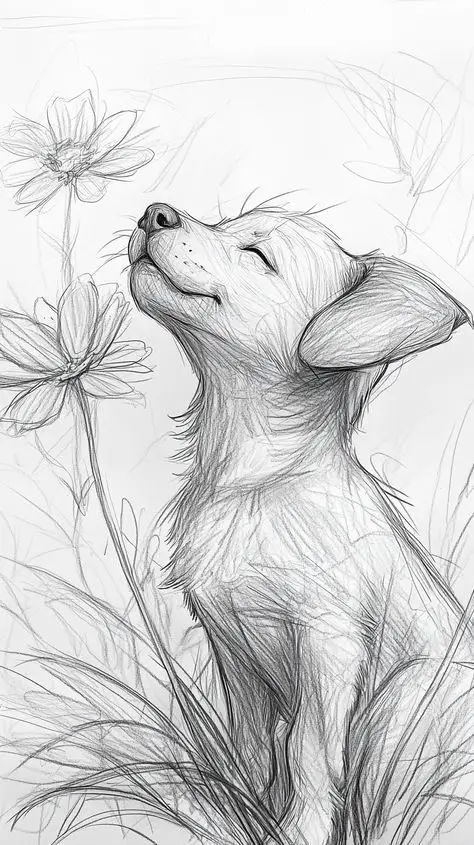

The personality of any dog shines through its face. I carefully mark where each eye goes using faint dots before shaping almond-like outlines around them. Ensuring equal alignment creates balance—crooked pupils can throw off the entire expression! For noses, triangular contours work best; softer edges make it look more natural. Finally, curving short lines beneath gives shape to lips while hinting at playful grins or calm expressions.
Step 4: Refining Outlines And Adding Fur Texture
Once satisfied with basic details, I refine outlines by erasing unnecessary marks and darkening essential ones using precise strokes from sharper pencils (like HB or 2B). Then comes fur texture—I layer quick directional strokes mimicking real fur patterns observed in photos of dogs’ coats such as smooth Dachshunds versus fluffy Samoyeds’. This step adds depth without overcomplicating things visually.
Adding Depth With Shading And Highlights
Creating depth in a dog drawing enhances its realism and brings it to life. Incorporating shading and highlights emphasizes the three-dimensional form of the dog.
Techniques For Shadow And Light
Applying shadows and light involves understanding how these elements interact with your subject. I begin by observing the reference image to identify light sources. Shadows typically fall on areas opposite the light, such as under the chin or along one side of the body.
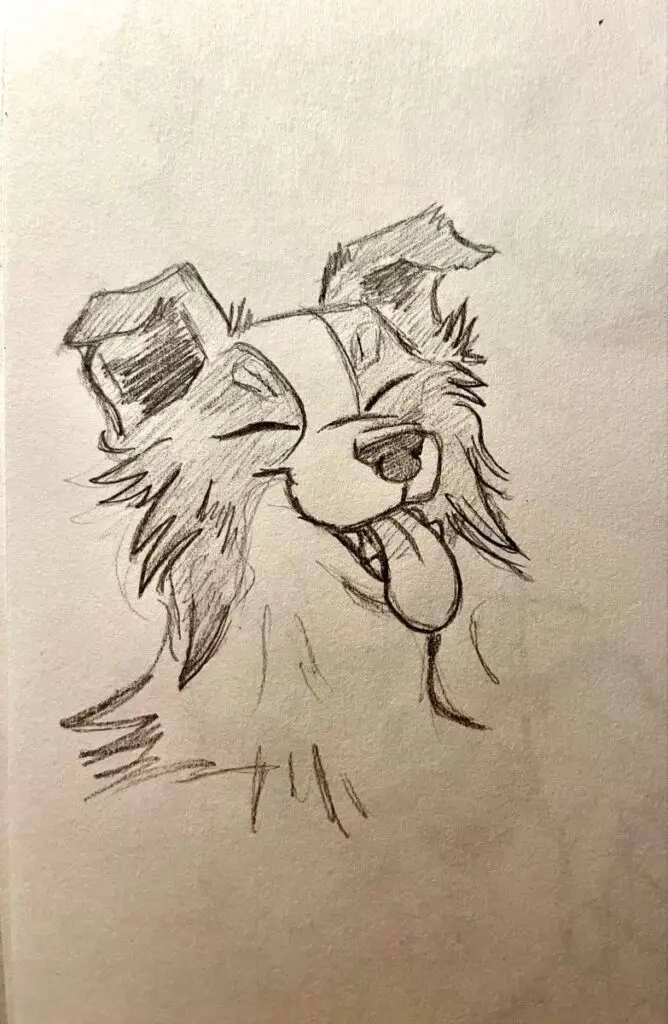
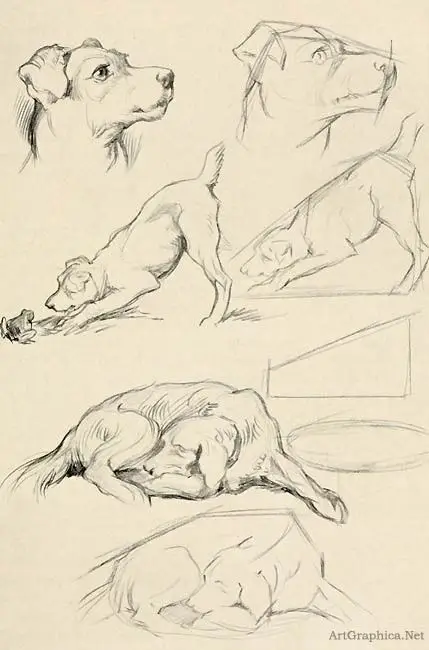
Layering graphite pencils is key for building shadows. I start lightly with an HB pencil and gradually use darker grades like 2B or 4B for deeper tones. To maintain balance, I leave specific areas untouched to act as natural highlights or use a kneaded eraser for subtle lifting effects.
Blending tools refine transitions between light and dark regions. For example, using a blending stump softens harsh lines around shadows near muscle curves or fur folds.
Tips For Realistic Fur Texture
Shading fur texture requires attention to stroke direction, length, and density. Short directional strokes mimic fine facial hairs around the muzzle, while longer strokes represent flowing fur on tails or ears.
To achieve dimension, vary pencil pressure within each stroke set; lighter pressure conveys softer hair layers at exposed points like ear tips. Darker pressure defines denser fur sections where shadows naturally deepen—such as under legs or behind ears.

Highlight placement enhances shine in smooth-coated breeds like Labradors while adding vibrancy to textured coats like those of Huskies. Carefully erase thin lines within darkened areas to simulate reflected light along individual strands in highlighted zones above curved surfaces such as shoulders or foreheads.
Common Mistakes And How To Fix Them
Drawing a dog can feel rewarding, but mistakes often hinder progress. Recognizing and addressing these errors ensures better results and overall improvement.
Overlapping Proportions
Misaligned body proportions disrupt the drawing’s accuracy. For instance, a head drawn too large or legs placed unevenly distorts the dog’s natural posture. This often occurs when I skip initial guidelines or rush through sketching.
To fix this, I begin with basic shapes to outline proportions properly. Circles for heads and ovals for bodies help establish balance. Checking symmetry by flipping the paper or viewing it in a mirror highlights misalignments early on. Adjustments become more manageable before adding details like facial features or fur texture.
Overworking The Details
Excessive focus on details detracts from the drawing’s cohesion. Spending disproportionate time perfecting one ear while neglecting other parts creates an imbalanced appearance.
I tackle this issue by progressing uniformly across the drawing rather than fixating on one area. Using lighter pencil strokes at first keeps me flexible for adjustments throughout the process. Setting timers for specific sections—like 10 minutes for shading eyes—helps distribute attention evenly, ensuring consistency without overloading any single feature.
Alternative Approaches And Styles
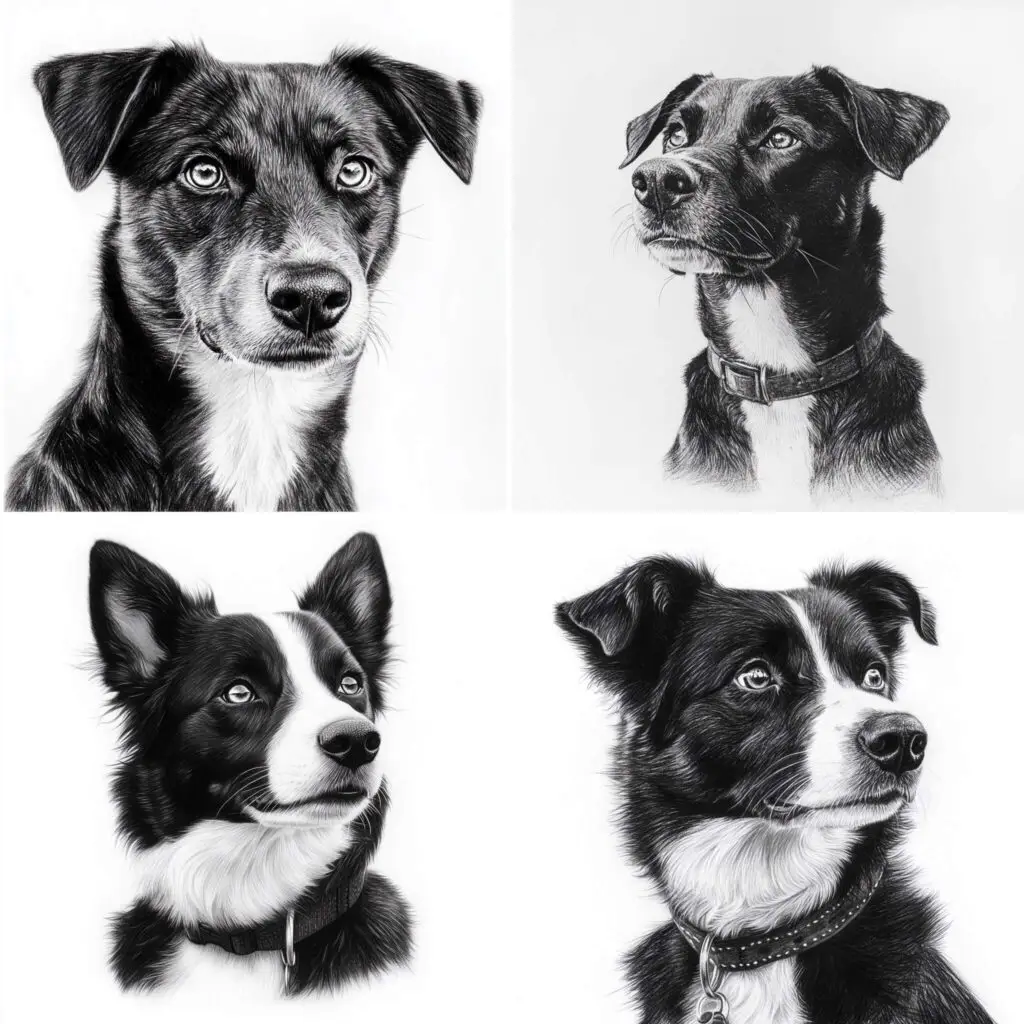
Exploring different approaches allows for creative freedom and adaptability in dog drawing. By experimenting with styles, the process becomes more personal and engaging.
Simplistic Cartoon Dog Drawing
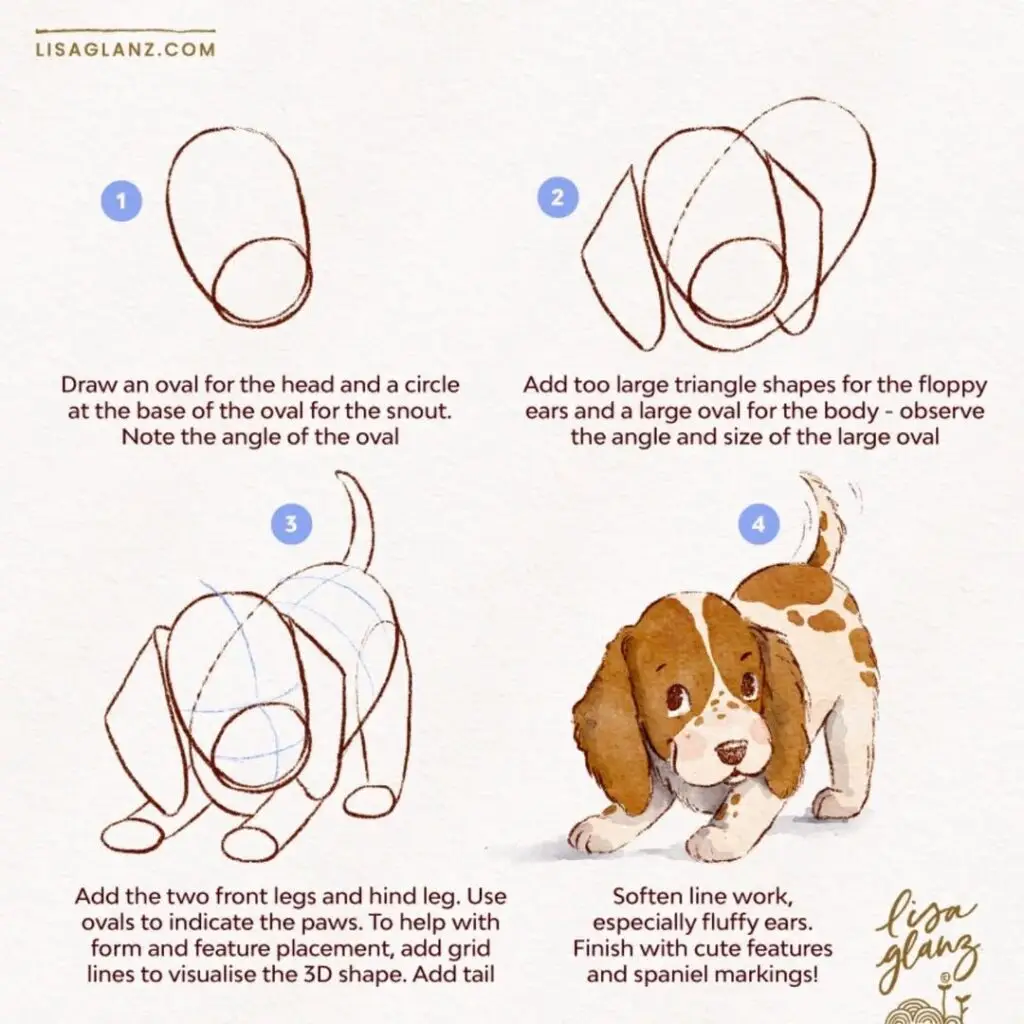
Creating a cartoon-style dog focuses on exaggeration and simplicity. Start with basic shapes like circles for the head and body, rectangles for legs, and triangles for ears. Add oversized eyes or an exaggerated smile to enhance personality traits. For instance, large floppy ears can highlight a playful breed like a Beagle.
Use bold outlines to define features clearly. A thick marker or dark pencil works well for this style. Incorporate minimal details—such as dots for whiskers or simple strokes for fur texture—to keep the design uncluttered yet expressive.
Experimenting with color adds vibrancy to your cartoon dog. Use soft pastels or bright hues depending on the mood you want to convey. This approach suits quick sketches or creating lighthearted illustrations.
Realistic Dog Portrait

Realism involves capturing intricate details that reflect a dog’s unique appearance accurately. Begin by studying reference photos closely, identifying specific characteristics like fur patterns or eye shape.
Focus on proportions first, using faint guidelines to outline the head, muzzle, and body structure before adding finer elements such as facial expressions. Pay attention to textures; short directional strokes mimic short fur breeds like Labradors while longer overlapping lines suit shaggy breeds like Sheepdogs.


Shading plays a crucial role in realism. Gradually build shadows using layered graphite pencil strokes where light sources create depth—underneath the chin or near folds of skin are good starting points. Avoid over-shading areas that require highlights such as glossy eyes or shiny noses.
A blending tool enhances smooth transitions between shadows and highlights while maintaining natural fur textures when used sparingly across key areas of the portrait.
Conclusion

Drawing a dog is more than just putting pencil to paper; it’s about capturing personality, exploring creativity, and enjoying the process. Whether you’re sketching a whimsical cartoon or striving for lifelike realism, there’s no right or wrong way to express your artistic vision.
Each attempt teaches you something new and builds your confidence as an artist. With practice, patience, and a willingness to experiment, you’ll find joy in every stroke and discover your own unique style. So grab your tools and let your creativity run free—you might surprise yourself with what you can create!
- 3.5Kshares
- Facebook0
- Pinterest3.5K
- Twitter0
- Reddit0

