Anime hair drawing can transform an ordinary character into something truly captivating, but many artists struggle with creating those distinctive gravity-defying styles that make anime characters so memorable. The unique flowing locks, spiky textures, and dynamic movement patterns require specific techniques that differ significantly from realistic hair drawing approaches.
Mastering anime hair involves understanding its structural fundamentals, using proper sketching techniques, and learning how to create movement and personality through stylized strands. You’ll discover that anime hair follows its own set of rules, where artistic expression takes precedence over realistic physics, allowing you to create bold and imaginative hairstyles.
Whether you’re aiming for sleek straight styles, bouncy curls, or wild spiky looks, the right techniques will help you bring your characters to life. The key lies in understanding how to break down complex hairstyles into manageable shapes and learning the essential shading methods that give anime hair its distinctive three-dimensional appearance.
Key Takeaways
- Start with basic head structure and hairline placement to create a solid foundation for any anime hairstyle
- Use flowing directional strokes and chunky sections rather than individual strands to achieve the characteristic anime hair look
- Apply proper shading techniques with mid-tones and highlights to create depth and movement in your character’s hair
Anime Hair Structure and Fundamentals
Mastering anime hair requires understanding its anatomical foundation and how it naturally flows from the skull. The key lies in recognizing hair growth patterns and dividing the hair into manageable sections for accurate drawing.
Understanding the Anatomy of Anime Hair
Anime hair follows simplified versions of real hair structure. Hair grows outward from the scalp in specific directions based on the skull’s shape.
The crown sits at the top-back of the head where hair naturally swirls outward. This creates the primary flow direction for most hairstyles.
Hair flow moves away from growth points in predictable patterns. Front hair flows forward and down, side hair moves laterally, and back hair falls straight down or curves around the neck.
Unlike realistic hair, anime hair groups into large clumps or sections rather than individual strands. These clumps maintain the natural flow direction while simplifying the drawing process.
The skull’s curvature influences how hair sits and falls. Hair closer to the head follows the skull’s roundness, while longer sections fall away following gravity.
Dividing Hair into Sections: Front, Sides, and Back
Breaking hair into three main sections makes complex hairstyles manageable. Each section has distinct characteristics and flow patterns.
Front sections include bangs and face-framing pieces. These often move forward and downward from the hairline. They can be swept to either side or hang straight down.
Side sections encompass hair above and around the ears. This hair typically flows laterally away from the crown toward the face or neck.
Back sections contain the bulk of longer hairstyles. Hair here falls straight down or curves following the neck and shoulder line.
Each section connects smoothly to adjacent areas. Avoid creating harsh divisions between sections by overlapping and blending the boundaries naturally.
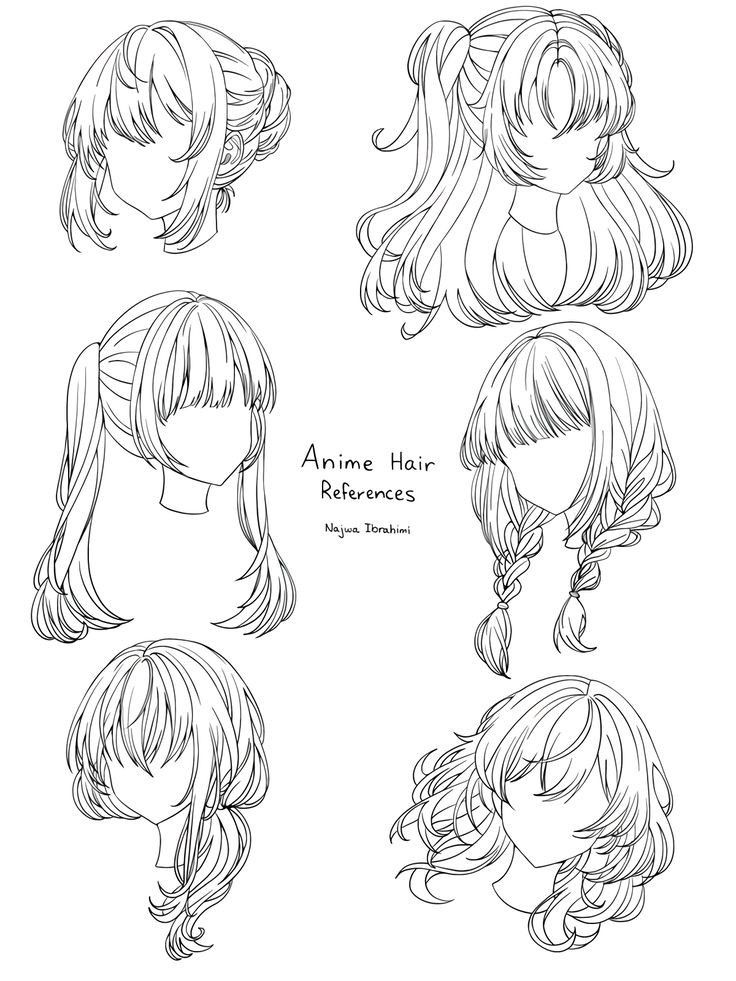
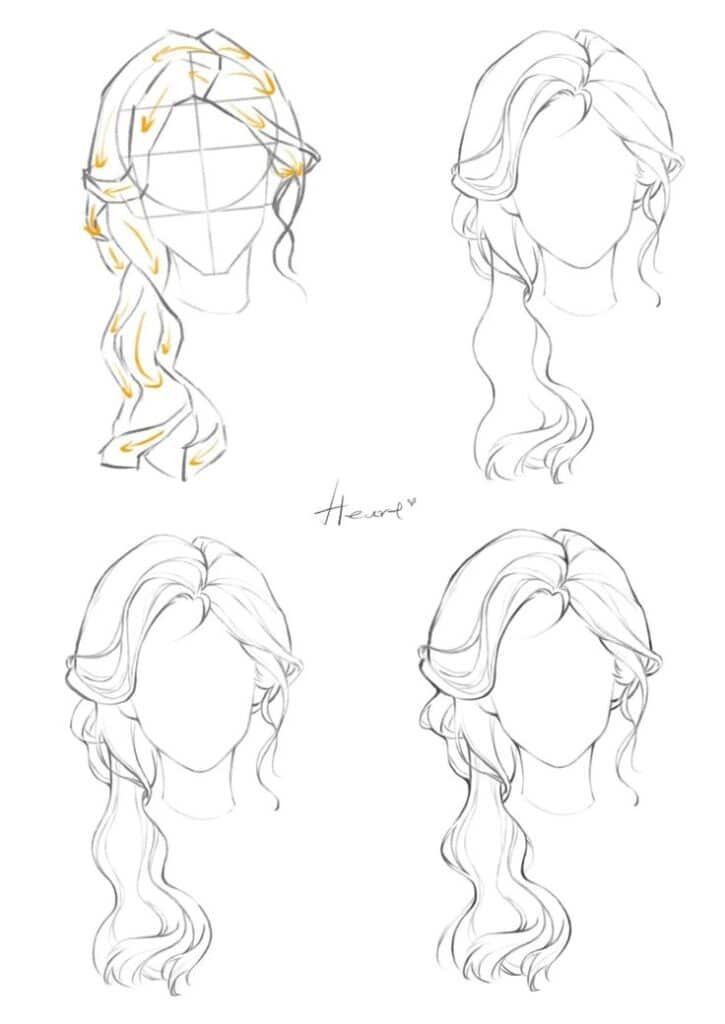
Establishing Hairlines and Crowns
The hairline defines where hair begins growing on the forehead. It typically forms a gentle curve across the forehead, dipping slightly at the temples.
Most hairlines sit about one-third down from the top of the head to the eyebrows. This proportion varies with age and character design but provides a reliable starting point.
The crown determines overall hair flow direction. Position it at the back-top of the skull, slightly off-center. All hair sections radiate outward from this central point.
Mark the crown early in your sketch as a reference point. Draw light guidelines showing hair flow directions emanating from this spot to maintain consistent movement throughout the hairstyle.
Different hairline shapes create distinct character feels. Straight hairlines appear more formal, while irregular or higher hairlines suggest youthfulness or specific personality traits.
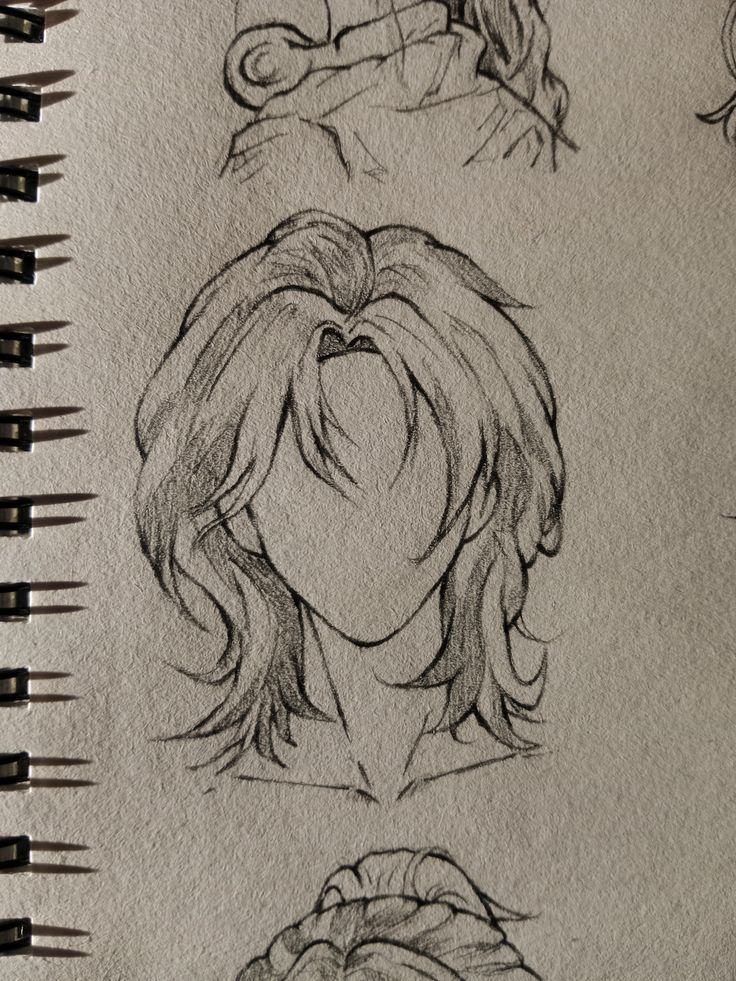
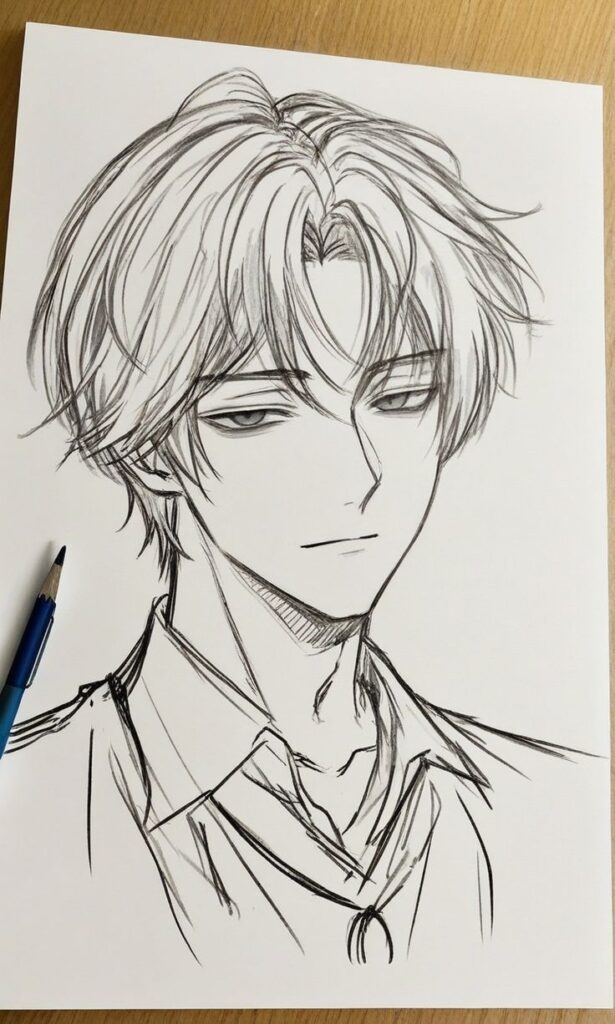
Essential Tools and Materials for Anime Hair Drawing
The right tools can make drawing anime hair significantly easier and more enjoyable. Whether you prefer traditional pencils or digital software like Clip Studio Paint, having quality supplies helps you achieve the dynamic, flowing styles that define anime hair.
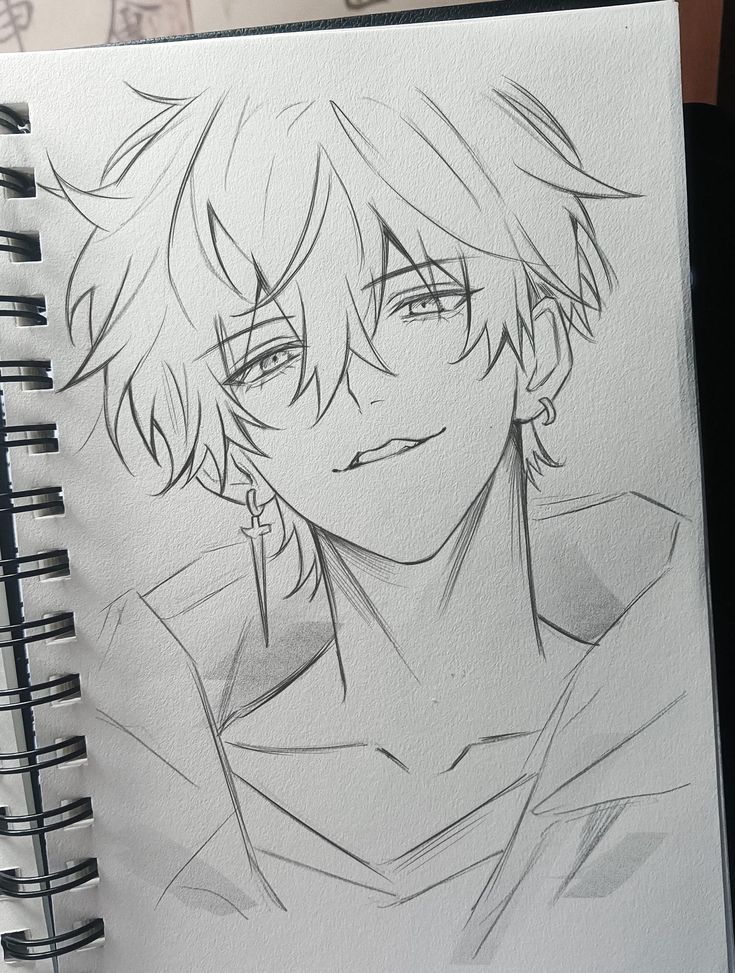
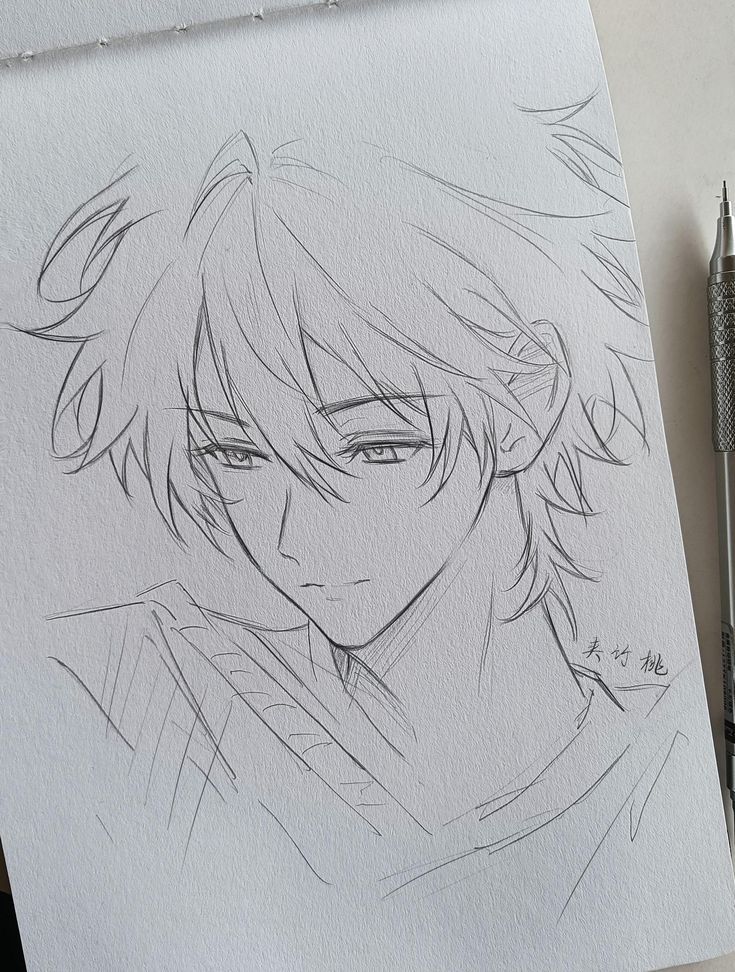
Traditional Art Supplies
Basic pencils form the foundation of traditional anime hair drawing. You’ll need HB pencils for initial sketches and 2B or 4B pencils for darker lines and shading.
Mechanical pencils with 0.5mm or 0.3mm lead work excellently for fine details like individual hair strands. The consistent line weight helps create clean, professional-looking artwork.
Blending tools are essential for smooth shading effects. Blending stumps and tortillons help you achieve gradient effects in hair shadows. Your finger can also work for larger areas.
Quality paper makes a significant difference. Bristol board provides a smooth surface ideal for detailed work. Sketch paper works well for practice and rough concepts.
Erasers are crucial for anime hair techniques. Kneaded erasers lift graphite gently without damaging paper. White gel pens add highlights and light strands effectively.
Digital Drawing Techniques
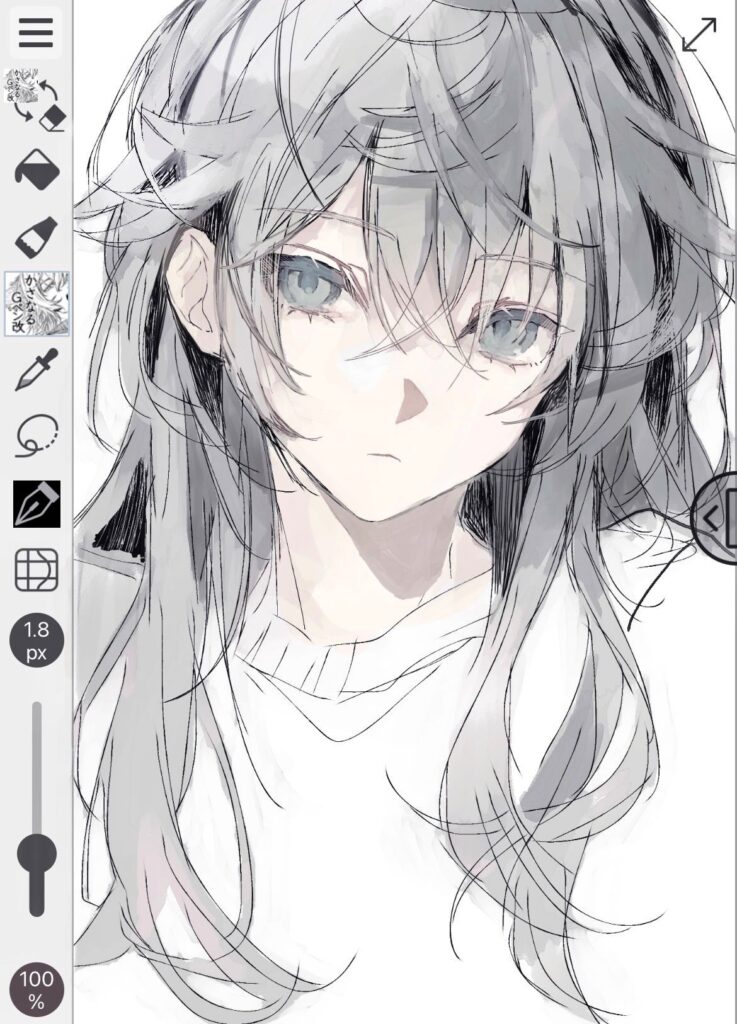
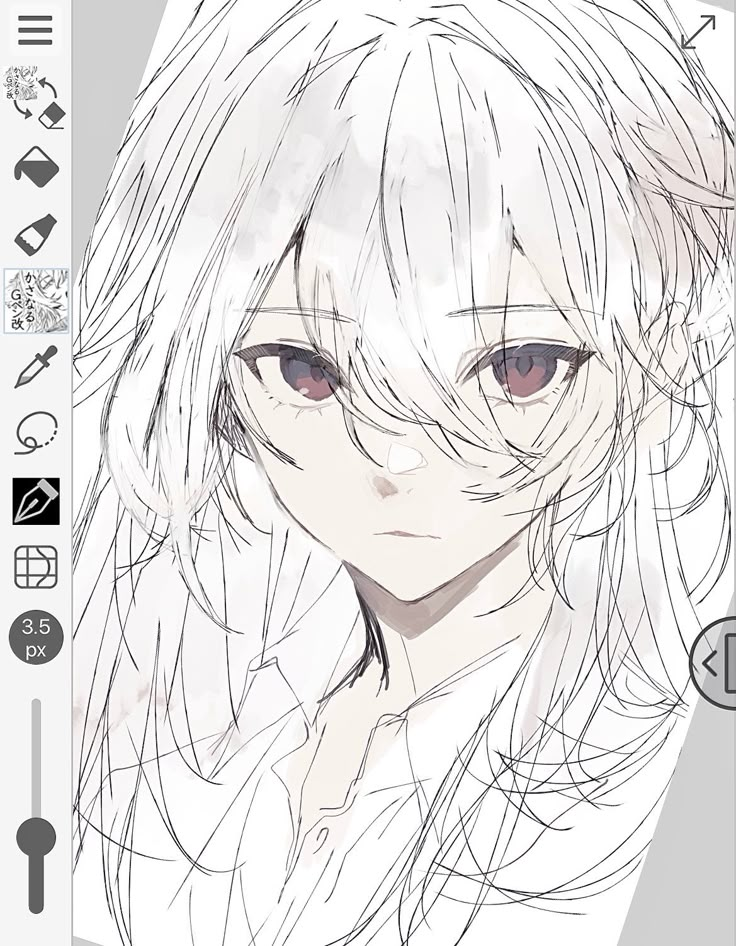
Digital tools offer unique advantages when you draw anime hair. Pressure-sensitive tablets like Wacom or Huion models provide natural drawing control. The pressure sensitivity helps create varied line weights that traditional mice cannot achieve.
Layer functionality revolutionizes hair drawing workflow. You can separate base colors, shadows, highlights, and details onto different layers. This approach allows easy adjustments without redrawing entire sections.
Selection tools help isolate hair sections for targeted editing. You can adjust colors, add effects, or modify specific areas without affecting other parts of your artwork.
Digital brushes simulate traditional media while offering additional possibilities. Custom brushes designed specifically for hair can speed up your workflow significantly.
Choosing Brushes and Software
Clip Studio Paint excels at anime hair drawing with specialized brushes and tools. The software includes hair-specific brushes that create realistic strand textures automatically.
The G-pen tool in Clip Studio Paint creates clean, crisp lines perfect for anime hair outlines. Soft airbrush tools work well for basic shading and color application.
Photoshop offers versatility through custom brush creation. You can design brushes that match your specific drawing style and hair texture preferences.
Free alternatives like Krita provide professional-level tools without cost. Krita includes excellent brush engines that handle hair textures effectively.
Brush settings matter more than software choice. Focus on opacity control, pressure sensitivity, and texture settings to achieve the anime hair look you want.
Step-by-Step Techniques to Draw Anime Hair
Drawing anime hair requires understanding basic head structure first, then building outward with flowing shapes that capture movement and volume. Each strand should follow natural hair physics while maintaining the stylized aesthetic that makes anime hair distinctive.
Sketching Head and Mapping Hairlines
Start by drawing a basic head shape as your foundation. This gives you reference points for where hair naturally grows and falls.
Draw a circle for the skull, then add guidelines for the face. Mark the natural hairline about one-fifth down from the top of the head.
The hairline isn’t perfectly straight. It curves slightly and has small variations that make it look natural.
Consider your character’s age and gender when mapping the hairline. Male characters often have slightly higher hairlines than female characters.
Add reference points for the ears and neck. These help you understand how hair falls around the head and shoulders.
Don’t skip this step even if you’re eager to draw the hair itself. A solid foundation makes everything else easier and more accurate.
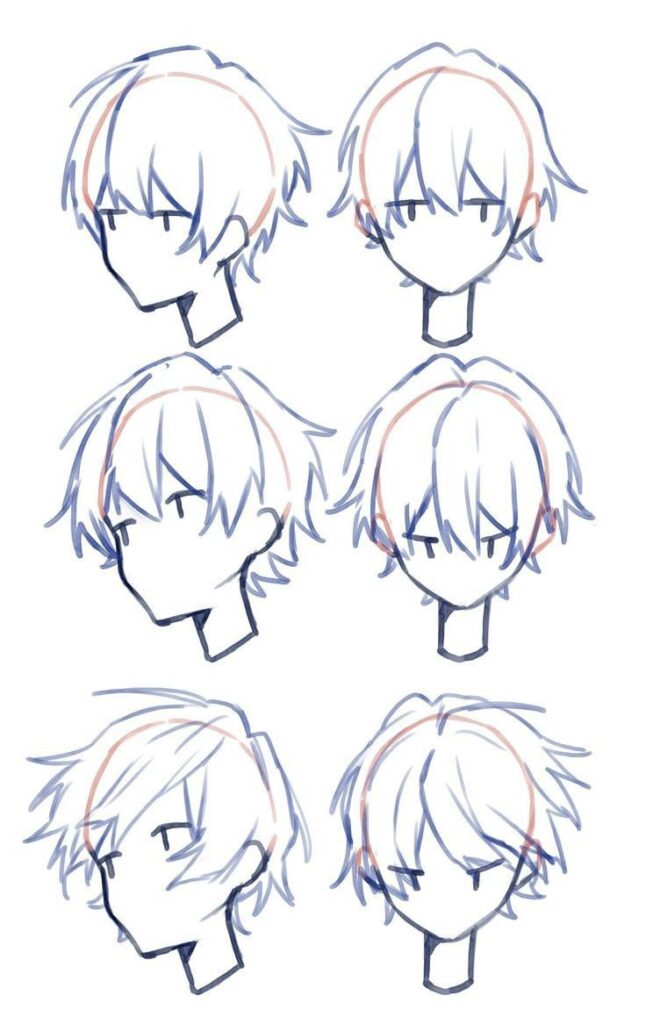
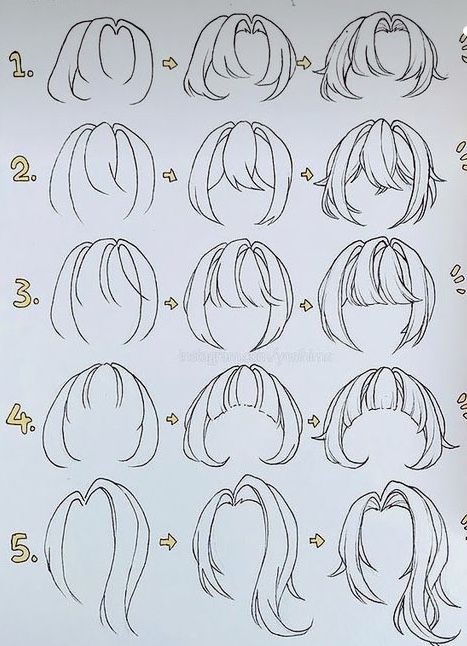
Outlining the Hair Shape and Volume
Hair has volume and mass that extends beyond the skull. Draw the overall silhouette before adding any individual strands.
Think of hair as a 3D shape wrapping around the head. It’s thicker at the roots and can spread outward or hang down depending on the style.
Start with simple shapes like triangles, curves, or geometric forms. These basic shapes will become your hair sections later.
Anime hair often defies gravity more than realistic hair. You can create spikes, curves, and flowing sections that look dynamic and stylized.
Consider the hair’s weight and texture. Thick hair creates larger volumes while thin hair sits closer to the head.
Leave gaps and negative space between sections. This prevents the hair from looking like a solid helmet and adds visual interest.
Defining Hair Strands and Direction
Break down your hair sections into individual strands or small groups of strands. Each strand should follow a logical hair flow direction.
Hair grows outward from the scalp in predictable patterns. Most strands flow downward and outward from their root points.
Use curved lines rather than straight ones. Hair strands naturally bend and flow, even in stylized anime art.
Vary your line weights to create depth. Thicker lines work well for outer edges and separations between major sections.
Group strands together rather than drawing every single hair. Three to five strands per group creates a natural look without overwhelming detail.
Pay attention to how hair moves around the ears, neck, and shoulders. These contact points affect how strands fall and cluster.
Adding Details, Layers, and Movement
Layer different strand groups to create depth and complexity. Front layers should overlap back layers in logical ways.
Add movement lines that suggest hair swaying or flowing. These can be subtle curves within existing strands or additional loose strands.
Include small flyaway hairs and shorter pieces that break free from the main sections. These details make the hair feel more alive and natural.
Vary strand thickness throughout the hairstyle. Some areas can have finer details while others remain simpler and bolder.
Consider lighting when adding final details. Hair reflects light differently depending on its texture and color.
Drawing hair successfully means balancing detail with simplicity. Too many small strands can make your artwork look cluttered and confusing.
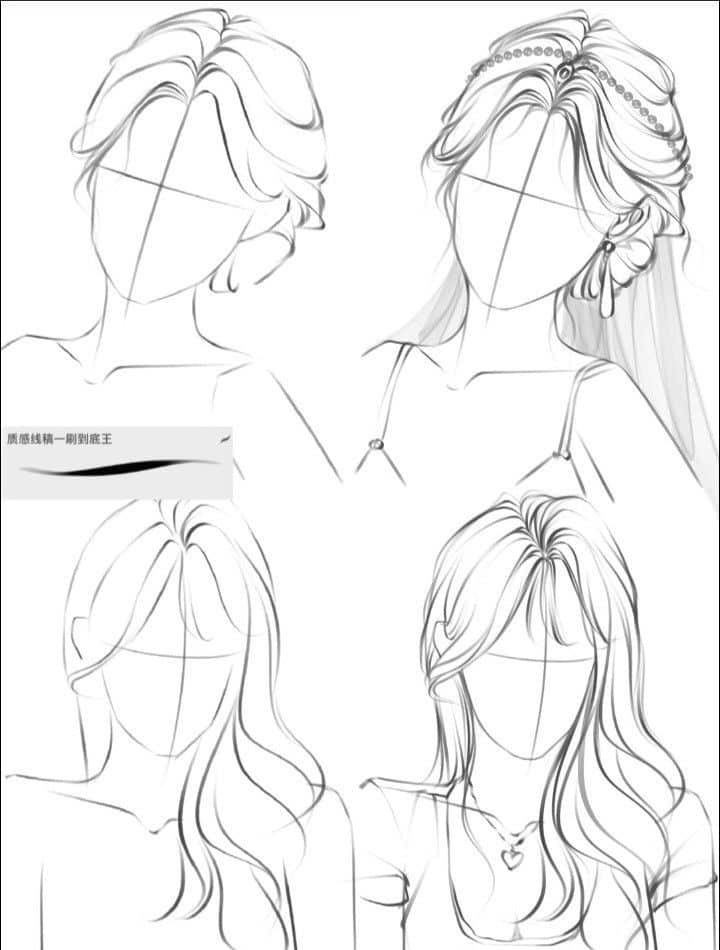
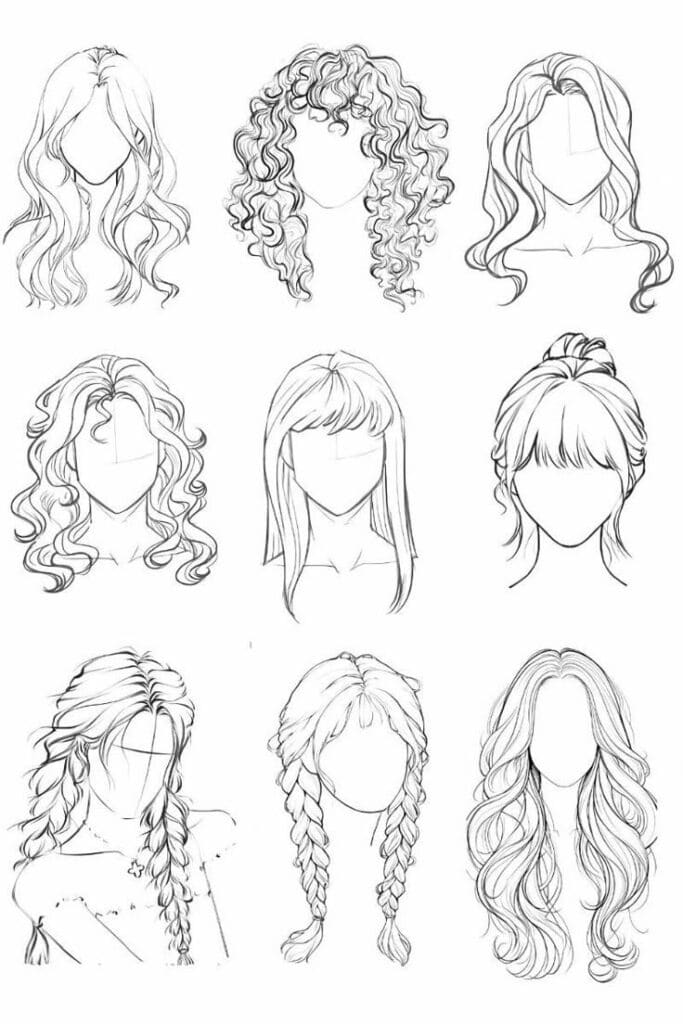
Mastering Anime Hairstyles and Styling Variations
Different hairstyles require specific drawing techniques to achieve the distinctive anime look. Understanding how to create various hair textures, lengths, and decorative elements will expand your artistic range significantly.
Drawing Spiky and Straight Hair
Spiky hair forms one of the most recognizable anime styles. Start by sketching the basic head shape, then add angular chunks that point in different directions.
Each spike should have a clear origin point from the scalp. Draw them as triangular shapes with sharp points rather than rounded forms.
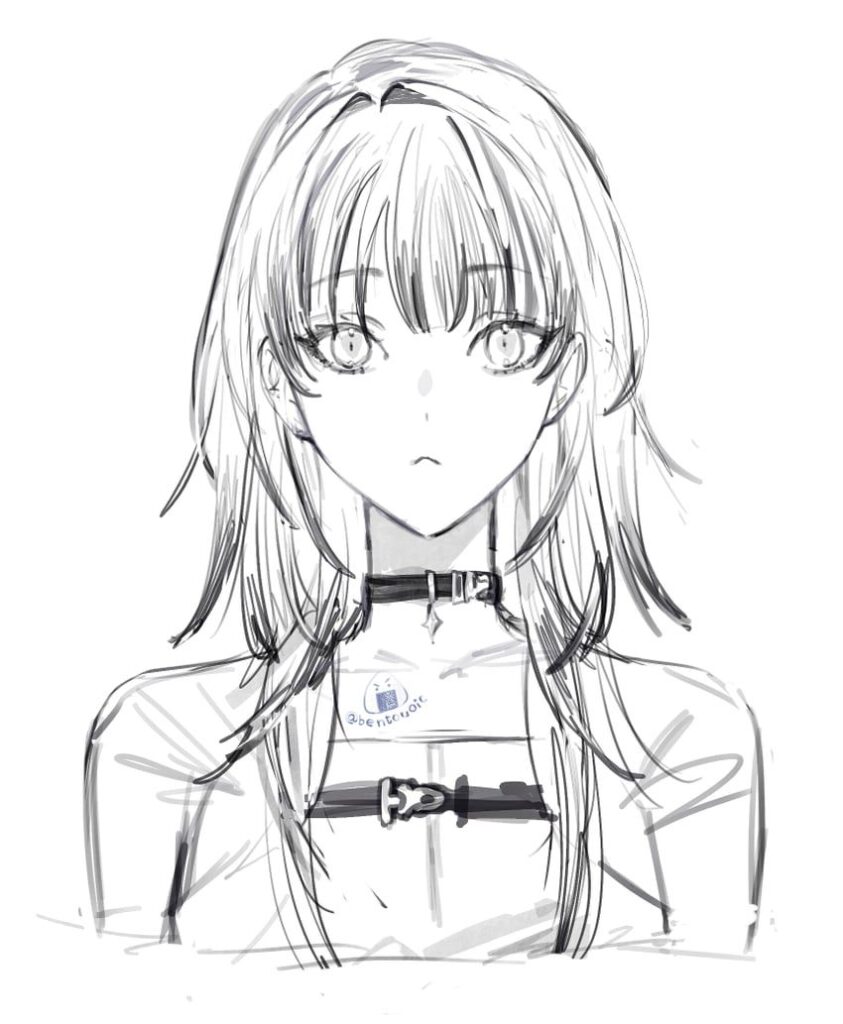
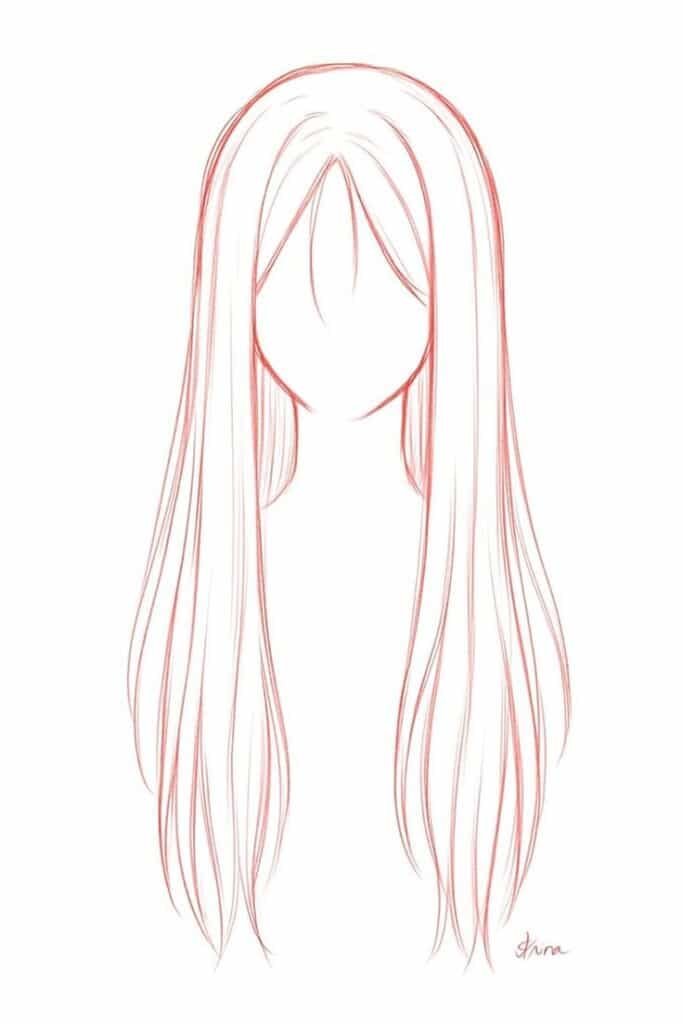
For straight hair, focus on creating smooth, flowing lines. Draw long vertical strokes that follow the natural fall of hair from the crown to the tips.
Keep the lines parallel but not perfectly uniform. Add slight variations in thickness to create visual interest without breaking the straight pattern.
Both styles benefit from establishing clear directional flow. Consider the character’s movement and personality when determining spike angles or hair direction.
Creating Curls, Waves, and Braids
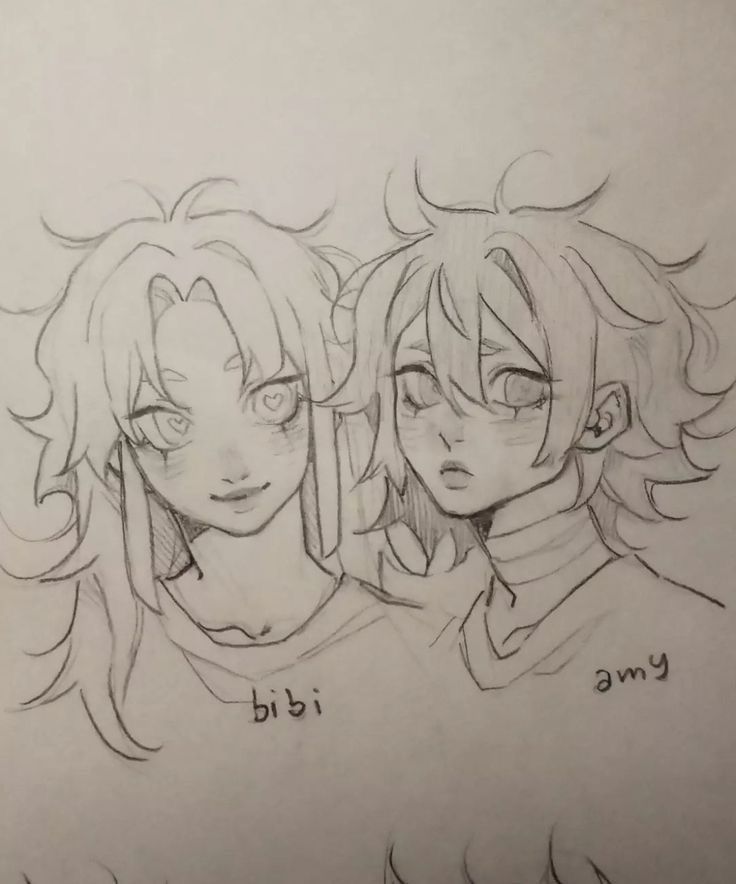
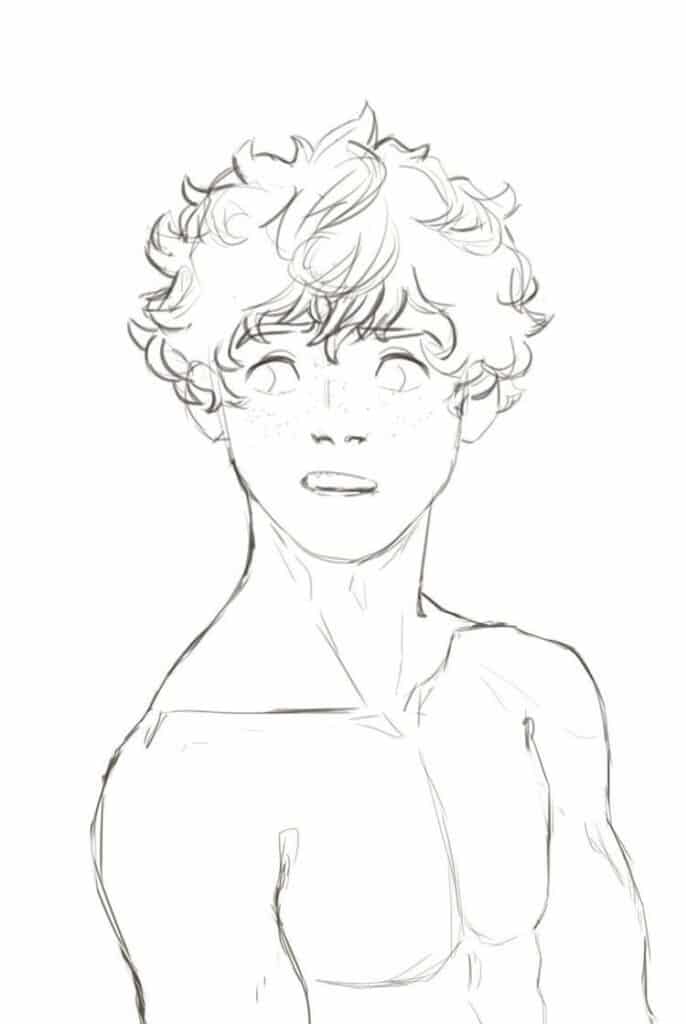
Curly anime hair requires understanding spiral patterns. Draw the overall shape first, then add curved lines that follow a consistent spiral direction.
Start each curl wide at the roots and taper toward the ends. Layer multiple spirals to create volume and depth.
Wavy hair uses gentle S-curves instead of tight spirals. Draw flowing lines that alternate between left and right curves in a rhythmic pattern.
Braided hairstyles need careful planning. Sketch three sections crossing over each other in an alternating pattern: left over center, right over center, repeat.
Add texture by drawing individual hair strands escaping from the braid. This creates a more natural, lived-in appearance.
Designing Short and Long Hairstyles
Short anime hairstyles typically end above the shoulders. Focus on creating clean, defined edges that frame the face effectively.
Popular short styles include bob cuts with straight edges and layered cuts with varied lengths. Draw the hair following the head’s curvature closely.
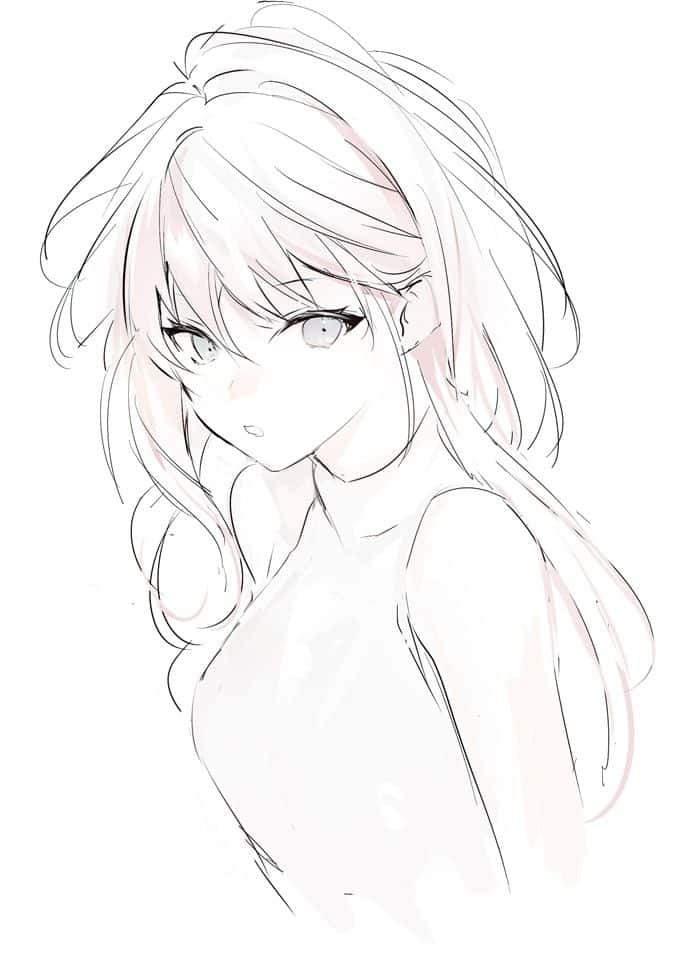
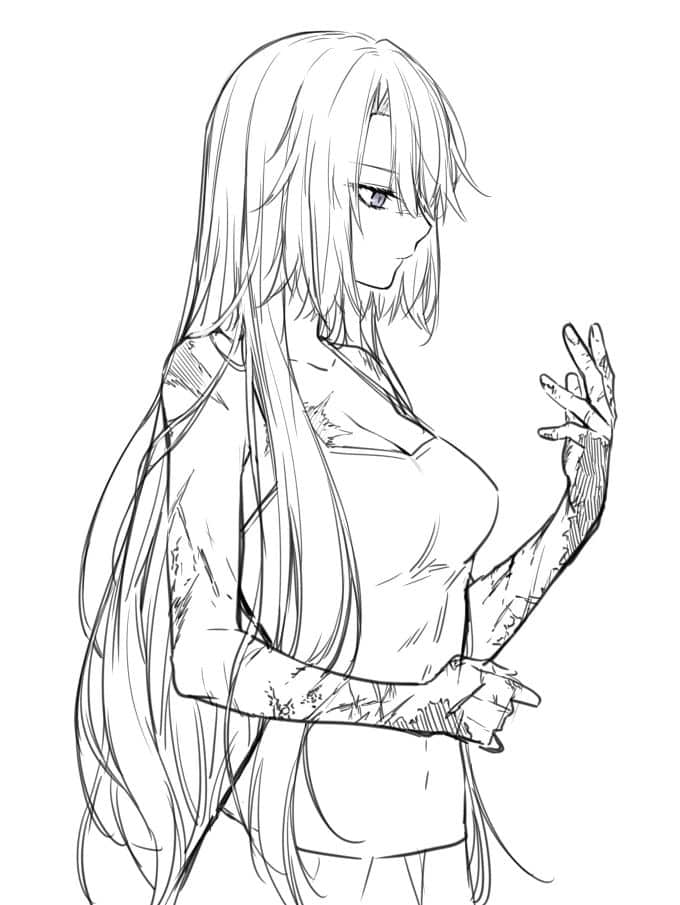
Long hairstyles require understanding weight and gravity. Hair should appear heavier at the bottom, with natural gathering points where strands clump together.
Long hair often splits into distinct sections. Draw these as separate flowing shapes rather than one solid mass.
Consider how long hair interacts with the character’s body and clothing. It should drape naturally over shoulders and react to movement.
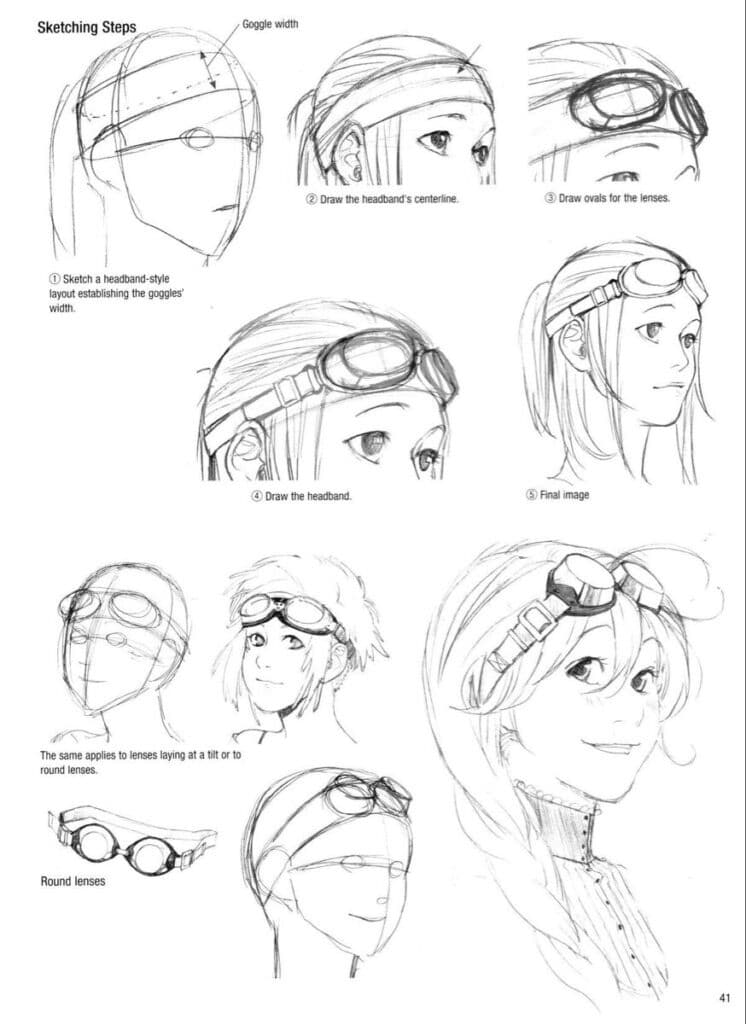
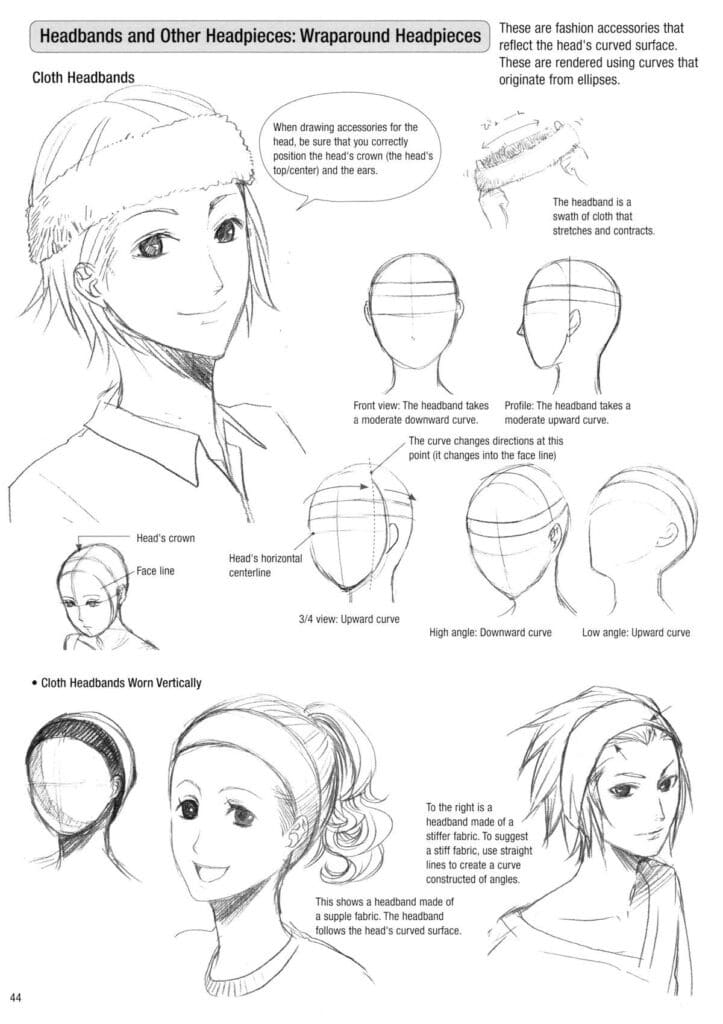
Incorporating Accessories and Headbands
Headbands sit approximately one inch above the hairline. Draw them as curved shapes that follow the head’s natural contour.
Hair should appear compressed where the headband touches and fuller where it’s released. This creates realistic volume distribution.
Hair clips and ribbons serve as focal points in anime hairstyles. Position them at natural gathering spots like the side of the head or back sections.
When drawing tied hair, show the compression point where the accessory holds the strands together. Hair should appear tighter at this spot and flow freely beyond it.
Decorative elements like flowers or pins should complement the hairstyle without overwhelming it. Keep accessories proportional to the character’s head size.
Advanced Tips for Realism and Personalization
Mastering advanced techniques transforms basic anime hair into compelling character features. These methods focus on creating dimensional depth through strategic lighting and seamless integration with facial anatomy.
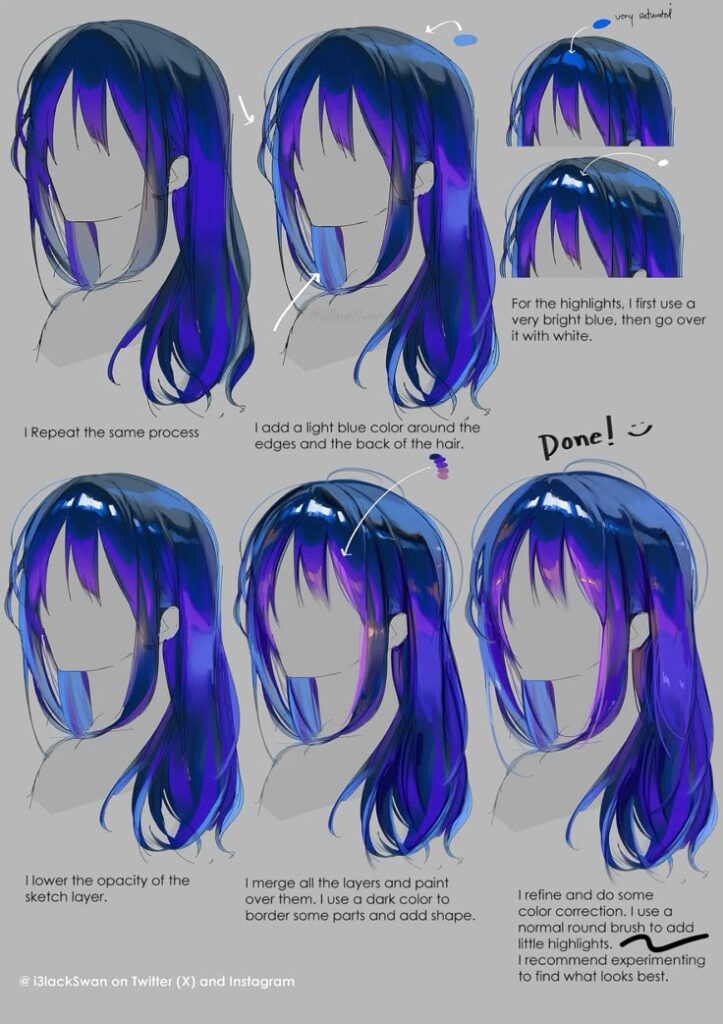
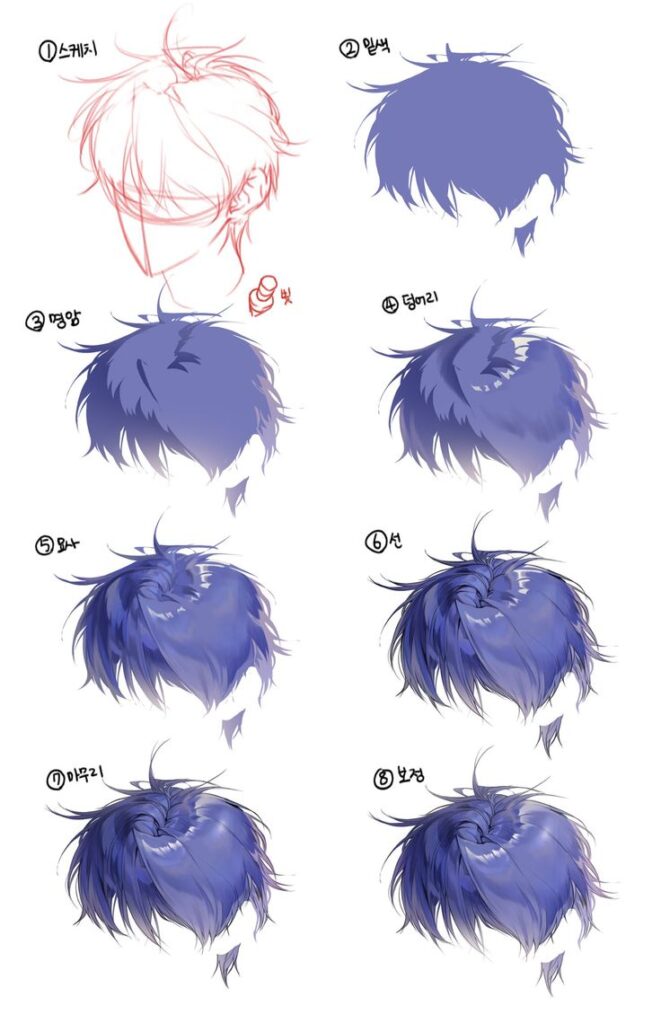
Highlighting and Shading for Depth
Strategic highlighting creates the illusion of volume and movement in anime hair. Place your primary highlight along the crown where light naturally hits first. This area should be the brightest point of your hair drawing.
Secondary highlights follow the hair’s directional flow. Add smaller light spots where individual clumps separate or curve away from the head. These subtle touches make hair strands appear three-dimensional.
Shadow placement defines the hair’s structure. Deep shadows belong underneath hair sections and where strands overlap. The area near the scalp typically receives less light and needs darker tones.
Use gradient shading between highlights and shadows. Harsh transitions make anime hair look flat and artificial. Blend your tones gradually to maintain the stylized anime aesthetic while adding realism.
Hair texture affects light reflection. Smooth hair produces sharp, defined highlights. Wavy or curly hair creates multiple smaller light points scattered across the surface.
Blending Hair with Facial Features
Hair should connect naturally with the character’s facial structure. Study how real hairlines follow the skull’s contours. Your anime character’s hair must respect these basic anatomical rules even in stylized form.
The hairline shape influences character personality. Widow’s peaks create dramatic effects while rounded hairlines appear softer. Adjust the hairline to match your character’s intended impression.
Consider hair weight and how it affects facial framing. Heavy bangs cast shadows on the forehead. Side-swept hair creates asymmetrical lighting patterns across the face.
Hair movement should respond to the character’s pose and expression. Energetic characters benefit from dynamic hair that appears wind-blown or bouncy. Calm characters work better with controlled, structured hairstyles.
Pay attention to hair thickness around the ears and neck. These transition areas often look awkward if not handled carefully. Hair should appear to have actual volume rather than lying flat against the head.
Common Mistakes and How to Avoid Them
Overcomplicating hair strands ranks among the most frequent errors. Anime hair works best when simplified into clear, readable sections. Avoid drawing every individual strand.
Hair that ignores gravity appears unrealistic. Even stylized anime hair follows basic physics. Heavy sections should hang downward while lighter pieces can float more freely.
Inconsistent lighting destroys hair believability. Choose one primary light source and stick with it throughout your drawing. Mixed lighting creates confusing shadow patterns.
Neglecting hair volume makes characters appear to have painted-on hair. Remember that hair has thickness and sits above the skull surface. Leave appropriate space between the head shape and hair outline.
Drawing hair strands that all flow in identical directions looks mechanical. Vary the directional flow slightly to create natural randomness while maintaining the overall hairstyle shape.
- 12.0Kshares
- Facebook0
- Pinterest12.0K
- Twitter3
- Reddit0

