Drawing anime characters is one of the most exciting entry points into art. Big eyes are a defining feature of anime, and anime faces typically feature large, expressive eyes that can take up one-third of the face or more. The large expressive eyes, simplified anatomy, and stylized proportions make anime both approachable for beginners and endlessly deep for experienced artists. At the center of every great anime character is a well-constructed head. If the head feels “off,” everything else tends to fall apart.
This guide will walk you through how to draw an anime head from scratch, covering structure, proportions, angles, and common mistakes. Whether you’re holding a pencil for the first time or refining your style, you’ll learn how professionals think about anime head construction—and how to practice it effectively.
Why the Anime Head Is Different from a Realistic Head
Before drawing, it helps to understand why anime heads look the way they do.
Anime is stylized realism. It’s not random exaggeration. Most anime heads are based on real human skull structure, simplified and adjusted for clarity, emotion, and appeal.
Key differences include:
- Larger eyes relative to the face
- Smaller noses and mouths
- Simplified jaw and cheek structure
- Greater variation in head shape by age and personality
When drawing anime heads, it’s important to consider the differences between male characters and female characters. Male anime characters usually have sharper features, while female characters often have softer jawlines and rounder faces. Paying attention to these distinctions helps create more believable and appealing anime and manga heads for both male and female characters.
Understanding this balance between realism and style is what separates beginner drawings from polished anime art.
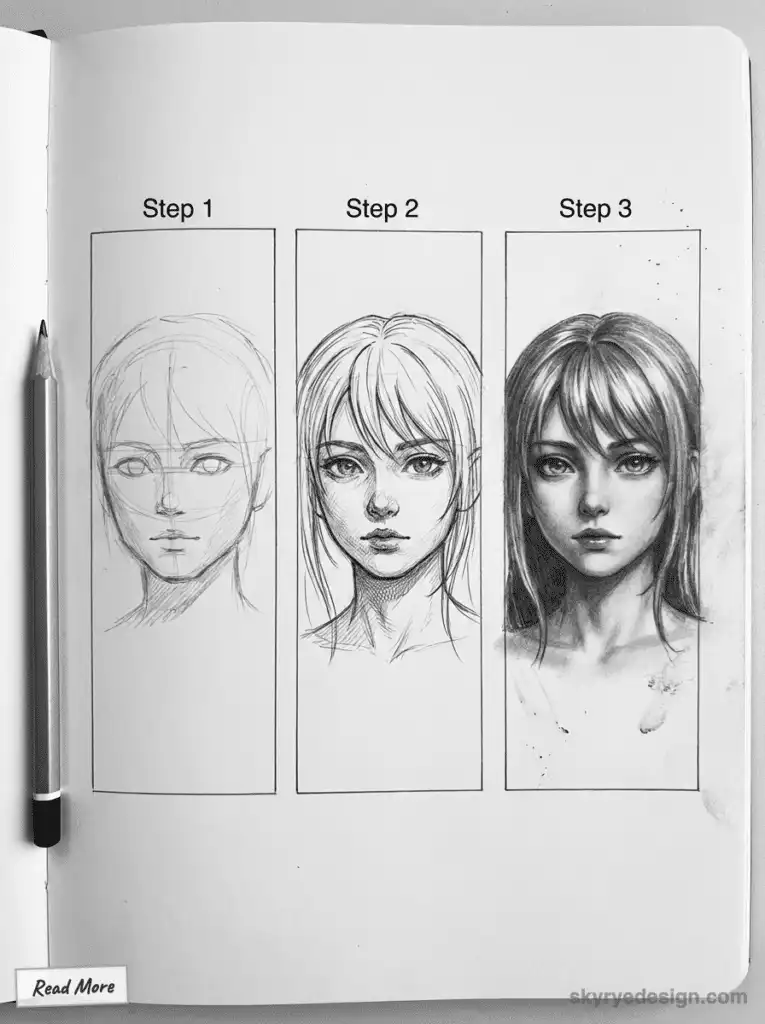
Step 1: Start with the Basic Head Shape
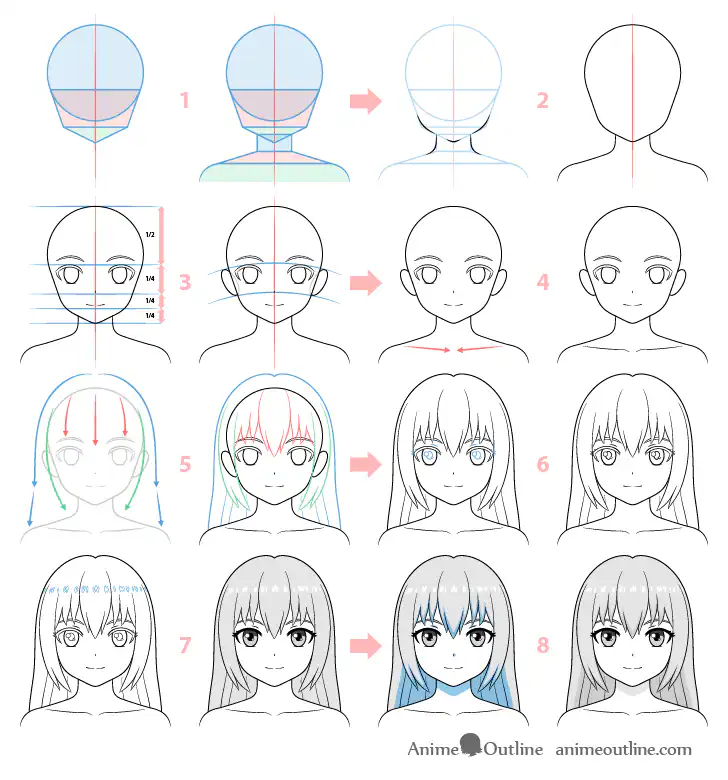
Almost every anime head begins the same way: a circle and a jaw.
Draw the Circle
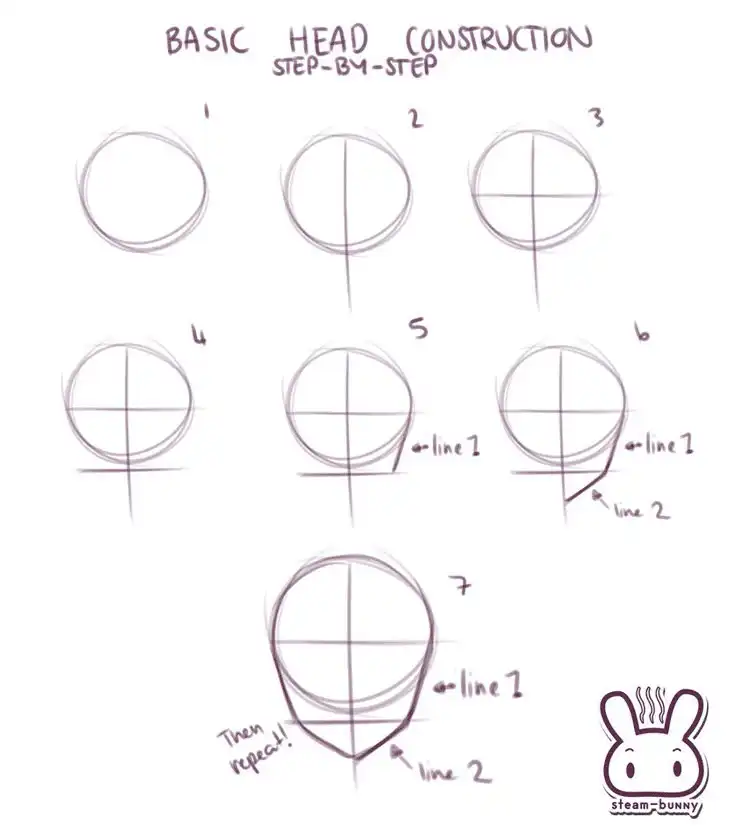
- To start drawing an anime head, lightly sketch a circle. You start with a circle to outline the shape of the head, which represents the top of the skull.
- Don’t worry about perfection—clean lines come later.
Add the Jaw
- Draw a vertical line down the center of the circle.
- From the bottom of the circle, sketch two angled lines downward to form the jaw.
- Connect them with a rounded or pointed chin.
Tip:
- A round chin = youthful, cute character
- A sharp chin = mature or intense character
At this stage, your drawing should resemble a lollipop shape.
Step 2: Add Guidelines for Facial Proportions
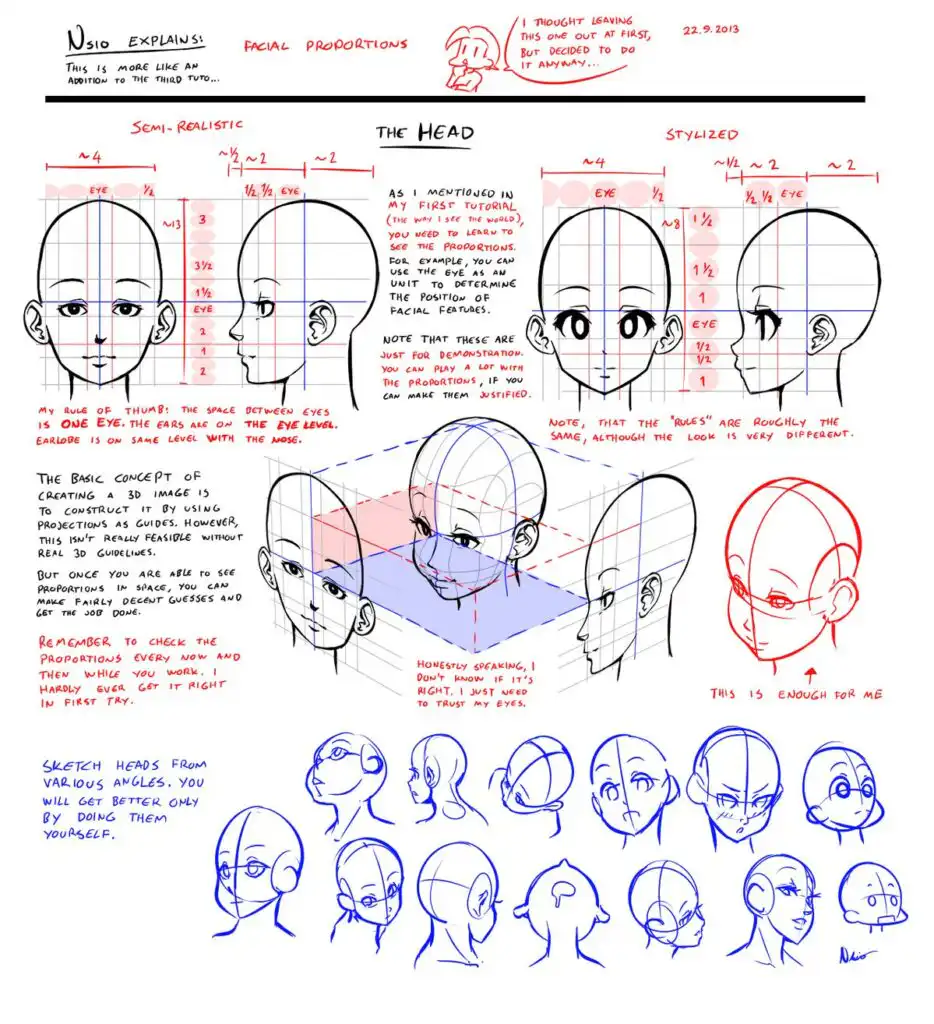
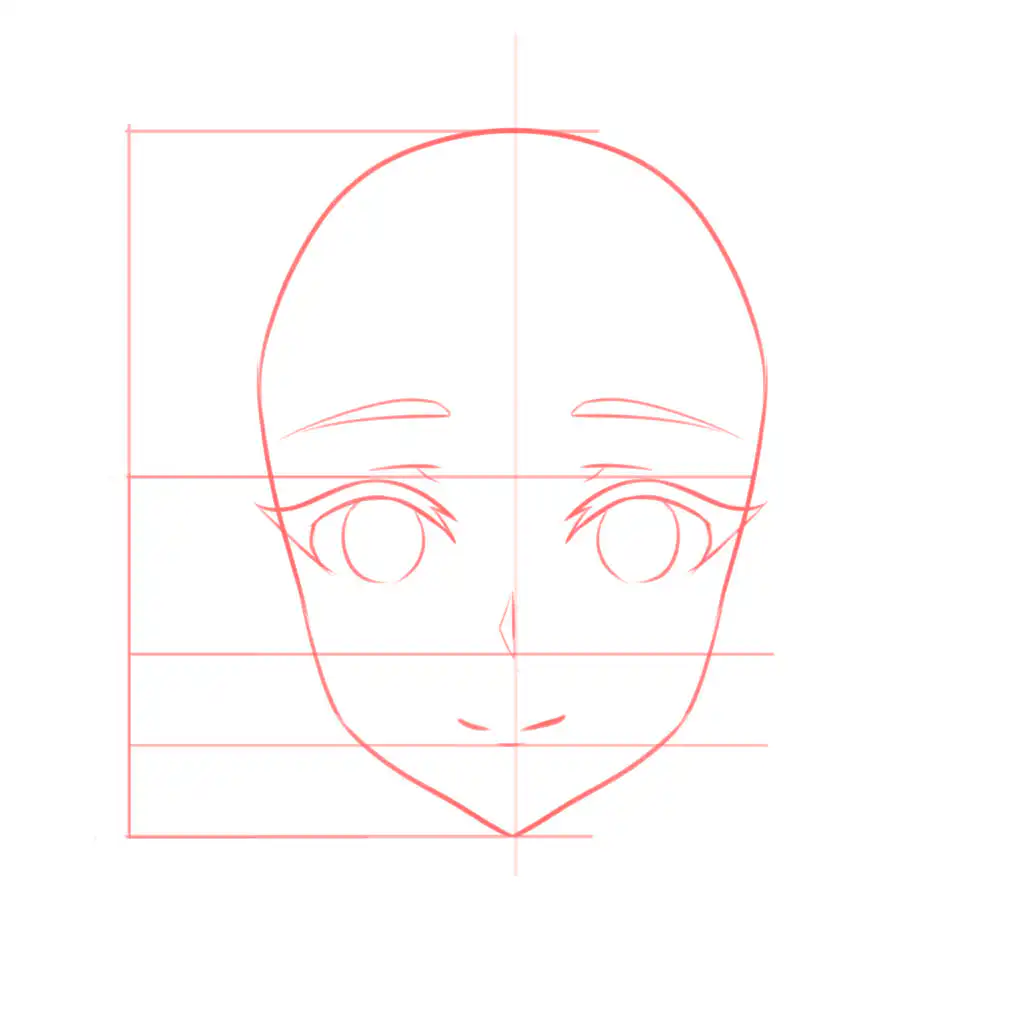
The placement of facial features is crucial for achieving a balanced character’s face in anime. Using guidelines, such as vertical and horizontal lines, helps you place facial features symmetrically and according to specific proportions, which is essential for the overall structure and expression of the face.
Guidelines keep your features aligned and proportional.
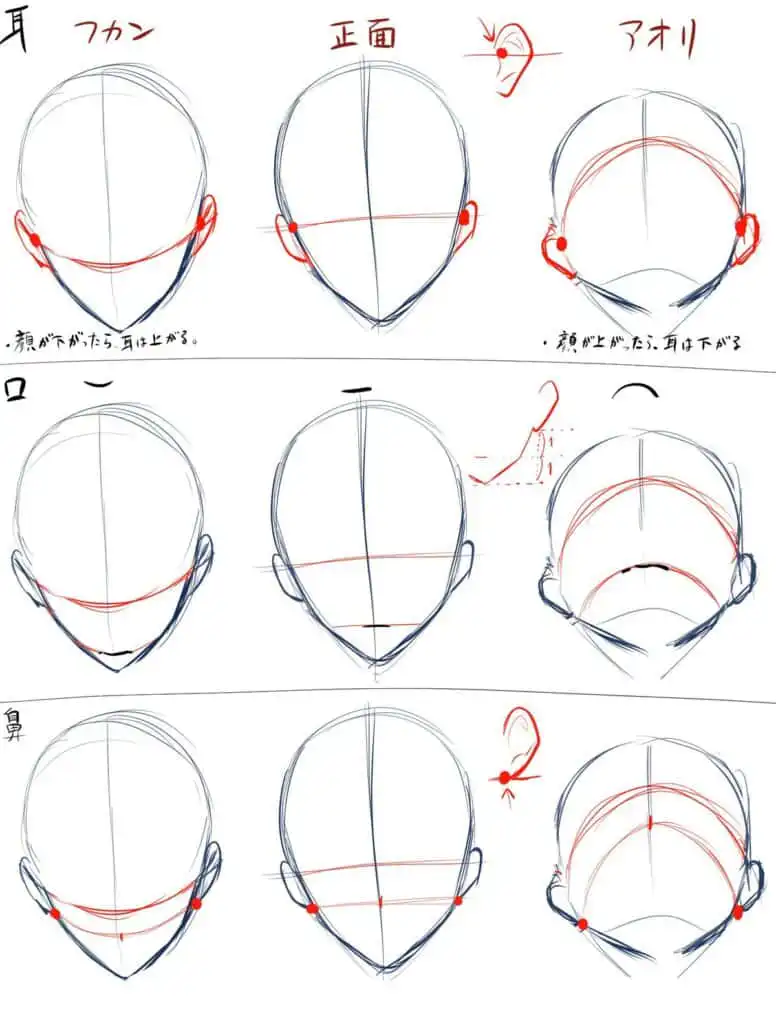
Vertical Center Line
- Splits the face in half
- Keeps eyes, nose, and mouth symmetrical
Horizontal Eye Line
- Draw a horizontal line across the face
- In anime, eyes usually sit slightly below the midpoint of the head
Nose and Mouth Lines
- Nose: halfway between eyes and chin
- Mouth: halfway between nose and chin
These are flexible rules, not rigid laws—but they give you consistency.
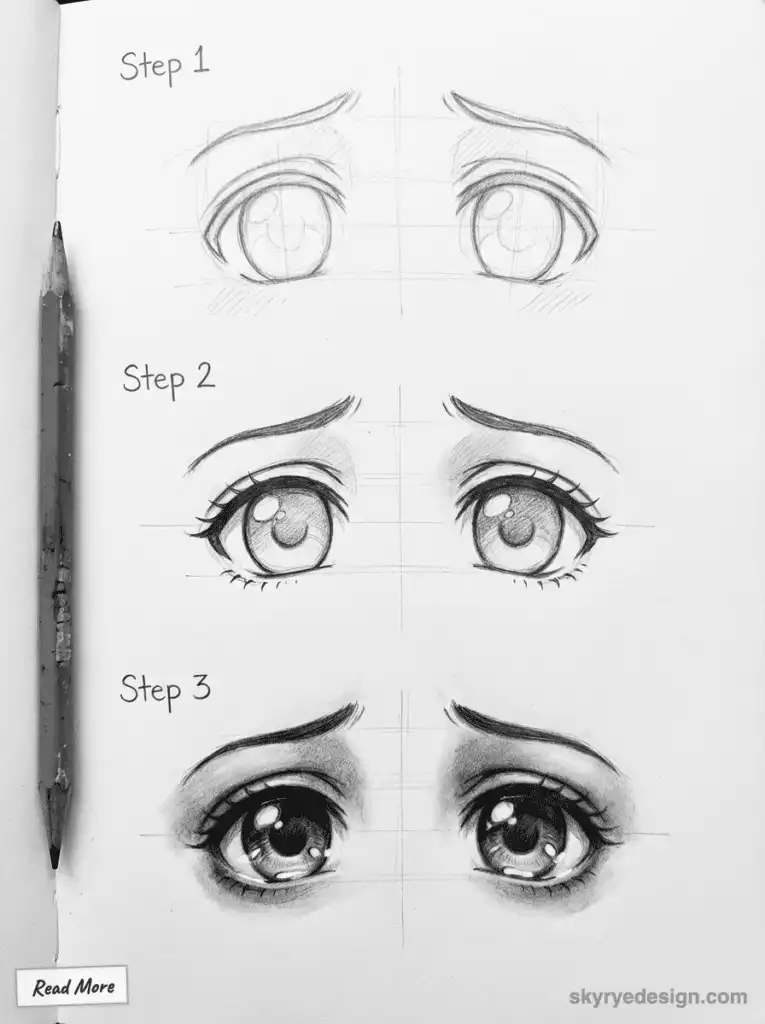
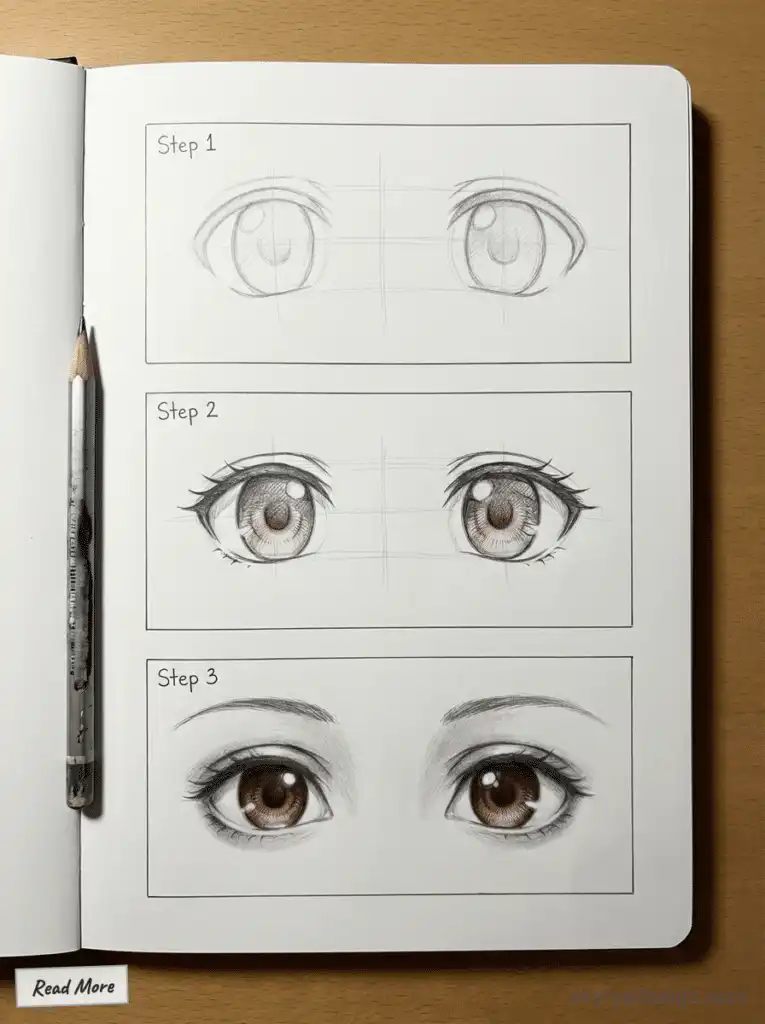
Step 3: Draw the Eyes (The Soul of Anime)
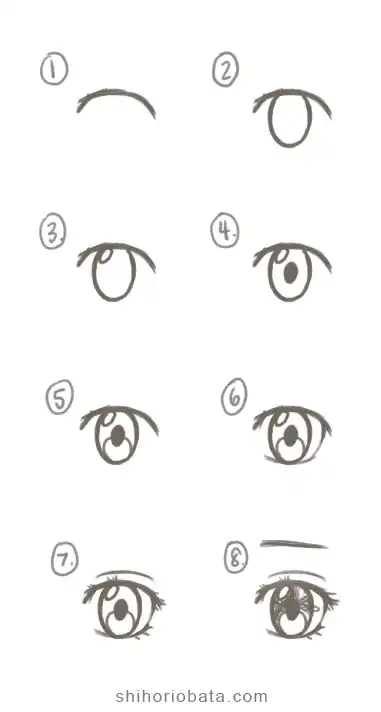
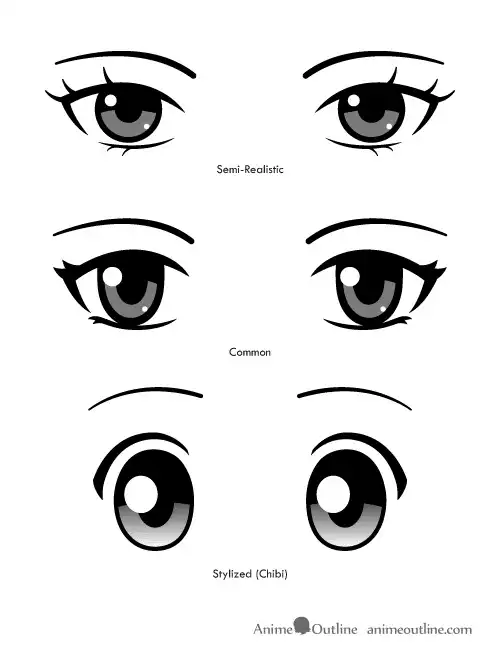
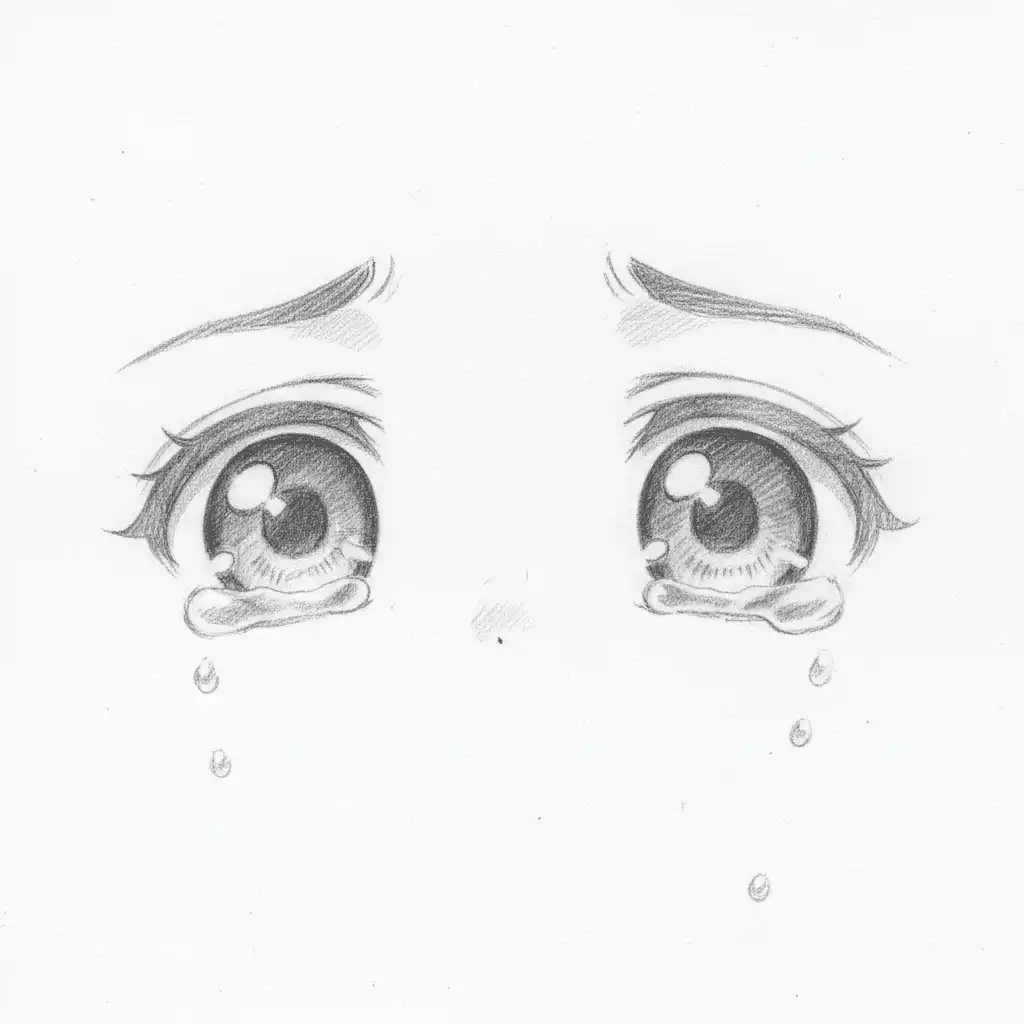
Eyes are the most expressive feature in anime, and they define the character’s mood and style.
Eye Placement
- Eyes are usually one eye-width apart
- Upper eyelids are thicker than lower ones
- Eyes sit directly on the eye guideline
Eye Shapes
- Round eyes → innocence, youth
- Narrow eyes → confidence, mystery
- Sharp angles → aggression or intensity
Eye Details
- Large iris and pupil
- Highlights for shine
- Minimal lower lashes
- Add shade to the eyes and face to enhance depth; in anime, this is usually done with cel shading (no gradients) for a stylized look.
Beginner mistake: drawing eyes too high.
Fix: always double-check the eye line.
Step 4: Simplify the Nose and Mouth
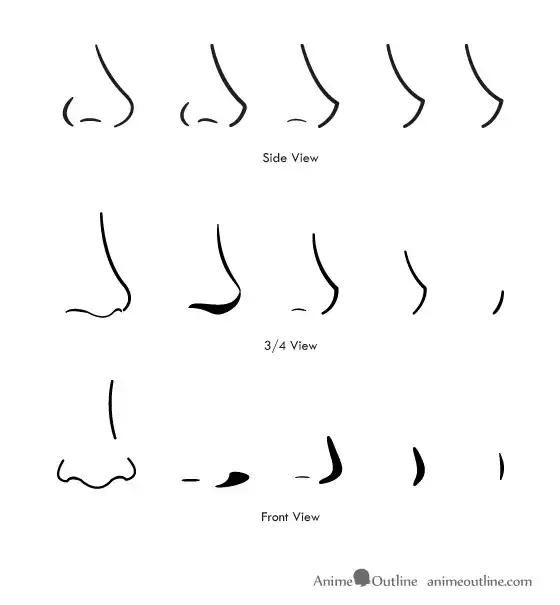
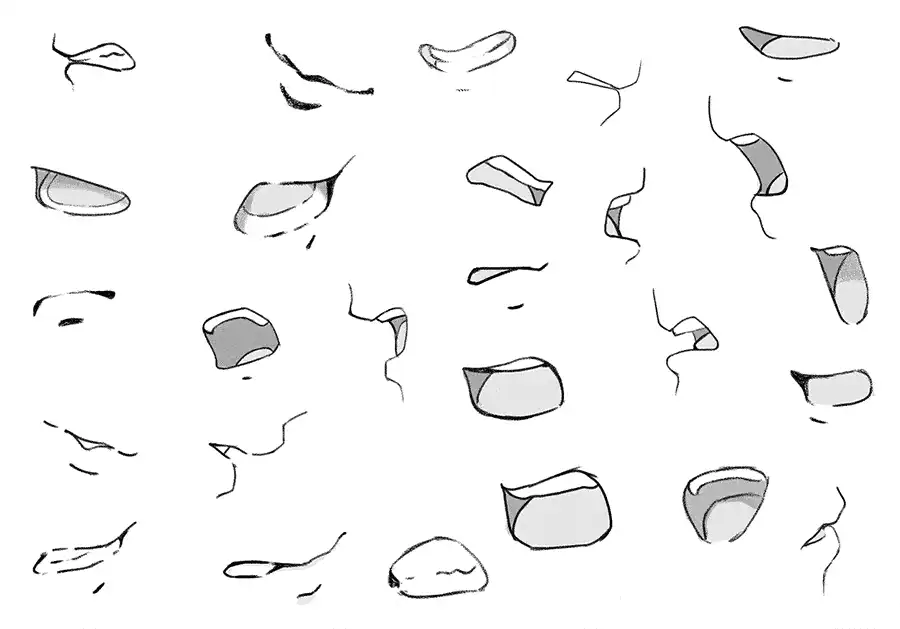
Anime noses and mouths are understated but crucial. Drawing anime noses is super easy because they are usually small and pointy, often without visible nostrils. Anime mouths are typically small as well, and can be represented by simple lines or curves.

Nose
- Often just a small line, dot, or triangle
- Rarely fully shaded
- Placed lightly on the center line
Mouth
- Simple curved line
- Positioned closer to the nose than the chin
- Expression comes from shape, not detail
Less detail = more flexibility for expression.
Step 5: Add the Ears and Neck
Ears
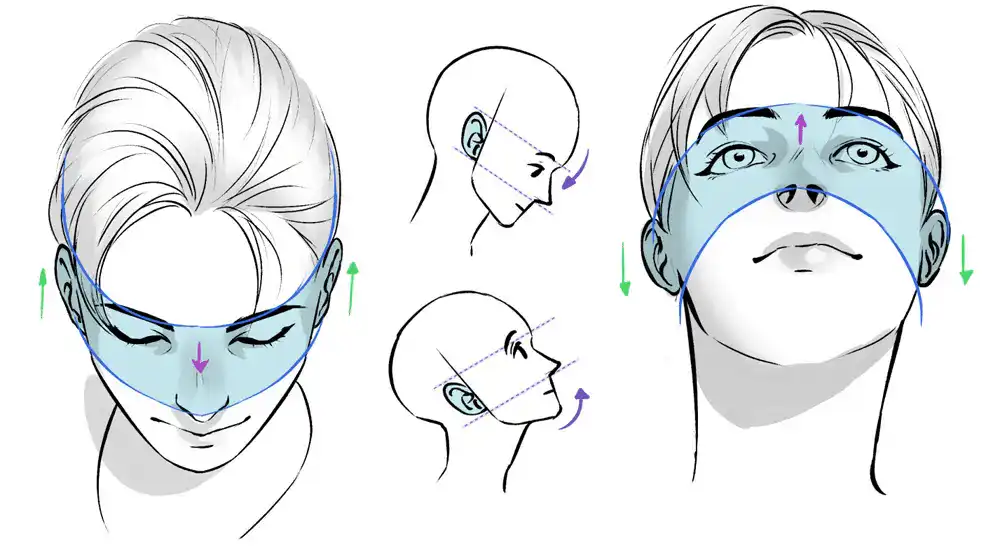
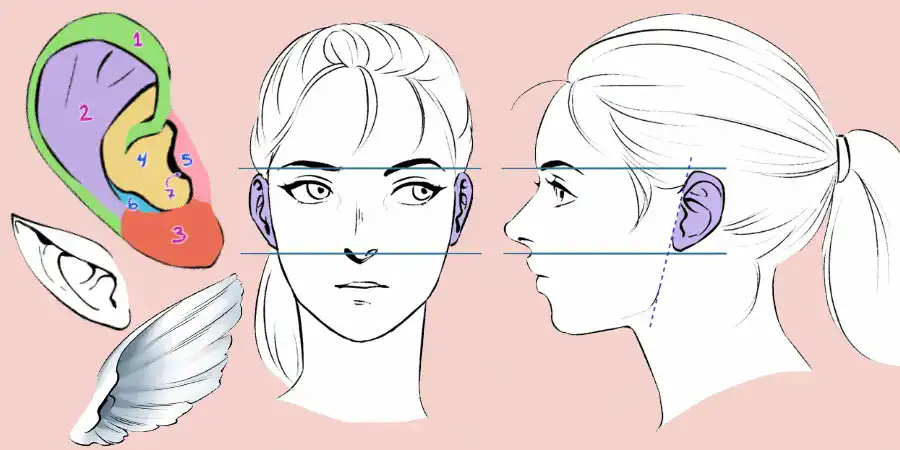
- Top aligns with the eyes
- Bottom aligns with the nose
- Simple inner shapes—don’t overdraw
Neck
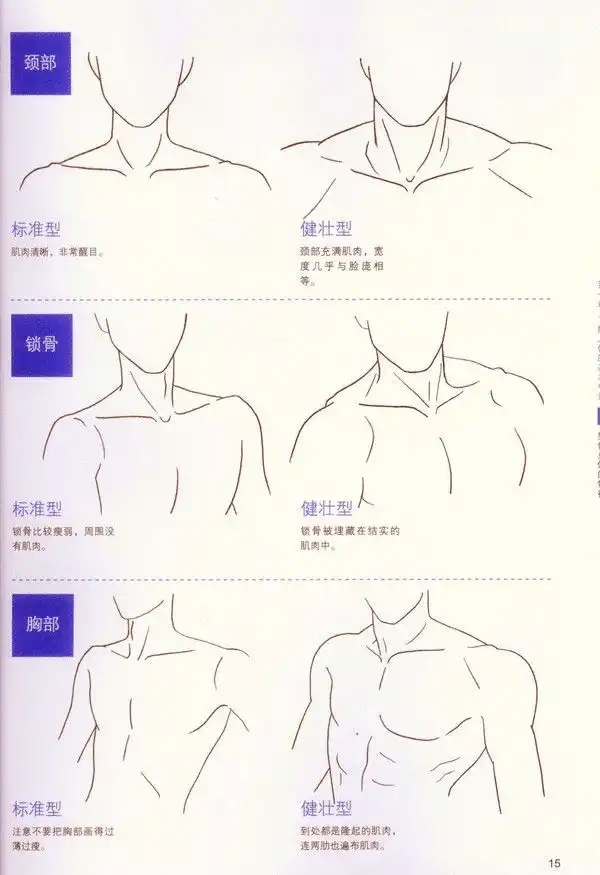
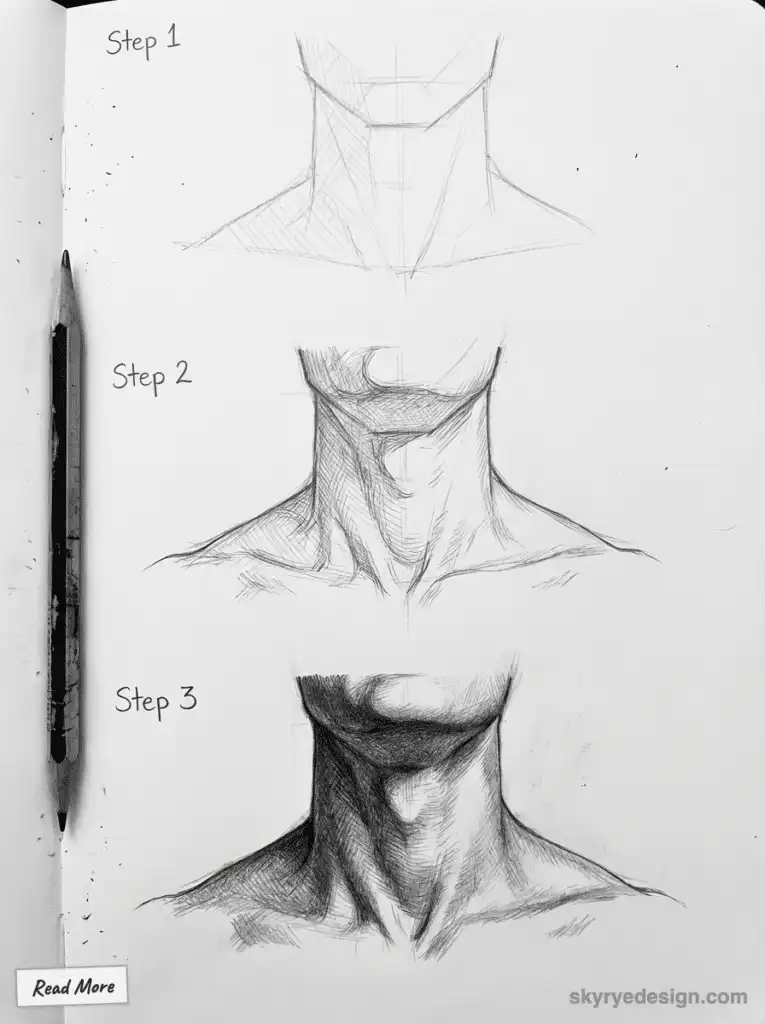
- Thinner than realistic anatomy
- Extends downward from behind the jaw
- Avoid placing it directly under the chin
A neck that’s too thick can instantly ruin an otherwise good head drawing.
Step 6: Draw Anime Hair (Volume Comes First)
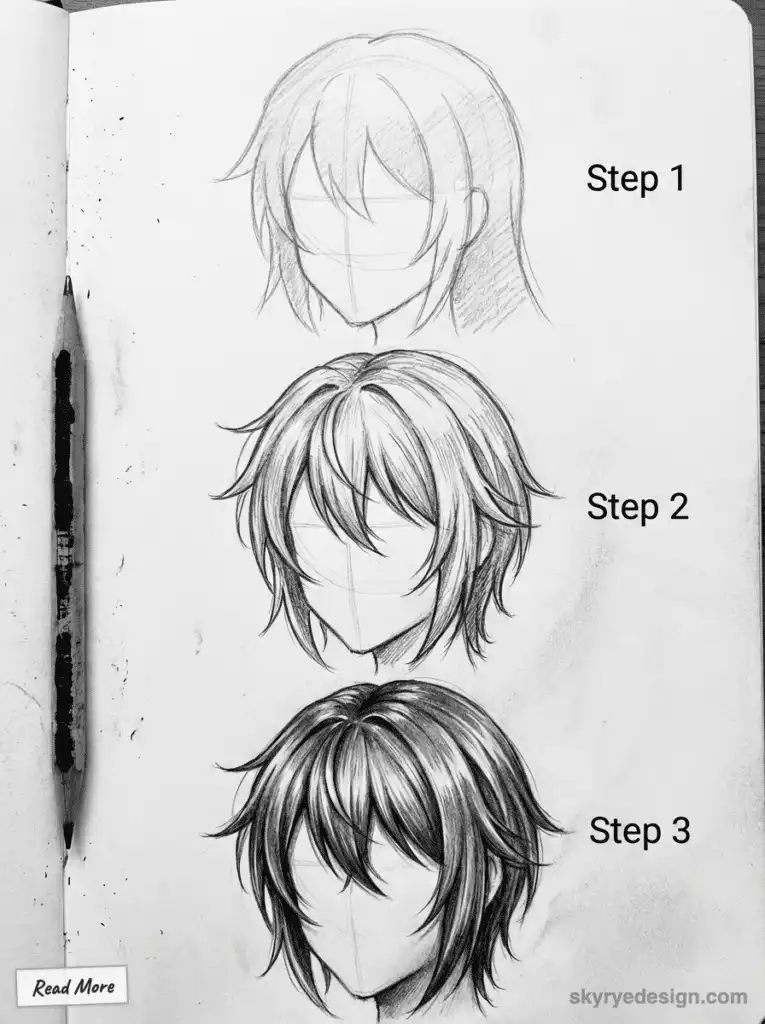
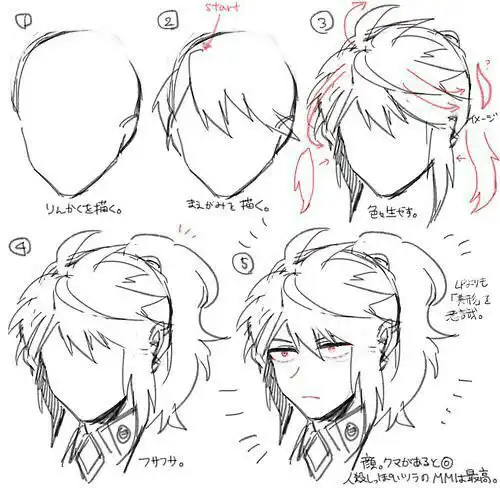
Anime hair is about shape and flow, not individual strands.
Three Hair Layers
- Base volume (hair mass around skull)
- Main clumps (large sections)
- Detail strands (sparingly)
Key Rules
- Hair floats slightly above the skull
- Use sharp, confident strokes
- Avoid drawing every strand
Think of hair like fabric or flames—structured but fluid.
Step 7: Clean Up the Drawing
Once all features are placed:
- Erase guidelines
- Darken final lines
- Refine shapes and curves
This is where your drawing goes from sketch to illustration.
Drawing Anime Heads at Different Angles
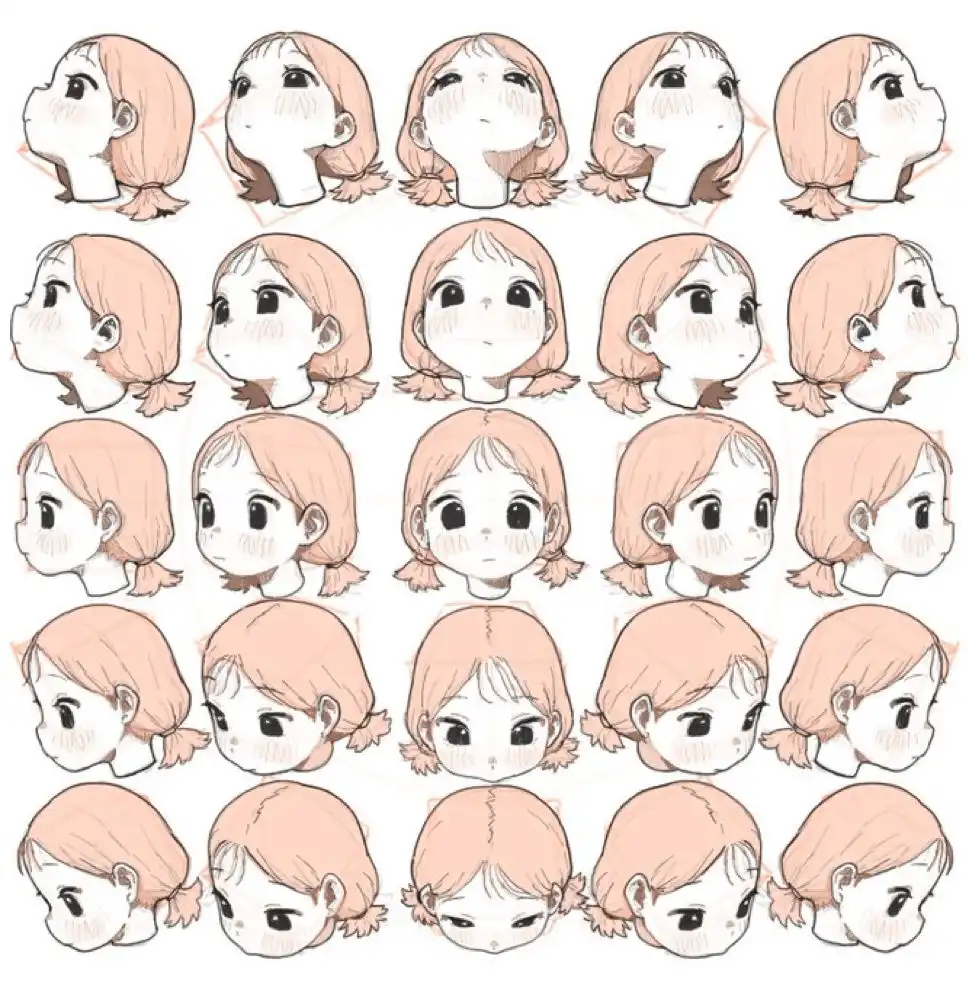
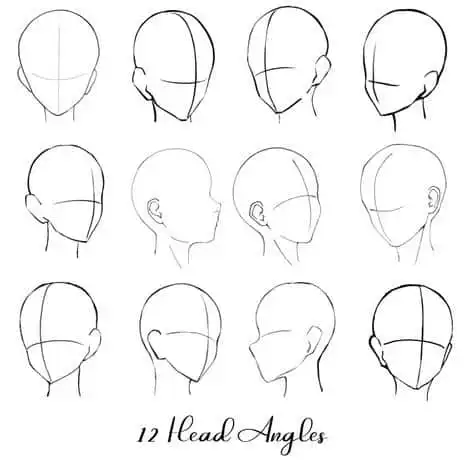
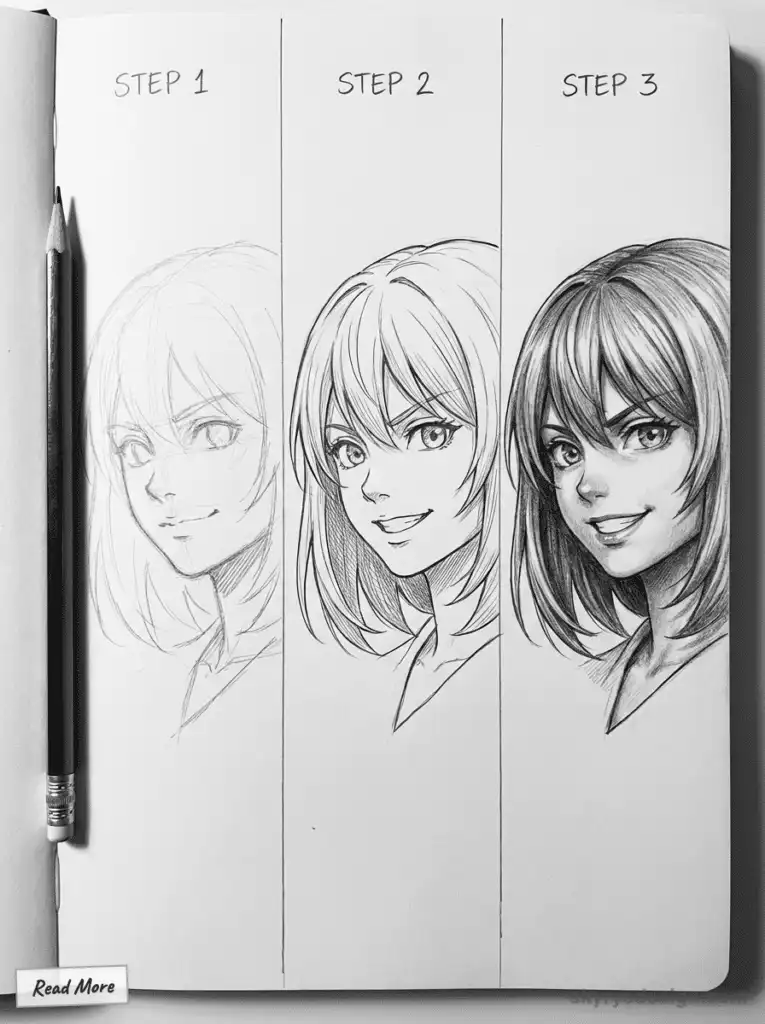
Understanding the correct direction, or head orientation, is essential for maintaining proper proportions and achieving a realistic, natural look when drawing anime heads from different angles. Practicing both front and side views helps you understand facial proportions and features from multiple angles, which is key for dynamic and accurate character drawings.
Front views are just the beginning. When drawing the front view, pay close attention to the alignment and proportion of facial features. Practicing both front and side views will improve your ability to draw anime heads from any direction.
The box method helps in visualizing the head as a 3D structure, particularly for drawing from challenging angles. By imagining the head as a box, you can better understand how to rotate and position facial features in space, making it easier to maintain correct proportions and perspective.
Front View
- Start with a circle and jaw as usual
- Use guidelines to align features
- Focus on symmetry and proportion
Side View
- Circle becomes a partial oval
- Face extends forward from the skull
- Eye sits farther back than beginners expect
3/4 View
- Most popular anime angle
- One eye slightly narrower
- Nose overlaps the far cheek
Practice tip: rotate the same head shape instead of redrawing randomly.
Creating Expressive Anime Faces
One of the most captivating aspects of anime characters is their ability to convey a wide range of emotions with just a few simple lines. Creating expressive anime faces is all about understanding the anime head structure and how each facial feature contributes to the character’s mood and personality.
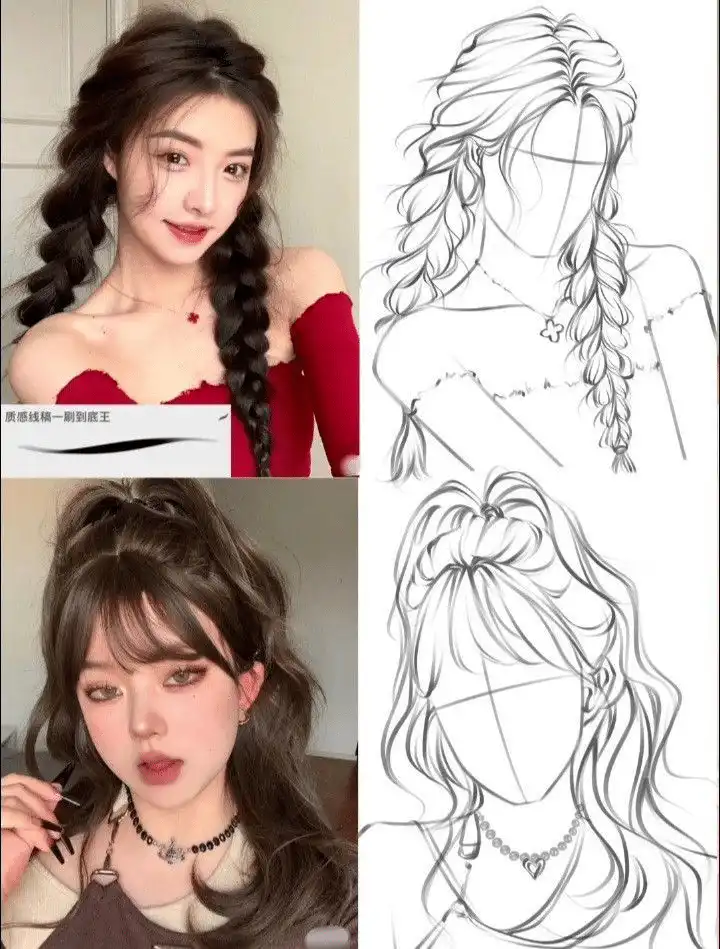
Start by building your anime head using basic shapes—a circle for the skull and a jawline to define the face. Use a vertical line down the center and a horizontal line for the eyes to keep your features balanced. These guidelines are essential for drawing anime heads from different angles and ensuring your facial features stay proportional.
When it comes to drawing anime faces, the eyes are your most powerful tool. Large, stylized anime eyes can instantly communicate excitement, sadness, or mischief. Begin with a bold horizontal line for the upper eyelid and a softer curve for the lower lid. Add the iris, pupils, and highlights to bring the eyes to life. Don’t forget the eyebrows—arched, angled, or relaxed brows can completely change your character’s expression.
The nose and mouth, though simple in anime style, are just as important. Place the nose slightly lower than you might expect, using a small line or dot to keep it subtle. For anime mouths, a single curved line can suggest a smile, frown, or surprise. Experiment with the placement and curve of the mouth to see how it affects the overall expression. Adding a hint of a bottom lip or a small shadow can give your anime faces more depth.
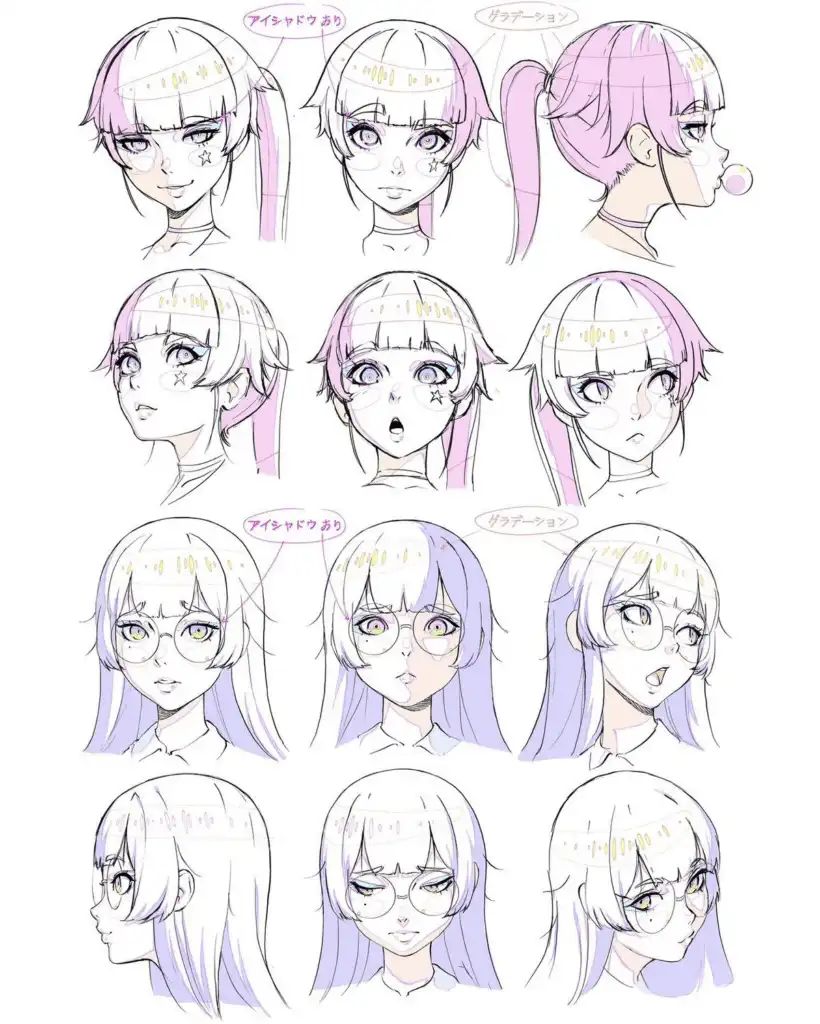
To keep your proportions consistent, try using the Loomis head method. This technique breaks the head into simple shapes and uses two lines—the vertical line for symmetry and the horizontal line for eye placement—to guide your drawing process. It’s especially helpful when you want to draw anime heads from different angles or create dynamic character poses. Studying real head anatomy using methods like the Loomis method helps in simplifying shapes for anime character design.
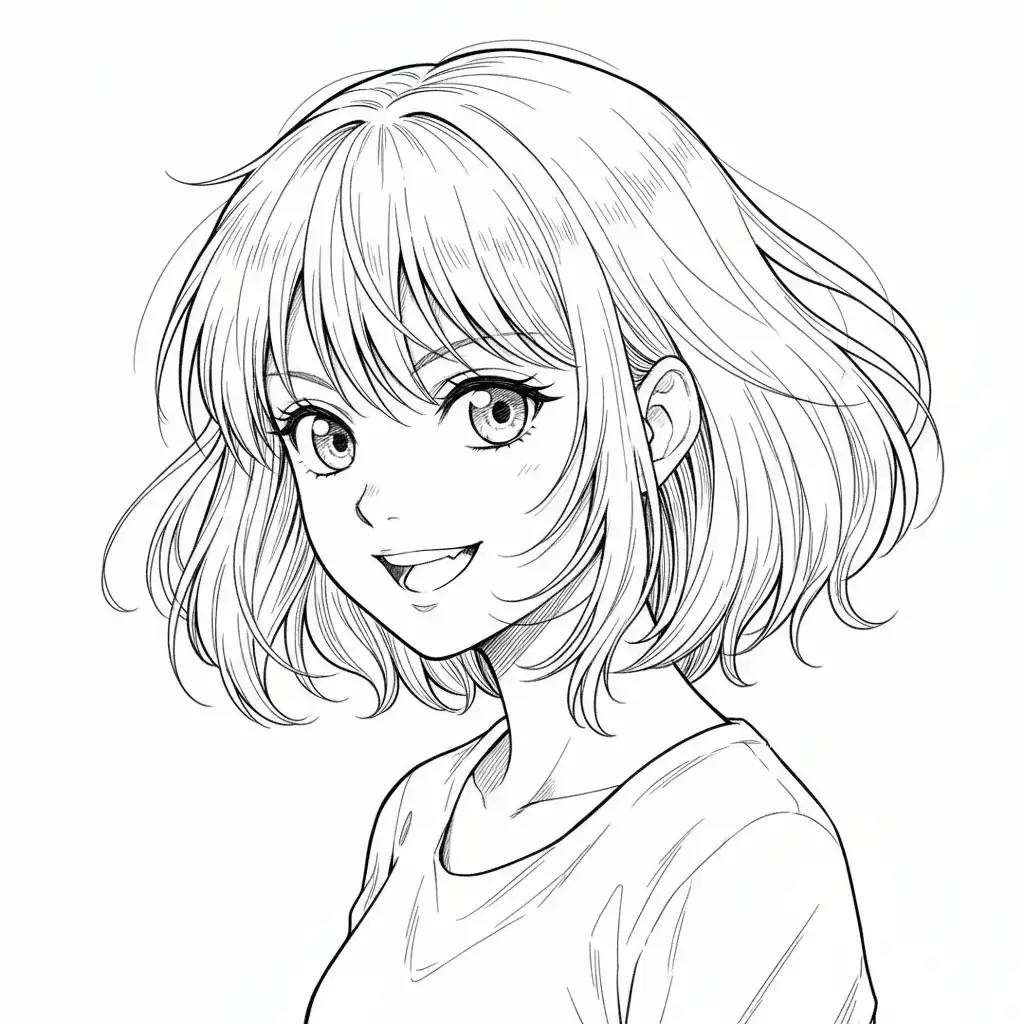
Hair also plays a big role in expressing your character’s style and personality. Use simple lines to sketch the overall shape and volume, then add more detail to match the emotion you want to convey. Spiky, flowing, or neatly styled hair can all add to the character’s story.
As you move from sketch to finished drawing, use your pencil to refine the features and clean up any extra line marks. Focus on the basics: clear head structure, expressive facial features, and confident lines. Don’t be afraid to experiment with different shapes, angles, and styles—each attempt helps you learn how to draw more dynamic and unique anime faces.
With regular practice and a focus on the fundamentals, you’ll soon be able to create anime characters whose faces are as expressive and memorable as those from your favorite art houses. Whether you’re drawing a cheerful anime girl face or a stoic male character, mastering these techniques will bring your drawings to life.
Common Mistakes (And How to Fix Them)
- Eyes too high
→ Lower the eye line slightly - Flat face
→ Add cheek curves and jaw depth - Tiny cranium
→ Make the skull bigger; anime heads need space - Over-detailed features
→ Simplify nose and mouth
Mistakes are part of the process—every skilled artist has made all of these many times.
How to Practice Effectively
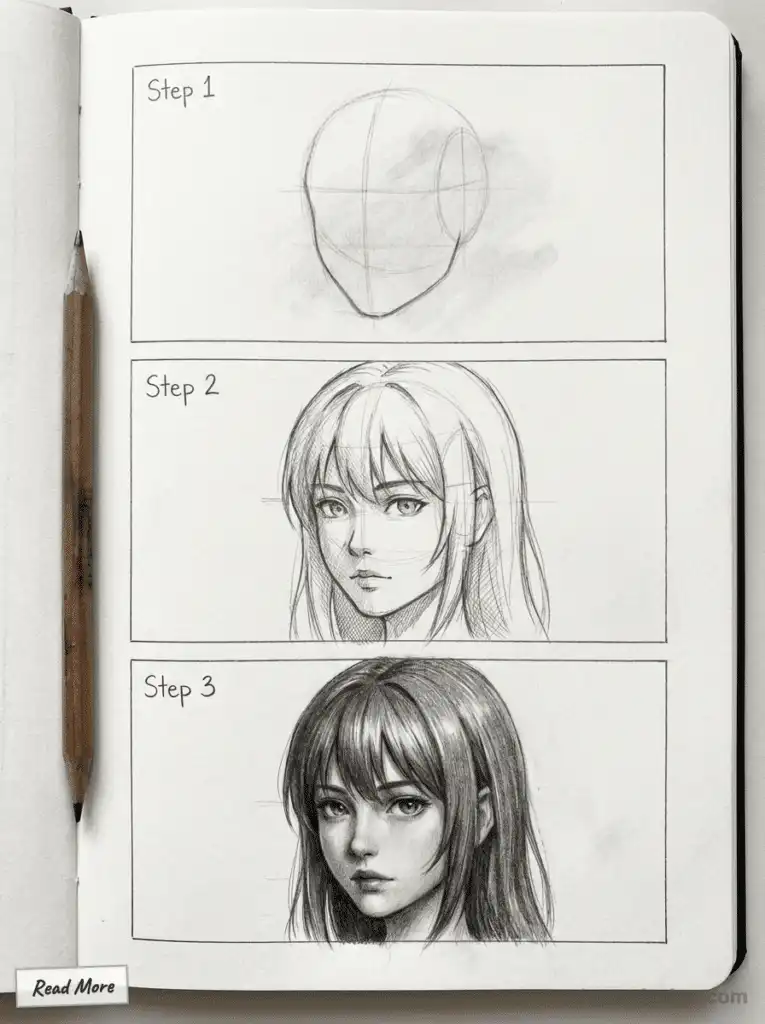
Having the right tools is essential for drawing anime heads effectively. Start with basic supplies: paper, a pencil, a pen, and an eraser. For sketching initial outlines, an H pencil is recommended, as it allows you to draw with light pressure—making it easier to erase and refine your lines later.
Improvement comes from focused repetition, not random sketching.
Daily Practice Ideas
- Draw 10 heads using only circles and jaws
- Practice eyes separately on a page
- Copy anime screenshots, then redraw from memory
- Draw the same head from 3 angles
For more inspiration, check out these body drawing ideas to further improve your figure drawing skills.
Short, consistent sessions beat long, infrequent ones.
Developing Your Own Anime Style
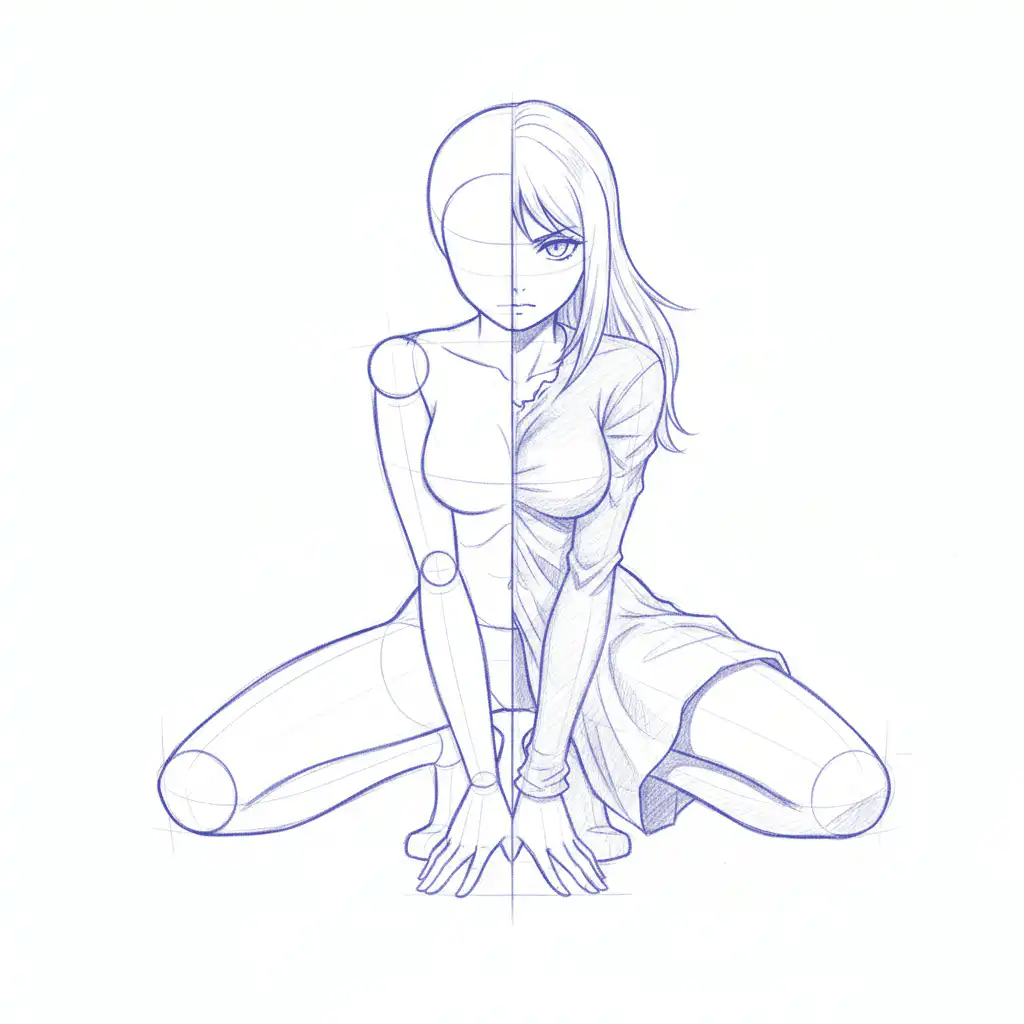
Once you understand the basics, style naturally emerges. When you draw manga or anime faces, using basic shapes like circles and ovals can simplify the process and help you build accurate proportions.
Style comes from:
- Proportion choices (eye size, jaw shape)
- Line thickness
- Hair complexity
- Facial feature spacing
Don’t rush it. Master structure first—style follows.
Final Thoughts
Learning how to draw an anime head is a foundational skill that unlocks everything else: expressions, hairstyles, character design, and storytelling. By breaking the head into simple shapes, using consistent guidelines, and practicing intentionally, you’ll see improvement faster than you expect. For the best results, follow a step-by-step tutorial—this makes the drawing process super easy and effective, especially for beginners.
Every professional anime artist started with uneven circles and awkward faces. The difference is they kept going.
Pick up your pencil, draw another head—and enjoy the process.
- 2.2Kshares
- Facebook0
- Pinterest2.2K
- Twitter0
- Reddit0

