Ever felt that little itch to create something beautiful, but then a voice whispers, “I can’t even draw a straight line!”? You’re not alone. So many of us believe that drawing is some exclusive club for the naturally gifted. But here’s a secret: drawing isn’t about innate talent; it’s about practice, observation, and most importantly, having fun! Think of it less as a serious art lesson and more like a playground for your imagination.
Learning to draw is like learning any other skill – it starts with baby steps. And those baby steps can be incredibly rewarding, helping you de-stress, boost your creativity, and even see the world around you with fresh eyes. You don’t need fancy supplies or years of art school. Just a pen, a piece of paper, and a willingness to explore. If you’re ready to ditch the self-doubt and unleash your inner artist today, you’ve come to the right place. We’ve rounded up 10 super fun and easy drawing ideas that will get your creative juices flowing without a shred of intimidation. Let’s get started!
1. Doodling with Geometric Shapes & Patterns
Remember those times you’d absentmindedly draw squiggles and shapes during a long phone call or a boring meeting? That wasn’t just mindless scribbling; that was your inner artist trying to break free! Doodling with geometric shapes and patterns is one of the easiest and most therapeutic ways to start drawing. There’s no pressure to create a “realistic” image, just pure, unadulterated pattern play.
How to Get Started:
- Pick Your Shapes: Start with the basics: circles, squares, triangles, ovals, rectangles. Don’t overthink it.
- Overlap and Intersect: Draw one shape, then draw another one overlapping it. See how they create new, smaller shapes where they meet? This is where the magic begins.
- Repeat and Vary: Try drawing a row of circles, then a row of squares beneath them. Or draw a large circle and fill it with smaller, concentric circles. Repetition is key to building interesting patterns.
- Fill with Texture: Once you have your basic shapes, start filling them in with different patterns. Think stripes, polka dots, checkerboards, cross-hatching, wavy lines, or even tiny spirals. Each pattern adds a new layer of visual interest.
- Embrace the Abstract: The beauty of this method is that there’s no “right” or “wrong.” The goal is to create something visually engaging through repetition and contrast. You’ll often find that your doodles evolve into surprisingly complex and beautiful designs.
Tips for Maximum Fun:
- Use Different Pens: Try a fine-liner for intricate details and a thicker marker for bolder lines.
- Introduce Color (Optional): If you’re feeling adventurous, add a splash of color with colored pencils or markers to make your patterns pop.
- Try a Grid: For a more structured approach, lightly draw a grid on your paper and fill each square with a different pattern or a variation of a single shape. This can lead to some incredible mosaic-like effects.
- Zentangle Inspiration: If you really get into this, look up Zentangle art. It’s a structured, meditative drawing method based entirely on repetitive patterns within defined spaces. It’s incredibly relaxing and produces stunning results.
This exercise isn’t just about drawing; it’s about mindfulness. The repetitive motion and focus on patterns can be incredibly calming, making it a perfect activity to unwind after a busy day.
2. Sketching Everyday Objects (Still Life for Beginners)
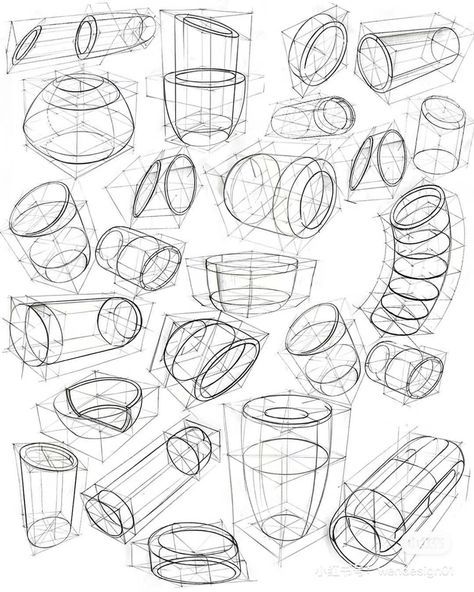
Don’t let the term “still life” intimidate you! It doesn’t mean you need to set up a complex arrangement of fruit bowls and drapery like a Renaissance painter. For beginners, sketching everyday objects is simply about looking closely at things around you and trying to capture their basic form on paper. It’s a fantastic way to train your eye and hand coordination.
How to Get Started:
- Choose Simple Subjects: Look for objects with clear, simple shapes. A coffee mug, a piece of fruit (like an apple or orange), a book, a houseplant, or even your car keys are perfect starting points. Avoid anything too complex or reflective for your first few attempts.
- Observe the Outline: Focus primarily on the outer edges or contour of the object. Don’t worry about details or shading just yet. Try to draw the shape as accurately as you can see it. Squinting can sometimes help you see the larger form without getting distracted by small details.
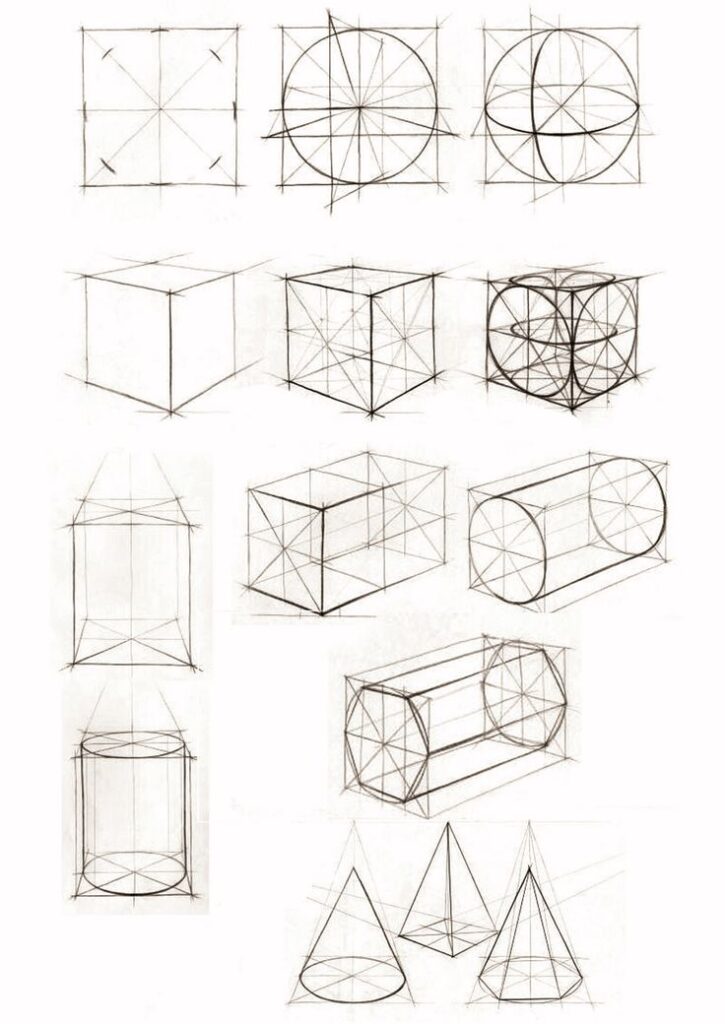
- Break It Down into Basic Shapes: Before drawing the exact outline, try to see if you can break your object down into simpler geometric forms. For example, a mug is essentially a cylinder with a smaller cylinder (the handle) attached. An apple is a slightly irregular circle. Drawing these underlying shapes first can make the process much easier.
- Focus on Relationships: If you’re drawing two objects together (say, a mug and a spoon), pay attention to how they relate in size and position. Is the spoon taller than the mug? Does it overlap the mug? These relationships help create a sense of depth and realism.
- Light Shading (Optional): Once you’re comfortable with outlines, try adding some basic shading. Look for the darkest and lightest areas on your object. Where does the light hit it directly? Where are the shadows deepest? Use simple lines or gentle smudging to indicate these differences.

Tips for Maximum Fun:
- Start with One Object: Keep it simple! Don’t overwhelm yourself with too many items at once.
- Angle Matters: Try drawing the same object from different angles. You’ll be amazed at how different it looks.
- Don’t Erase Mistakes, Learn from Them: Seriously, embrace the “wonky” lines. Each attempt is a learning experience. You’re building a visual vocabulary.
- Time Yourself: Do quick 5-minute sketches. This forces you to capture the essence quickly without getting bogged down in perfectionism.
- Set Up a “Scene”: Once you’re confident with individual items, try arranging two or three simple objects together on a table. Pay attention to the negative space (the space around and between the objects) – it’s just as important as the objects themselves!
Sketching everyday objects helps develop your observational skills, which are fundamental to all forms of drawing. Plus, it’s super convenient since your “subjects” are always within reach!
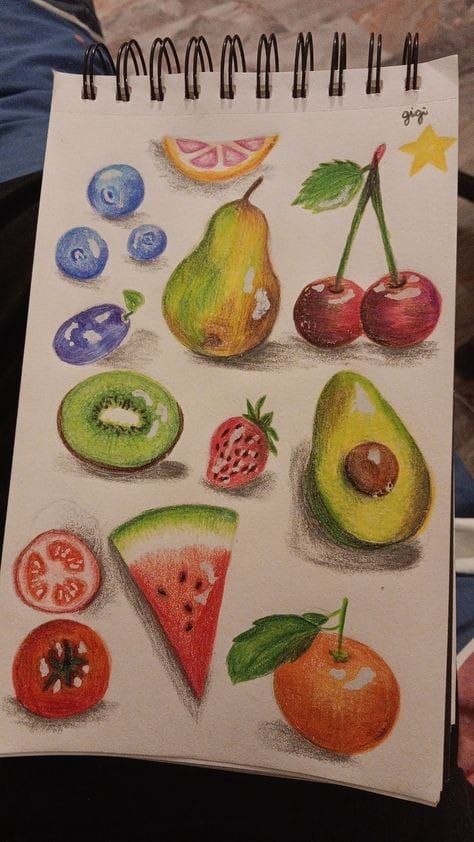
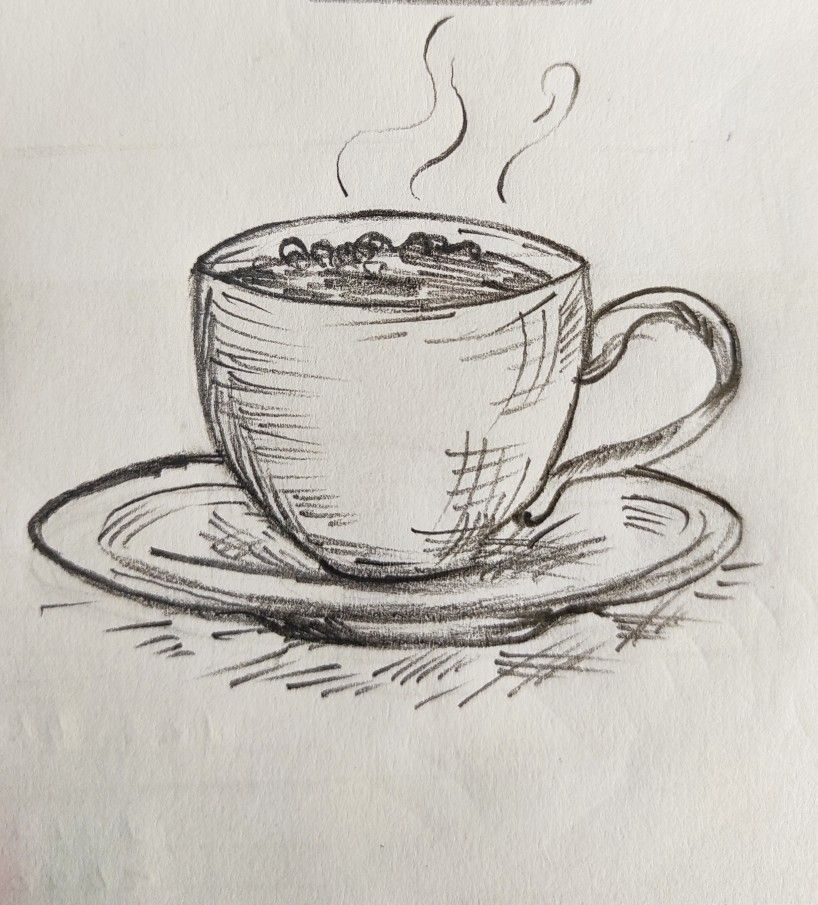
3. Whimsical Food Illustrations
Who doesn’t love food? And who wouldn’t love drawing it? Food illustrations are a delightful way to explore color, texture, and form in a fun, appetizing manner. From juicy fruits to fluffy pastries, the world of cuisine offers endless, delicious inspiration. This idea is particularly great because your subjects are usually pretty colorful and have interesting shapes, making them engaging to draw.
How to Get Started:
- Pick Your Favorite Treat: What makes your mouth water? A slice of pizza, a cupcake, a scoop of ice cream, a perfectly ripe avocado? Start with something you genuinely love, as your enthusiasm will translate onto the page.
- Outline the Basic Shape: Begin by lightly sketching the main form. For a cupcake, it’s a circle on top of a trapezoid. For a banana, it’s a curved oblong. Don’t press too hard, as you might want to refine these lines later.
- Add Details and Texture: This is where food illustrations truly shine. Think about the sprinkles on a donut, the seeds on a strawberry, the fluffy peaks of whipped cream, or the intricate layers of a croissant. Use small lines, dots, and varied strokes to suggest these textures.
- Think About “Flavor” and “Freshness”: How can you make your drawn food look appealing? A few highlights can make a fruit look juicy, and slightly irregular lines can make baked goods look homemade and comforting.
- Color It In: This is where the real fun begins! Use colored pencils, markers, or even watercolors to bring your food to life. Think about the natural colors and try to capture their vibrancy. Don’t be afraid to exaggerate colors a little for a more whimsical effect.
Tips for Maximum Fun:
- Give Your Food Personality: For a truly whimsical touch, try adding little faces or limbs to your food items! A smiling donut or a dancing carrot can be incredibly charming.
- Create a “Menu”: Draw a whole series of your favorite foods and arrange them like a mini-menu or a chef’s tasting plate.
- Focus on the Cross-Section: Instead of drawing a whole apple, try drawing a sliced apple to reveal the core and seeds. This adds a different kind of visual interest.
- Draw What You’re About to Eat: Before diving into your next meal or snack, take a moment to sketch it. It’s a quick, easy way to get some practice in and makes the experience even more delightful.
- Use Photos as Reference: If you don’t have the actual food in front of you, a quick image search for “cupcake illustration” or “pizza drawing” can give you plenty of inspiration for shapes, colors, and details.
Food illustrations are not only fun to create but can also brighten up your kitchen or even become personalized recipe card decorations.
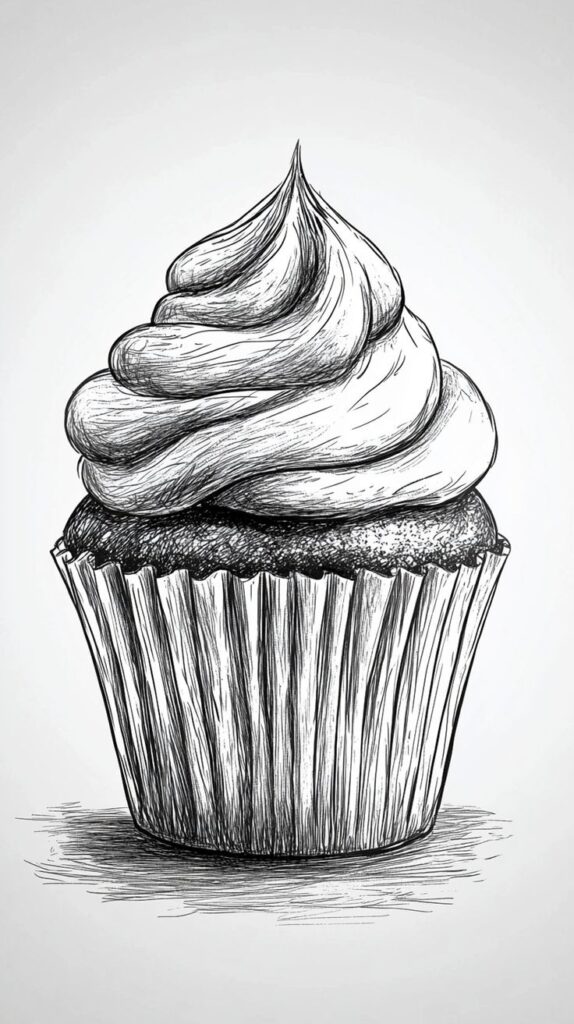
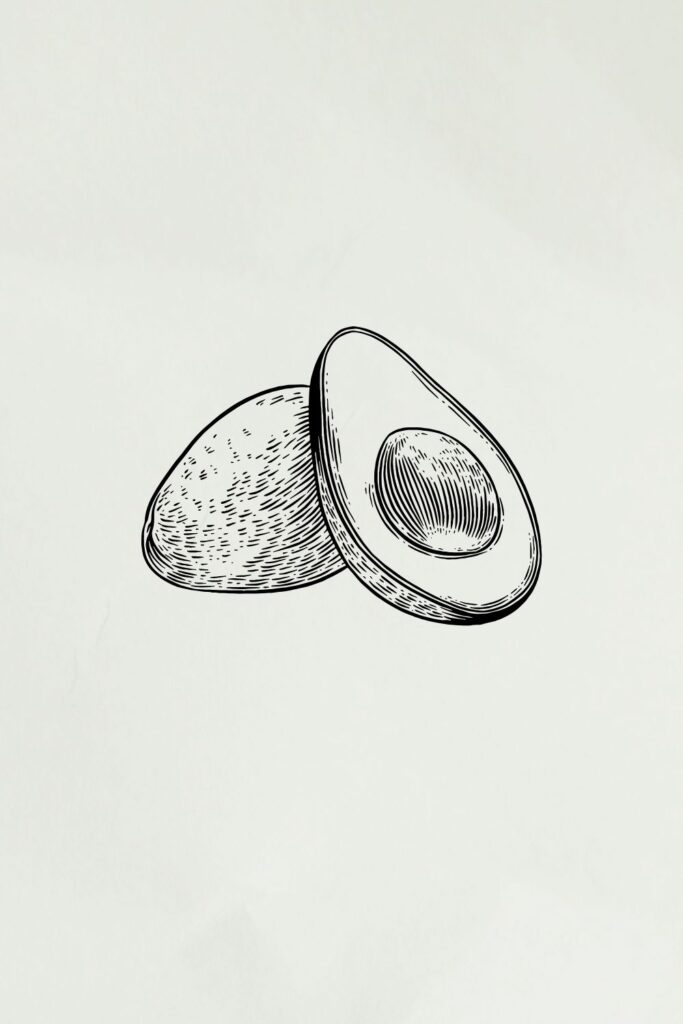
4. One-Line Drawings
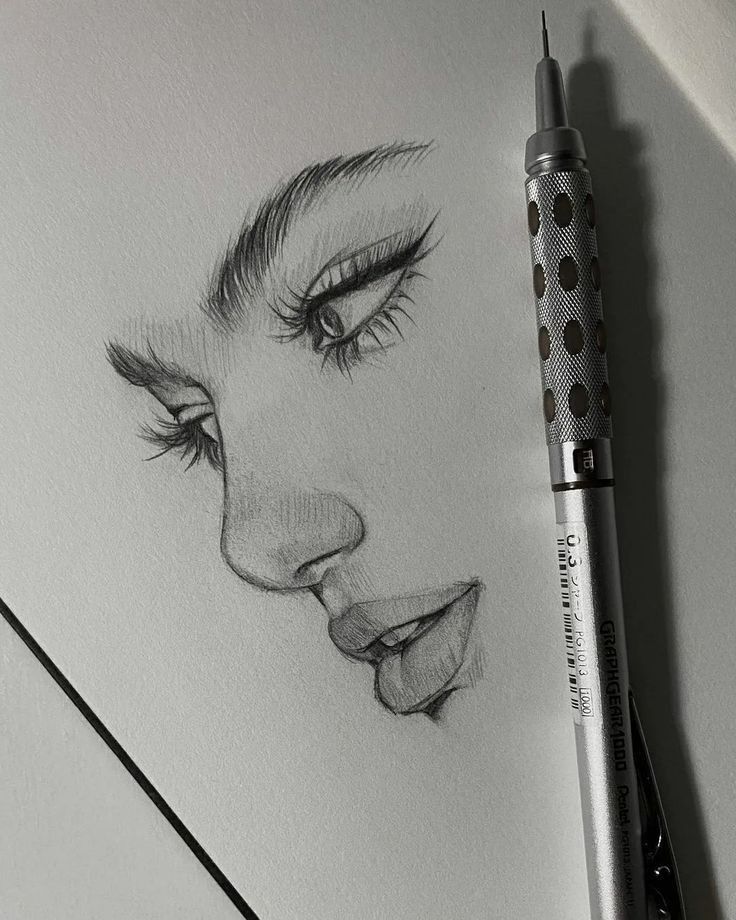
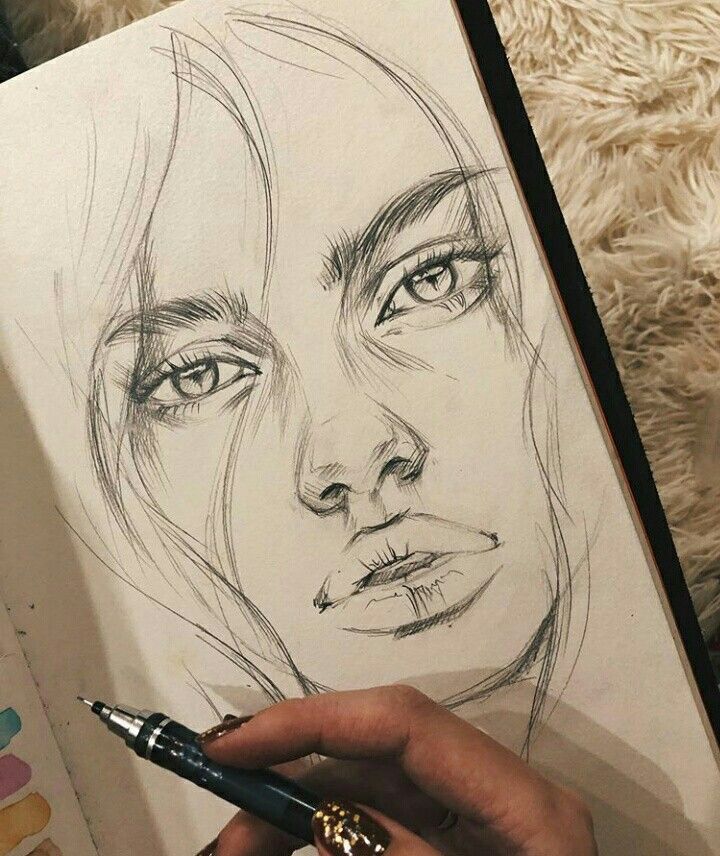
Ready for a challenge that’s deceptively simple yet incredibly stylish? One-line drawing, also known as continuous line drawing, is exactly what it sounds like: you draw an entire object without lifting your pen from the paper. This technique forces you to simplify forms and focus on the essence of your subject, resulting in abstract yet recognizable artworks. It’s a fantastic way to develop hand-eye coordination and a more fluid drawing style.
How to Get Started:
- Choose a Simple Subject: Start with something straightforward. A hand, a face in profile, a simple flower, an animal silhouette, or a single fruit are excellent choices. Complex subjects can be overwhelming when you’re just learning.
- Place Your Pen and Commit: Put your pen down on the paper, and decide where you want to start. Remember, once it’s down, it doesn’t come up until the drawing is complete!
- Trace the Outer Contour First: Begin by slowly moving your pen along the outer edge of your subject. Imagine your pen is an ant crawling along the object’s surface, mapping its boundary.
- Move Inside for Details: Once you’ve established the general outline, move your pen into the object to capture internal details like eyes, mouth, folds, or veins, then move back out to continue the main contour. You’ll often have to retrace parts of your line to move to a new area without lifting the pen.
- Embrace Imperfection: The beauty of one-line drawing isn’t perfect realism; it’s the raw, flowing energy of the continuous line. Your lines might wobble, or proportions might be off, and that’s perfectly fine. It adds character!
Tips for Maximum Fun:
- Go Slow and Steady: Don’t rush. The slower you go, the more you can observe and plan your next move.
- Practice with Your Non-Dominant Hand: This is a fantastic exercise for freeing up your drawing style and truly focusing on observation rather than precision. It’s all about the experience!
- Draw from Life: Try drawing a friend’s face, a houseplant, or even your own hand in a single line. Observing a real object helps you understand its form better than a flat image.
- Experiment with Abstract Forms: Once you’re comfortable with recognizable objects, try abstract one-line compositions where you just let your hand flow, creating a tangle of lines that form an interesting design.
- Explore More Ideas: If you’re looking for endless inspiration and want to dive deeper into this cool technique, check out these fantastic one-line drawing ideas to spark your next masterpiece.
One-line drawing is a wonderful way to challenge your perception and develop a more confident, spontaneous drawing style. Plus, the minimalist aesthetic of these drawings often looks incredibly sophisticated!
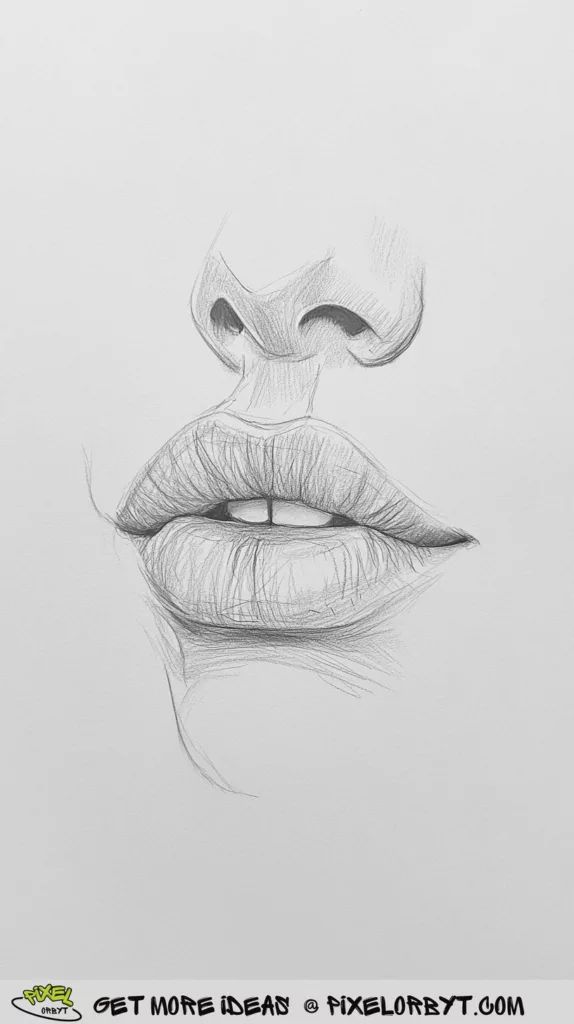
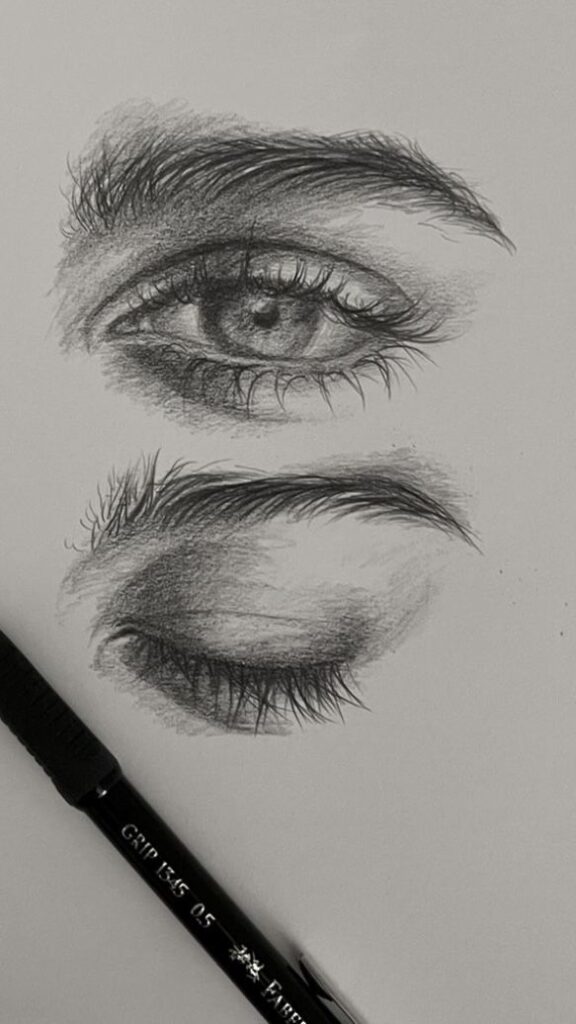
5. Expressive Eyes and Lips
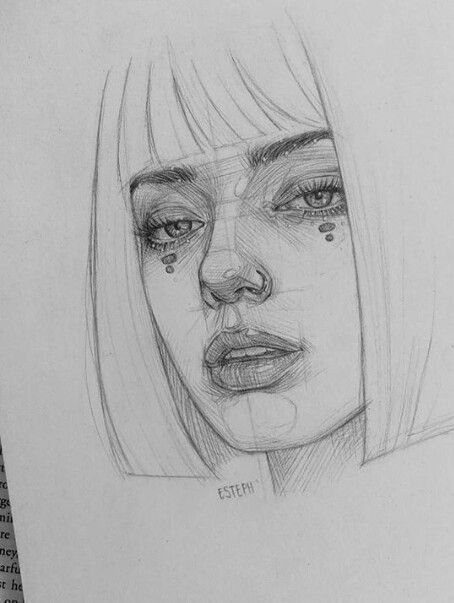
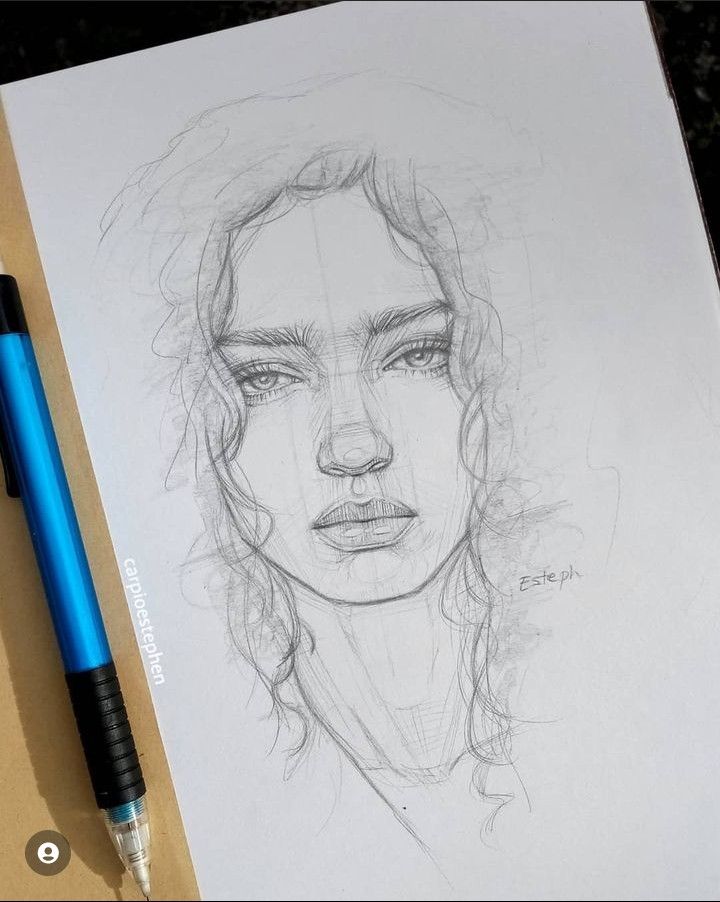
Faces are incredibly complex, and trying to draw a full portrait right away can be daunting. But by breaking it down and focusing on individual features like eyes and lips, you can build confidence and skills step by step. These features are packed with expression and character, making them fascinating subjects to practice. Once you master drawing expressive eyes and realistic lips, you’ll feel a huge leap in your artistic confidence.
How to Get Started with Eyes:
- Basic Shape First: Start with the general shape of the eye socket and the almond-like shape of the eyeball within it. Don’t forget the upper and lower eyelids.
- The Iris and Pupil: Draw a circle for the iris (the colored part) and a smaller, darker circle in the center for the pupil. Remember that the eyelids usually cover a small part of the top and bottom of the iris.
- Eyelids and Creases: Add the thickness of the eyelids and the creases above and below the eye. These details add depth.
- Lashes and Brows: Lightly sketch in the eyelashes, remembering they curve outwards and are thicker at the base. Add the eyebrow above, paying attention to its shape and how the hairs grow.
- Reflect Light: A tiny white dot or two on the pupil and iris represents the reflection of light, bringing the eye to life.
How to Get Started with Lips:
- Simplified Shapes: Start with a few basic guiding lines: a horizontal line for the mouth opening and two curved lines for the top and bottom lip. Think of the top lip as an M-shape and the bottom lip as a U-shape.
- Define the Cupid’s Bow: The curve in the center of the upper lip (the Cupid’s bow) is a key feature.
- Add Volume: Lips aren’t flat. Use subtle curves and shading to show their natural plumpness and contours.
- Wrinkles and Texture: Lips have small vertical lines, especially when relaxed. Add these sparingly to suggest texture without making them look too harsh.
- Shading: Pay attention to where the light hits and where shadows fall, especially underneath the bottom lip, which often casts a small shadow.
Tips for Maximum Fun:
- Use References: Look at photos of different eyes and lips. Notice how their shapes, sizes, and expressions vary across different people. You can even use a mirror to study your own features!
- Experiment with Emotions: Try drawing eyes that look happy, sad, surprised, or angry. Observe how the eyebrows, eyelids, and corners of the mouth change with each expression.
- Practice with Different Angles: Draw eyes and lips from a front view, then a three-quarter view, and finally a side profile. This helps you understand their three-dimensional form.
- Learn from the Experts: For an in-depth guide to making your lip drawings look truly lifelike, you’ll find incredible value in learning how to draw realistic lips. It’s a fantastic resource for taking your facial feature sketches to the next level.
- Don’t Aim for Perfection: Especially when you’re starting, focus on understanding the structure and capturing the general impression rather than achieving photographic realism.
Mastering these individual features will not only make drawing faces less intimidating but will also give you a fantastic foundation for more complex portraiture down the line.
6. Cartoon Characters & Emojis
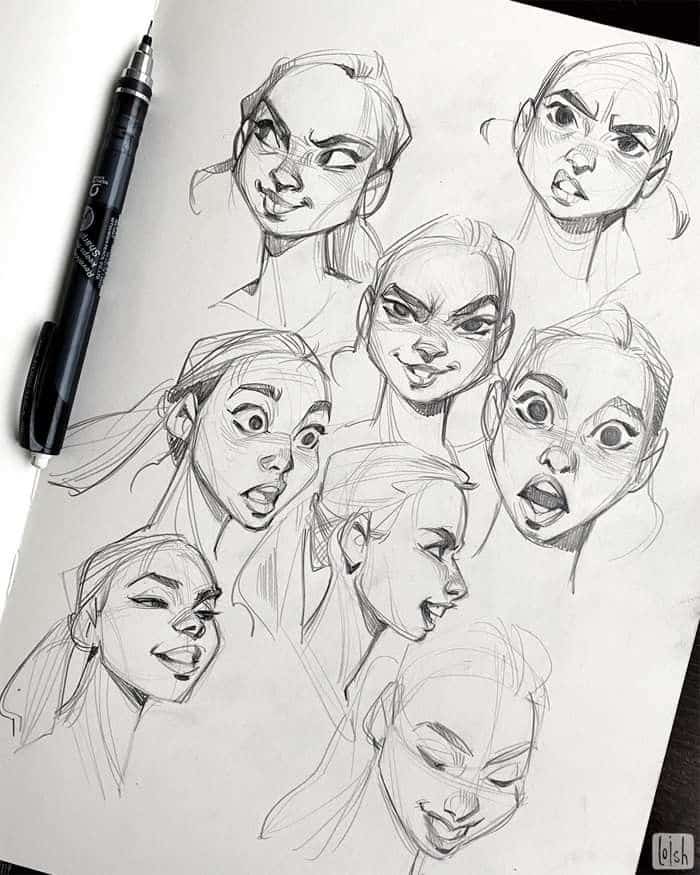
Dive into the playful world of cartoon characters and emojis! This drawing idea is pure fun and offers incredible freedom for exaggeration and expression. Whether you want to recreate your favorite animated heroes or invent quirky characters of your own, this genre is all about personality and storytelling through simple shapes. It’s a fantastic way to practice conveying emotion with minimal lines.
How to Get Started:
- Start with Basic Shapes: Most cartoon characters are built from simple circles, squares, ovals, and cylinders. For example, a character’s head might be a circle, its body an oval, and its limbs simple cylinders. Sketch these lightly first.
- Exaggerate Features: This is the heart of cartooning. Big eyes, tiny mouths, oversized hands, or spindly legs all contribute to a character’s unique look. Don’t be afraid to push the boundaries of realism.
- Convey Emotion with Facial Expressions: Emojis are masters of this! A slight upturn of the mouth and a twinkle in the eye can instantly convey happiness. Slanted eyebrows and a downturned mouth can show sadness or anger. Pay attention to how small changes in features dramatically alter the mood.
- Think About the Pose: Even simple stick figures can tell a story with their posture. Is your character slumped? Jumping? Running? Use simple lines to suggest movement and action.
- Add Simple Details: Hair, clothing, and small accessories can bring your character to life. Keep them simplified and stylized to match the cartoon aesthetic.
Tips for Maximum Fun:
- Copy Your Favorites: Find a cartoon character or emoji you love and try to draw it. This is a great way to learn how others simplify forms and express emotions. Don’t worry about tracing; just observe and replicate.
- Invent Your Own: What kind of character lives in your imagination? A grumpy cloud? A shy monster? A super-powered potato? Give them a name and a backstory!
- Tell a Story with a Series: Draw your character in different poses or showing various emotions. Create a mini-comic strip with just two or three panels.
- Use Color Liberally: Cartoons are often vibrant! Don’t hold back with bright, bold colors to make your characters pop.
- Explore Different Styles: If you’re particularly interested in drawing characters with dynamic poses and expressive features, exploring various character design techniques, such as those found in anime sketching techniques, can provide a wealth of inspiration and foundational skills. It’s a great way to learn how to inject personality into your drawn figures.
Drawing cartoon characters and emojis isn’t just for kids; it’s a powerful tool for visual storytelling and self-expression. Plus, who doesn’t need a custom emoji for their next text message?

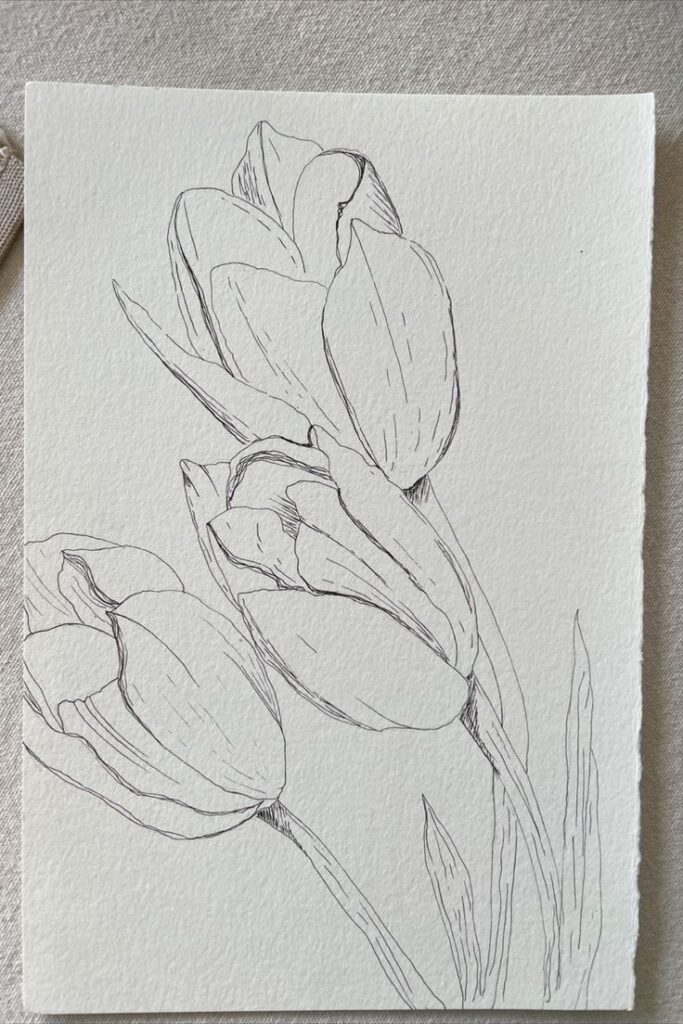
7. Nature’s Bounty: Leaves, Flowers, & Simple Botanicals
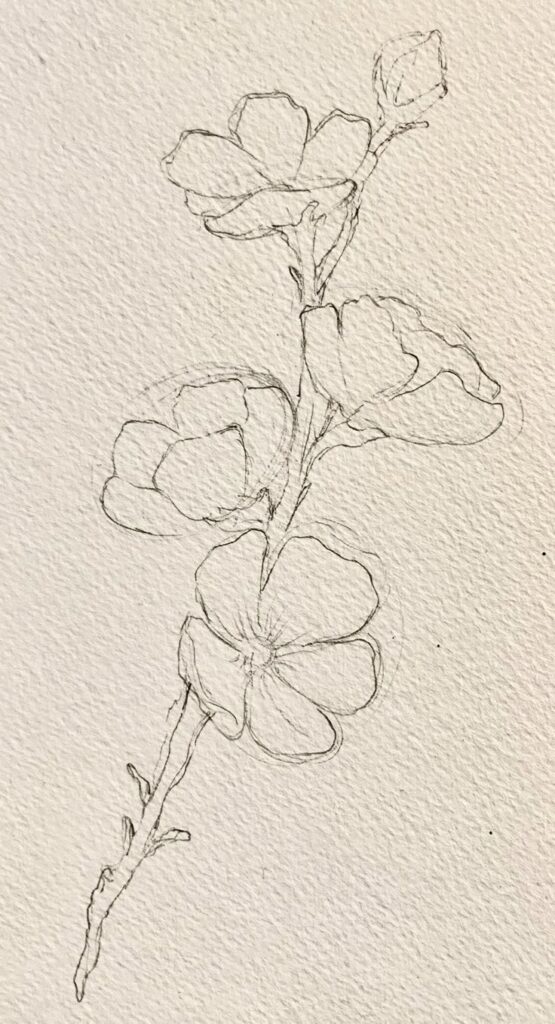
Step outside or look at your favorite houseplant – nature is an endless source of artistic inspiration! Drawing leaves, flowers, and simple botanical elements is incredibly relaxing and accessible for beginners. You don’t need to capture every intricate detail; the beauty lies in observing natural forms, patterns, and textures. It’s also a wonderful way to practice mindfulness and appreciate the intricate designs of the natural world.
How to Get Started:
- Collect Your Subject: Find a leaf, a small flower, a sprig of herbs, or even a pinecone. If you can’t get outside, look at a photo of a plant.
- Observe the Overall Shape: Begin by sketching the general outline. Is the leaf oval, heart-shaped, or jagged? What’s the basic form of the flower – a bell, a cup, or a star?
- Focus on Veins and Petals: Once you have the main shape, start adding the details. For leaves, draw the central vein first, then the smaller veins branching off. For flowers, sketch the individual petals, noticing how they overlap and curve.
- Notice the Edges: Are the edges of the leaf smooth, serrated, or lobed? These small details add a lot of character.
- Add Stems and Buds: Don’t forget the supporting elements. A simple stem or a small bud can complete the botanical drawing.
Tips for Maximum Fun:
- Don’t Strive for Perfection: Nature isn’t perfect, so your drawings don’t need to be either. A slightly asymmetrical leaf or a wobbly petal adds to its natural charm.
- Try Different Angles: Draw the same leaf from the top, then from the side, and then curled up. This helps you understand its three-dimensional form.
- Create a Botanical Collection: Draw a “field guide” on a single page, featuring different leaves, flowers, or seeds you find. Label them if you like!
- Experiment with Shading: Use light shading to give your botanicals a sense of depth. Notice where the light hits the leaves and where shadows form in the folds of petals.
- Explore Beyond Simple Lines: While focusing on lines is great, if you’re curious about how these natural subjects translate into other mediums, taking a peek at beautiful watercolor floral sketches can inspire new ways to approach your botanical drawings, even if you stick to pencil and paper for now.
- Use Contrasting Colors: If you’re coloring your drawings, try using a slightly darker green for the veins of a leaf than for the main body, or different shades of the same color for flower petals to add depth.
Drawing botanicals is a peaceful and rewarding activity that connects you with the beauty of the natural world, even from your kitchen table.
8. Fantastic Beasts and Whimsical Creatures
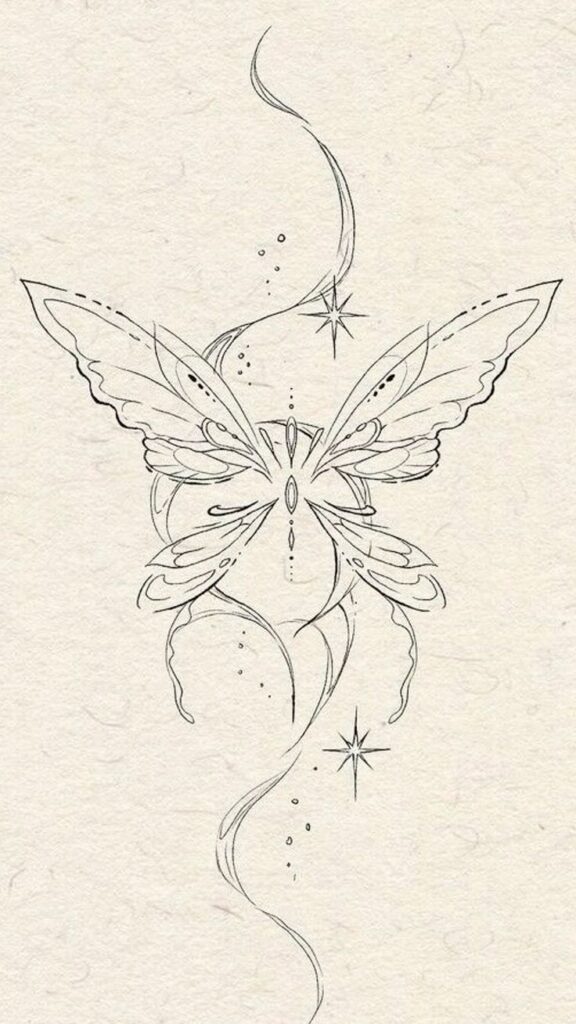
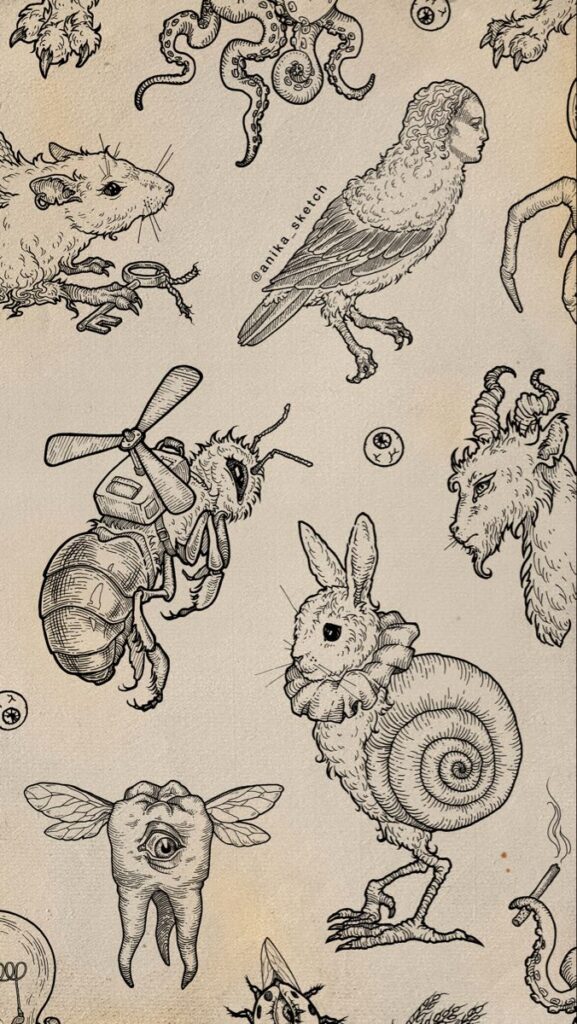
Forget the rules of biology and unleash your wildest imagination! Drawing fantastic beasts and whimsical creatures is one of the most liberating drawing exercises you can do. There’s no “wrong” way to draw a creature that doesn’t exist, making it perfect for beginners who want to escape the pressure of realism. This is your chance to combine elements from different animals, add magical features, and invent something truly unique.
How to Get Started:
- Start with a Base Animal: Think of an existing animal whose shape you like – maybe a cat, a bird, a fish, or an insect. Use its basic silhouette as your starting point.
- Mix and Match Features: Now, the fun begins! Give your cat creature dragon wings. Add extra eyes to your bird. Give your fish a mermaid’s tail. Combine the scales of a reptile with the fur of a mammal. The possibilities are endless.
- Add Magical Elements: Does your creature glow? Does it have horns made of crystal, or feathers that change color? Think about what makes it “fantastic” and add those magical touches.
- Consider Its Environment: Where does your creature live? A desert, an ocean, a magical forest? This can inspire its physical adaptations (e.g., gills for water, long legs for running).
- Give It Personality: Is your creature grumpy, playful, majestic, or mischievous? Its posture, facial expression (if it has one), and small details can convey its character.
Tips for Maximum Fun:
- Use Prompts: If you’re stuck, try a random generator. “Draw a creature that is half owl, half octopus, and lives in a cloud.” Or “Draw a furry creature with three eyes and a tail like a feather.”
- Sketch Freely: Don’t worry about making it perfect. Do quick, loose sketches to explore different ideas before settling on one design.
- Create a Backstory: Giving your creature a name and a simple story (what it eats, where it sleeps, what its powers are) can help you visualize and refine its design.
- Exaggerate! This is where you can really let go. Make the horns ridiculously long, the eyes impossibly huge, or the fur unbelievably fluffy.
- Color Adds Magic: Once you have your creature outlined, bring it to life with vibrant or mystical colors. Think iridescent scales, glowing eyes, or rainbow feathers.
Drawing fantastic beasts is a pure exercise in imagination. It reminds you that art is a powerful tool for creating worlds and characters entirely from your own mind, and that creativity knows no bounds.
9. Architectural Snapshots: Simple Buildings & Windows
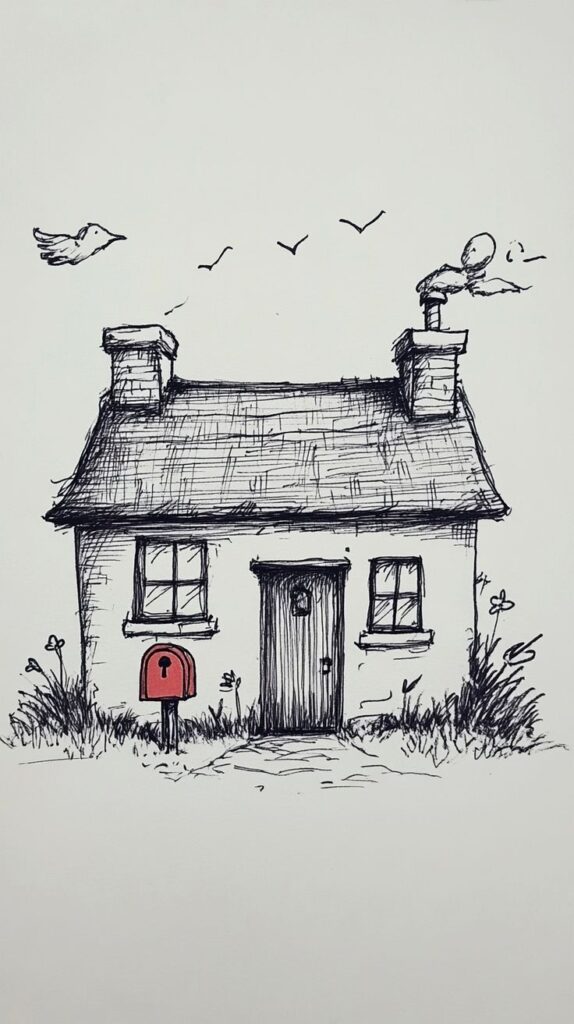
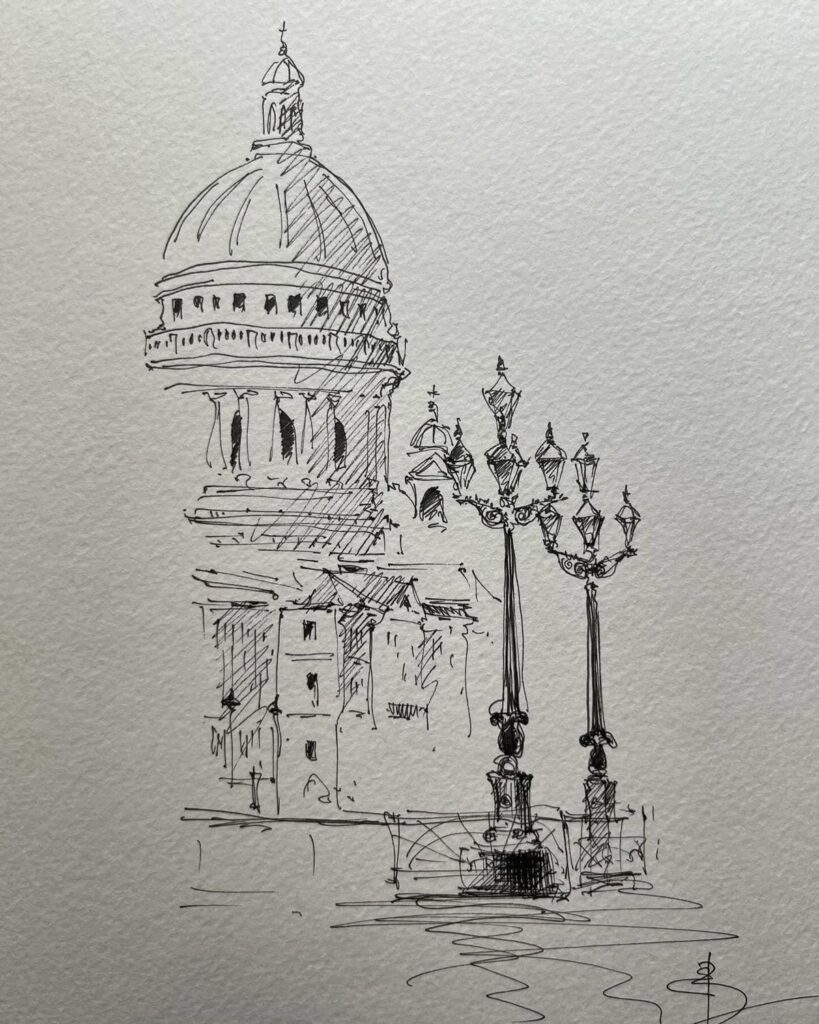
Ever admired the interesting lines of a building or the intricate details of a window? Drawing simple architectural elements is a fantastic way to practice perspective, straight lines, and geometric precision without needing complex engineering skills. You can start with basic shapes and gradually add details, making it a very satisfying progression for beginners.
How to Get Started:
- Start Small: A Single Window: Don’t try to draw a whole skyscraper first. Begin with a single window on a wall. Draw a simple square or rectangle, then add a frame around it. Notice how the window sill might protrude slightly.
- Basic House Shape: Next, try a simple house. Start with a square or rectangle for the main body, then add a triangle on top for the roof. Add a door (another rectangle) and a window. Keep it very basic.
- Introduce Basic Perspective: Even for simple buildings, understanding a little perspective helps. Imagine a horizon line. Lines that are parallel in real life will converge towards a “vanishing point” on that horizon line as they recede into the distance. For a simple front-on view, you mostly deal with straight vertical and horizontal lines. For a corner view, you’ll see two sides receding to two different vanishing points. Don’t overcomplicate this initially; just try to make receding lines look like they’re going “away” from you.
- Add Details Gradually: Once you have the basic structure, add details like brick patterns (simple rows of rectangles), roof tiles (overlapping lines), windowpanes, or even a small porch.
- Focus on Lines and Angles: Architectural drawing relies heavily on clear lines and accurate angles. Don’t be afraid to use a ruler for guiding lines if it helps you feel more confident – no one judges a beginner for using tools!
Tips for Maximum Fun:
- Draw from Observation: Look out your window or take a walk around your neighborhood. Find a simple house, a garden shed, or even a fence. Sketch what you see.
- Simplified Stylization: You don’t have to draw photo-realistic buildings. Try a more whimsical, storybook style where lines are a bit wobbly, or colors are exaggerated.
- Focus on a “Piece”: Instead of drawing an entire building, focus on an interesting corner, an ornate doorway, or a unique roofline.
- Play with Light and Shadow: Architecture often has strong shadows, especially on sunny days. Use simple shading to show which parts of the building are in light and which are in shadow, giving it depth.
- Imagine a Fantasy Structure: Once you’re comfortable with real buildings, design your own! A fantastical castle, a futuristic city apartment, or a cozy cottage in the woods. This combines structure with pure imagination.
Architectural drawing helps you understand how objects exist in space and teaches you precision, which are valuable skills that can be applied to many other drawing subjects.
10. Dreaming Up Cool Car Designs
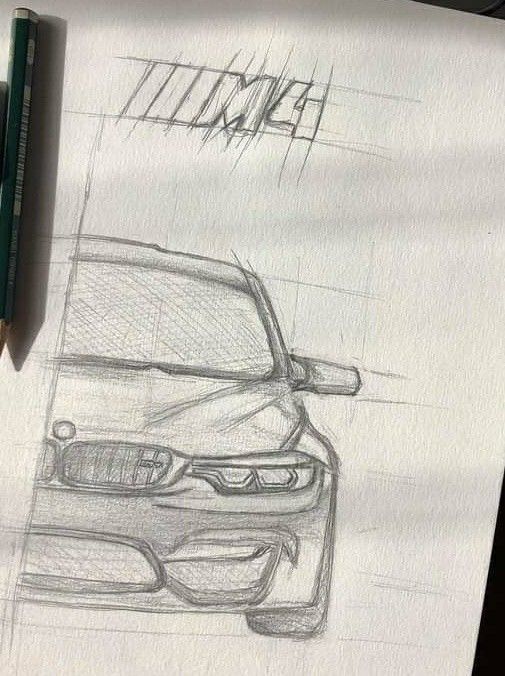
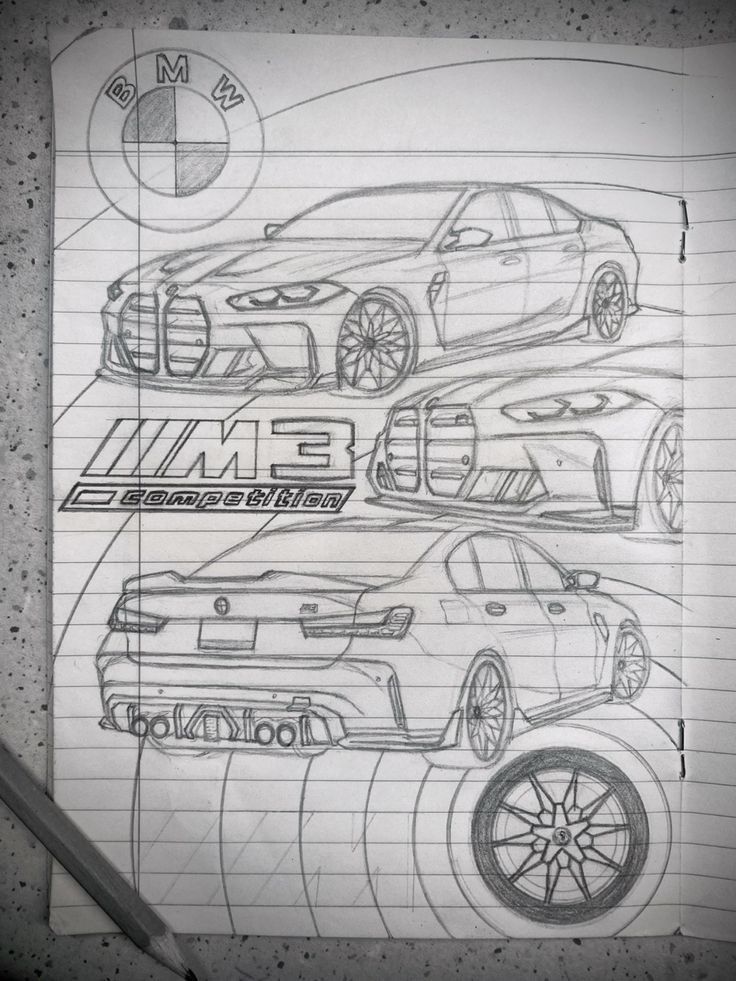
For those who appreciate sleek lines, dynamic curves, and the art of engineering, sketching car designs can be an incredibly engaging and rewarding drawing idea. You don’t need to be an automotive designer to enjoy putting pen to paper and imagining your own vehicles. This exercise combines technical thinking with creative flair, allowing you to explore form, function, and futuristic concepts.
How to Get Started:
- Start with a Basic Silhouette: Begin by lightly sketching the overall shape of the car. Think of it as a long, slightly curved box. Are you aiming for a sporty, low-slung look, or a more rugged, off-road design?
- Define the Wheels and Wheel Arches: These are fundamental. Draw four circles for the wheels (or just two if you’re doing a side profile). Then, sketch the wheel arches, making sure they comfortably fit around the wheels.
- Add the Cabin (Greenhouse): This is the part of the car where people sit. Sketch the windows, windshield, and roofline on top of your main body shape. This defines whether it’s a sleek coupe or a more spacious SUV.
- Integrate Key Features: Once the basic form is there, start adding headlights, taillights, grilles, and door lines. These details define the car’s “face” and overall character.
- Consider Aerodynamics and Flow: Even if you’re not an engineer, try to make your lines flow. Imagine how air would move over the car’s surface. Smooth curves and subtle angles can make your design look more professional and dynamic.
Tips for Maximum Fun:
- Use Reference Photos: Look at pictures of existing cars you like. Notice their proportions, how the light hits their surfaces, and the specific design elements that appeal to you. You can even find inspiration in car design drawing concepts to see how professionals approach this art form.
- Experiment with Different Angles: Try drawing a car from a side profile first, then move to a three-quarter front view or a rear view. Each angle presents a new challenge and helps you understand the car’s three-dimensional form.
- Focus on One Feature: Spend an entire drawing session just on headlights, or just on wheel designs. Mastering individual components can make the whole vehicle easier to tackle.
- Imagine a Future Car: Don’t limit yourself to current technology. What will cars look like in 50 years? What new features will they have? This is where your imagination can truly soar.
- Add Subtle Shading: Use light and shadow to give your car a metallic, reflective quality. Pay attention to how the light would bounce off the curved surfaces. This really brings the design to life.
Designing cars on paper is a fantastic way to blend artistic expression with a touch of industrial design. It’s a great exercise for precision, perspective, and understanding how different elements come together to create a cohesive and functional object.
Ready to Pick Up That Pen?
There you have it – 10 super fun and easy drawing ideas to kickstart your artistic journey. From the meditative patterns of geometric doodles to the whimsical expressions of cartoon characters, and the observational challenges of everyday objects or car designs, there’s a whole world of creative exploration waiting for you.
The most important takeaway isn’t to create a masterpiece on your first try, or even your tenth. It’s about the process: the joy of making marks on paper, the satisfaction of seeing something appear from your imagination, and the quiet calm that drawing can bring. It’s a fantastic way to de-stress, boost your problem-solving skills, and connect with your inner self.
So, ditch the excuses and the self-doubt. Grab a simple pen, a plain piece of paper, and pick an idea that sparks your interest. The blank page isn’t intimidating; it’s an invitation. Your inner artist is just waiting for you to give it a chance. What are you waiting for? Start drawing today!
- 5.7Kshares
- Facebook0
- Pinterest5.7K
- Twitter0
- Reddit0

