Bird drawing is an art form enjoyed by many, from beginners to professional artists. It involves capturing the unique characteristics of birds, such as their shapes, feathers, and behaviors, through various drawing techniques. This practice not only enhances artistic skills but also fosters a deeper appreciation for wildlife.
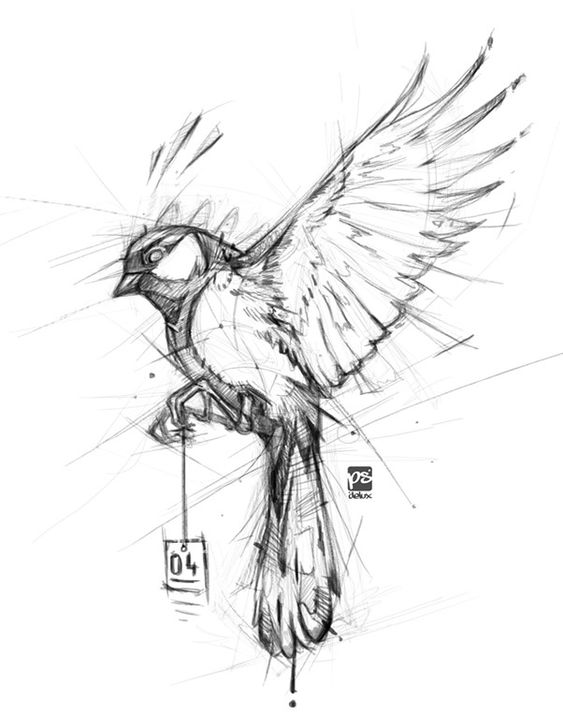
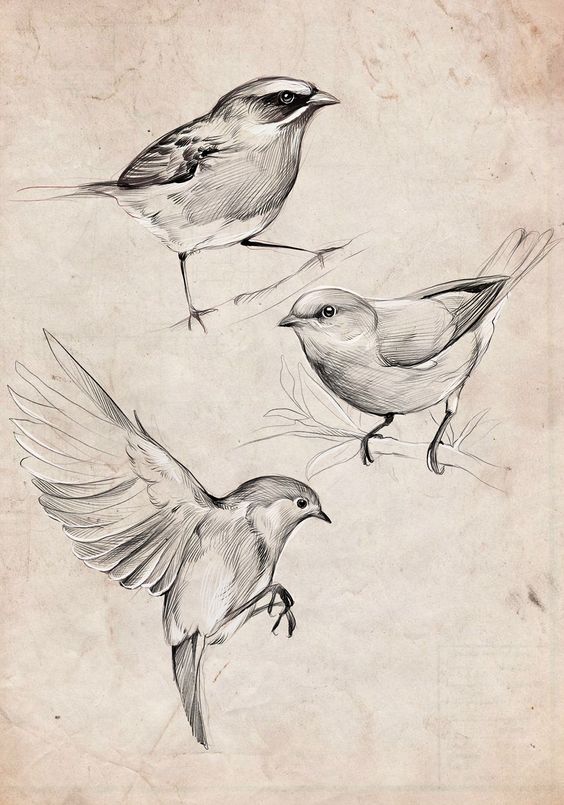
Artists can explore different styles in bird drawing, ranging from realistic to abstract interpretations. Many find joy in portraying the vibrant colors and intricate details that make each species unique. Techniques like sketching, watercolor, or digital rendering offer diverse ways to express individual creativity while showcasing the beauty of birds.
Engaging in bird drawing can also serve as a therapeutic activity, providing a means of relaxation and mindfulness. Those interested in starting will benefit from consistent practice, observation, and a willingness to learn about avian anatomy and behavior. This creative pursuit invites enthusiasts to connect with nature in a meaningful way.
Understanding Bird Anatomy

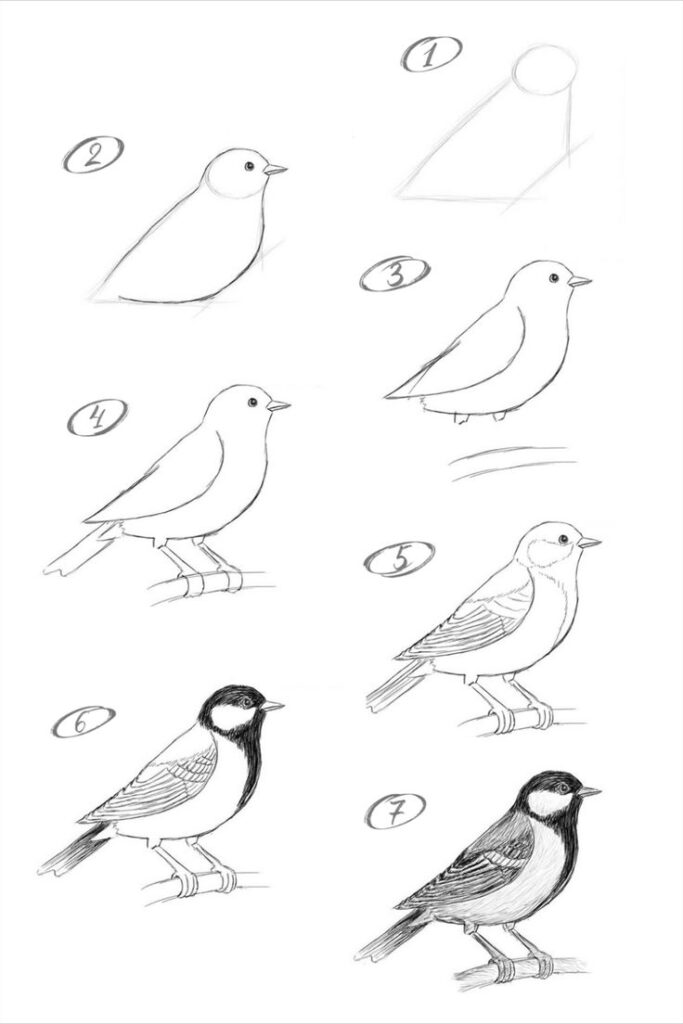
Bird anatomy is essential for artists aiming to accurately depict these creatures. Focusing on the structural aspects of wings, feathers, eyes, and tails provides a deeper comprehension for drawing and appreciating birds.
Wing Structure


Bird wings are complex structures designed for flight. They consist of three primary parts: the humerus, radius, and ulna. The wing’s shape varies among species; for example, sparrows have shorter, broader wings compared to the long, narrow wings of swallows.
Birds have a unique arrangement of feathers, including remiges (flight feathers) and coverts. The primary feathers are essential for thrust and lift during flight. Wing proportions affect a bird’s flying style, influencing how it maneuvers in various environments. Understanding these elements aids in creating accurate wing representations in drawings.
Feather Types and Patterns
Feathers serve multiple purposes such as insulation, waterproofing, and display. They come in several types, including contour, down, flight, and tail feathers.
Contour feathers provide a bird’s shape and streamline its body. Down feathers offer insulation, particularly in colder climates. Flight feathers are longer and attach to the wings and tail, crucial for aerodynamics.
Feather patterns contribute to a bird’s identity and can aid in species differentiation. Artists should observe these patterns, which may include mottling, stripes, or solid colors, to enhance their illustrations.
Bird Eyes and Vision
Birds have highly developed eyes adapted for their lifestyles. Most bird species possess excellent color vision, allowing them to see a broader spectrum than humans. This ability helps them find food and identify mates.
The placement of a bird’s eyes affects its field of view. Predatory birds, such as hawks, have forward-facing eyes for depth perception, while prey species, like pigeons, have eyes positioned on the sides of their heads, maximizing their peripheral vision.
Understanding these ocular traits is crucial for accurately depicting a bird’s expression and behavior in drawings.
Tail Diversity and Function
Bird tails serve essential functions, including balance, steering, and communication. Tail feathers, known as retrices, come in various shapes and sizes depending on the bird’s flying style.
For instance, the elongated tails of swallows assist in agile movements, while the short tails of pigeons help with quick take-offs. Some species utilize tail displays to signal aggression or attract mates.
The tail’s structure contributes significantly to flight dynamics. Artists should pay close attention to tail shape and function to accurately represent a bird’s posture and movement in their artwork.
Materials and Tools
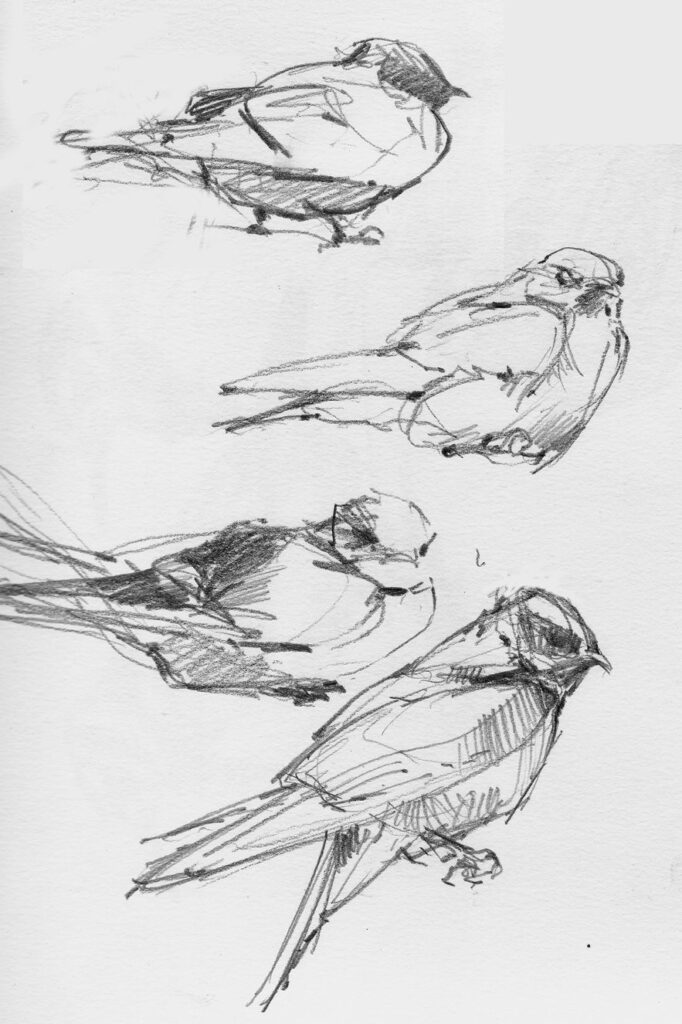
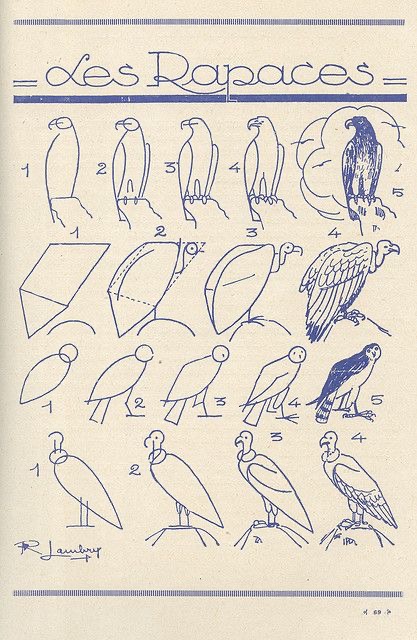
When creating bird drawings, selecting suitable materials and tools significantly impacts the quality of the artwork. The choice of paper, drawing utensils, and coloring mediums can enhance techniques and bring the subject to life.
Selecting the Right Paper
Choosing the right paper is crucial for bird drawing. Different weights and textures provide unique effects. For detailed work, a smooth surface like bristol board is ideal. This type allows for fine lines and precise details.
For those using colored pencils, a heavier weight paper (around 200gsm) enhances the vibrancy of colors. Alternatively, watercolor paper is perfect for mixed media projects, providing resilience against moisture.
Consider the texture as well. A rough texture can add depth, while smooth paper enables detailed pencil work. Always test materials to find the best fit for individual styles.
Choosing Drawing Utensils
The choice of drawing utensils also plays a vital role. Graphite pencils offer varying degrees of hardness, impacting line quality. Softer pencils (like 2B or 4B) create rich, dark lines, suitable for shading, while harder pencils (like H or 2H) provide finer details.
Ink pens can add contrast and definition to drawings. Fine liners are excellent for detailed outlines, while brush pens offer versatility in line width.
Erasers, both regular and kneaded, are essential for corrections and refining details. Always consider the drawing style when selecting utensils, as different techniques may require specific tools for the best results.
Utilizing Coloring Mediums
Coloring mediums enhance bird drawings and add vibrancy. Colored pencils are a popular choice due to their blendability and precision. Artists often layer colors to create a realistic appearance, utilizing lighter shades first for a base.
Watercolor is another effective medium, particularly for capturing the fluidity of feathers. It allows for soft gradients and spontaneous blending. Using water-soluble colored pencils can combine the benefits of both mediums.
Markers also offer bold colors and sharp edges, making them great for outlines and highlights. Each medium requires different techniques, so experimentation is key to mastering the impact of color in artwork.
Basic Drawing Techniques
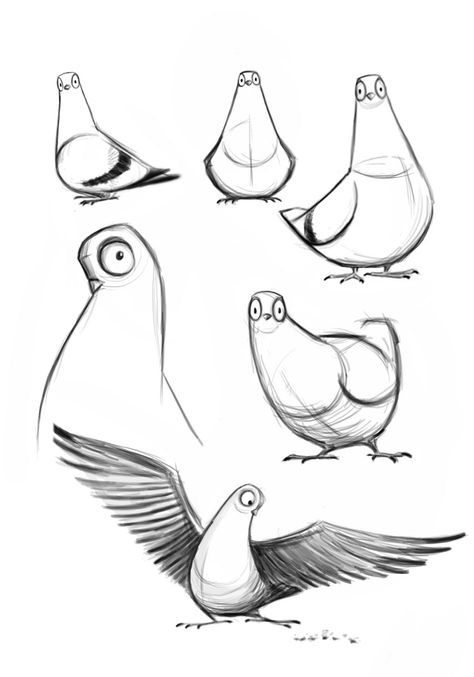

Understanding the foundational techniques in bird drawing is essential for developing realistic and expressive artwork. These techniques include establishing basic shapes, incorporating shading, and creating depth.
Sketching Foundation Shapes
Successful bird drawings begin with basic shapes. These shapes serve as the framework, offering structure to the final piece.
Starting with circles and ovals helps outline the body and head. For the wings and tail, curved lines and teardrop shapes are effective.
The artist should create light, loose sketches to allow adjustments.
This stage focuses on proportion and placement. Observing real birds can provide insights into the correct dimensions and angles. Gradually adding complexity will yield a more accurate representation.
Shading and Adding Texture


Shading plays a critical role in bringing bird drawings to life. It adds depth and dimensionality while enhancing the overall realism.
Artists can use various techniques, such as hatching, cross-hatching, and blending, to create different textures. Layers of pencil shading build up richness in the feathers.
Focusing on light and shadow helps define the contour of the bird. The direction of light will inform where to apply darker and lighter areas.
Utilizing different pencil grades can also enhance texture. Softer pencils create darker tones, while harder ones maintain fine details.
Creating Depth and Dimension
Creating depth and dimension involves several artistic strategies.
One effective method is overlapping shapes. This technique suggests foreground and background relationships.
Utilizing perspective can also enhance realness. For instance, drawing smaller elements in the distance contributes to a three-dimensional effect.
Incorporating varied line weights adds to the depth. Thicker lines can emphasize the bird’s outline, while thinner lines can express finer details.
Including backgrounds, like branches or skies, provides context and enhances the overall composition. These elements enrich the visual storytelling in bird drawings.
Drawing Birds Step-by-Step
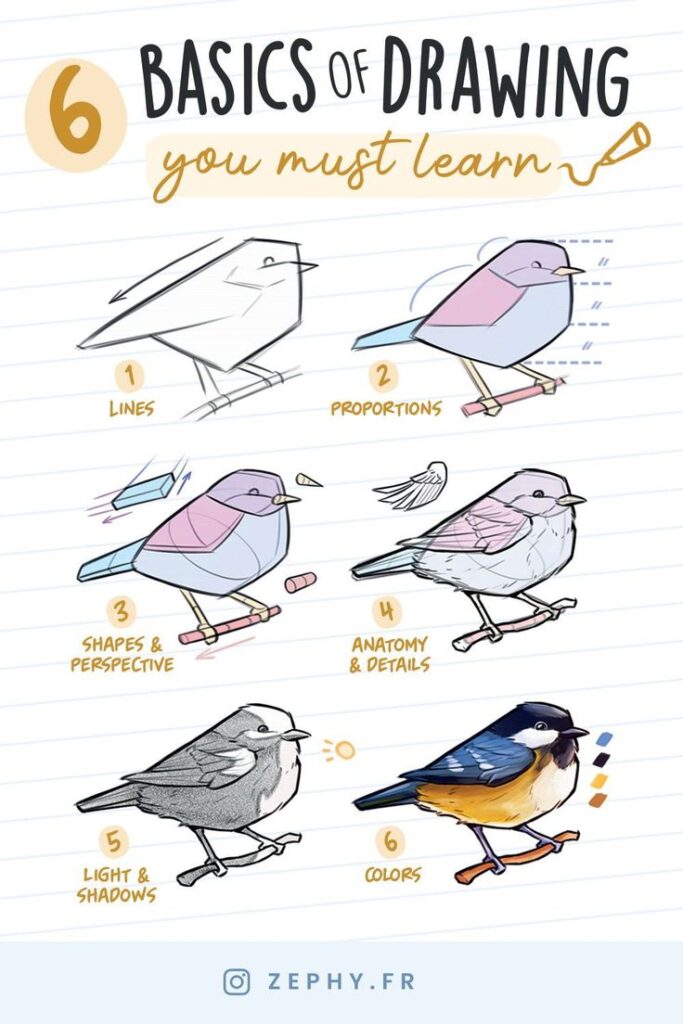

This section provides a clear approach to drawing birds by focusing on guidelines, adding details, and capturing their unique movements. Each step is essential to develop a realistic representation of these creatures.
Guidelines and Proportions
Accurate proportions form the foundation of bird drawing. Start with basic shapes to outline the bird’s form. A simple oval for the body and a circle for the head can be effective.
Next, identify the sizes of key features:
- Beak: The beak should be proportionate to the head. A small bird may have a beak that is 1/4 of the head size, while larger birds may have a longer beak.
- Legs: Birds typically possess thin legs. Measure their length to ensure they match the body size.
Use angles to represent the bird’s stance or posture. Any tilt can help depict how they may be perched or in flight.
Adding Details and Refinements
Details bring birds to life. Once the basic shapes are sketched, refine the features. Start with the beak, ensuring it has the correct shape. For instance, a hawk’s beak is hooked while a sparrow’s is shorter and more straight.
Focus on the legs as well. Add joints and claws, emphasizing their unique structure. To depict feathers, use light, quick strokes to mimic texture.
Consider incorporating shading. Shadows can indicate light direction and lend depth to the drawing. Pay attention to areas under the wings and the belly for a more dimensional look.
Capturing Posture and Movement
Birds exhibit a range of postures, from perching to in-flight. Observe reference images to grasp how the body curves in these positions.
To illustrate movement, emphasize angles in the wings and tail. For example, when a bird flaps its wings, they are angled upwards and outwards. Capturing these angles accurately will enhance the sense of action.
Experiment with different poses. A bird landing may exhibit a distinct posture compared to one in a resting position. Use dynamic lines to convey movement, focusing on how the bird shifts its weight and where its legs and wings are positioned.
Advanced Drawing Techniques

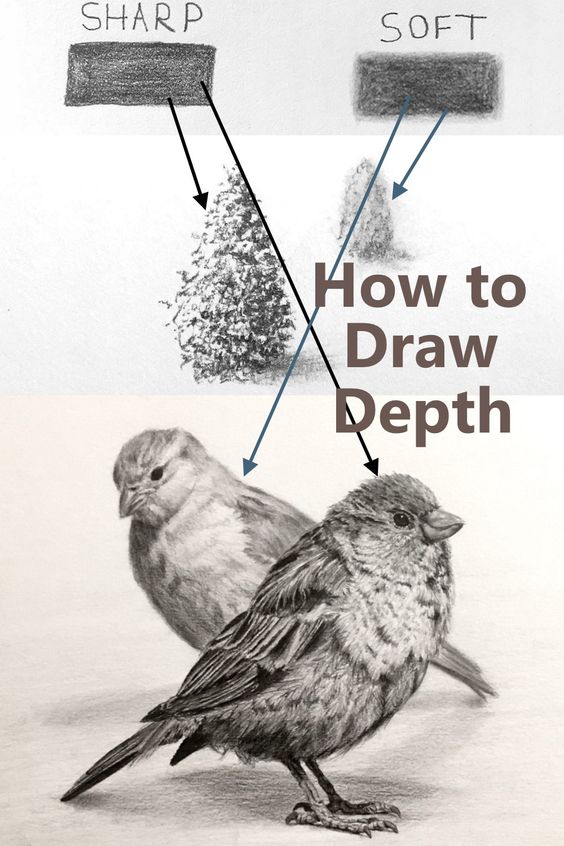
In bird drawing, advanced techniques significantly enhance the artist’s ability to capture realistic forms and movement. Key skills include depicting birds in flight, mastering textures and layering, and effectively using lighting to create depth. These elements contribute to a more dynamic and engaging representation.
Drawing Birds in Flight
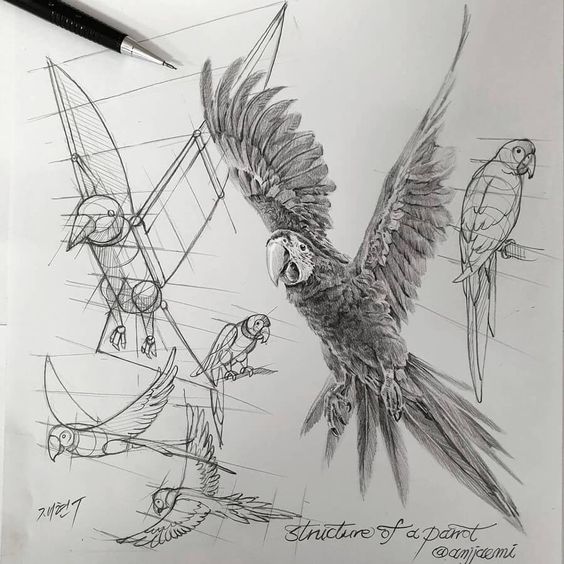
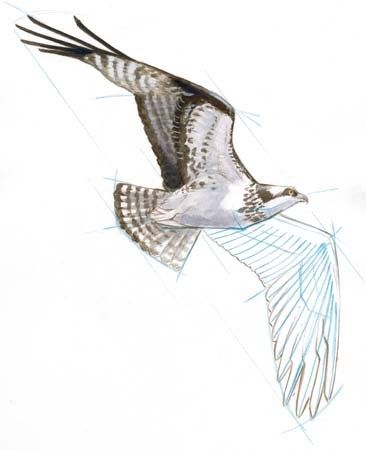
Capturing birds in flight involves understanding their anatomy and movement. Observing reference images helps artists to grasp the angles and positions of wings and bodies during various flight patterns.
Key Points:
- Wing Position: Identify the wing’s spread and angle, which varies based on the bird species and flight dynamics.
- Body Posture: The bird’s torso often shifts to balance against the wing motions. Pay attention to these details for greater realism.
Using outlines to sketch the basic shape first allows for adjustments. Artists should focus on fluid strokes to convey motion, emphasizing the curve of the wings as they rise and fall.
Mastering Layering and Feather Details
Layering techniques are crucial for adding depth to bird drawings. Artists should begin with a light base sketch. Gradually build layers for the feather textures and nuances.
Process:
- Base Layer: Start with a mid-tone for the body and wings.
- Feathering: Use short, directional strokes that mimic feather patterns. Consider the direction of feathers—this varies by species.
Adding contrast through darker shades at the feather edges enhances realism. Reference images are invaluable here, allowing artists to observe how light plays on different textures and colors in birds’ feathers.
Incorporating Lighting Effects
Effective use of lighting can dramatically alter the perception of a drawing. Shadows and highlights create a three-dimensional effect that brings birds to life.
Techniques:
- Light Source: Determine where the light is coming from. This influences shadow placement and intensity.
- Shadow Placement: Use softer shades beneath the body and wings. The intensity varies based on the angle and proximity of the light source.
Highlights on the feathers can be achieved with lighter colors or erasing techniques to create a shine effect. This adds depth and interest, making the bird appear more dynamic.
Using Reference Materials
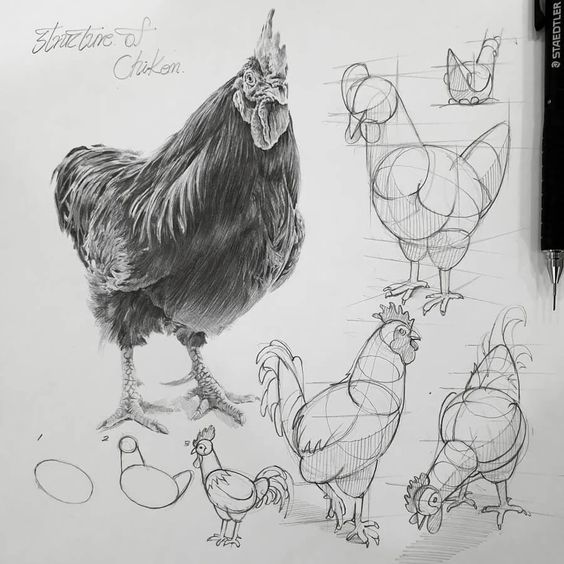
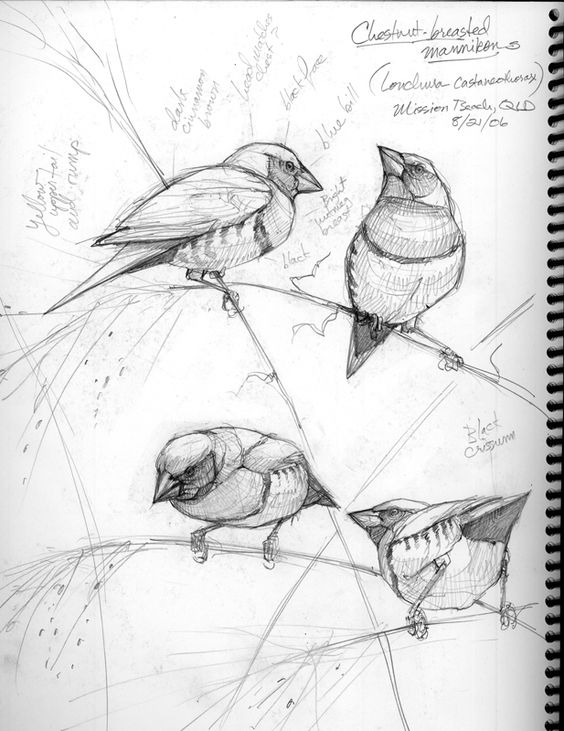
Utilizing reference materials enhances the accuracy and detail in bird drawings. Photographs and anatomy guides provide essential insights into the form, color, and posture of various bird species.
Working with Photographs
Photographs serve as vital tools for artists. They capture details that can often be missed during live observation. Artists can use high-quality images to study specific features such as plumage texture, color gradients, and beak shape.
When selecting reference images, consider lighting and angle. Pictures taken in natural light reveal true colors and shadows. It’s beneficial to have multiple angles of the same bird to understand its dimensions and postures.
Creating a mood board can be helpful. Compile various images showing different poses, environments, and expressions. This collection can inspire variation when composing original work.
Anatomy Guides and Books
Anatomy guides provide insight into the structural elements of birds. These resources often break down features into understandable components, illustrating bone structure, muscle placement, and feather arrangement.
Books focused on bird anatomy often include diagrams and explanations. This information aids in accurately depicting the bird’s body proportions and movements.
Additionally, many resources offer comparative studies of different species. This can inform the artist about specific traits unique to each type of bird. Understanding these elements leads to more realistic and anatomically correct drawings.
Drawing Projects and Practice
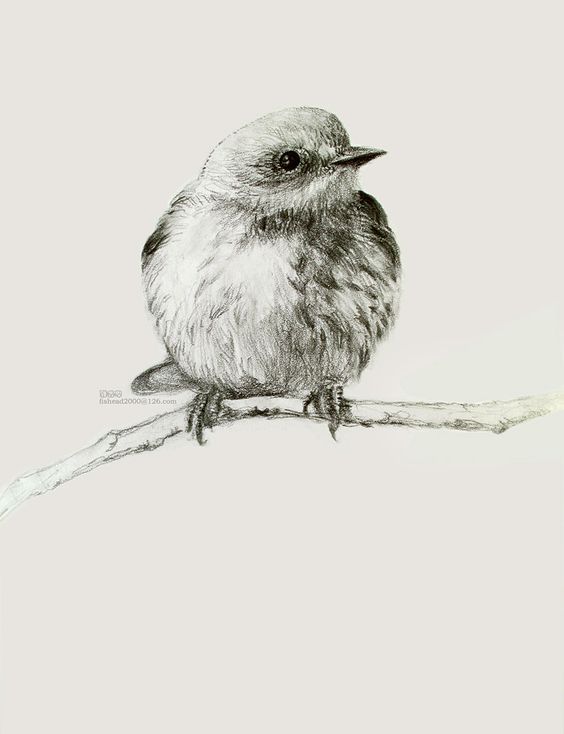
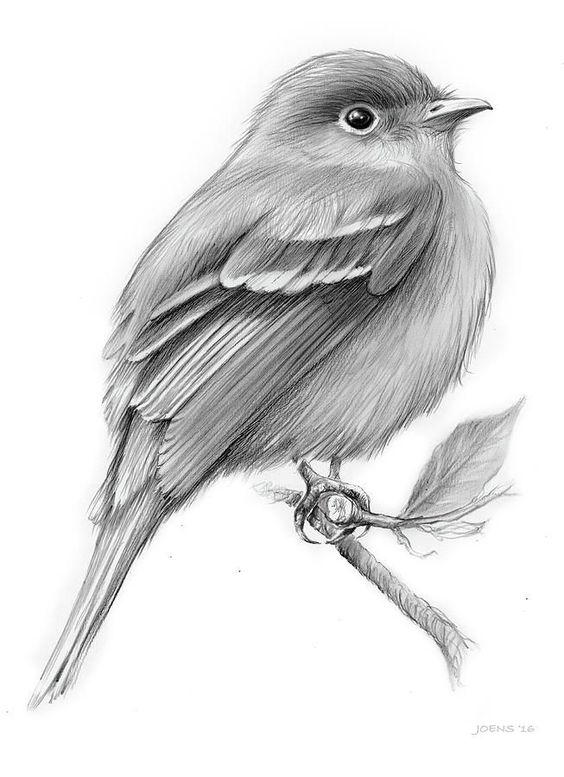
Engaging in structured drawing projects and exercises can significantly enhance one’s skills in bird drawing. Consistent practice builds both confidence and proficiency. Below are specific exercises and project ideas aimed at improving drawing techniques for avian subjects.
Weekly Drawing Exercises
Setting aside time each week for focused drawing exercises can lead to substantial improvement. An effective approach involves selecting a different bird species each week. This encourages exploring various shapes, sizes, and feather patterns.
- Contour Drawing: Focus on the outline of the bird without lifting the pencil.
- Gesture Drawing: Capture the essence and movement of the bird quickly.
- Value Studies: Experiment with shading to represent light and shadow on feathers.
Such exercises can vary in duration from 15 minutes to an hour, helping artists to refine their observational skills while becoming more familiar with avian characteristics.
Project Ideas for Skill Development
Creating specific projects can motivate artists to apply new techniques and engage deeply with bird drawing. Here are several ideas:
- Bird ID Chart: Create a chart featuring different bird species, incorporating detailed drawings and notes about each bird’s habitat and characteristics.
- Bird Movement Series: Illustrate a sequence of a bird in motion, such as taking off, flying, and landing.
- Themed Sketchbook: Dedicate a sketchbook to different species, drawing one bird per page along with written observations.
These projects serve to deepen an artist’s understanding of anatomy and capture likeness, while mixing elements of research and creativity.
- 5.0Kshares
- Facebook0
- Pinterest5.0K
- Twitter3
- Reddit0
