Ever stared at a photo of a perfect water splash, frozen in time, and wondered how artists capture that ephemeral beauty? It’s mesmerizing, right? From the delicate ripple of a single droplet to the explosive chaos of a cannonball dive, drawing water splashes can seem like magic.
But here’s a secret: it’s totally doable, and genuinely fun! If you’ve been itching to add dynamic, liquid elements to your art, you’re in the right place. This guide is your friendly deep dive into how to draw a splash water, breaking down the complex into simple, manageable steps. Forget intimidation; we’re going to unravel the mysteries of drawing liquid motion, making it accessible for everyone, whether you’re a seasoned artist or just sketching your first lines. Get ready to make a splash on your canvas!

Understanding Water Dynamics: The Secret Sauce
Before we even pick up a pencil, let’s talk about water itself. It’s not just a blue blob; it’s a living, breathing, constantly moving entity. Understanding its basic physics is your superpower for drawing believable splashes. Think of it like this: you wouldn’t try to draw a tree without understanding its branches, right? The same goes for water.
Water behaves in predictable ways, even in its most chaotic moments. Gravity is always pulling it down, but surface tension holds it together, creating those beautiful, rounded droplet forms. When something hits water, it displaces it, sending ripples, crowns, and droplets flying. The size, speed, and shape of the impacting object, along with the volume of water, all dictate the type of splash you get.
Consider the difference between a single raindrop hitting a puddle and a whale breaching the ocean surface. Both are splashes, but vastly different in scale, energy, and visual complexity. Observing these nuances in real life – or even in slow-motion videos – will give you an intuitive feel for how water dances. It’s about more than just lines; it’s about capturing energy, force, and fleeting moments. Pay attention to how light interacts with water too; it’s reflective, refractive, and translucent all at once, which adds layers of complexity and beauty to your drawing.
Gearing Up: Your Essential Splash-Drawing Toolkit
You don’t need a fancy art studio or expensive equipment to start drawing amazing water splashes. In fact, some of the best learning happens with the simplest tools. Here’s what you’ll want to have on hand:
Basic Supplies:
- Pencils: A good range of graphite pencils (like a 2H for light guidelines, an HB for general sketching, and a 2B or 4B for darker shadows and details) is perfect.
- Paper: Any good quality drawing paper will do. A slightly toothy paper can help capture textures, but smooth paper works well for crisp lines.
- Eraser: A kneaded eraser is fantastic for lifting graphite subtly without smudging, and a precise stick eraser can clean up small areas.
- Reference Images: This is crucial! Find photos or videos of water splashes. Pinterest, Flickr, or even just a quick Google Image search will provide endless inspiration. The more you observe, the better you’ll understand what you’re trying to replicate.
Optional (But Fun!) Additions:
- Fineliners or Ink Pens: For giving your splashes clean, sharp edges and adding crisp details.
- Markers or Colored Pencils: If you want to add a touch of color to your water, these can be great for layering blues, greens, and even hints of white for foam.
- Digital Tablet & Software: If you’re into digital art, a tablet (like Wacom or iPad Pro) and software (Procreate, Photoshop, Clip Studio Paint) open up a world of possibilities for brushes, layers, and effects.
- A Camera/Smartphone: Take your own reference photos! Drop an ice cube into water, splash your hand in a sink – observing these real-time moments can be incredibly insightful.
No matter your chosen medium, the core principles of drawing a splash remain the same. The tools just change how you apply those principles. Remember, the goal is to capture movement and light, not just replicate an exact photo.
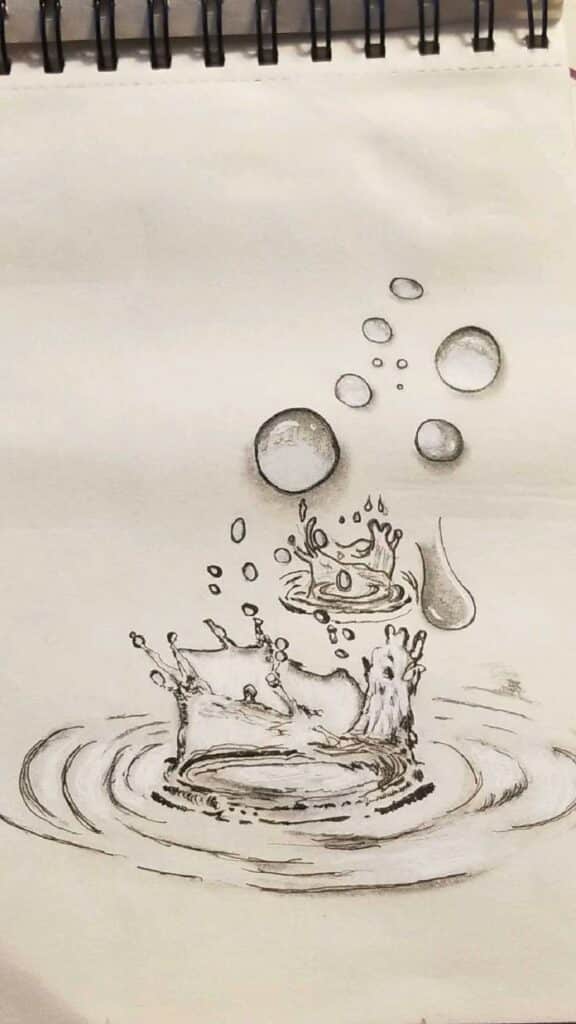

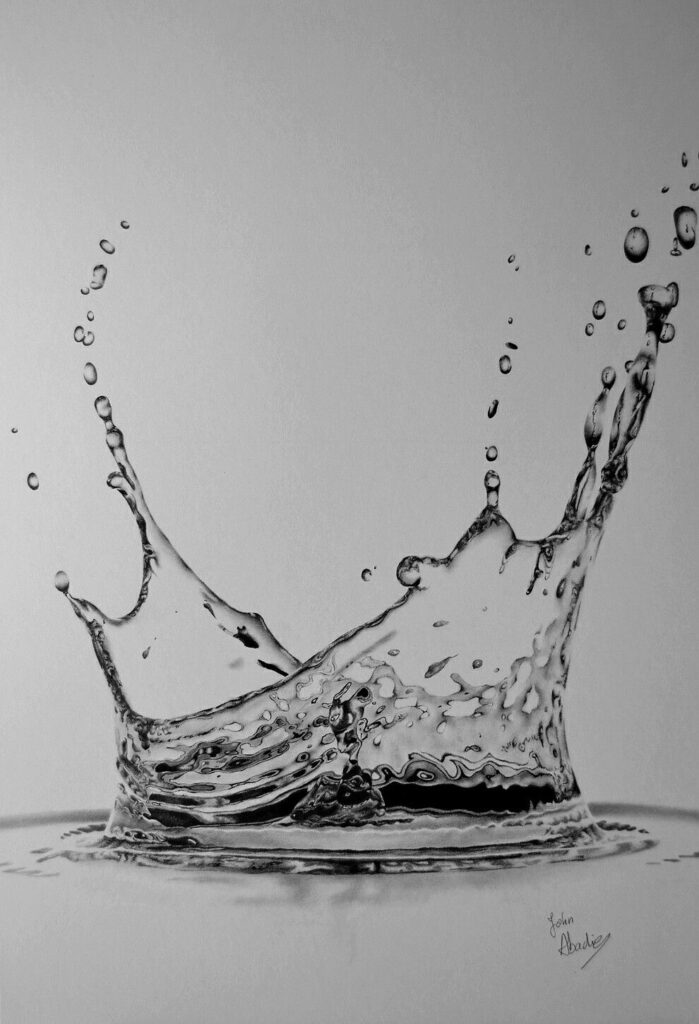
Basic Splash Anatomy: Building Blocks of Liquid Chaos
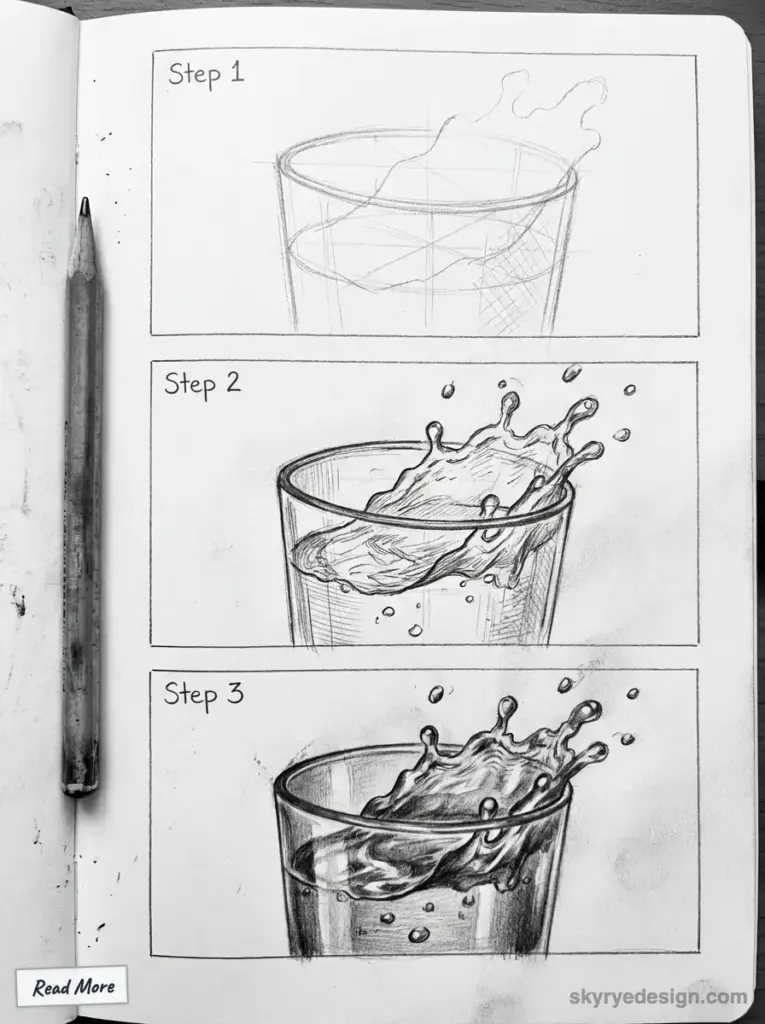
Think of drawing a splash like constructing something. You start with the big shapes, then refine the details. Don’t try to draw every single droplet right away! That’s a recipe for frustration. Instead, break it down into fundamental components:
1. The Impact Point:
This is where the object (or another drop of water) hits the surface. It’s often the focal point of your splash. It might be a small ripple, a deep crater, or a turbulent vortex. This area usually has the most concentrated energy.
2. The Crown or Fringe:
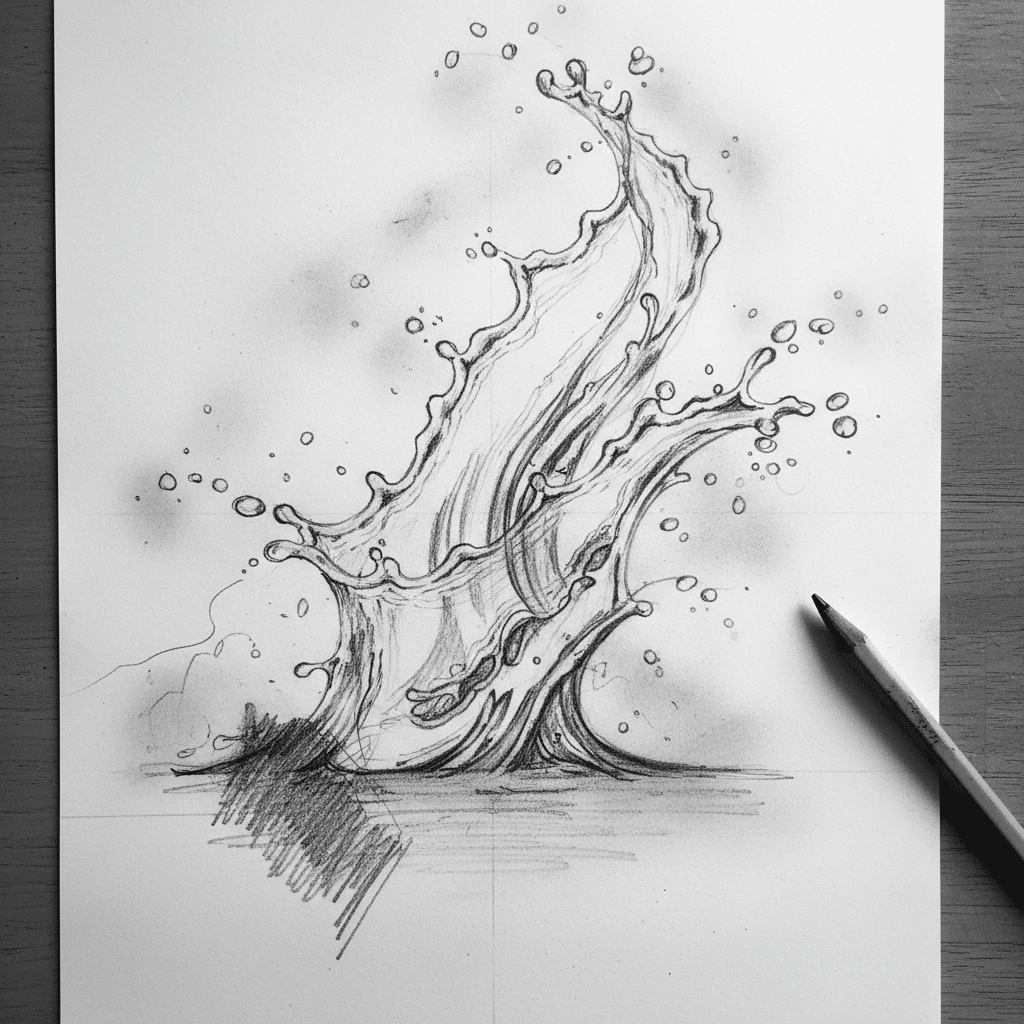
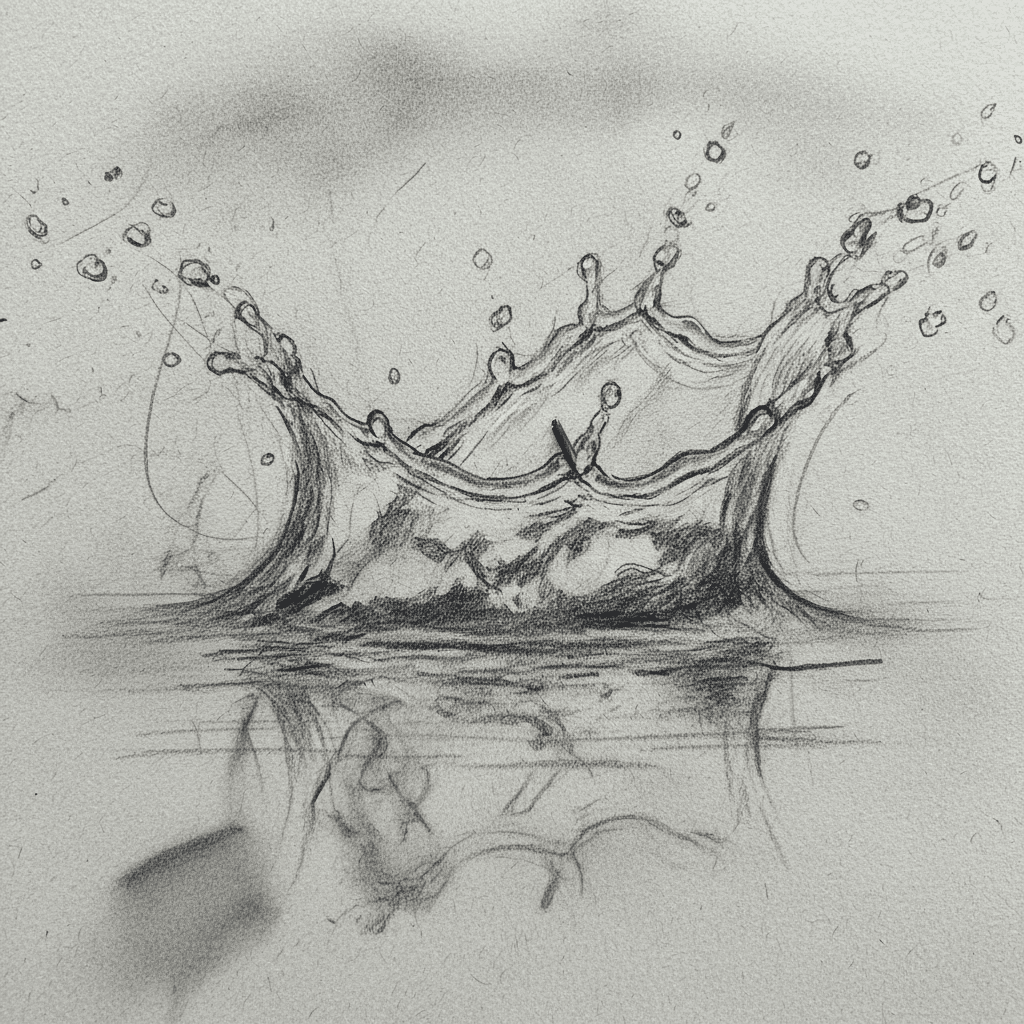
As water is displaced, it forms a temporary wall or ‘crown’ around the impact point. This is one of the most iconic features of a splash. It rises upwards, often with a slightly irregular, delicate edge, before collapsing.
3. Droplets and Secondary Splashes:
From the crown, or directly from the impact, countless tiny droplets break free, flying into the air. These vary in size, shape, and trajectory. Sometimes, larger droplets will form their own tiny secondary splashes when they hit the surface again.
4. Ripples and Waves:
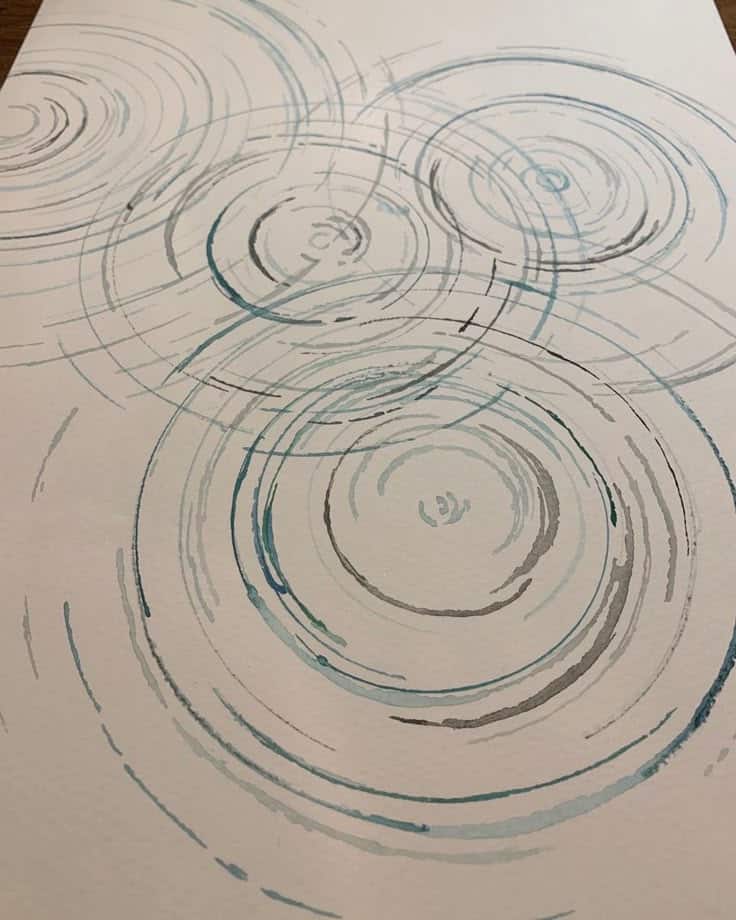
Even as the main splash dissipates, the energy spreads outwards in concentric ripples or larger waves, depending on the scale and force. These add a sense of aftermath and continuation to your drawing.
5. Foam and Bubbles:
Especially in larger, more energetic splashes, you’ll see aerated water – white foam and tiny bubbles – which adds texture and opacity.
When you start, visualize these components as simple geometric shapes: a circle for the impact, a curved line for the crown, small ovals or dots for droplets. You’re essentially building a skeletal structure for your splash before adding the watery flesh. This approach makes the process much less daunting and helps you maintain control over the overall form and flow.
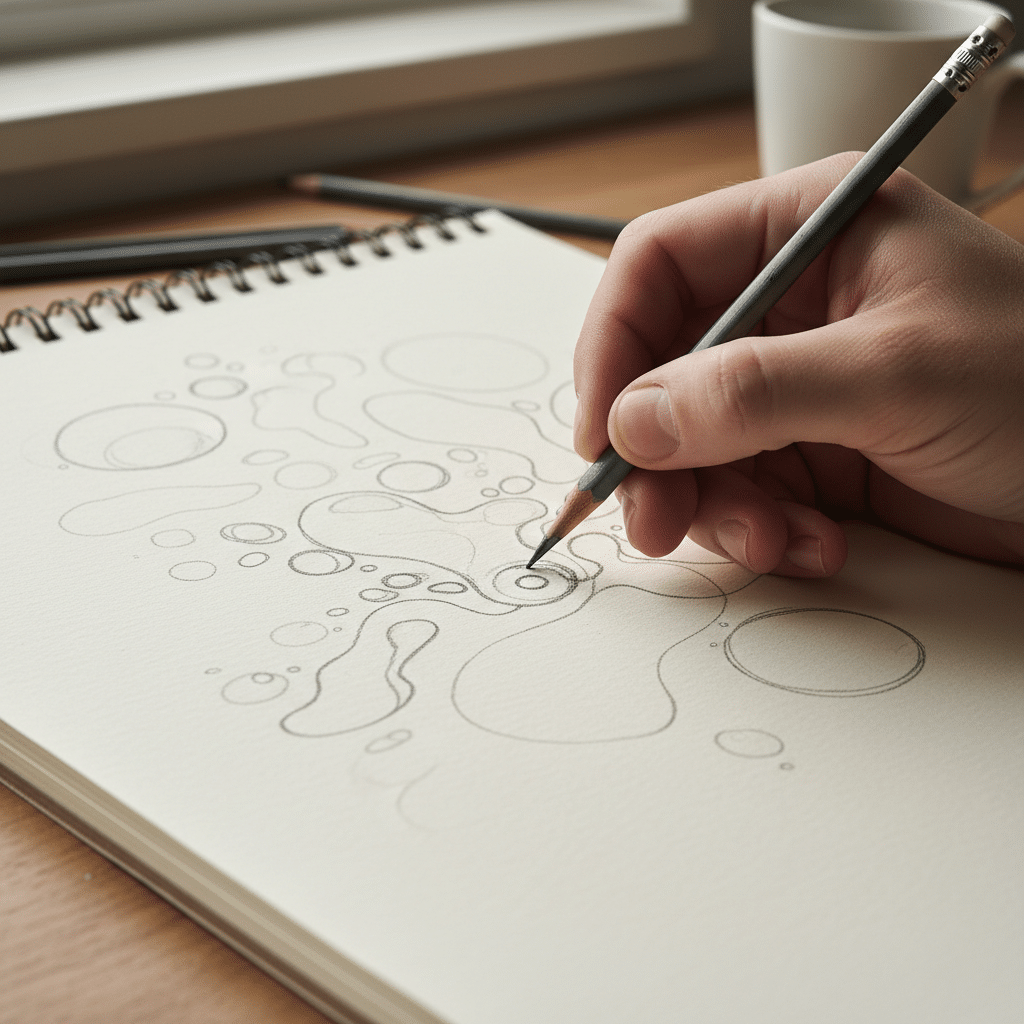
Step-by-Step: Drawing a Simple Water Drop Splash
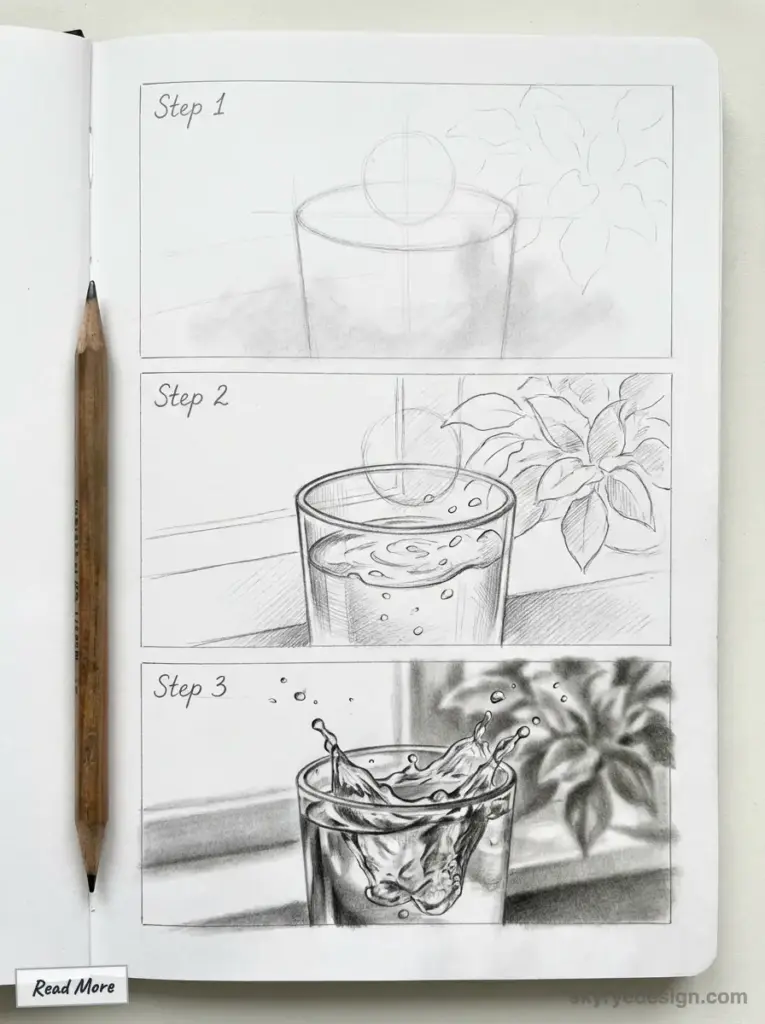
Let’s put those anatomical lessons into practice with a common scenario: a single drop hitting a calm water surface. This is an excellent starting point because it contains all the key elements in a manageable form.
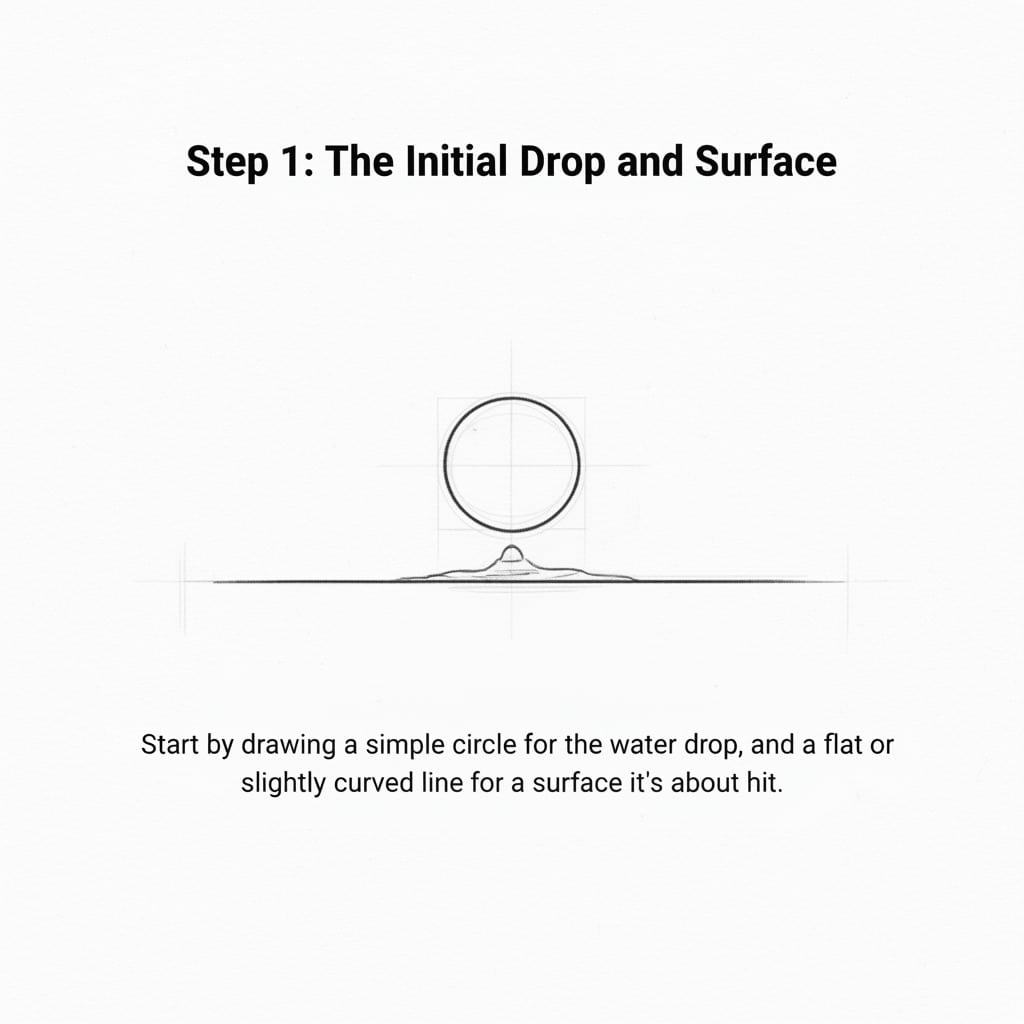
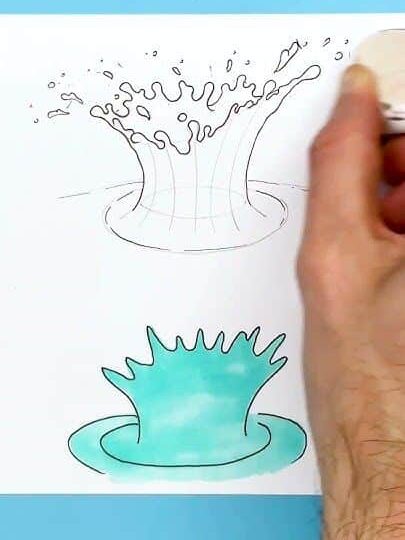
Step 1: Establish the Surface and Impact Point
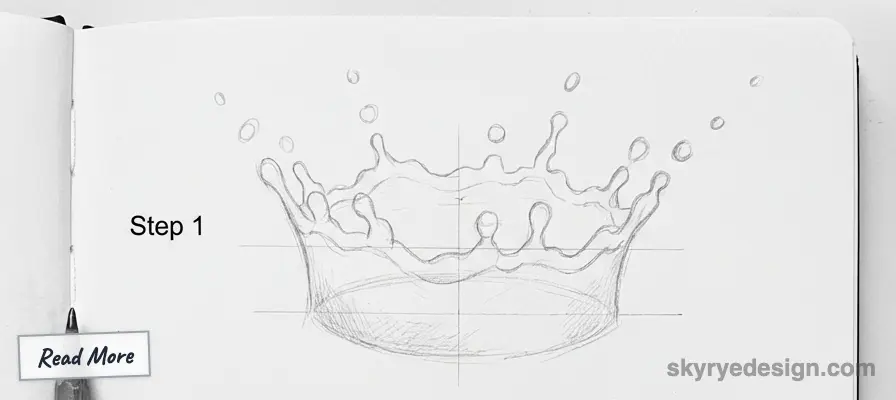
Start with a light horizontal line to represent your water’s surface. Then, very lightly, draw a small circle or oval where your water drop will hit. This is your initial impact point.
Step 2: Outline the Crown
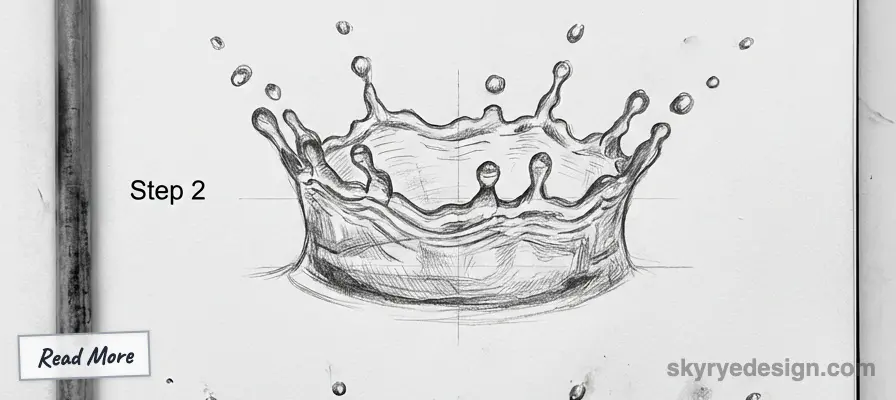
Around your impact point, draw a curved, cup-like shape that rises upwards. This is the beginning of your splash crown. Don’t make it perfectly symmetrical; water is organic. Think of it as a loose, slightly jagged wall of water. This is similar to thinking about how you draw clothing that flows and moves – it’s all about natural, dynamic lines.
Step 3: Add the Droplets
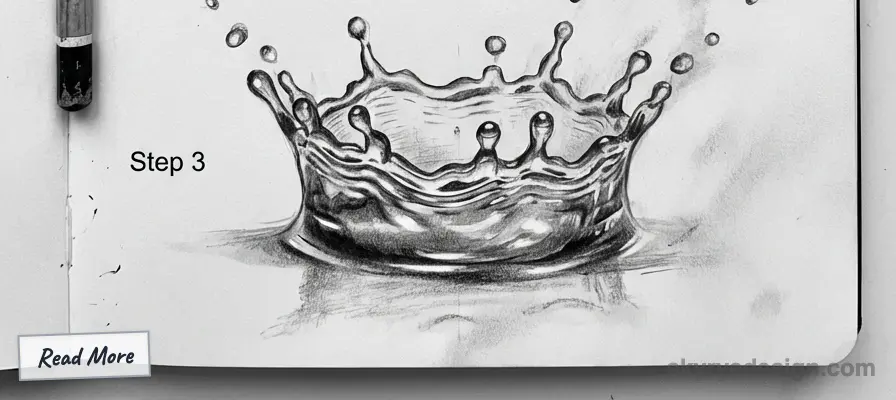
From the top edges of your crown, draw small, irregular droplet shapes flying upwards and outwards. Vary their sizes – some tiny dots, some slightly larger teardrops. Remember, gravity is at play, so many will arc outwards and begin to fall back down. Add a larger, central ‘spike’ or column of water rising from the very center of the impact if it’s a more forceful splash.
Introduce Shading and Highlights
This is where your splash truly comes alive.
- Shadows: Add shading to the underside of the crown and droplets, where they would naturally be in shadow. This gives them volume. The inside of the crown might also have darker areas.
- Highlights: Use your eraser to create bright white areas on the most prominent surfaces where light would catch the water – the tops of droplets, the very edges of the crown. These highlights are crucial for conveying water’s reflective quality.
- Transparency: Use lighter shading for the parts of the water that are more transparent, allowing the background (or the water below) to show through.
Practice this simple splash many times. Each time, try to vary the shape of the crown or the number of droplets. This repetition builds muscle memory and a better understanding of water’s forms.
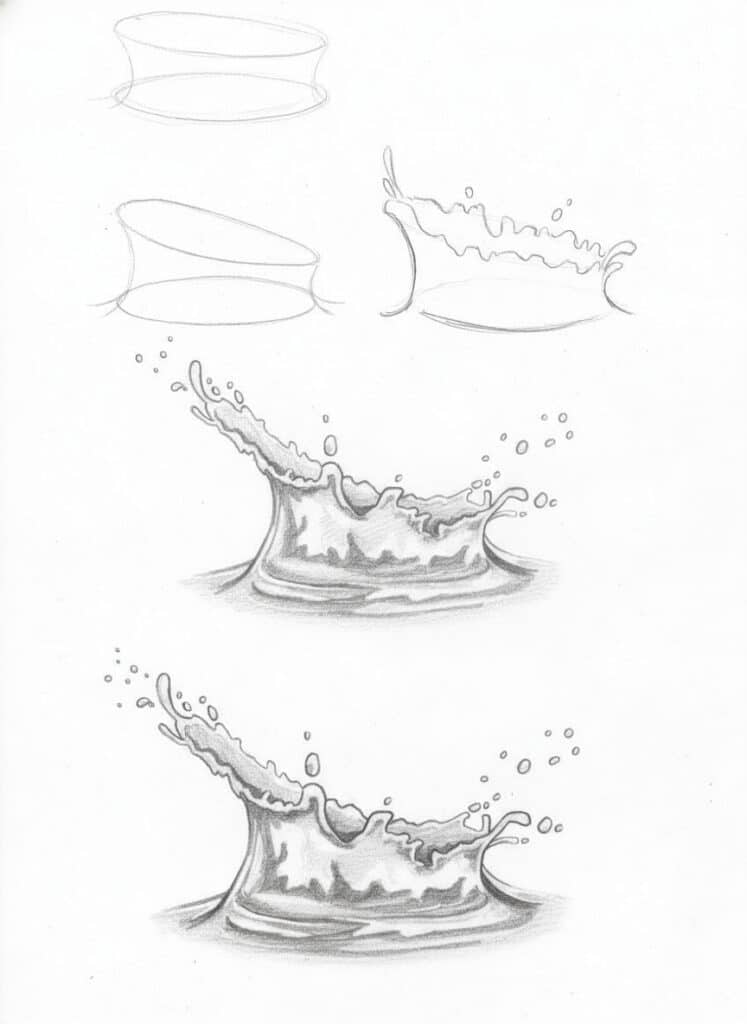
Capturing Movement and Energy: Making it Dynamic
A splash isn’t static; it’s a burst of energy captured in a fleeting moment. How do you convey that motion and power in a two-dimensional drawing? It’s all about intention and exaggeration.
Exaggeration is Your Friend:
Don’t be afraid to make your droplets fly higher, your crown rise more dramatically, or your ripples spread further than they might in a perfectly still photograph. Art often requires a bit of dramatic license to convey the feeling of movement.
Directional Lines:
Think about the path each droplet is taking. Even though they are individual forms, they should collectively suggest a direction of movement – upwards, outwards, or a combination. Use invisible “flow lines” to guide your eye and ensure the splash feels cohesive rather than just a collection of random blobs. These lines can also inform the slight blurring or elongation you might add to faster-moving elements.
Varying Forms and Sizes:
A truly dynamic splash isn’t uniform. Some droplets will be large and round, others long and thin, almost like streaks. Some parts of the crown might be thicker, others almost ethereal. This variation creates visual interest and reinforces the idea of chaotic energy.
Impact and Rebound:
Show the force of the initial impact. If an object is hitting the water, consider how the water reacts immediately around it – is it compressed, then springing upwards? The way water ‘bounces’ or ‘springs’ away from an impact point is key to showing energy.
Distortion and Diffusion:
Water often distorts what’s behind it, especially when it’s moving fast or in complex forms. Use subtle wavy or refractive lines to suggest distortion through the splash. Similarly, elements in the distance might appear diffused or less distinct through a heavy splash, adding depth.
By consciously thinking about these elements, you’ll move beyond simply drawing a shape and start truly capturing the vibrant, active nature of water in motion. It’s about storytelling with your lines and shading.

Advanced Techniques: Texture, Transparency, and Light Play
Once you’ve got the basic shapes and movement down, it’s time to level up by focusing on the qualities that make water truly unique: its texture, transparency, and incredible interaction with light.
Texture: The Smooth and the Foamy
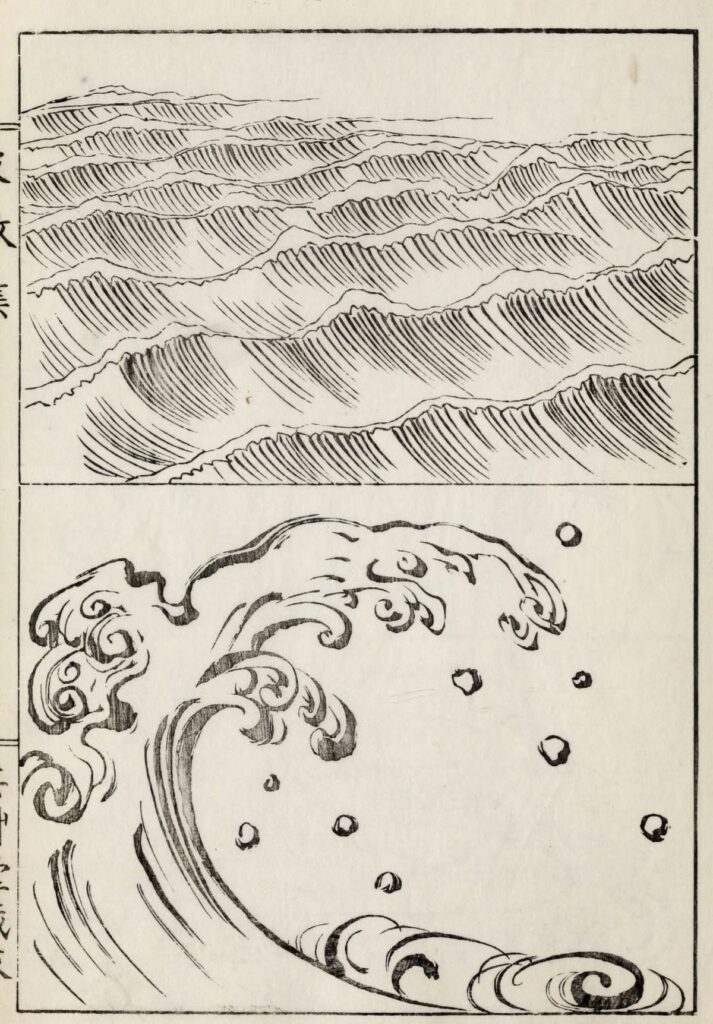
Water isn’t a single texture. Large, smooth surfaces reflect light almost like a mirror. Smaller droplets, especially when numerous, can create a sense of rough, broken texture. And then there’s foam! Foamy water, often seen in crashing waves or highly turbulent splashes, appears white, opaque, and bubbly. To render foam, use soft, irregular clusters of white or very light grey, with tiny darker areas for the shadows between bubbles. Contrast these with the smooth, reflective surfaces of larger water volumes.
Transparency and Refraction: Seeing Through
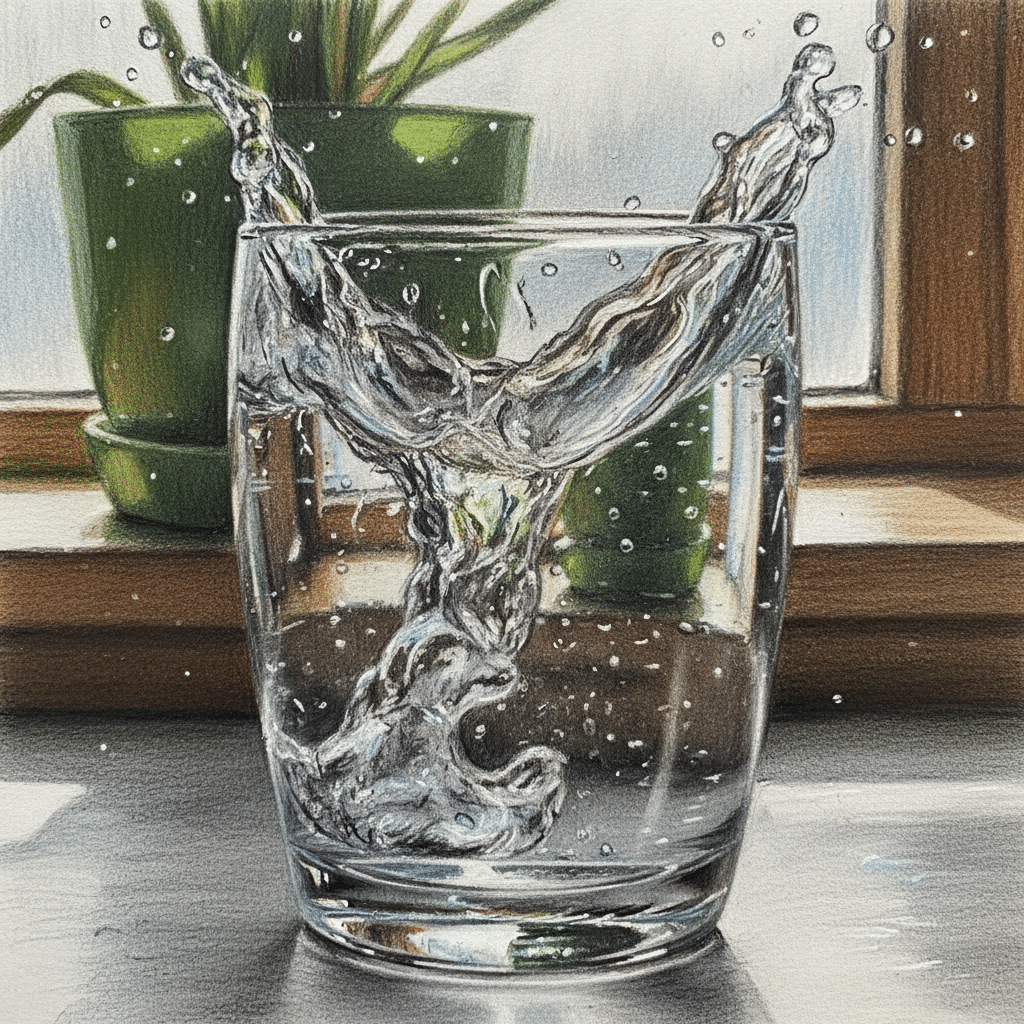
Water is transparent, but it also bends light (refraction). This means you can often see through parts of a splash to objects or water underneath, but those elements will appear distorted or shifted.
- To show transparency: Use lighter values and allow hints of the background color (if applicable) to subtly show through the water. The edges of the water might be slightly darker or have a defined outline, but the interior should be lighter.
- To show refraction: If an object is partially submerged or viewed through a thick part of a splash, draw it slightly bent or offset from its natural line. This is a subtle but powerful detail that instantly screams “water!”
The Dance of Light and Shadow:
Light is everything when drawing water. Water is highly reflective, so understanding your light source is paramount.
- Highlights: These are your brightest whites, often sharp and defined. They appear on the surfaces directly facing the light source, or where the water’s curves perfectly reflect it. Highlights define the form and wetness of the water. Think about drawing individual water beads – the highlight is a tiny, often elongated, dot.
- Shadows: Shadows give your water volume and depth. They appear on the parts of the splash that are turned away from the light, or where one part of the water casts a shadow on another.
- Reflections: Water reflects its surroundings. If there’s a sky above, a faint blue might be reflected. If there’s a colorful object nearby, its hues might subtly appear on the water’s surface. These reflections, even if faint, anchor the water in its environment.
By playing with these elements, you’ll create water that not only looks like water but feels like water – wet, fluid, and shimmering. This is where the artistry truly shines.
Drawing Different Types of Splashes: A Splash for Every Story
Not all splashes are created equal! Mastering a variety allows you to tell different stories and add specific dynamism to your scenes. Let’s explore a few common types:
1. The Delicate Drop Splash:
This is what we practiced earlier. Characterized by a crisp, rising crown, a few well-defined droplets, and spreading concentric ripples. It’s elegant and precise.
- Key focus: Clean lines, subtle shading for translucency, distinct highlight on the crown and each droplet.
- Example: A single tear falling into a still pond, morning dew dripping from a leaf.
2. The Impact Splash (The “Rock Drop”):
When a solid object hits the water with some force. This splash is more chaotic than a single drop, with a more broken, jagged crown and a higher volume of flying droplets.
- Key focus: A wider, more irregular crown, many varying sizes of droplets, a disturbed water surface where the object entered, possibly with some foam.
- Example: A stone thrown into a lake, a heavy rain pellet hitting a puddle.
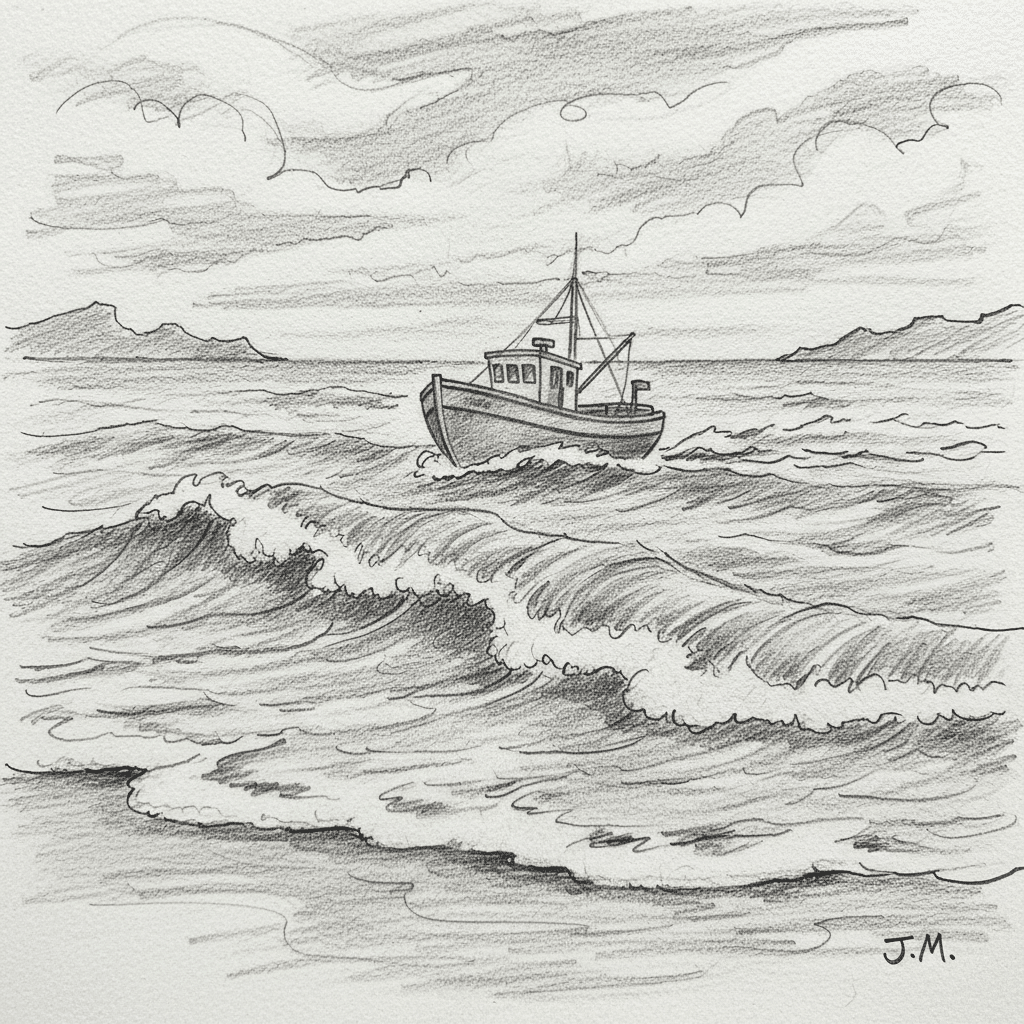
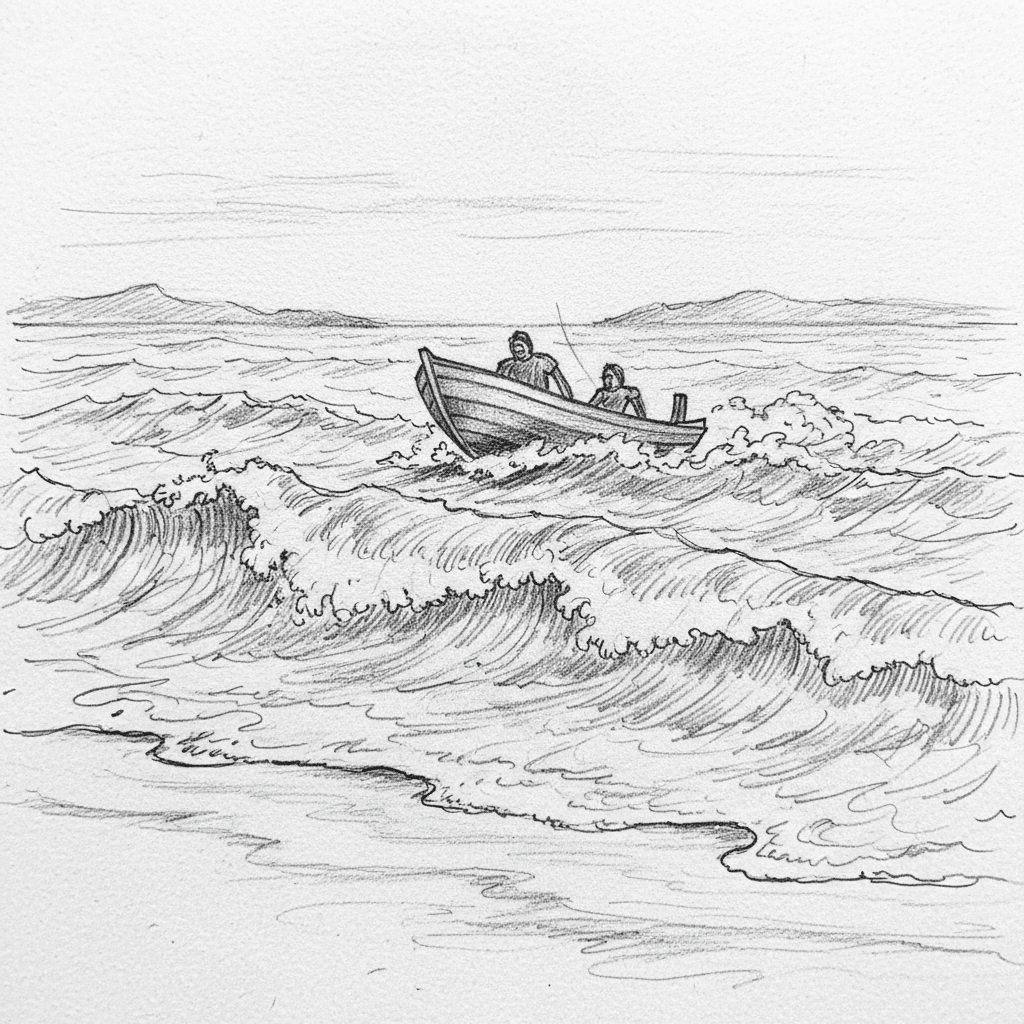
3. The Wave Splash (The “Ocean Breaker”):
This is the crest of a breaking wave, often involving more foam and a larger, more elongated form. It has a powerful, horizontal sweep.
- Key focus: A large, arching form, plenty of white foam at the crest, and a sense of forward motion. Droplets are often smaller and more numerous, resembling spray.
- Example: Ocean waves crashing on a beach, a boat cutting through rough water.
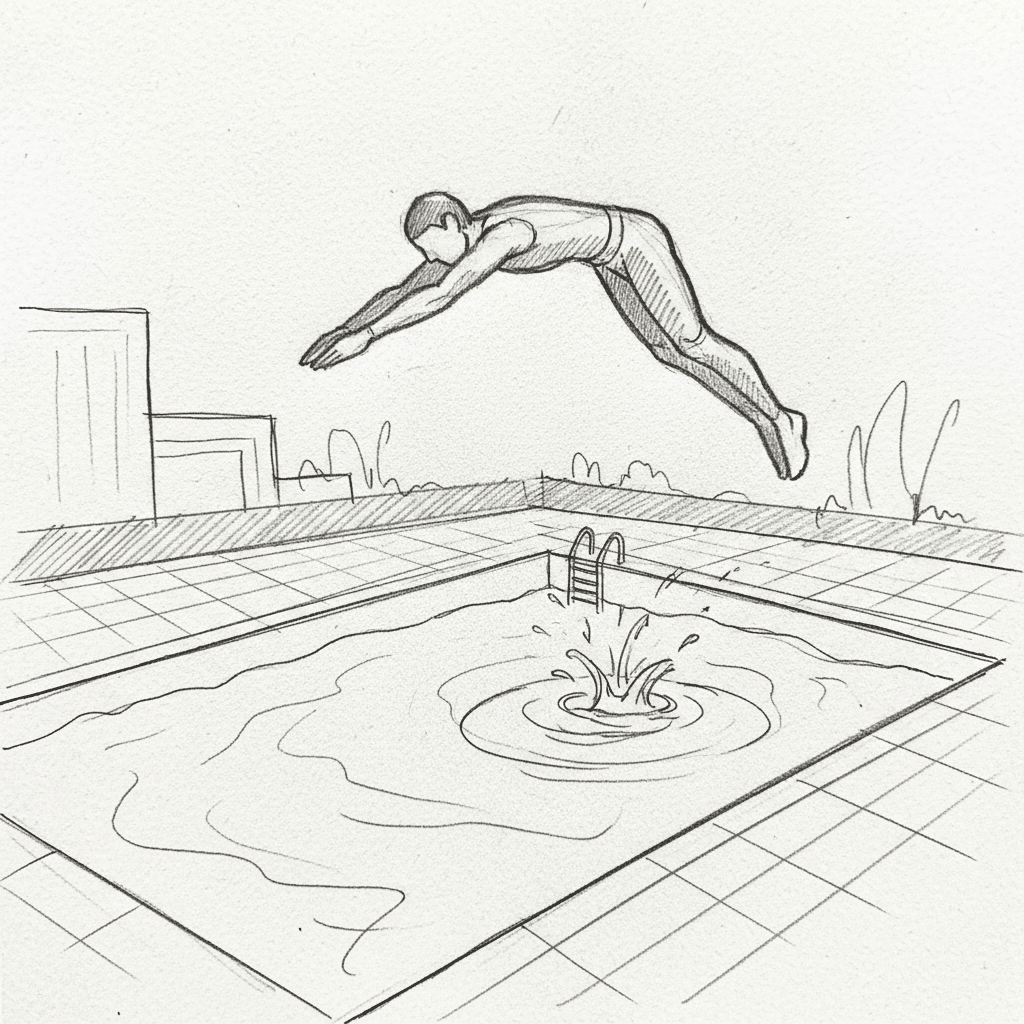
4. The Dynamic/Explosive Splash (The “Cannonball”):
High energy, often from a large object entering water at speed. Think maximum chaos, many layers, and a powerful upward burst.
- Key focus: A central column or huge eruption of water, surrounded by a complex array of overlapping splashes, crowns, and countless droplets. Strong contrasts between light and shadow are essential to convey volume. Foam and bubbles are often prominent.
- Example: A diver entering a pool, a vehicle plunging into a river. When you’re thinking about creative ideas for a complex scene, this type of splash can add incredible drama.

5. The Dripping/Falling Water:
Not quite a splash, but often leads to one. This involves individual drops or streams of water falling.
- Key focus: Elongated teardrop shapes for falling drops, sometimes with a ‘tail’ indicating speed. Reflective surfaces and soft shadows are key to making them look wet.
- Example: A leaky faucet, water dripping from icicles.
By practicing each type, you’ll develop a versatile vocabulary for rendering water in any scenario. Don’t be afraid to combine elements from different splash types to create unique effects.
Tips for Realism and Expressiveness
Making your water splashes look truly alive goes beyond just getting the shapes right. It’s about injecting them with realism and emotional impact.
Observe, Observe, Observe:
This is probably the most crucial tip. Take five minutes to stare at water. Watch rain hitting a window (perhaps inspiring what to draw on a rainy day: atmospheric ideas), notice how water drips from a faucet, or look at high-speed videos of splashes online. Pay attention to how light hits the water, how shadows form, the different sizes of droplets, and the overall flow. Our brains are incredibly good at absorbing visual information, even subconsciously.
Use Reference Photos (Wisely!):
References are invaluable, especially for complex forms like splashes. But don’t just copy them slavishly. Use them to understand the principles of how water behaves. Look at multiple references of similar splashes to identify common patterns and variations. Then, apply those principles to your own unique drawing.
Don’t Be Afraid to Experiment:
Water is fluid, and so should your artistic approach. Try different pencil pressures, varying line weights, or even sketching with your non-dominant hand to break free from rigid habits. What happens if you make the droplets smaller? What if the crown is taller? Pushing boundaries helps you discover new techniques and develop your personal style.
Understand Light and Shadow (Again!):
Seriously, this is key. A splash without proper lighting looks flat. Always define your light source. Is it coming from the left, right, top, or behind? This will dictate where your highlights and shadows fall, giving your water form, depth, and a sense of volume. Remember that water is reflective, so strong highlights will be present.
Vary Droplet Sizes and Trajectories:
A common mistake is making all droplets the same size and shape. Real splashes have a huge range – from almost invisible mist to large, distinct globules. Varying these adds dynamism and realism. Also, ensure they follow believable arcs and paths, influenced by the initial force and gravity.
Embrace Imperfection:
Water is organic and chaotic. Don’t strive for sterile perfection. A little irregularity in your lines, a slightly uneven ripple, or an asymmetrical crown can make your splash feel much more natural and alive. It’s about capturing the essence of the moment, not a photographic replica.

Common Mistakes to Avoid When Drawing Splashes
Even seasoned artists can fall into certain traps when tackling water. Being aware of these common pitfalls can help you sidestep them.
1. Making Water Too Uniform:
A splash isn’t a collection of identical, perfectly round droplets. Avoid making all your droplets the same size, shape, or spacing. Water’s chaos is its beauty. Embrace the variety!
2. Ignoring Perspective:
Even though a splash is chaotic, it still exists in a three-dimensional space. Elements closer to the viewer should be larger and more detailed, while those further away appear smaller and less distinct. The ripples should also recede into the distance.
3. Lack of Movement or Flow:
If your splash looks stiff or static, you’ve missed its core essence. Ensure your lines and shading convey direction, energy, and the fleeting nature of the moment. Dynamic lines and varied shapes are your allies here.
4. Over-detailing or Under-detailing:
There’s a sweet spot. Over-detailing every single droplet can make your splash look busy and artificial, losing the overall impression of fluid motion. Conversely, under-detailing can make it look flat and unconvincing. Focus on key details that enhance realism without overwhelming the viewer.
5. Forgetting Light and Shadow:
As reiterated, this is critical. A splash drawn without a clear light source and corresponding highlights and shadows will lack volume and appear dull. Water’s reflective quality demands strong light play.
6. Making Water Opaque or Too Transparent:
Water is rarely completely opaque (unless very turbulent and foamy) or completely invisible. It has a translucent quality. Find the balance where you can hint at what’s behind it while still showing its body and form.
By being mindful of these common mistakes, you can refine your technique and produce more convincing and engaging water splashes.
Practice Exercises to Sharpen Your Skills
Like learning to play an instrument (say, mastering Guitar Drawing Essentials: A Step-by-Step Guide for Beginners), consistent practice is key to improving your water splash drawings. Here are some exercises to get you started:
1. Timed Splash Sketches:
Set a timer for 1, 2, or 5 minutes. Quickly sketch as many different splashes as you can within that time. Don’t focus on perfection, but on capturing the essential forms, energy, and movement. This helps you work quickly and intuitively.
2. Draw from Multiple References:
Choose one type of splash (e.g., impact splash) and find 3-5 different reference photos of it. Draw each one, paying attention to the unique variations. This broadens your understanding of how that specific splash type can manifest.
3. Focus on Individual Elements:
Dedicate a page just to drawing different styles of droplets. Another page for various crown shapes. Another for ripples. Isolating elements helps you understand their individual mechanics before combining them into a complex splash.
4. Observe and Sketch from Life:
Fill a glass with water and drop small objects into it (marbles, pebbles). Observe the splash and quickly sketch what you see. Take photos or even record slow-motion videos on your phone for later reference.
5. Experiment with Different Mediums:
If you usually draw with pencil, try ink. If you use ink, try digital. Each medium offers a different feel and can push you to approach water in new ways.
6. Splash in Context:
Draw a simple object (a ball, a hand, a boat) interacting with water, focusing on how the splash forms around it. This helps you integrate splashes into larger scenes. For example, consider how a character’s hand might create a splash, tying into broader art skills like those involved in drawing poses.
Remember, improvement isn’t linear. Some days your drawings will feel great, others less so. The goal is consistent effort and enjoyment. Every line you draw, every observation you make, adds to your artistic toolkit.

Conclusion
Phew! You’ve just waded through the wonderful world of water splashes, from understanding their basic physics to mastering advanced techniques of light and transparency. Learning how to draw a splash water might seem like a daunting task at first, but by breaking it down into manageable steps – observing, sketching basic shapes, adding movement, and refining with light – you can absolutely capture that fluid magic on paper or screen.
Remember, every artist starts somewhere. Don’t get discouraged if your first few attempts aren’t masterpieces. The beauty of art, especially with something as dynamic as water, lies in the process of discovery and constant improvement. Keep observing, keep practicing, and most importantly, keep having fun! Your unique artistic voice will shine through with every ripple, crown, and droplet you create. So go on, grab your tools, and make some waves – your canvas is waiting for your next big splash!
- 0shares
- Facebook0
- Pinterest0
- Twitter0
- Reddit0

