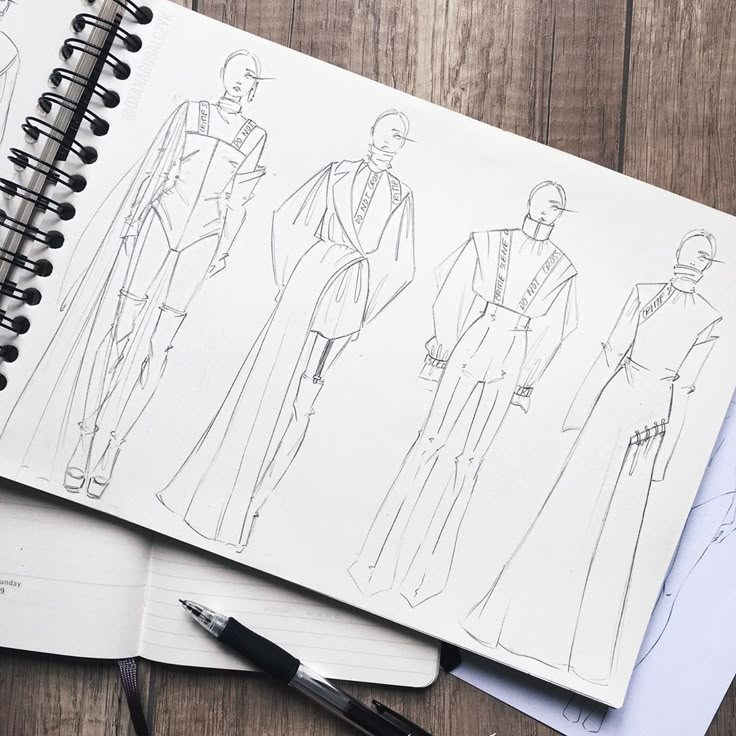

Hey there, aspiring digital artists! Ever looked at a stunning piece of figure art and thought, “I wish I could do that”? Well, guess what? You absolutely can! And the best part is, you don’t need a fancy studio or a stack of expensive supplies. With just your iPad, Apple Pencil, and the magical app called Procreate, you’re already halfway there. This isn’t just about learning to draw bodies; it’s about understanding the human form, capturing its dynamism, and expressing yourself through every curve and line. Whether you’re a complete newbie or looking to transition your traditional skills, diving into Procreate figure drawing is a fantastic journey, and I’m here to be your casual guide through it all.
Forget those intimidating, stuffy art classes for a moment. Procreate makes the learning process incredibly fun, forgiving, and flexible. It’s a digital playground where mistakes are just opportunities to hit “undo,” and experimentation is always encouraged. So, grab your stylus, settle into your favorite drawing spot, and let’s unlock your inner artist together!
Why Procreate is Your Ultimate Digital Sketchbook for Figure Drawing


Think about traditional figure drawing: you need paper, pencils, erasers, charcoal, maybe some pastels – and a whole lot of mess potential. Procreate throws all that out the window, giving you an entire art supply store at your fingertips, neatly packed into one powerful app. This isn’t just about convenience; it revolutionizes how we approach learning and practicing the human form.
First off, the sheer versatility of brushes is a game-changer. From rough charcoal textures perfect for gesture drawing to smooth inking pens for refined lines, Procreate has it all, and you can even customize or download more. No more worrying about running out of paper or smudging your work beyond repair. The “undo” button is your best friend, allowing for fearless experimentation. You can adjust, tweak, and redo without a single tear or eraser crumb in sight.
Layers are another superpower. Imagine being able to draw a skeleton, then a muscle overlay, then skin, all on separate transparent sheets. You can turn them on and off, adjust opacity, and refine each element independently. This is invaluable for understanding anatomy and building up complex figures. Plus, importing reference photos directly onto your canvas (or using the handy Reference Companion window) means you can draw alongside your inspiration without juggling physical prints. It’s all contained within your iPad, ready to go wherever inspiration strikes, whether you’re at a coffee shop, on a train, or simply lounging on your couch. This portability makes consistent practice not just possible, but genuinely enjoyable.
Getting Started: Setting Up Your Canvas and Tools

Before we dive into the nitty-gritty of anatomy, let’s get you set up in Procreate. Think of this as preparing your digital art desk.
Choosing Your Canvas
When you open Procreate, tap the ‘+’ icon in the top right to create a new canvas. While you can start with any size, a good all-rounder for figure drawing is around 2000×3000 pixels at 300 DPI (dots per inch). This gives you enough resolution for detail without making the file too huge, which can sometimes slow down older iPads. For quick gesture sketches, a smaller canvas is perfectly fine, but for more detailed studies, bigger is often better.
Essential Brushes to Begin With
You don’t need a thousand brushes to start. Here are a few reliable ones built right into Procreate:
- Pencils (Sketching Set): The HB Pencil or 6B Pencil is excellent for initial sketches, gesture drawing, and laying down loose lines. They mimic traditional pencils beautifully.
- Inking (Inking Set): The Technical Pen is great for clean, crisp lines when you want to refine your sketches or do line art.
- Airbrushing (Airbrushing Set): A Soft Airbrush is useful for subtle shading, blending, and adding soft transitions to your forms later on.
Feel free to experiment with others! The beauty of Procreate is discovering what feels right for your hand and your style.
Importing Reference Photos
Reference is crucial for learning figure drawing. Tap the wrench icon (Actions) in the top left, go to ‘Add’, and then ‘Insert a photo’. You can place your reference image on a separate layer, resize it, and even reduce its opacity so you can draw over or alongside it. Procreate also has a ‘Reference Companion’ window (under ‘Canvas’ in the Actions menu) which keeps your reference image floating independently, letting you zoom and pan on it without affecting your main canvas. It’s a fantastic feature for staying focused.
Understanding the Human Form: Core Principles of Figure Drawing
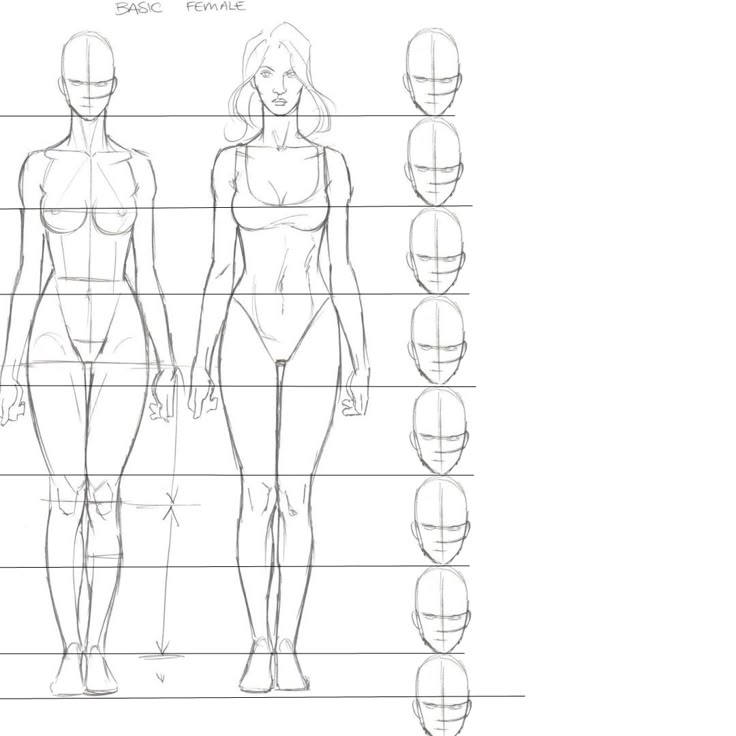

Figure drawing can seem daunting because the human body is so complex. But don’t worry, we’re going to break it down into manageable, understandable principles. It’s less about memorizing every muscle and more about understanding the underlying structure, movement, and relationships.
Proportions: The Blueprint
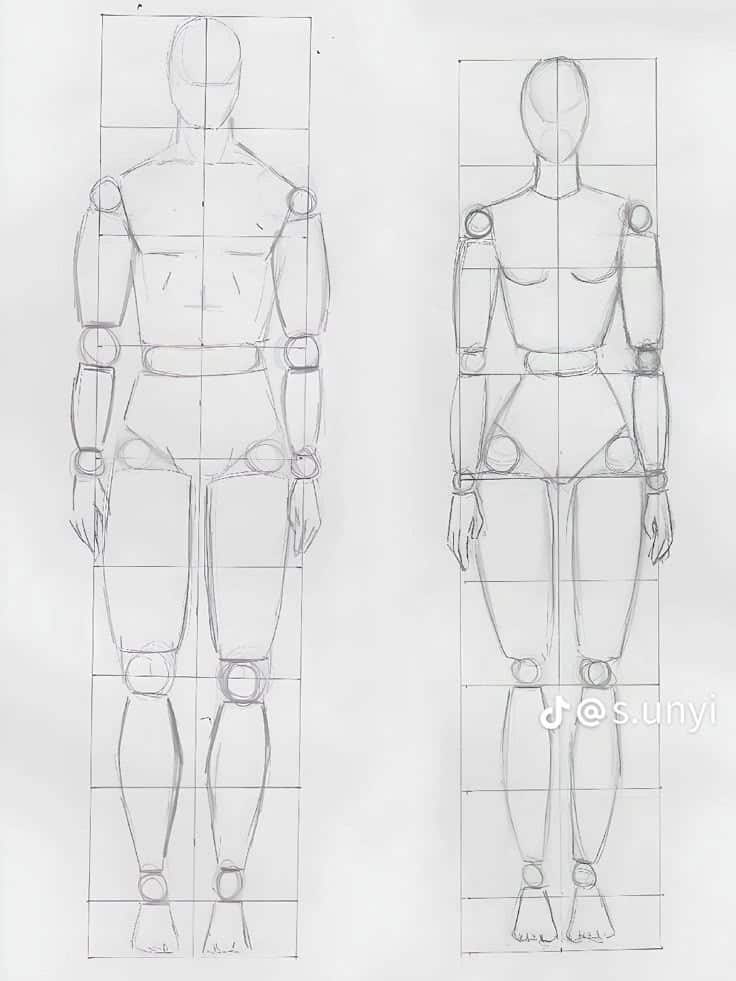
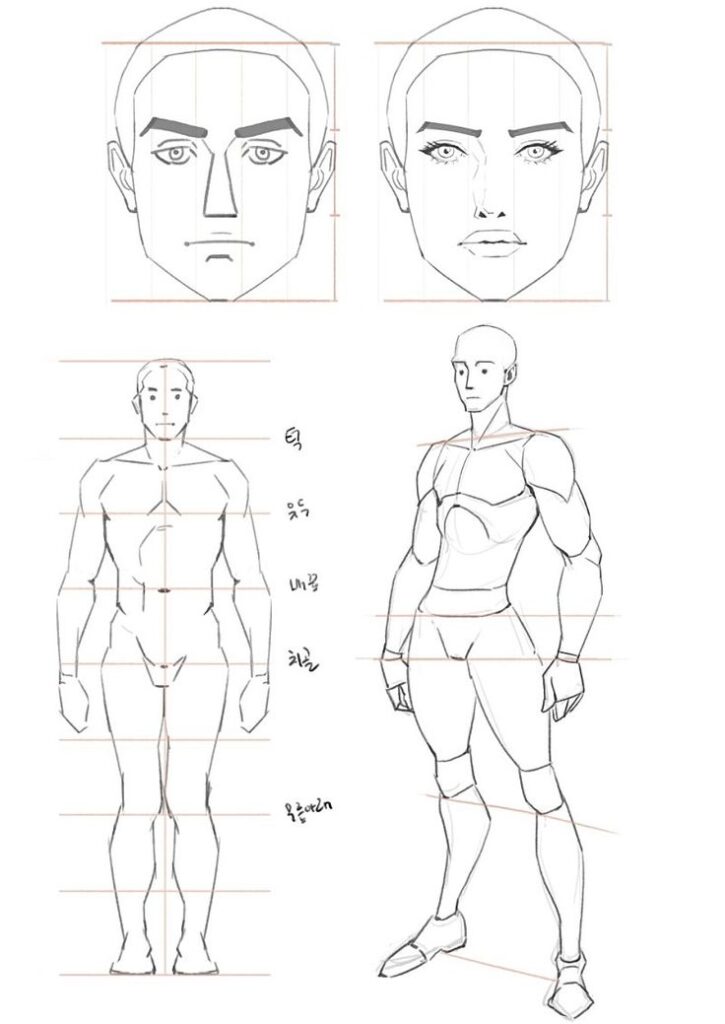
Ever wondered how artists make figures look “right”? It often comes down to proportions. A widely used guide is the “head-height” method. An average adult figure is roughly 7.5 to 8 heads tall.
- The head.
- Chest/torso: about 1.5 to 2 heads.
- Pelvis: about 1 head.
- Legs: about 4 heads (femur is 2 heads, lower leg is 2 heads).
- Arms: elbow is usually at the navel, fingertips reach roughly mid-thigh.
These are guidelines, not rigid rules, as everyone’s body is unique. But they provide a foundational structure to start with.
Gesture Drawing: Capturing Life and Movement
This is arguably the most important step in figure drawing. Gesture drawing is about capturing the essence of a pose, its energy, rhythm, and flow, in a very short amount of time (often 30 seconds to 2 minutes). It’s not about accuracy or detail; it’s about feeling the pose. Think of it as a warm-up, a way to loosen your hand and eye.
- Draw with your whole arm, not just your wrist.
- Focus on the line of action – the main curve or direction of the body.
- Use long, sweeping, continuous lines.
- Don’t lift your pencil too much.
- Look for pushes and pulls, stretches and compressions in the body.
Gesture drawing helps your figures feel alive, preventing them from looking stiff or static. It’s a skill that improves dramatically with consistent practice. To enhance your daily creative routine, consider integrating quick gesture studies as part of your draw your day practice, capturing moments and forms around you.
Anatomy Basics: Simplified Forms

You don’t need to be a doctor to draw people, but a basic understanding of anatomy is incredibly helpful. Think of the body as being made up of simple, manageable forms:
- Head: An egg or sphere.
- Ribcage: A barrel or an egg shape.
- Pelvis: A bucket or a bowl shape.
- Limbs: Cylinders or tapered tubes.
- Joints: Spheres (shoulders, elbows, wrists, hips, knees, ankles).
These simplified forms allow you to construct a figure in 3D space, giving it volume and presence before you even think about muscles or skin.
Perspective and Foreshortening
These concepts sound intimidating, but they’re essential for making your figures look like they exist in space.
- Perspective: How objects appear to recede into the distance. If a hand is closer to you, it will appear larger than the head, even if in reality it’s not.
- Foreshortening: When an object appears shorter than it actually is because it’s angled towards or away from the viewer. Think of an arm reaching out towards you – the upper arm might appear very short, while the hand seems large.
The key to both is observation. Look at your references closely. How do things overlap? What appears bigger or smaller? Don’t draw what you know is there; draw what you see.
Breaking Down the Body into Simple Shapes (The Mannequin Approach)

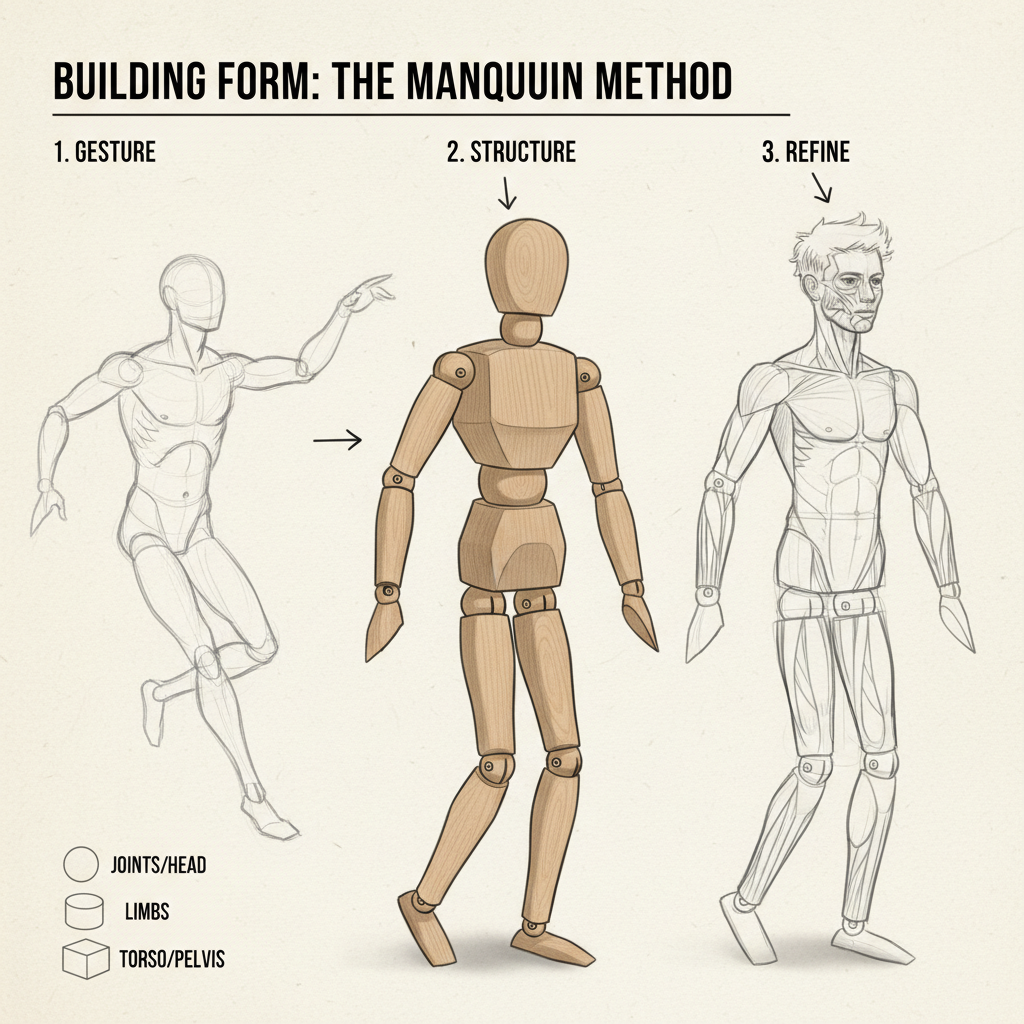
Once you’ve got your gesture down, it’s time to build structure. The “mannequin” approach is fantastic for this. Imagine the human body isn’t flesh and bone, but rather a series of connected blocks, cylinders, and spheres, like a wooden artist’s mannequin.
- Start with the Core: Establish the ribcage (like a slightly tapered box or egg) and the pelvis (another box or bowl shape). Crucially, notice how these two forms tilt and twist in relation to each other. This “twist” is called contrapposto and is vital for dynamic poses.
- Connect with the Spine: Draw a line (or a series of curves) connecting the ribcage to the pelvis. This is your simplified spine, indicating the flow and bend of the torso.
- Add Limbs: Attach cylinders for the upper arms and thighs, then spheres for the elbows and knees, and smaller cylinders for the forearms and lower legs. Finally, simple block shapes for hands and feet.
- Think in 3D: As you’re doing this, constantly imagine these forms existing in three-dimensional space. Are they receding? Coming forward? Overlapping? This will help you naturally apply perspective and foreshortening.
This method gives your figure a solid foundation, a scaffold upon which you’ll later add details. It ensures your figure has volume and feels grounded, rather than flat. It’s also a great way to think about how different elements align, much like using creative grid layouts in design to ensure visual harmony and proportion in other artistic fields.
Mastering Gesture Drawing in Procreate
We touched on gesture earlier, but let’s really dive into how Procreate can help you master this fundamental skill.
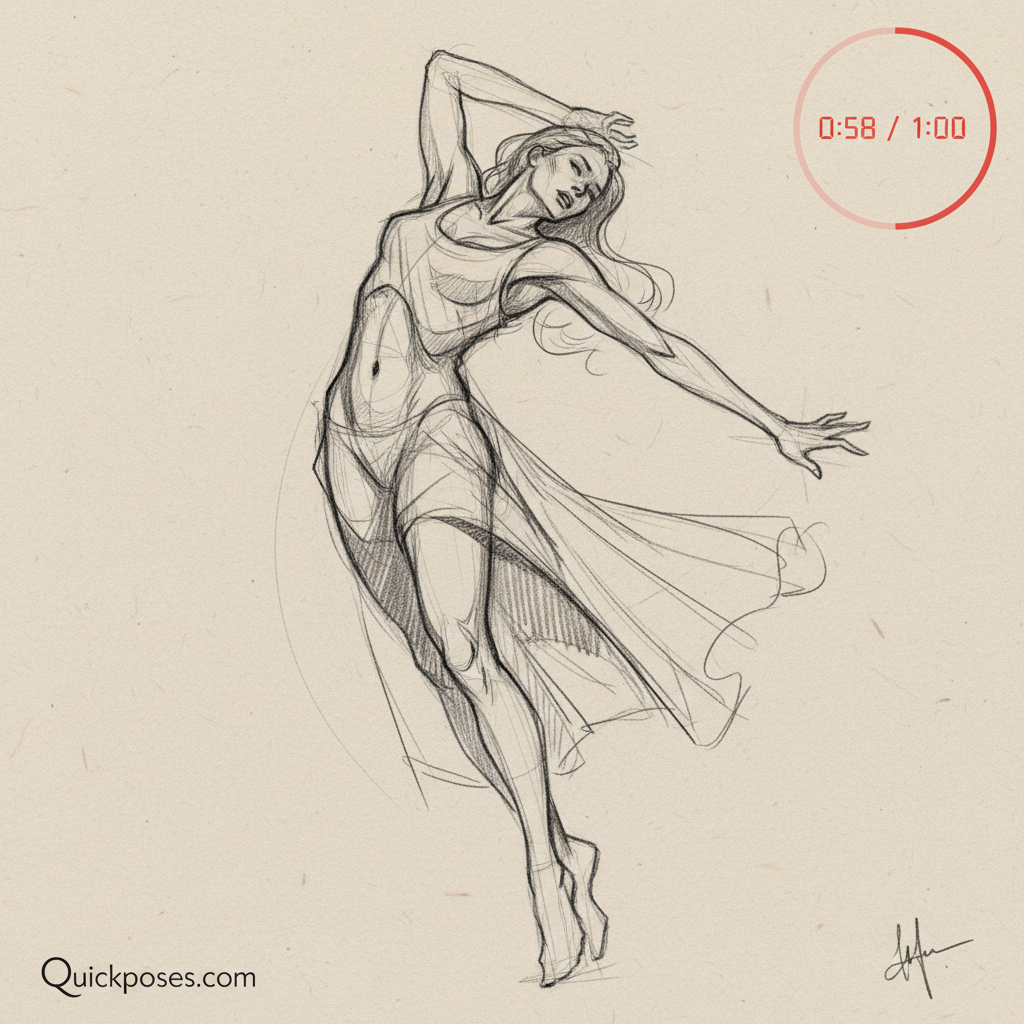
The Power of Timed Exercises
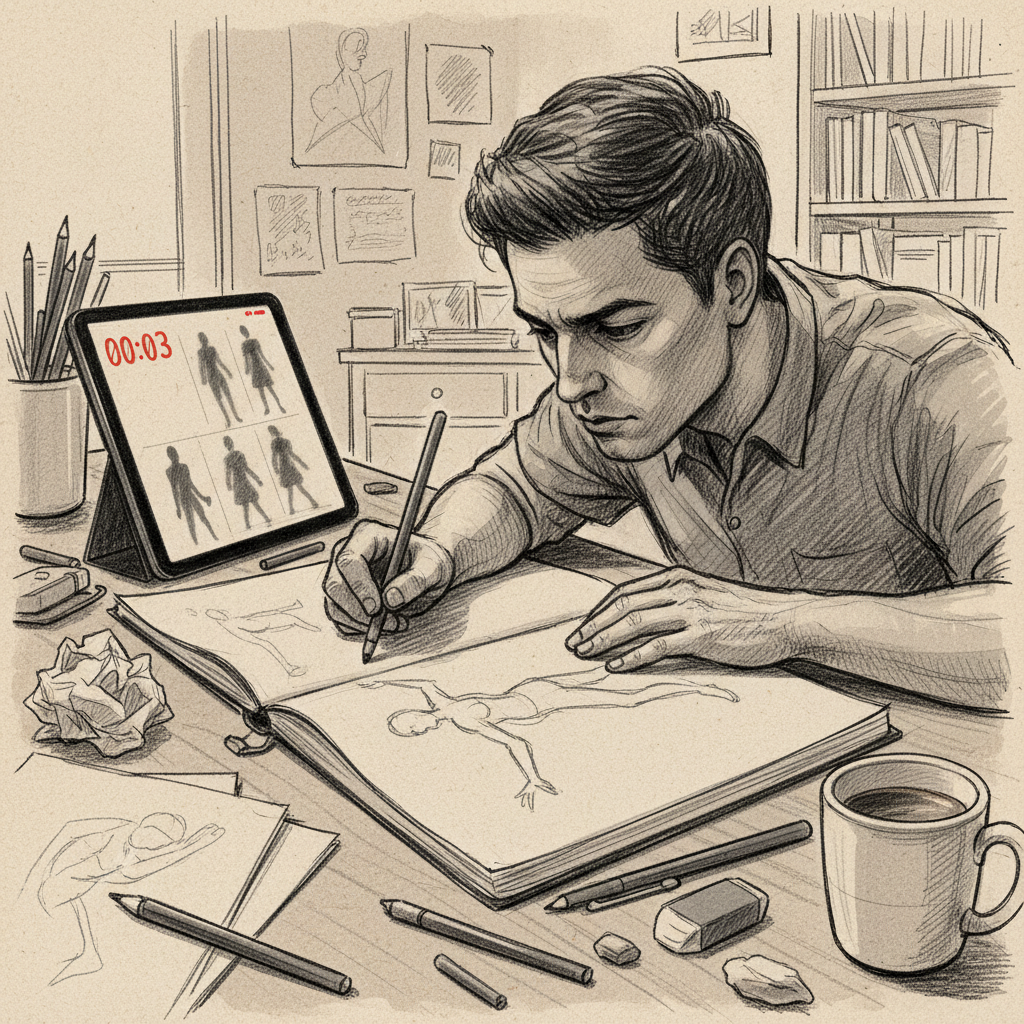
Gesture drawing thrives under time constraints. There are many online resources (like Quickposes or Croquis Cafe) that provide timed figure references.
- Set a Timer: Start with 1-minute poses. Don’t worry about perfection. The goal is to capture the overall movement and rhythm.
- Focus on Flow: Use your pencil brush to draw long, sweeping lines that follow the main energy of the pose. Where is the weight? Where is the push? Where is the pull?
- Repetition is Key: Do dozens, even hundreds of these. You’ll notice your eye getting faster and your hand becoming more confident. Procreate’s infinite canvas (if you zoom out enough or create many small canvases) allows you to do a ton of these without wasting paper.
Gesture drawing is less about drawing what you see and more about drawing what you feel from the pose. It’s about expressing the life within the figure, and Procreate’s smooth brush engine and instant undo make it incredibly forgiving for this expressive, quick drawing style.
Building Form and Volume: From Shapes to Structure
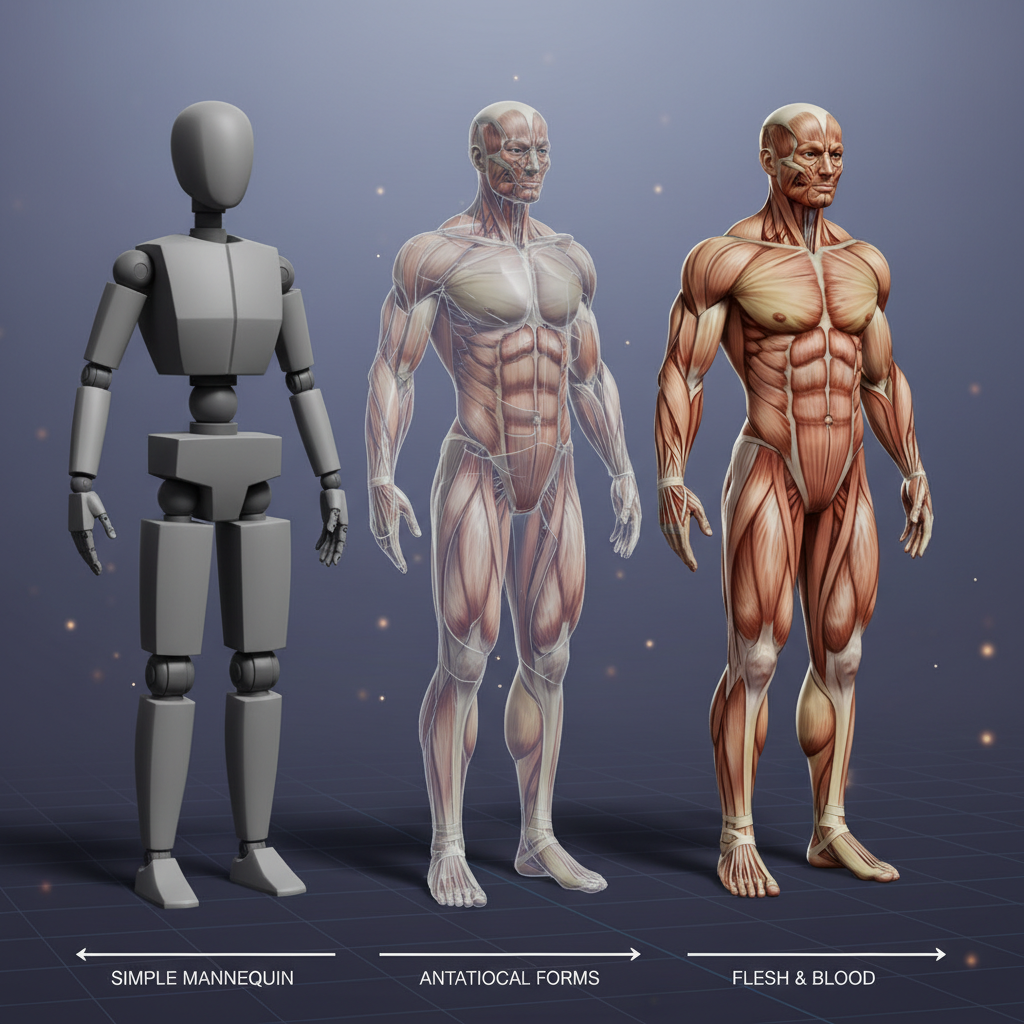

Once your simplified mannequin is in place, it’s time to add some flesh and blood – well, digitally speaking. This is where you start transitioning from simple shapes to more complex anatomical forms, giving your figure weight and solidity.
- Refine the Silhouette: Look at your mannequin. Now, begin to draw over it, gently curving the lines to suggest the contours of the body. Think of the surface of the skin stretching over the bones and muscles beneath.
- Think in Planes: Instead of just drawing curves, try to simplify complex anatomical areas into flat or slightly curved planes. For example, the deltoid muscle on the shoulder isn’t just a curve; it has distinct planes that catch light differently. This thinking helps in understanding how light and shadow will eventually fall.
- Understand Overlap: Overlap is crucial for conveying depth. If one arm is in front of the torso, ensure its lines clearly overlap the torso’s lines. This creates a sense of spatial relationship.
- Block in Major Forms: Still working broadly, start to define the major muscle groups – the pectorals on the chest, the biceps/triceps on the arms, quadriceps/hamstrings on the legs. Don’t go into tiny details yet; just block in their general mass and shape.
This stage is about moving from the conceptual (gesture, mannequin) to the structural, laying the groundwork for more detailed anatomy and shading.
Anatomy Made Easy: Focusing on Key Landmarks
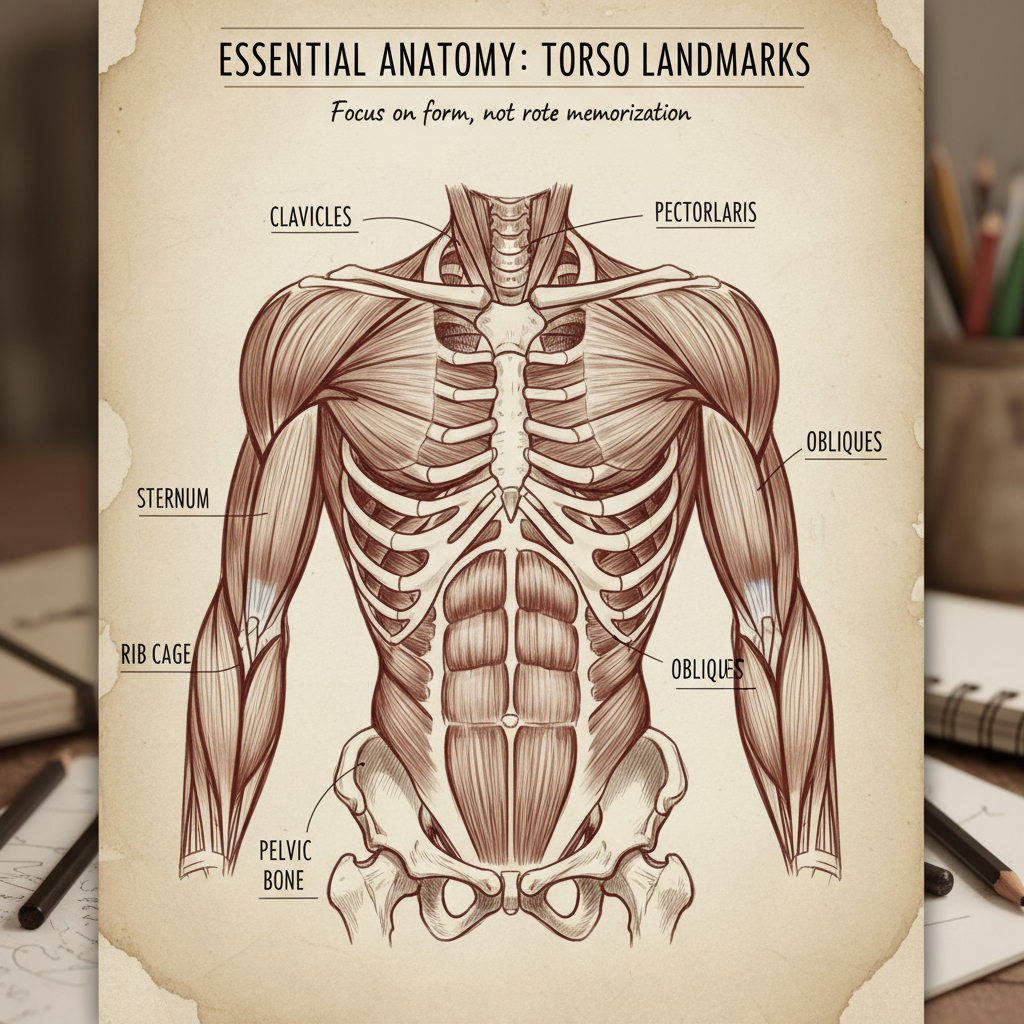

You don’t need to be a medical illustrator to draw compelling figures. Instead of memorizing every single muscle, focus on the most visually impactful ones and key skeletal landmarks. These are the “signposts” that define the human form.
Skeletal Landmarks: Your Hidden Guide
Think of these as the bony protrusions you can often see or feel, even on a well-muscled person:
- Clavicles (Collarbones): Prominent at the base of the neck, forming the top of the chest.
- Scapulae (Shoulder Blades): Though often covered by muscle, their movement affects the back.
- Ribcage: The overall shape of the ribcage is visible.
- Greater Trochanter: The bony bump on the side of your hip, where the femur connects to the pelvis.
- Kneecap (Patella): A clear landmark on the front of the knee.
- Ankles (Malleoli): The bony bumps on either side of your ankle.
These landmarks help you orient your figure and ensure your muscle masses are placed correctly. They provide the underlying structure that gives the body its solidity.
Major Muscle Groups: Defining the Form
Focus on these large, defining muscle groups:
- Neck & Shoulders: Trapezius, Sternocleidomastoid, Deltoids.
- Torso (Front): Pectoralis Major (chest), Rectus Abdominis (abs), Obliques (sides).
- Torso (Back): Latissimus Dorsi (lats), Erector Spinae (back muscles).
- Arms: Biceps, Triceps, Forearm flexors/extensors.
- Legs: Quadriceps (front thigh), Hamstrings (back thigh), Gastrocnemius (calf).
As you study, observe how these muscles connect, overlap, and change shape with movement. Remember, observation is key. Don’t just draw from reference; draw what you observe in your reference.
Procreate Features to Level Up Your Figure Drawing


Procreate isn’t just a basic drawing app; it’s packed with powerful features that can significantly enhance your figure drawing process.
Reference Companion
As mentioned, this pop-out window (found under Actions > Canvas) keeps your reference image visible at all times. You can zoom, pan, and rotate it without affecting your main canvas, allowing for seamless observation.
Drawing Guides (Symmetry, Perspective)
While less commonly used for organic figure drawing, these can be immensely helpful for specific tasks:
- Symmetry Guide: (Actions > Canvas > Drawing Guide > Edit Drawing Guide > Symmetry) Excellent for drawing symmetrical faces or static poses where you want to ensure both sides match perfectly.
- Perspective Guide: (Actions > Canvas > Drawing Guide > Edit Drawing Guide > Perspective) While complex for organic forms, you could use it to establish a ground plane or a simple environment around your figure.
Alpha Lock and Clipping Masks for Shading
These are your best friends for non-destructive shading and coloring.
- Alpha Lock: On a layer with existing drawing, swipe right on the layer thumbnail to activate Alpha Lock. Now, anything you draw on that layer will only appear where pixels already exist. Perfect for shading within your line art.
- Clipping Mask: Create a new layer above your line art or base color layer. Tap on the new layer and select ‘Clipping Mask’. Now, anything you draw on this new layer will only appear within the boundaries of the layer directly below it. This is fantastic for adding shadows, highlights, or colors without going outside your lines.
Adjustments (Hue/Saturation, Curves, Color Balance)
Found under the magic wand icon, these tools allow you to tweak colors and tones without re-drawing. If your shadows are too strong or your colors feel off, you can adjust them here, experimenting until they look just right.
Time-lapse Recording for Review
Procreate automatically records your entire drawing process as a time-lapse video (Actions > Video). Watching this back is an incredible learning tool. You can see your mistakes, identify areas where you struggled, and understand your own workflow. It’s like having a private instructor reviewing your work!
Practice Makes Perfect: Exercises and Routines

No matter how many Procreate tricks you learn, consistent practice is the real secret to improvement.
Daily Quick Poses
Dedicate 15-30 minutes each day to gesture drawing using timed online resources. This builds your visual library and hand-eye coordination. Don’t skip it!
Longer Studies
Once a week, try a 1-2 hour study. Pick a single pose and focus on building form, understanding anatomy, and perhaps even some basic shading. This is where you apply what you’ve learned from your quick poses.
Drawing from Life
If you can, draw from life! People at a park, friends, family, even yourself in a mirror. Nothing beats observing real 3D forms. If real-life models aren’t available, high-quality photos work too, but always be aware of potential distortions from camera lenses. While drawing figures from life, you might even be inspired to sketch some interesting objects or drawing architectural wonders in your surroundings.
Copying Masterworks
Study how master artists (both traditional and digital) tackled the human form. Copy their drawings, not to plagiarize, but to understand their methods, their line economy, and their approach to anatomy. It’s a fantastic way to learn. For an inspiring way to organize these learning goals, you could even make your own aesthetic vision board to visualize your progress and artistic aspirations.
Overcoming Common Challenges
Learning figure drawing can be a rollercoaster of excitement and frustration. Here are some common hurdles and how to jump over them.
“My Proportions Are Always Off!”
This is super common.
- Solution: Go back to basics with your head-height measurements. Use reference photos where you can visually measure. Don’t be afraid to draw construction lines directly on your reference in Procreate to check your work. Practice drawing simple stick figures and mannequins before adding detail.
“My Figures Look Stiff and Lifeless.”
We’ve all been there!
- Solution: This usually means you’re skipping or rushing the gesture phase. Slow down, focus on the line of action, and exaggerate the curves and twists. Think about the feeling of the pose, not just its static appearance. Do more quick gesture studies to loosen up.
“I’m Afraid of Making Mistakes.”
The digital world is your friend here!
- Solution: Embrace the undo button! Procreate allows for endless experimentation. Use layers liberally. If you mess up a limb, just delete that layer and redraw it. This freedom allows you to be bolder and take more risks, which is essential for growth.
“I Can’t Find Good References.”
The internet is a treasure trove!
- Solution: Pinterest is fantastic for compiling reference boards. Websites like SketchDaily or Quickposes offer timed figure drawing sessions. Posemaniacs provides 3D models you can rotate. Just be mindful of copyright and use images for study purposes.
Finding Your Style and Having Fun

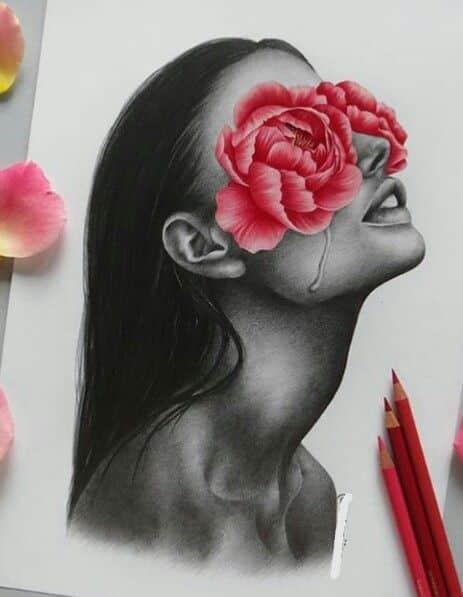
Ultimately, art is about expression. While learning fundamentals is crucial, don’t get so bogged down in “correctness” that you forget to enjoy the process.
Experimentation is Key
Once you have a grasp of the fundamentals, start playing.
- Try different brushes.
- Experiment with exaggerated proportions for a more stylized look.
- Explore different rendering techniques – line art only, bold colors, painterly strokes.
- Don’t be afraid to merge what you learn with other art styles you admire. Maybe you want to incorporate elements of American Traditional tattoo design into your figure work, giving your characters a distinct, graphic edge.
Connect with the Community
Share your work online! Platforms like Instagram, DeviantArt, or art communities on Reddit are great places to get feedback, find inspiration, and connect with other artists. Seeing others’ work and sharing your own can be incredibly motivating. Remember, every artist, no matter how skilled, started somewhere.
Conclusion: Your Procreate Figure Drawing Journey Awaits!


Congratulations! You’ve just walked through a comprehensive, casual guide to Procreate figure drawing. We’ve covered everything from setting up your digital canvas to understanding complex anatomical principles and leveraging Procreate’s powerful features. You now have a roadmap to confidently approach the human form, break it down into understandable chunks, and bring it to life on your screen.
Remember, this is a journey, not a race. There will be frustrating days, and there will be breakthroughs. The most important thing is to keep showing up, keep practicing, and keep having fun. Procreate is an incredible tool that democratizes art, making figure drawing more accessible and enjoyable than ever before. So, take a deep breath, perhaps integrate some mindful evening routines into your practice schedule to calm your mind before you draw, and start creating. Your inner artist is ready to unleash some amazing figures. Go forth and draw!
- 25shares
- Facebook0
- Pinterest22
- Twitter3
- Reddit0
