Christmas is a magical time of year, filled with joy, laughter, and a touch of sparkle. But let’s be real, it can also be a season of overconsumption, with new decorations bought and old ones quickly discarded. What if you could infuse your home with festive cheer while also being kind to the planet and your wallet? Enter the wonderful world of upcycling! Turning everyday items that would otherwise end up in the bin into beautiful, unique, and personalized holiday decor is not only sustainable but incredibly rewarding. Get ready to unleash your inner elf as we explore the top 8 upcycled Christmas decorations that you can easily DIY, transforming trash into treasure and making your holiday season truly special.
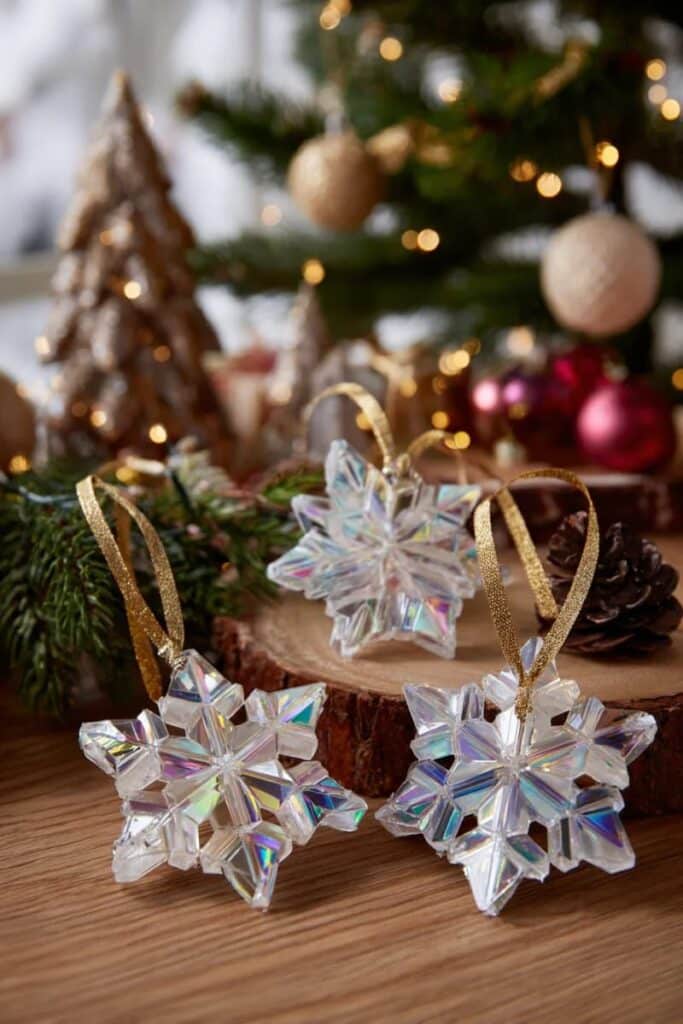
1. Whimsical Toilet Paper Roll Characters and Ornaments
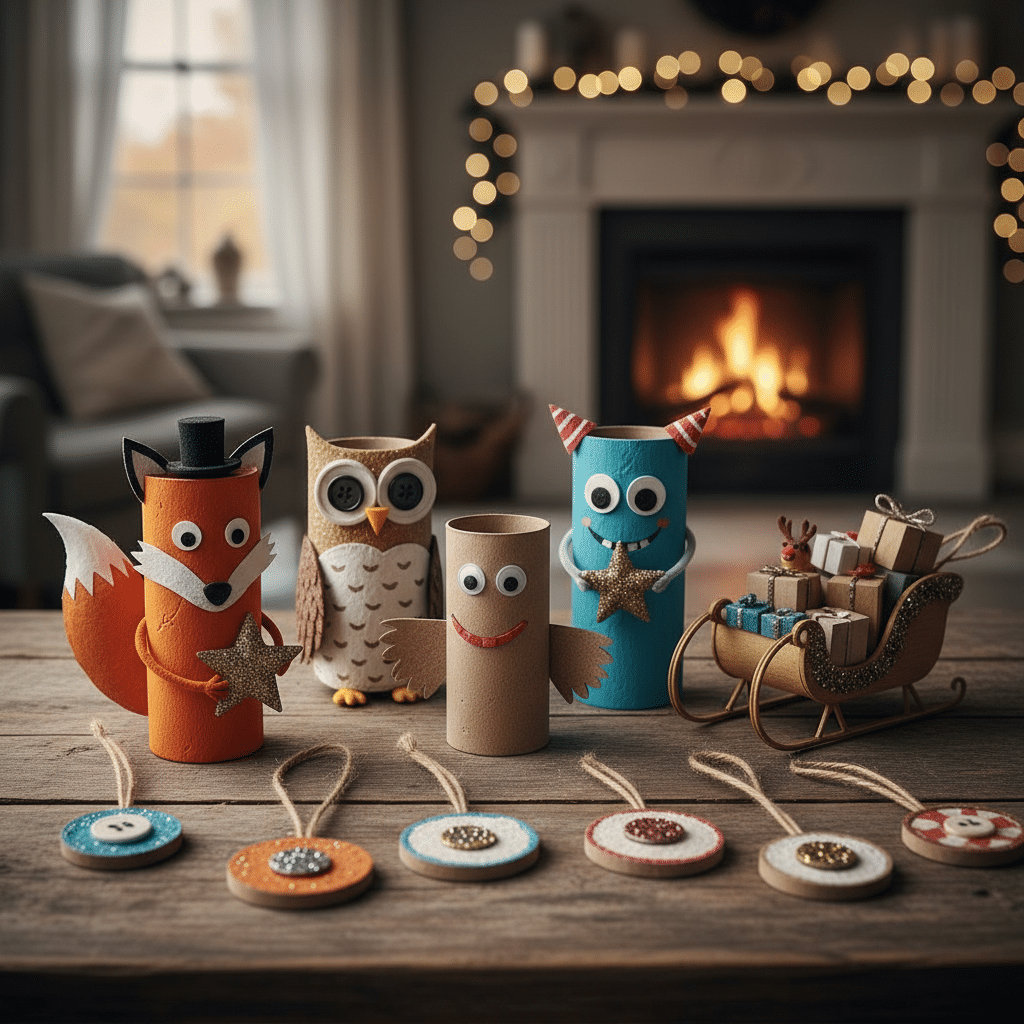
Who knew that humble toilet paper rolls could be transformed into the cutest Christmas characters or elegant ornaments? This is a fantastic project for all ages, offering endless possibilities for creativity and a truly zero-waste approach to your holiday decor. Imagine a tiny village of Santa, reindeer, or even snowmen adorning your mantelpiece, all crafted from cardboard tubes!
Materials You’ll Need:
- Empty toilet paper or paper towel rolls (cut to size)
- Craft paint (acrylic works great)
- Paintbrushes
- Glue (PVA or hot glue gun for quicker drying)
- Scissors
- Various scraps: felt, fabric, yarn, buttons, glitter, googly eyes, cotton balls, pipe cleaners
How to Create Your Cardboard Charms:
1. Prep Your Rolls: Start by gathering your empty rolls. If using paper towel rolls, cut them into smaller sections – about 3-4 inches tall is perfect for individual characters. 2. Base Coat: Paint the entire roll with a base color. Red for Santa, brown for reindeer, white for snowmen, or green for a Christmas tree. Let it dry completely. You might need a second coat for full coverage. 3. Add Features (Characters): Santa: Paint a white beard, add a pink nose with a small pom-pom or a dab of paint, and draw on eyes (or glue googly eyes). Cut a small triangle from red felt for his hat and glue it on. A tiny cotton ball can be his hat’s pom-pom. Reindeer: Paint the body brown. Cut out antler shapes from brown cardstock or pipe cleaners and glue them inside the top of the roll. Add googly eyes and a red pom-pom for Rudolph’s nose! Snowman: Paint the roll white. Draw on eyes, a carrot nose (orange paint or felt), and a button smile. Wrap a thin strip of fabric or yarn around his “neck” for a scarf. 4. Transform into Ornaments: If you want to hang them, punch a small hole at the top of the roll before decorating (or after, carefully) and thread a piece of string or ribbon through. You can also flatten the rolls slightly and cut them into snowflake shapes or small rings to make more abstract designs. Decorate these with glitter, paint, or small beads. 5. Personalize and Embellish:* This is where the fun really begins! Use glitter glue to add sparkle, buttons for eyes or clothing details, or yarn for hair. Don’t be afraid to mix and match materials. You can even cut small shapes from other recycled paper, like old holiday cards, to glue onto your creations.
These charming creations are not only a delightful addition to your tree or mantel, but they’re also a fantastic way to introduce kids to the concept of upcycling and creative problem-solving.

2. Enchanting Mason Jar Luminaries and Snow Globes
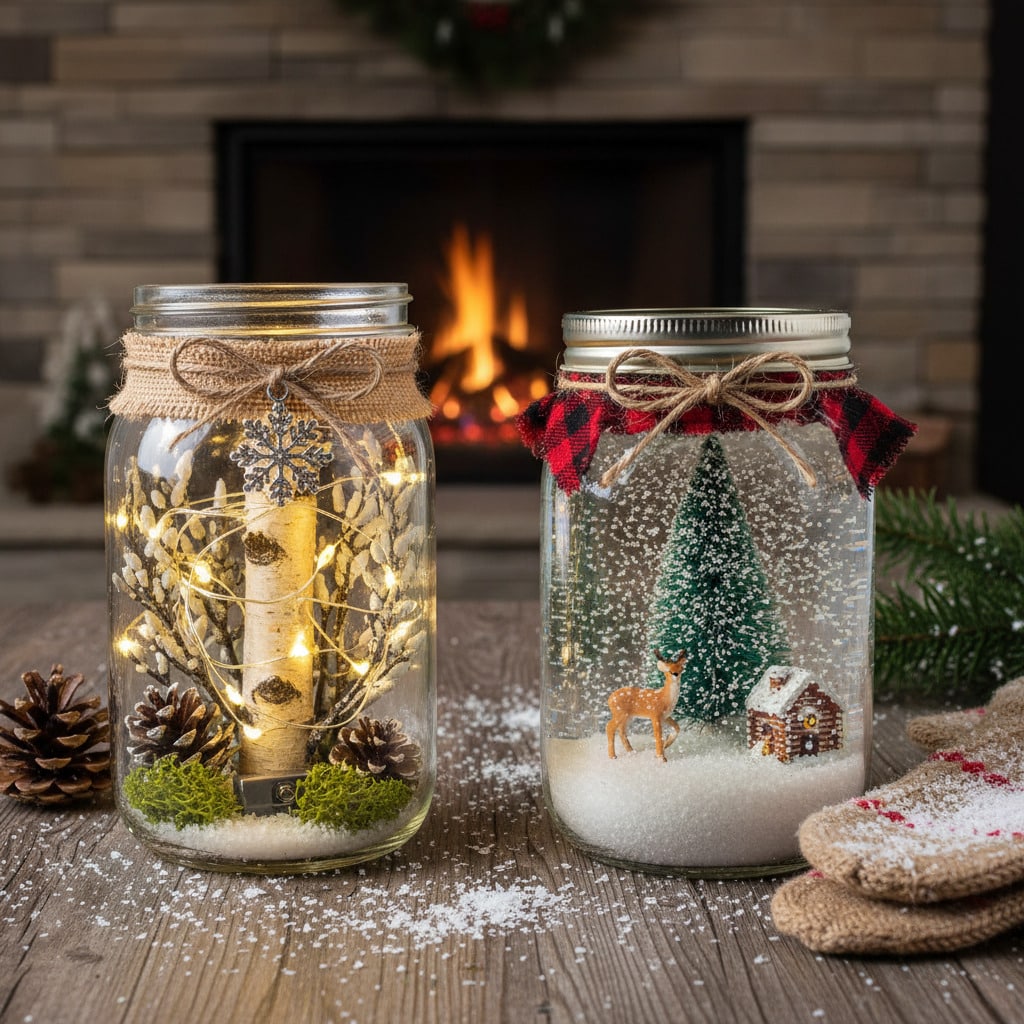
Glass jars are ubiquitous in our kitchens, and instead of tossing them, they can become truly magical elements of your Christmas decor. From glowing luminaries to charming miniature snow globes, these upcycled treasures add a touch of rustic elegance and a warm, inviting glow to any space. They’re perfect for window sills, side tables, or as a centerpiece.
Materials You’ll Need:
- Clean, empty glass jars (mason jars, jam jars, pickle jars, etc.)
- For Luminaries: Battery-operated LED tea lights or fairy lights, Epsom salt (for a snowy effect), natural elements (pinecones, cranberries, cinnamon sticks), ribbon, twine, or lace.
- For Snow Globes: Distilled water, glycerin (a few drops for snow to fall slowly), glitter, small waterproof figurines (tiny deer, Santa, trees – look for old toy figures), hot glue gun, clear sealant/epoxy.
Crafting Your Glowing Jars:
For Luminaries: 1. Clean and Dry: Ensure your jars are thoroughly clean and dry. Remove any labels. 2. Snowy Base (Optional): Pour a layer of Epsom salt (about an inch or two) into the bottom of the jar. This mimics fresh snow. You can even add a few drops of essential oils like pine or cinnamon for a festive scent. 3. Add Elements: Carefully place your battery-operated LED tea light or fairy lights on top of the Epsom salt. Arrange small pinecones, faux berries, cranberries, or cinnamon sticks around the light. For a touch of rustic charm, you might want to consider adding other unique home decor elements to your space, like a beautiful solid wood furniture piece nearby to complement the natural textures. 4. Decorate the Exterior: Tie a festive ribbon, twine, or a piece of lace around the neck of the jar. You can also glue on small sprigs of faux greenery or a miniature bell. 5. Placement: Place your finished luminaries on window sills, shelves, or as a captivating table centerpiece. They provide a soft, ambient glow without the fire risk of real candles.
For Snow Globes: 1. Select Figurines: Choose small, waterproof figurines that fit inside your jar and can be glued to the inside of the lid. Ensure they aren’t too tall. 2. Glue Figurines: Using a hot glue gun, securely glue your chosen figurine(s) to the inside of the jar lid. Allow it to dry completely. For extra waterproofing, you can add a layer of clear sealant or epoxy over the glue. 3. Fill the Jar: Fill the jar with distilled water, leaving a little space at the top. Add 1-2 teaspoons of glitter (fine glitter works best for a delicate snowfall) and a few drops of glycerin. The glycerin helps the glitter fall slowly, creating that magical snow globe effect. 4. Seal It Up: Carefully screw the lid (with the glued figurine) onto the jar. Ensure it’s very tight. You might even want to apply a bead of waterproof glue around the rim before sealing for extra security against leaks. 5. Shake and Enjoy: Give it a good shake and watch your miniature winter wonderland come to life! These make wonderful gifts or charming decorative accents.
3. Wine Cork Wonderland Creations
Don’t toss those wine corks after the holiday celebrations! These versatile little cylinders are a fantastic material for creating charming and rustic Christmas decorations. They’re surprisingly easy to work with and add a unique, natural texture to your festive display. From adorable reindeer to impressive wreaths, wine corks can be transformed into a whole new world of holiday cheer.
Materials You’ll Need:
- Plenty of wine corks (the more, the merrier!)
- Hot glue gun and glue sticks
- Scissors or craft knife
- For Reindeer: Small twigs or pipe cleaners for antlers, googly eyes, mini red pom-poms (for Rudolph), ribbon or twine.
- For Wreaths: Cardboard or wire wreath form, festive ribbon, small pinecones, faux berries.
Crafting Your Cork Delights:
For Adorable Wine Cork Reindeer: 1. Body: Start with four corks for the body. You can glue them together side-by-side or in a square formation, depending on how plump you want your reindeer to be. A single cork can also serve as a basic body for simpler designs. 2. Legs: Glue four corks vertically to the bottom of the body cork(s) to create legs. 3. Neck and Head: Glue another cork horizontally on top of the body for the neck, and then glue a final cork vertically on top of that for the head. 4. Antlers: Find some small, thin twigs from your garden or use brown pipe cleaners. Securely glue them to the top of the head cork for antlers. 5. Features: Glue on googly eyes. For Rudolph, add a small red pom-pom for his nose. You can also tie a tiny festive ribbon around his neck as a scarf. 6. Variations: Create different sizes of reindeer by adjusting the number of corks. You can even make a whole herd!
For Rustic Wine Cork Wreaths: 1. Prepare Your Base: You can either use a pre-made wire wreath form or cut a donut shape from sturdy cardboard for your base. 2. Glue Corks: Start gluing corks onto your base. You can arrange them in various patterns: Flat Lay: Glue them side-by-side, either horizontally or vertically, until the entire base is covered. Layered: Create more dimension by gluing some corks flat and others on top, creating small clusters. Circular: Glue them in concentric circles, stacking them for a fuller look. 3. Fill Gaps: Once the main structure is done, look for any gaps and fill them with smaller pieces of cork or by gluing corks at different angles to create a rich texture. 4. Embellish: Add a festive touch by gluing on small pinecones, faux berries, or sprigs of evergreen. Tie a large, decorative ribbon at the top for hanging. For more unique home decor ideas, consider exploring how you can incorporate [travel-inspired packable decor ideas](https://skyryedesign.com/design/interior-design/travel-inspired-packable-decor-ideas/) to add a global touch to your rustic cork wreath. 5. Seal (Optional):* If you plan to use the wreath outdoors, you might consider spraying it with a clear sealant to protect it from the elements.
These wine cork creations are not only charming but also a wonderful conversation starter, showcasing your dedication to eco-friendly crafting.


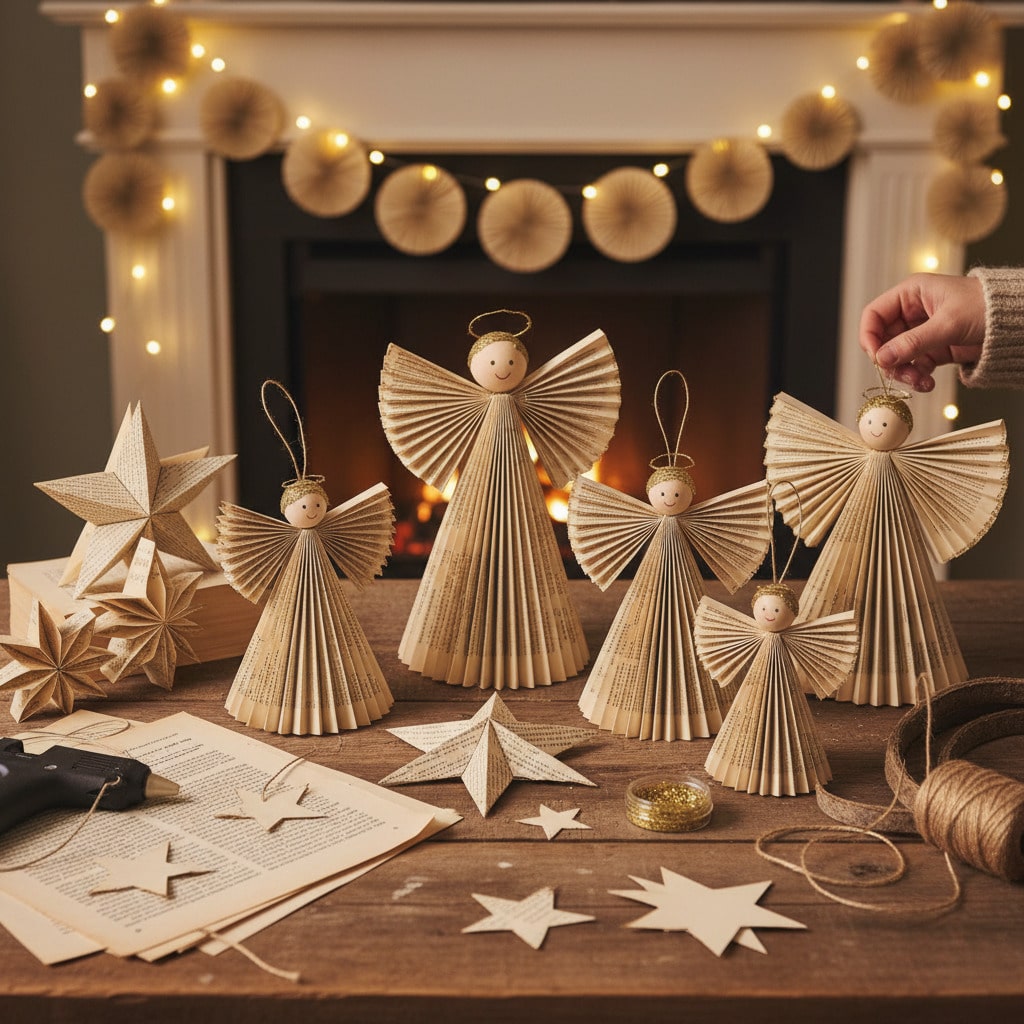
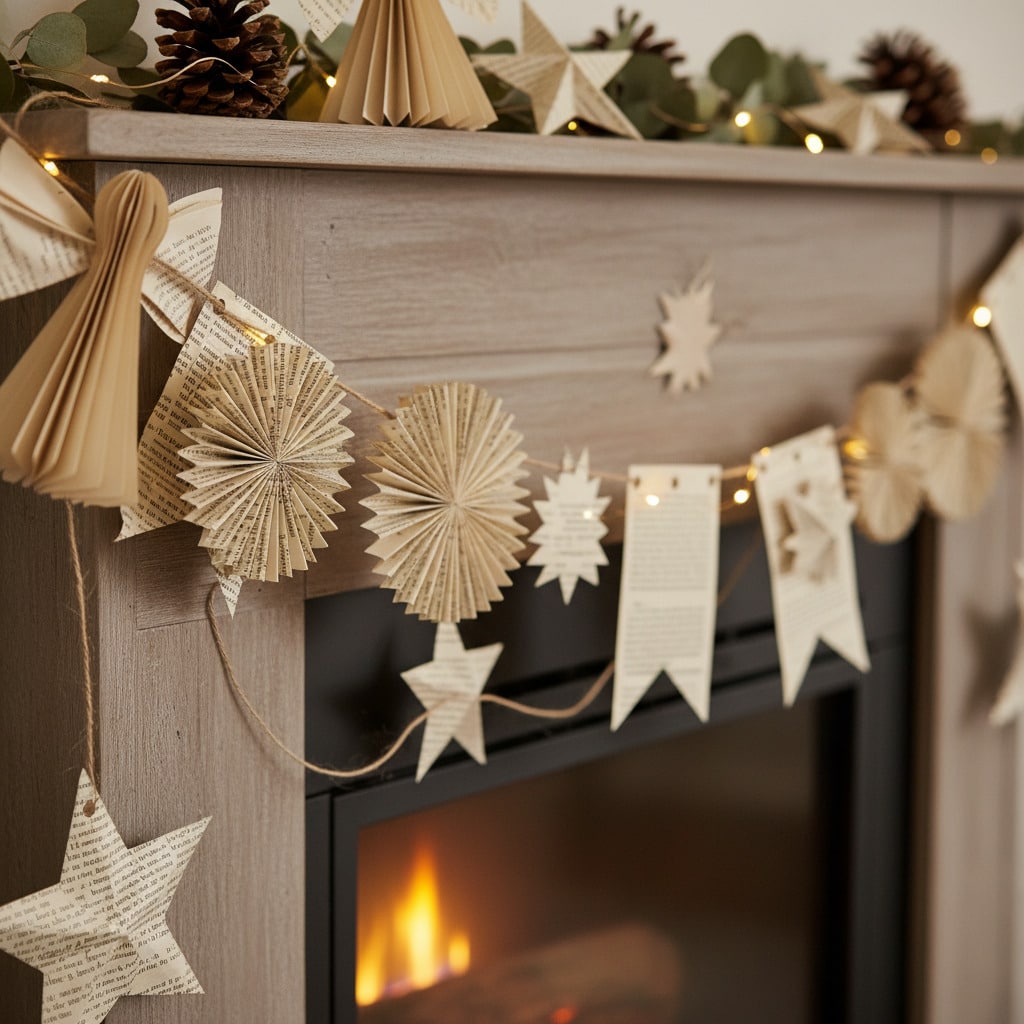
4. Old Book Page Delights: Garlands, Stars, and Angels
Before you toss out that old, tattered book or a forgotten paperback, consider giving its pages a new, beautiful life as delicate Christmas decorations. The aged, off-white hue of old book pages adds a vintage, sophisticated touch to any holiday display. This upcycling project is incredibly versatile, allowing you to create everything from intricate garlands to ethereal angels and striking stars. It’s an artistic way to pay homage to the written word while celebrating the festive season.
Materials You’ll Need:
- Old books with pages you’re willing to cut (avoid anything of sentimental or significant value!)
- Scissors or a craft knife
- Ruler
- Pencil
- Glue stick, PVA glue, or hot glue gun
- Twine or thread (for garlands)
- Glitter or metallic paint (optional, for added sparkle)
- Stapler (for some designs)
Crafting with Literary Flair:
For Elegant Book Page Garlands: 1. Prepare Pages: Gently tear or cut pages from the book. You can cut them into rectangles, squares, or even long strips. 2. Fold and Shape: Accordion Fold: Fold pages in an accordion style, then glue the ends together to form a fan. Make multiple fans and glue them together to create a circular rosette. Cones: Roll pages into small cones and glue the edges. Simple Strips: Cut pages into thin strips. 3. Assemble Garland: String your folded shapes, rosettes, or cones onto a piece of twine or strong thread using a needle, or simply glue them onto the twine. You can intersperse them with beads or small wooden ornaments for extra texture. 4. Embellish (Optional):* Lightly dust the edges with glitter or apply a thin coat of metallic paint for a subtle shimmer.
For Celestial Book Page Stars: 1. Cut Star Shapes: Draw or print out star templates in various sizes. Trace them onto the book pages and cut them out. For a 3D effect, cut two identical stars. 2. Fold for Dimension: Fold each star gently down the middle of each point, creating creases that add depth. 3. Assemble: Flat Stars: Simply punch a hole at the top of a single star and thread with twine to hang. 3D Stars: Place the two identical stars on top of each other, slightly offset, and glue them in the center. You can also cut a slit from the top to the center on one star and from the bottom to the center on the other, then slide them together to interlock, creating a more intricate 3D form. 4. Decorate: A touch of gold or silver glitter glue along the edges can really make these stars sparkle.
For Ethereal Book Page Angels: 1. Angel Body: Take a single page and roll it into a cone shape, gluing the edge to secure it. This forms the angel’s body. 2. Wings: Take another page, fold it in half, and then cut out a wing shape (like a half-heart). Open it up to reveal symmetrical wings. Gently score and fold the center of the wings to give them a slight bend. 3. Head: For the head, you can roll a small piece of page into a ball and glue it, or use a wooden bead. 4. Assembly: Glue the wings to the back of the cone body. Glue the head to the top of the cone. 5. Halo (Optional): Use a thin strip of metallic paper or even a pipe cleaner bent into a circle for a halo. 6. Finishing Touches: Add a small loop of thread for hanging. These look beautiful hanging on a tree or even standing on a shelf.
These book page decorations are not just eco-friendly; they bring a touch of timeless charm and intellectual whimsy to your holiday decor, perfect for those who appreciate a vintage or literary aesthetic.
5. Fabric Scrap Wonders: Rag Wreaths and Stuffed Ornaments
Do you have a stash of old clothes, worn-out sheets, or leftover fabric from sewing projects? Don’t let those textiles go to waste! Fabric scraps are a goldmine for creating cozy, tactile, and incredibly charming Christmas decorations. Upcycling fabric not only reduces landfill waste but also adds a unique, homespun feel to your holiday decor, telling a story with every piece of material.
Materials You’ll Need:
- Assorted fabric scraps (cotton, flannel, burlap, even old denim or sweaters work!)
- Scissors or rotary cutter
- For Rag Wreaths: Wire wreath frame (or a sturdy cardboard ring), hot glue gun (optional but helpful).
- For Stuffed Ornaments: Template shapes (stars, hearts, trees), needle and thread or sewing machine, stuffing (old pillow stuffing, more fabric scraps, or even cotton balls), ribbon or twine for hanging.
Crafting Cozy Fabric Decor:
For Rustic Fabric Rag Wreaths: 1. Prepare Fabric Strips: Cut your fabric scraps into strips. A good size is about 1-2 inches wide and 6-8 inches long, but you can vary this for different textures. Mix colors and patterns for a vibrant look, or stick to a specific palette for a more coordinated design. 2. Tie onto Frame: Take a fabric strip, fold it in half, and tie it onto your wire wreath frame with a simple knot. Push the knot tightly against the frame. 3. Continue Tying: Keep tying fabric strips onto the frame, pushing them close together to create a full, fluffy wreath. Alternate colors and textures as you go. You’ll need a lot of strips to get a truly lush look! 4. Fill it Up: Continue until the entire wreath frame is covered and you can’t see the wire anymore. Fluff out the fabric ties to give it volume. 5. Embellish (Optional): You can add small pinecones, faux berries, or even mini fabric bows with a hot glue gun. Tie a large loop of complementary fabric or ribbon at the top for hanging. This creates a wonderfully cozy and welcoming feel, much like incorporating cozy interior design tips into your everyday living space.
For Adorable Stuffed Fabric Ornaments: 1. Choose Shapes: Decide on your ornament shapes – stars, hearts, Christmas trees, gingerbread men, or even simple circles. You can draw them freehand or use cookie cutters as templates. 2. Cut Fabric: Place two pieces of fabric (right sides together, if applicable) and trace your chosen shape onto the top piece. Pin them together to prevent slipping, then cut out the shape. You’ll have two identical pieces for each ornament. 3. Sew Together: Using a sewing machine or needle and thread, sew around the edges of your fabric shapes, leaving a small opening (about 1-2 inches) on one side. Remember to backstitch at the beginning and end. If you’re using a sewing machine, a quarter-inch seam allowance is usually good. 4. Clip and Turn: Carefully clip the curves and corners of your sewn shape (without cutting through the seam) to help it lie flat when turned. Turn the ornament right side out through the opening. Use a blunt tool (like a chopstick or pencil eraser) to gently push out the corners. 5. Stuff It: Lightly stuff your ornament with poly-fill, cotton balls, or even tiny fabric scraps. Don’t overstuff; you want it plump but not bursting. 6. Close Opening: Stitch the opening closed using a ladder stitch (invisible stitch) for a neat finish. 7. Add Hanger: Attach a loop of ribbon or twine to the top of the ornament for hanging. You can stitch it securely or use a hot glue gun. 8. Decorate: Embellish with buttons, beads, embroidery, or fabric paint if desired. These make fantastic personalized gifts or additions to your Christmas tree.

6. Shimmering CD/DVD Mosaics and Garlands
Before you toss those old, scratched CDs and DVDs, think about their hidden potential for sparkling Christmas decor! The iridescent, rainbow-like shimmer on their surface makes them perfect for creating modern, eye-catching ornaments and garlands. This is a wonderfully innovative way to upcycle tech waste and bring a unique, futuristic sparkle to your holiday season.
Materials You’ll Need:
- Old CDs or DVDs (the more, the merrier!)
- Strong scissors or craft knife (be careful, as edges can be sharp)
- Hot glue gun and glue sticks
- Cardboard shapes (for mosaic ornaments: stars, circles, trees)
- Clear fishing line or strong thread (for garlands)
- Glitter or metallic paint (optional)
Crafting with Digital Glow:
For Dazzling CD Mosaic Ornaments: 1. Break Down CDs: This is the most crucial step. Place a CD on a protected surface (like an old cutting board or cardboard). Using strong scissors, carefully cut the CD into small, irregular pieces. Triangles, squares, or random shards all work well. Be mindful of sharp edges. For safety, you might want to wear protective gloves. 2. Choose Your Base: Cut out your desired ornament shapes from sturdy cardboard (e.g., stars, circles, Christmas trees). 3. Glue Mosaic Pieces: Apply hot glue to a small section of your cardboard shape. Immediately press the CD pieces onto the glue, shiny side up, arranging them like a mosaic. Try to keep small gaps between the pieces, mimicking traditional mosaic art. 4. Cover Completely: Continue gluing pieces until the entire front surface of your cardboard shape is covered. Don’t worry if pieces extend slightly beyond the edges; you can trim them later. 5. Finish Edges (Optional): Once dry, you can trim any overhang. For a neater look, you can paint the exposed cardboard edges with metallic paint or wrap them with a thin ribbon. 6. Add Hanger: Punch a small hole at the top of the ornament and thread a piece of fishing line or ribbon through for hanging.
For Iridescent CD Garlands: 1. Cut CD Shapes (Larger): Instead of small shards, for garlands, you can cut the CDs into larger, uniform shapes like circles, squares, or stars. A craft punch (if strong enough for CDs) can create perfect circles. 2. Drill Holes: For each shape, you’ll need to drill two small holes (or carefully punch them with a sharp tool) – one at the top and one at the bottom – to connect them. If you’re using irregular pieces, you might only need one hole per piece. 3. String Together: Thread a piece of fishing line or strong thread through the holes, connecting the CD pieces one by one. Leave enough space between each piece to allow them to dangle and catch the light. You can string them horizontally to form a chain or vertically for a more cascading effect. 4. Vary the Design: Alternate between different CD shapes, or mix in some small glass beads or shiny craft store embellishments for extra sparkle. 5. Hang and Admire: Drape your finished garland across a mantel, around a window, or even on your Christmas tree for a truly unique and modern shimmering display.
These CD/DVD decorations are a testament to creative upcycling, turning discarded technology into dazzling, conversation-starting holiday decor that truly shines.
7. Plastic Bottle Bling: Snowflakes and Bells
Plastic bottles are perhaps one of the most common items destined for landfills, but with a little creativity, they can be transformed into surprisingly delicate and beautiful Christmas decorations. The clear plastic, especially the sturdy bottoms of larger bottles, is perfect for crafting shimmering snowflakes or charming bells that catch the light beautifully. This project is a fantastic way to give plastic a second life and teach about sustainability.
Materials You’ll Need:
- Empty, clean plastic bottles (preferably clear, larger ones like 2-liter soda bottles or water bottles for snowflakes; smaller ones for bells)
- Sharp scissors or craft knife (adult supervision required for cutting plastic)
- Permanent markers (metallic or opaque colors work well) or acrylic paint
- Glitter glue or fine glitter with PVA glue
- Hole punch
- String, fishing line, or ribbon for hanging
- Small bells or beads (for bells)
Crafting with Repurposed Plastic:
For Sparkling Plastic Bottle Snowflakes: 1. Cut the Bottom: Carefully cut off the bottom portion of your plastic bottle. Aim for the part where the base forms a natural five or six-pointed “flower” shape. This will be the base of your snowflake. You’ll typically need a sharp craft knife to make an initial incision, then scissors to cut around the circumference. Ensure the edges are as smooth as possible. 2. Trim and Refine: Trim any rough edges. If your bottle bottom has defined ridges, these will become the “points” of your snowflake. 3. Decorate Your Snowflake: Markers: Use permanent markers to draw intricate patterns, swirls, or dots on the plastic. White, silver, or blue markers look especially frosty. Paint: You can use acrylic paint, but be aware it might not adhere perfectly to all plastics. For best results, lightly sand the plastic first or use a primer designed for plastic. Glitter: Apply glitter glue to highlight the ridges or create frosty patterns. For a more subtle shimmer, apply a thin layer of PVA glue and sprinkle fine glitter on top. 4. Add a Hanger: Use a hole punch to create a small hole at one of the snowflake’s “points.” Thread a piece of fishing line or ribbon through the hole for hanging. 5. Hang and Twinkle:* Hang your finished snowflakes on your tree, in a window, or string several together to create a delicate garland. They catch the light beautifully and create a magical, frosty effect.
For Charming Plastic Bottle Bells: 1. Cut Bell Shape: For bells, you’ll want to cut a portion of the bottle that resembles a bell shape. This often means cutting off the very top (mouthpiece) and the very bottom, leaving a cylindrical or slightly conical section. You can then shape the bottom edge to be more bell-like (slightly flared). 2. Smooth Edges: Gently run the cut edges over a warm (not hot!) iron or carefully with a lighter flame for a second or two to slightly melt and smooth them. Be extremely careful and do this in a well-ventilated area. 3. Decorate Your Bells: Paint: Paint the inside or outside of the plastic bell with acrylic paint. Metallic gold or silver paints look very festive. Glitter: Cover the entire bell with glue and glitter for an extra sparkly effect. Stickers/Decals: Use festive stickers or even small cut-outs from old holiday cards to decorate the surface. 4. Add Clapper and Hanger: Punch a hole at the very top center of your plastic bell. Thread a piece of string through, and tie a small craft bell or a decorative bead to the end of the string that hangs inside the plastic bell. Secure the other end of the string with a knot or bead on the outside to create a hanger. 5. Hang and Jingle:* Hang your plastic bottle bells on your Christmas tree or in clusters around your home. They’re lightweight and add a lovely whimsical touch.

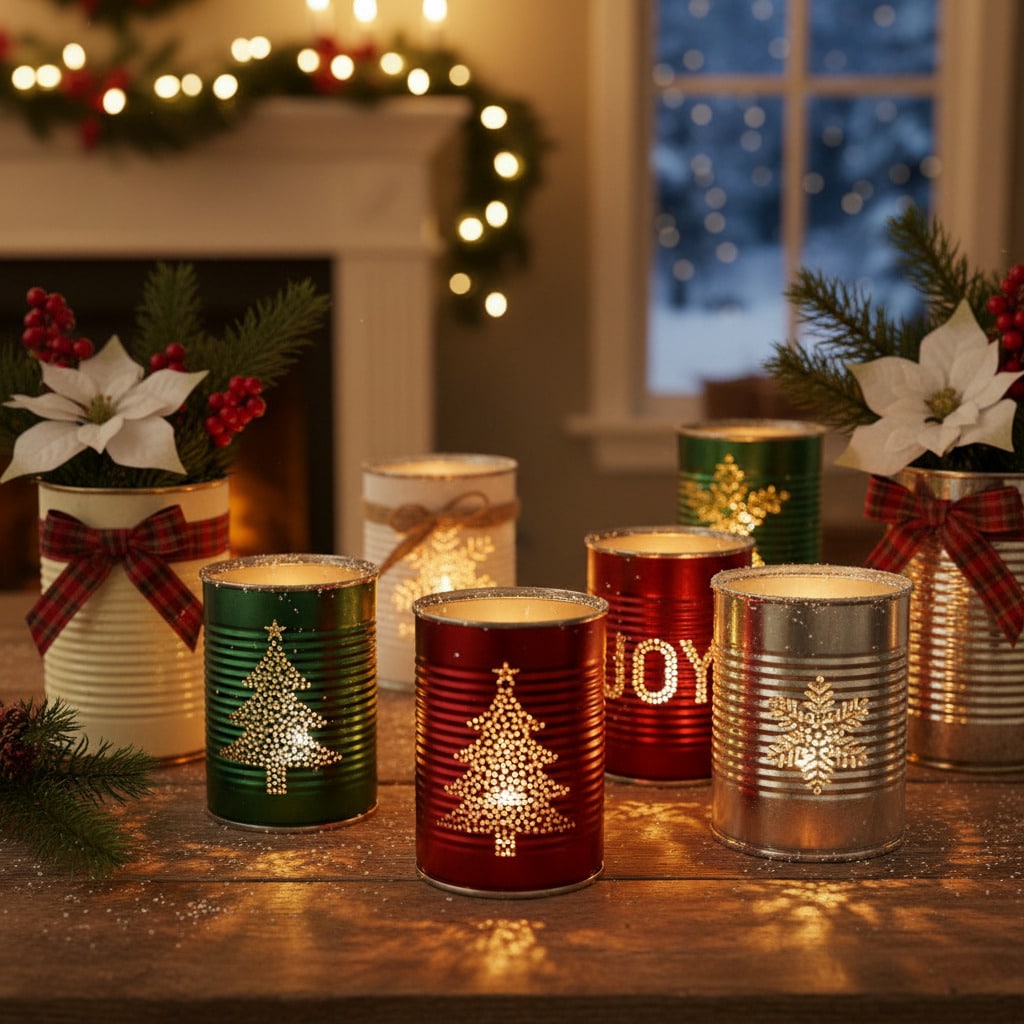
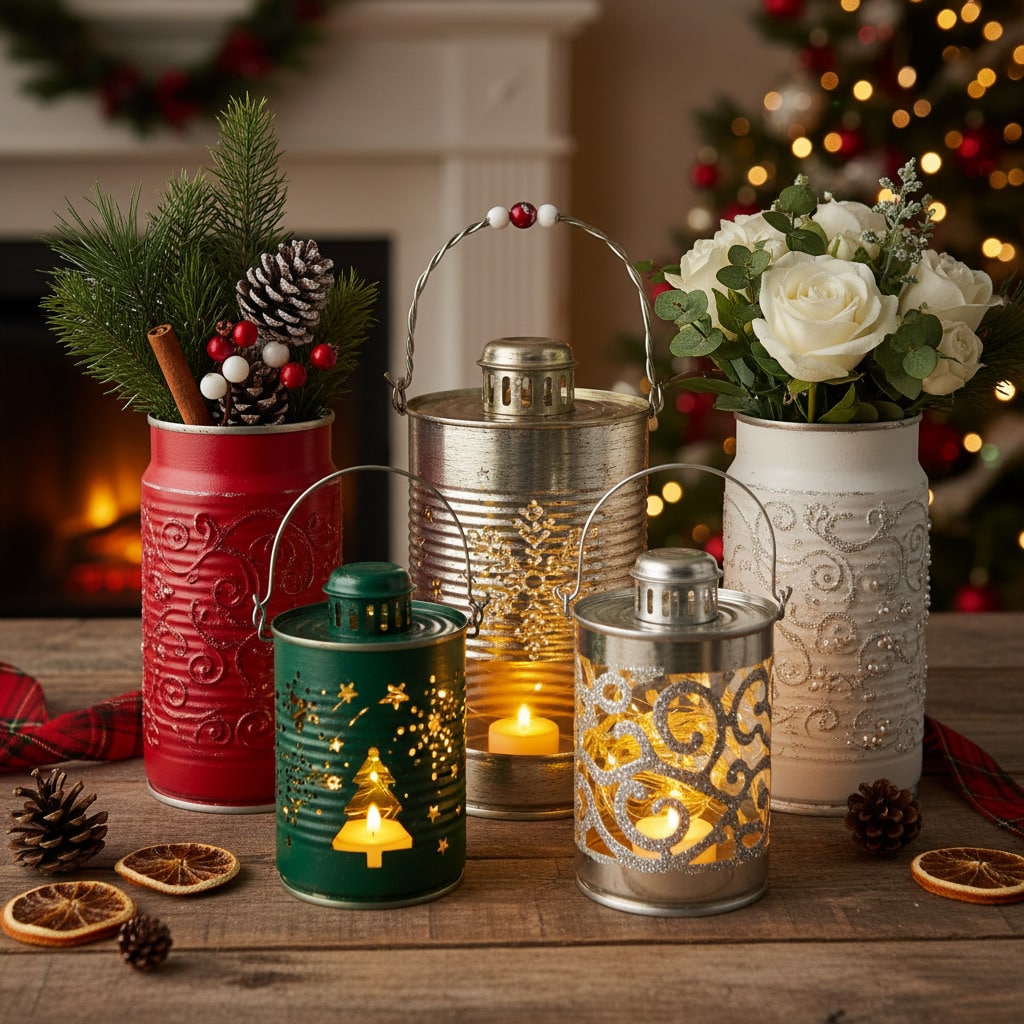
8. Tin Can Lanterns and Vases
Tin cans are one of the unsung heroes of upcycling! From soup cans to coffee tins, these sturdy metal containers can be transformed into beautiful, rustic lanterns or festive vases for your Christmas decor. The process is surprisingly simple, creating an industrial-chic look that’s both charming and incredibly eco-friendly. They’re perfect for adding a warm, inviting glow or showcasing holiday greenery.
Materials You’ll Need:
- Empty, clean tin cans (various sizes: soup cans, coffee cans, vegetable cans)
- Hammer
- Nails (various sizes for different hole patterns)
- Newspaper or old cloth (for protecting your work surface)
- Wire (for hanging lanterns)
- Battery-operated LED tea lights or fairy lights (for lanterns)
- Paint (spray paint or acrylic) and paintbrushes (optional)
- Permanent markers or stencils (optional, for designs)
- Holiday foliage or faux flowers (for vases)
Crafting with Cans:
For Rustic Tin Can Lanterns: 1. Clean and Prep Cans: Thoroughly clean and dry your tin cans. Remove all labels. 2. Fill with Water and Freeze: This is a crucial step! Fill each can with water and place it in the freezer until the water is completely frozen solid. The ice inside prevents the can from crushing when you punch holes and provides a firm surface to work against. 3. Design Your Pattern: Once frozen, place the can on a protected surface (like a folded towel or newspaper). Use a permanent marker to draw your desired pattern onto the can. Simple designs like stars, circles, or abstract swirls work well. You can also trace patterns from stencils. For a festive look, try drawing Christmas trees, snowflakes, or “JOY” in dots. 4. Punch the Holes: Using a hammer and a nail, carefully punch holes along your drawn pattern. For finer details, use a smaller nail; for larger dots, use a thicker nail. You can experiment with different nail sizes for varied effects. For hanging lanterns, punch two holes near the top rim, directly opposite each other, to thread a wire handle. 5. Melt and Dry: Once all your holes are punched, let the ice melt. Discard the water and thoroughly dry the inside and outside of the can to prevent rust. 6. Decorate (Optional): You can spray paint your cans in festive colors like metallic gold, silver, or deep red. Alternatively, you can leave them as raw metal for a rustic, industrial look. 7. Add Hanger (for hanging lanterns): Thread a piece of sturdy wire through the two top holes you punched earlier, forming a handle. Twist the ends of the wire securely. 8. Light It Up: Place a battery-operated LED tea light or a string of fairy lights inside each can. The light will beautifully shine through the punched patterns, casting festive shadows. These lanterns are perfect for indoor use, creating a warm, cozy ambiance. 9. Display: Hang your lanterns from hooks or place them on shelves, tables, or window sills. They look especially charming in groups.
For Festive Tin Can Vases: 1. Clean and Prep: Clean and dry your tin cans, removing all labels. 2. Paint and Decorate: This is where you can get really creative! Spray Paint: Apply several thin coats of spray paint in your chosen holiday colors (red, green, gold, silver, white). Acrylic Paint: Use acrylic paints to hand-paint designs like stripes, polka dots, or festive scenes. Fabric/Paper Wrap: Glue on festive fabric scraps, burlap, or even old holiday wrapping paper for a quick transformation. Twine/Ribbon: Wrap the cans tightly with twine, ribbon, or yarn, securing with hot glue, for a textured look. 3. Add Embellishments: Once dry, you can hot glue on small pinecones, faux berries, jingle bells, cinnamon sticks, or even glitter for extra sparkle. 4. Fill with Cheer: Place holiday foliage (fresh or faux), poinsettias, or arrangements of dried flowers into your newly decorated tin can vases. They make charming centerpieces or accents for any room. Consider pairing them with trending home decor items for a modern twist on classic holiday style.
Tin can crafts are not only budget-friendly but also incredibly durable, allowing you to reuse them year after year.
The holiday season is a time for magic, warmth, and cherishing what truly matters. By embracing upcycled Christmas decorations, you’re not just saving money and reducing waste; you’re infusing your home with unique stories and personalized charm that mass-produced items simply can’t offer. From the whimsical characters born from toilet paper rolls to the shimmering elegance of CD mosaics and the rustic glow of tin can lanterns, each handmade piece carries a special energy.
This festive season, challenge yourself to look at everyday “junk” with new eyes. That old jar isn’t just a container; it’s a future luminary. Those wine corks aren’t just stoppers; they’re the makings of a tiny reindeer herd. By choosing to create, you’re not only crafting beautiful decor but also contributing to a more sustainable world, one sparkle at a time. So gather your forgotten treasures, unleash your creativity, and let your home shine with the heartfelt beauty of upcycled Christmas cheer. Your efforts will not only deck the halls but also warm your heart and inspire others to join the eco-friendly festive movement.
- 33shares
- Facebook0
- Pinterest30
- Twitter3
- Reddit0

