Christmas is that magical time of year when homes transform into festive wonderlands, filled with twinkling lights, shimmering ornaments, and the cozy scent of pine. But let’s be real, decking the halls can seriously dent your wallet. Fear not, fellow festive fanatics! You don’t need to spend a fortune to create a stunning holiday atmosphere. This year, embrace the joy of crafting and add a personal touch to your decor with some incredible, wallet-friendly DIYs. We’re talking about smart, sustainable, and super fun projects that will have your home looking like a million bucks without the hefty price tag. Get ready to dive into 10 Budget-Friendly Christmas DIYs that you’ll absolutely adore creating and showcasing!
Why DIY This Christmas?
Beyond saving some cash, crafting your own decorations brings a unique warmth and personal story to your home. It’s a chance to get creative, involve the whole family, and make memories that last longer than any store-bought bauble. Plus, in an age of mass production, handmade items stand out, adding an authentic, rustic charm that often feels more genuinely “Christmas.” From upcycling everyday items to foraging natural elements, these projects prove that the best decorations often come from the heart and a little ingenuity.
Let’s get started on transforming your space into a festive haven, one delightful DIY at a time!
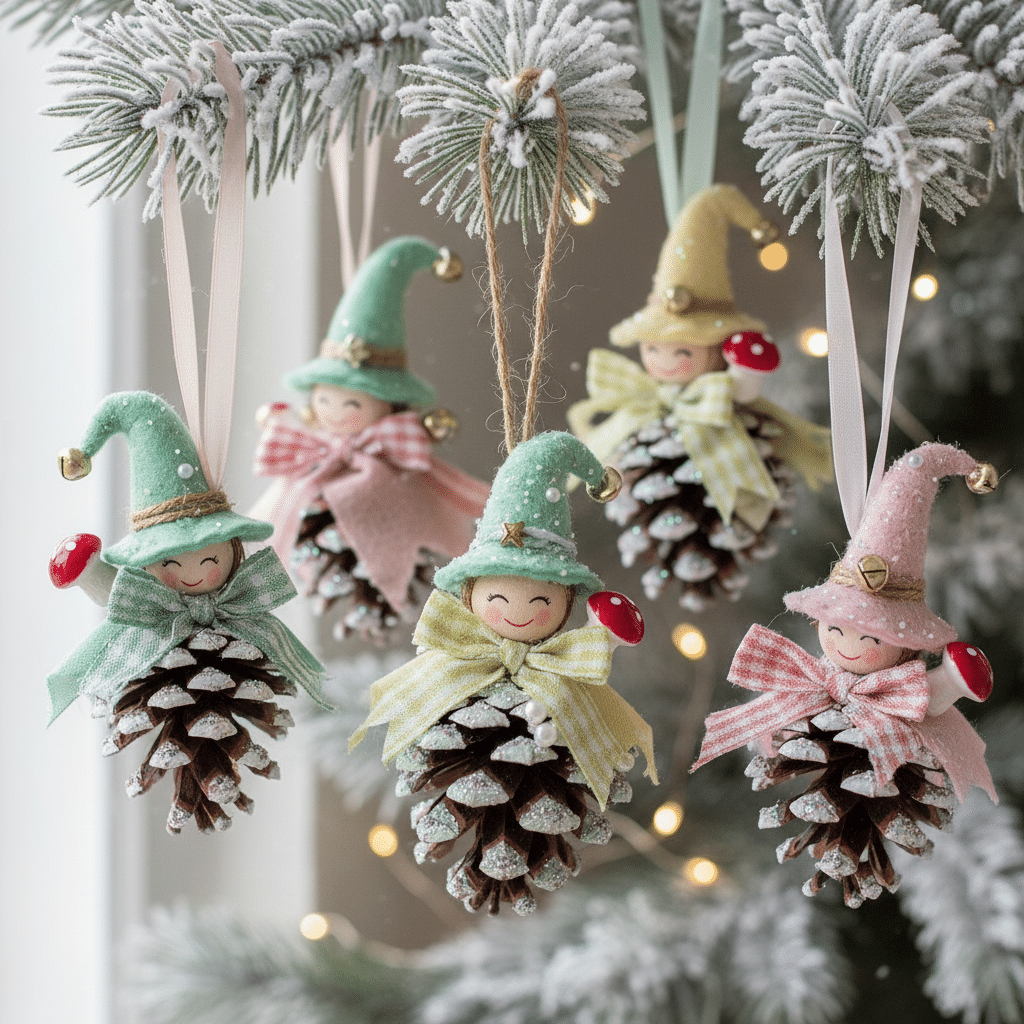
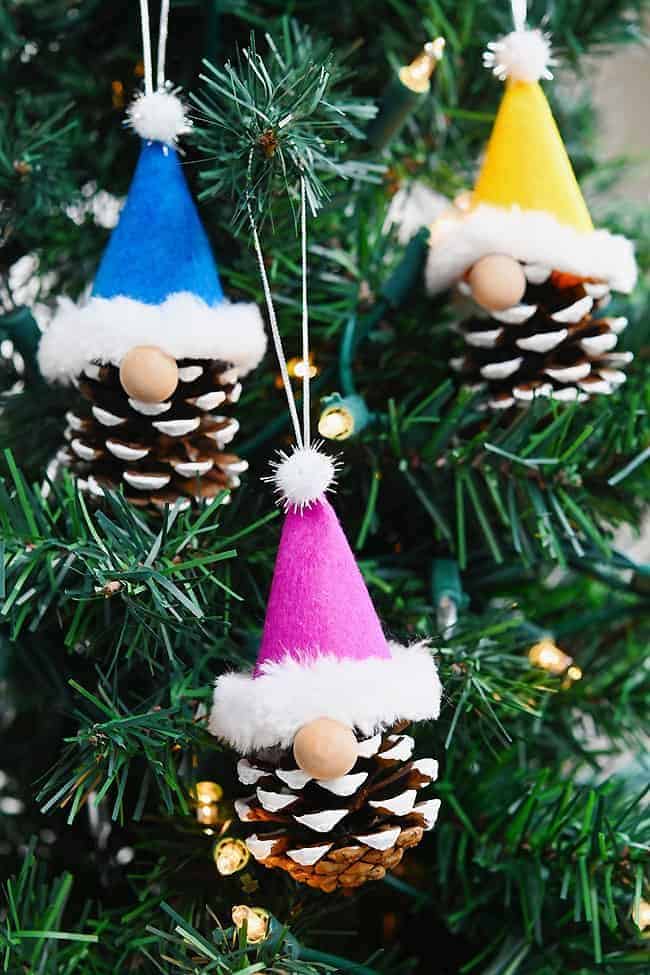
1. Whimsical Pinecone Ornaments
Nothing screams “winter wonderland” quite like a collection of pinecones. And the best part? They’re usually free! A simple walk in nature can provide you with all the raw materials you need for these charming ornaments. Not only are they naturally beautiful, but they’re also incredibly versatile, lending themselves to various styles from rustic farmhouse to elegant minimalist. This is a fantastic way to bring the outdoors in, connecting your festive decor with the natural world around you.
Materials You’ll Need:
- Assorted pinecones (clean and dry)
- White craft paint or “snow” spray paint
- Glitter (optional, but highly recommended for that sparkle!)
- Twine, ribbon, or string
- Hot glue gun (or strong craft glue)
- Small decorative elements like mini bells, beads, or small fabric scraps (optional)
How to Make Them: 1. Clean Your Pinecones: If you’ve gathered them yourself, give them a good shake to remove any loose debris. You can bake them on a low heat (around 200°F or 90°C) for about 30 minutes to kill any potential bugs and help them open up nicely. Let them cool completely. 2. Add a “Snowy” Touch: Lightly brush the tips of the pinecone scales with white craft paint to create a frosted effect. Alternatively, a quick spritz of “snow” spray paint offers a more uniform, powdery look. Let the paint dry thoroughly. 3. Sparkle Time (Optional): While the paint is still slightly tacky, sprinkle some glitter over the painted areas. The glitter will catch the light beautifully, giving your pinecones an enchanted, frosty glow. 4. Attach the Hanger: Cut a piece of twine or ribbon about 6-8 inches long. Form a loop and hot glue the ends securely to the base of the pinecone, or tuck it under one of the top scales. 5. Personalize (Optional): For an extra touch, hot glue tiny bows made from scrap ribbon, a small bell, or a few beads onto the pinecone. You can even dab a bit of essential oil like cinnamon or pine onto them for a subtle festive fragrance.
These pinecone ornaments are perfect for adorning your tree, hanging on door handles, or even grouping in a bowl as a natural centerpiece.
2. Sweet-Smelling Citrus Slice Garlands & Ornaments
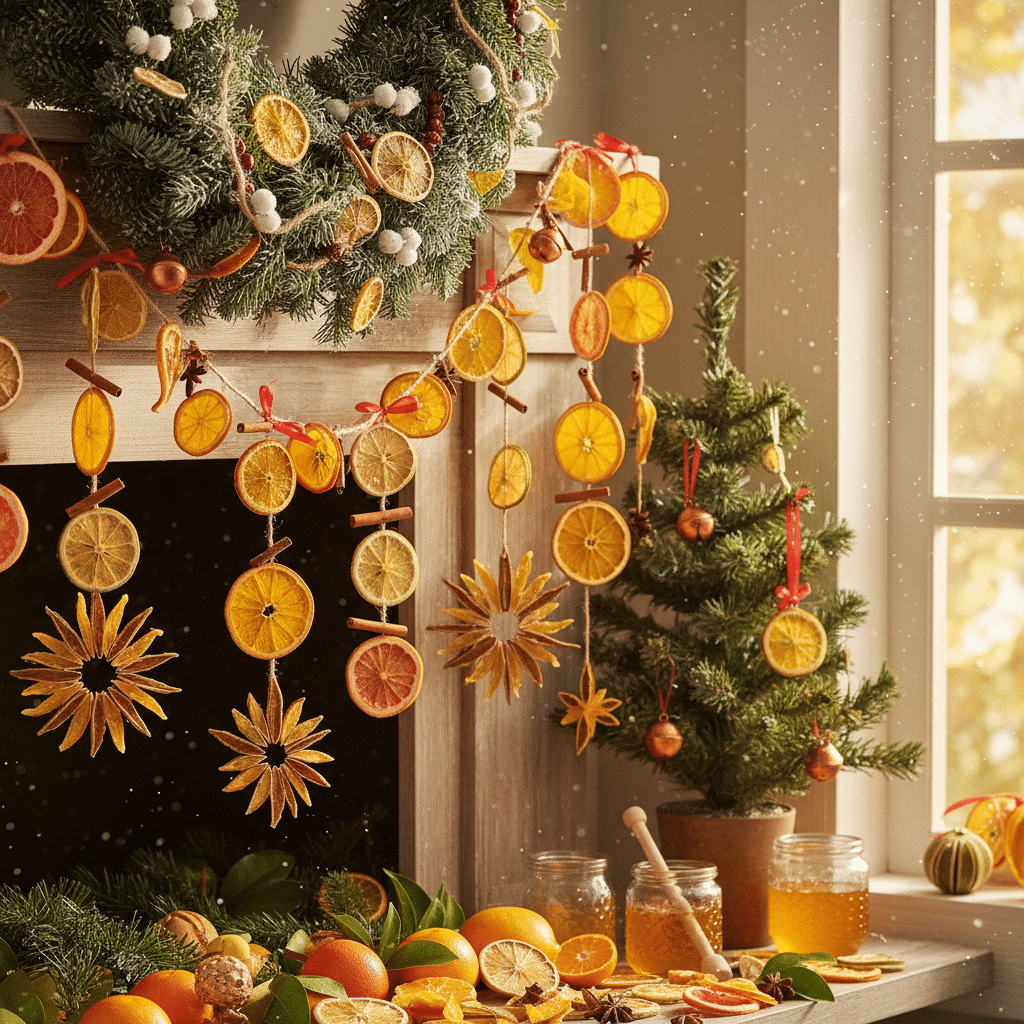
Dried citrus slices are a classic, beautiful, and delightfully fragrant Christmas decoration. They catch the light beautifully, offer a vibrant pop of natural color, and release a subtle, festive scent that makes your home feel extra cozy. Plus, they’re incredibly easy to make with just fruit and an oven. This project is a fantastic example of turning simple ingredients into elegant decor.
Materials You’ll Need:
- Oranges, lemons, grapefruits, or limes
- Sharp knife
- Baking sheets and parchment paper
- Twine or clear fishing line
- Large needle
How to Make Them: 1. Slice Your Citrus: Using a sharp knife, slice your chosen citrus fruits into thin (about 1/8 to 1/4 inch thick) rounds. The thinner they are, the faster they’ll dry. 2. Prepare for Drying: Blot the slices thoroughly with paper towels to remove as much moisture as possible. This step is crucial for preventing mold and speeding up the drying process. 3. Oven Dry: Lay the slices in a single layer on baking sheets lined with parchment paper. Bake in a very low oven, around 170-200°F (75-90°C), for 3-6 hours. Keep an eye on them, flipping them every hour or so, until they are completely dry and translucent. They should feel firm, not sticky or squishy. 4. Cool Down: Once dry, remove them from the oven and let them cool completely on a wire rack. They will crisp up further as they cool. 5. String Them Up: Using a large needle, carefully thread twine or fishing line through the top of each slice for individual ornaments. For a garland, thread multiple slices, adding knots between them or spacing them evenly. You can alternate citrus types for a varied look or add bay leaves, cranberries, or cinnamon sticks between slices for extra charm and scent.
Hang these fragrant beauties on your Christmas tree, drape them over a mantel, or string them across a window for a gorgeous, natural display.

3. Charming Salt Dough Ornaments
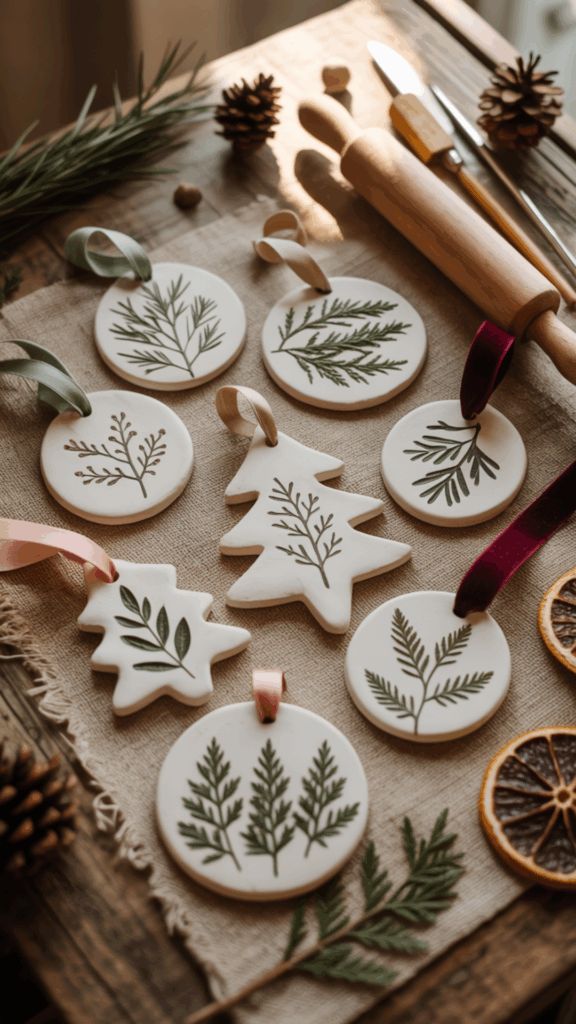
Salt dough ornaments are a timeless classic, offering a rustic, homemade charm that’s simply irresistible. They’re incredibly inexpensive to make, use basic pantry staples, and are perfect for involving kids in the decorating process. Plus, the possibilities for customization are endless – from handprints to intricate designs, these ornaments can truly be keepsakes.
Materials You’ll Need:
- 1 cup salt
- 2 cups all-purpose flour
- 1 cup warm water
- Cookie cutters (Christmas shapes are best!)
- Drinking straw or skewer (for making holes)
- Baking sheet and parchment paper
- Acrylic paints, glitter, markers, or sealers (optional, for decorating)
- Ribbon or twine for hanging
How to Make Them: 1. Mix the Dough: In a large bowl, combine the salt and flour. Gradually add the warm water, mixing until a stiff dough forms. You might need to adjust the water slightly. 2. Knead and Roll: Turn the dough out onto a lightly floured surface and knead for about 5-10 minutes until smooth and elastic. Roll the dough out to about 1/4 inch thickness. 3. Cut Shapes: Use your favorite Christmas cookie cutters to cut out various shapes. For a personal touch, press a child’s handprint or a pet’s paw print into the dough. 4. Make Holes: Use a drinking straw or skewer to create a small hole at the top of each ornament for hanging. 5. Bake: Carefully transfer the ornaments to a baking sheet lined with parchment paper. Bake in a low oven (around 200-250°F or 90-120°C) for 2-4 hours, or until completely hard and dry. The baking time will vary depending on the thickness of your ornaments. Flip them periodically to ensure even drying. 6. Decorate: Once cooled, let your creativity shine! Paint them with acrylics, add glitter, draw on details with markers, or simply leave them natural. If you paint them, consider a coat of clear sealant to protect the design and give them a slight sheen. 7. Hang: Thread ribbon or twine through the holes and hang your beautiful creations!
These are fantastic for decorating your own tree or giving as heartfelt, homemade gifts. For more general DIY decor ideas to spruce up your home, check out this article on 10 DIY Decor Ideas.

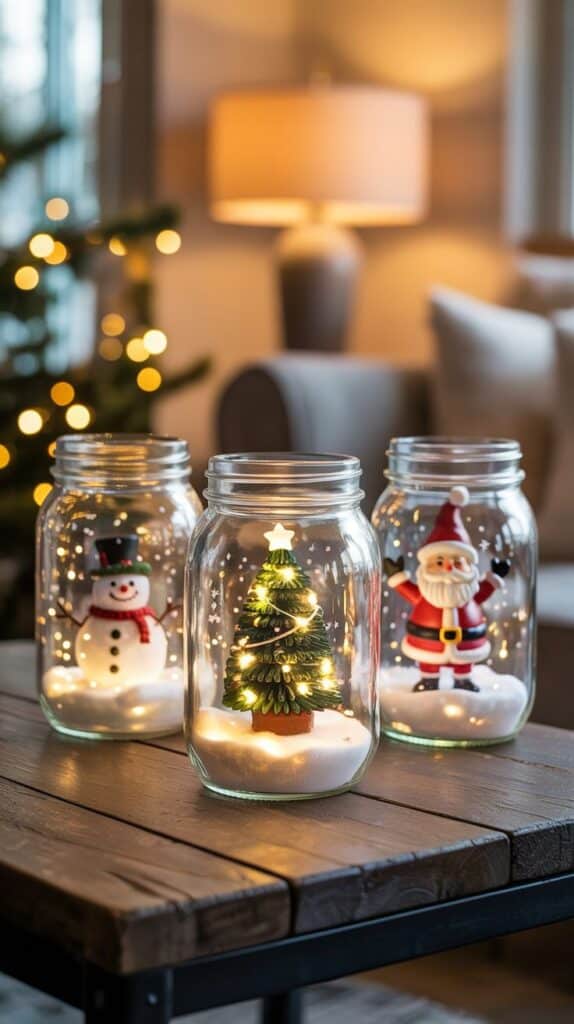
4. Upcycled Jar Luminaries and Votives
Empty glass jars, from pickles to jam, often end up in the recycling bin. This Christmas, give them a glorious second life as enchanting luminaries or elegant votive holders! These DIYs add a warm, inviting glow to any space and are incredibly versatile for indoor or outdoor use. They’re a perfect way to add ambient lighting without breaking the bank.
Materials You’ll Need:
- Clean, empty glass jars (various sizes)
- White craft glue (like Mod Podge) or spray adhesive
- Glitter, Epsom salts (for a snowy look), craft paper, lace, burlap, or fabric scraps
- Twine, ribbon, or raffia
- Small battery-operated tea lights or LED string lights (safer than real candles, especially for outdoor use or if you have kids/pets)
- Pine sprigs, berries, small pinecones (optional)
How to Make Them: 1. Prepare Your Jars: Ensure jars are sparkling clean and completely dry. Remove any labels. 2. Choose Your Style: Frosted Glow: Apply a thin layer of white craft glue to the outside of the jar (or use spray adhesive). Immediately roll the jar in Epsom salts for a frosty, snowy effect, or sprinkle liberally with fine glitter. Let dry completely. Cozy Wrapped: Wrap the jar in strips of burlap, lace, or festive fabric scraps, securing with hot glue. You can even use patterned craft paper. This is a great way to use up bits of material, similar to what you might do for DIY fabric wall art using scrap material. Painted Scenes: Paint festive silhouettes or designs directly onto the jar using acrylic paints. Think snowflakes, trees, or reindeer. 3. Add Embellishments: Once dry, tie a festive ribbon, twine, or raffia around the neck of the jar. Tuck in a small pine sprig, a few artificial berries, or a mini pinecone for extra charm. 4. Light It Up:* Place a battery-operated tea light or a short strand of LED fairy lights inside the jar. The soft glow will be magical.
These luminaries are perfect for lining a walkway, decorating a mantel, gracing a dining table, or adding a gentle light to a dreamy balcony styling.

5. Rustic Cinnamon Stick Bundles
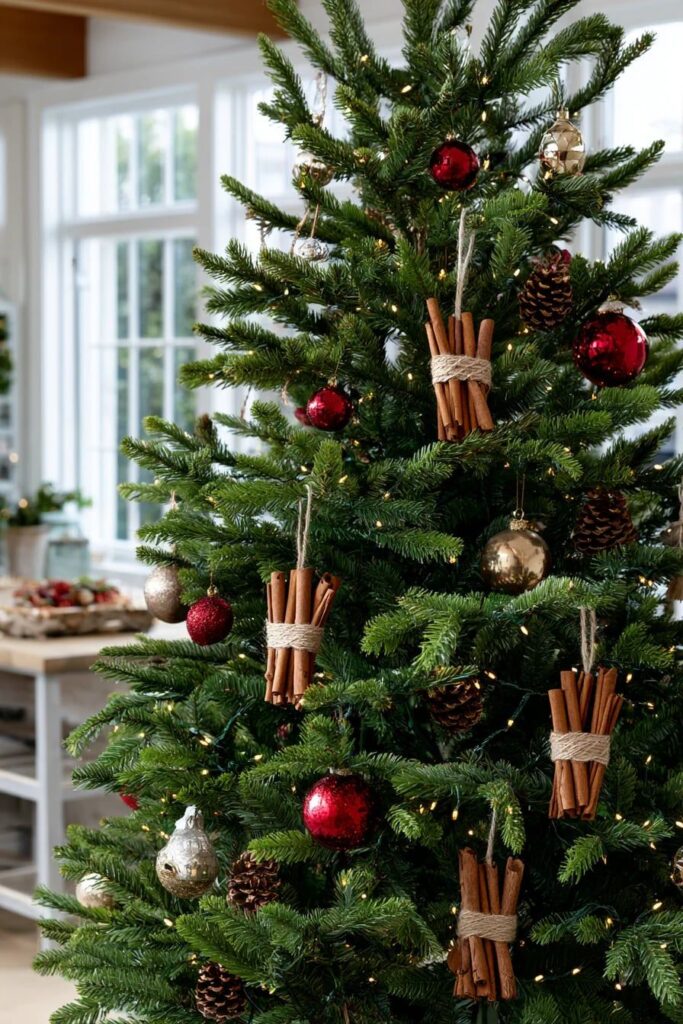
For an effortlessly elegant and deliciously fragrant decoration, look no further than cinnamon stick bundles. These are super simple to make, smell divine, and add a touch of natural warmth to your holiday decor. They’re a fantastic way to engage your senses and make your home feel inviting.
Materials You’ll Need:
- Cinnamon sticks (available at craft stores or bulk spice sections)
- Twine, raffia, or festive ribbon (red, green, gold)
- Small pine sprigs, dried orange slices, star anise, or mini pinecones (optional, for embellishment)
- Hot glue gun (optional, for securing embellishments)
How to Make Them: 1. Gather Your Sticks: Take 3-5 cinnamon sticks of similar length. The number can vary based on how chunky you want your bundle to be. 2. Bundle Them Up: Hold the cinnamon sticks together tightly. 3. Tie Securely: Wrap twine, raffia, or ribbon around the middle of the bundle several times, tying a secure knot or bow. You can also wrap it at both ends for a more contained look. 4. Add Natural Accents (Optional): Tuck a small pine sprig, a slice of dried orange (like those from our earlier DIY!), a star anise pod, or a mini pinecone under the twine/ribbon. Secure with a tiny dot of hot glue if needed. 5. Create a Hanger (Optional): If you want to hang them, form a loop with an extra piece of twine and tie it securely to the top of the bundle.
These rustic bundles are wonderful for hanging on the tree, tying onto gift packages, adorning napkin rings, or simply placing in bowls as fragrant decor. They make a lovely addition to any living room interior design ideas aiming for a cozy, festive feel.

6. Hand-Stitched Felt Ornaments
Felt is a crafter’s best friend. It’s inexpensive, easy to cut, doesn’t fray, and comes in a rainbow of festive colors. Hand-stitched felt ornaments are a delightful way to create custom, soft decorations that are safe for little hands and add a whimsical touch to your tree or garlands. Plus, they can become cherished heirlooms for years to come.
Materials You’ll Need:
- Felt sheets in various Christmas colors (red, green, white, gold, silver)
- Scissors
- Embroidery floss or thin thread
- Embroidery needle
- Stuffing (cotton balls, fiberfill, or even fabric scraps)
- Ribbon or twine for hanging
- Templates (cookie cutters, stencils, or freehand drawing)
- Buttons, beads, sequins (optional, for embellishment)
How to Make Them: 1. Choose Your Shapes: Decide on your desired shapes (stars, trees, hearts, stockings, gingerbread men, reindeer). You can find templates online, use cookie cutters to trace, or draw them freehand. 2. Cut the Felt: Cut two identical shapes for each ornament from your chosen felt colors. 3. Decorate (Optional): Before stitching, add any flat embellishments to one side of a felt shape. You could cut out smaller felt shapes (e.g., a white star on a red tree), stitch on sequins, or sew on small buttons. 4. Stitch Together: Place the two identical felt shapes together. Using embroidery floss and an embroidery needle, start stitching around the edge of the ornament with a simple running stitch or blanket stitch. Leave a small opening. 5. Stuff It: Gently push a small amount of stuffing into the opening until the ornament is plump. Don’t overstuff! 6. Close and Hang: Continue stitching to close the opening. Before finishing, insert a loop of ribbon or twine into the top of the ornament and stitch it securely into place. 7. Final Touches: Add any final details like embroidered snowflakes or names.
These soft ornaments are perfect for families with young children or pets, as they won’t shatter if they fall!


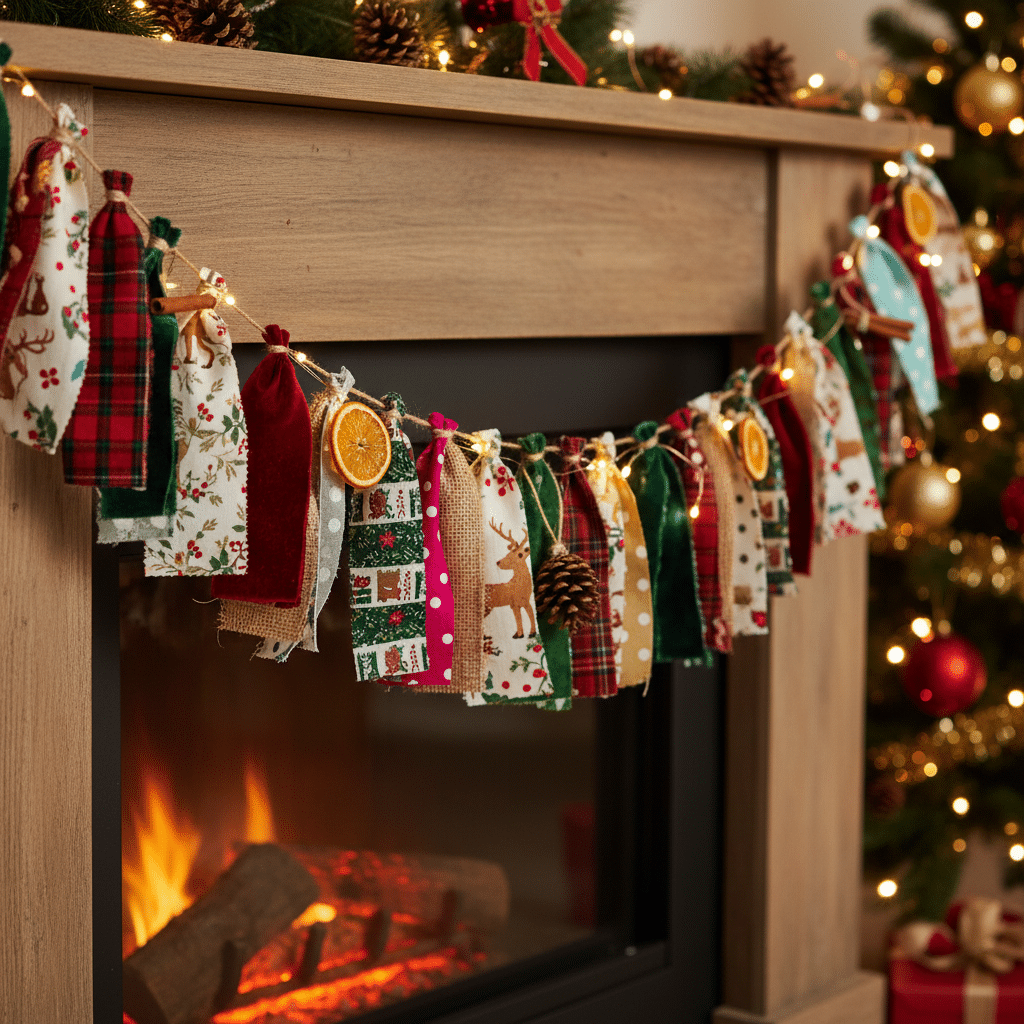
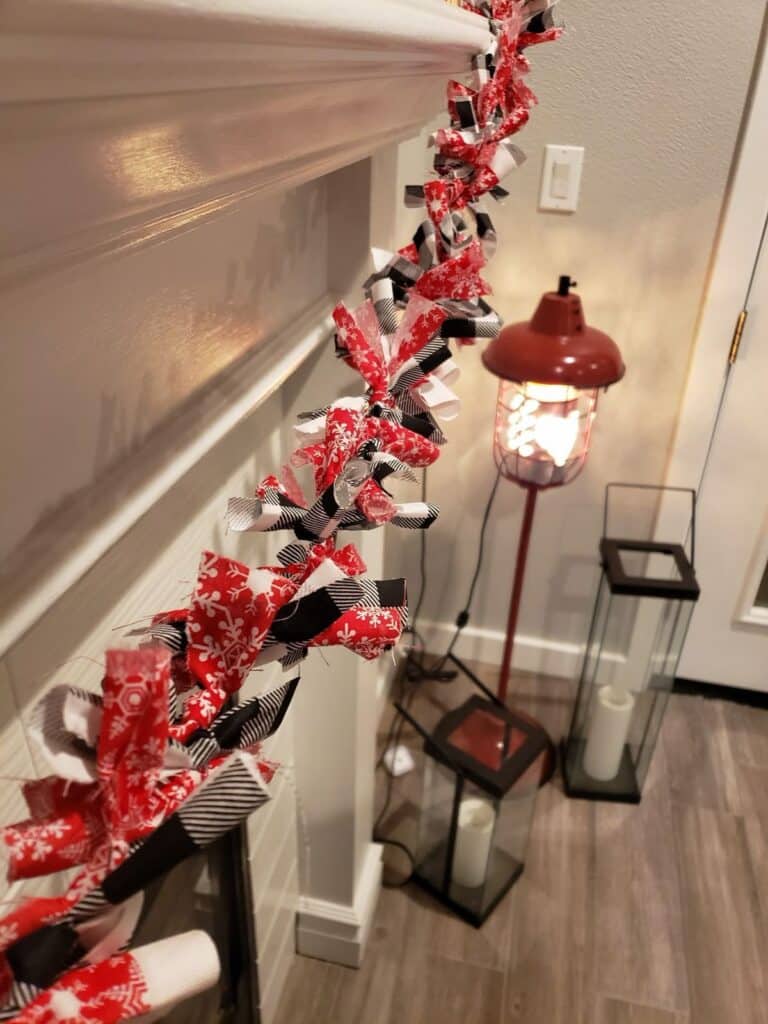
7. Festive Fabric Scrap Garland
Do you have a stash of fabric scraps from other projects, old clothes, or forgotten textile remnants? This is your moment to transform them into a vibrant, textural Christmas garland! This DIY is incredibly eco-friendly, uses up materials you already have, and adds a cozy, bohemian vibe to your holiday decor. It’s a delightful way to create something new from something old.
Materials You’ll Need:
- Fabric scraps (cotton, flannel, burlap, even old festive clothing)
- Scissors
- Long piece of twine or thick yarn
- Optional: Bells, wooden beads, small pinecones
How to Make Them: 1. Gather and Cut Scraps: Collect fabric scraps in varying lengths and widths. There’s no right or wrong here – asymmetry adds to the charm! Aim for strips generally 1-2 inches wide and 6-12 inches long, but feel free to mix it up. Cut a generous amount, as you’ll be tying many pieces. 2. Prepare Your Base: Cut a long piece of twine or thick yarn to your desired garland length, plus extra for tying loops at the ends. This will be the base for your garland. 3. Tie the Scraps: Take one fabric strip, fold it in half, and place the loop end over the twine. Pull the two loose ends of the fabric strip through the loop and tighten, creating a simple knot (a lark’s head knot). 4. Repeat and Vary: Continue tying fabric strips onto the twine, pushing them close together to create a full, fluffy garland. Vary the colors, patterns, and textures of your fabric scraps for an interesting look. 5. Add Embellishments (Optional): As you tie, you can occasionally thread on a wooden bead, a small bell, or a mini pinecone between fabric clusters for added detail and sparkle. 6. Hang It Up: Once your garland is full, tie loops at each end of the twine for easy hanging.
This fabric scrap garland is wonderfully versatile. Drape it across a mantel, weave it through your staircase banister, or hang it in an archway. It’s a beautiful way to create a festive atmosphere, just like how a DIY room makeover can completely transform a space.
8. Simple Paper Snowflakes & Garlands
Paper is one of the most accessible and affordable crafting materials, and it can be transformed into incredibly intricate and beautiful Christmas decorations. Classic paper snowflakes are a given, but with a little more paper and glue, you can create stunning 3D ornaments and elegant paper garlands that truly elevate your holiday decor.
Materials You’ll Need:
- White or colored paper (printer paper, construction paper, scrapbook paper)
- Scissors (precision scissors are helpful for intricate cuts)
- Pencil
- Stapler or glue stick
- Twine or thread
- Templates (optional, for complex snowflake designs or 3D stars)
How to Make Them: 1. Classic Folded Snowflakes: Start with a square piece of paper. Fold it diagonally to form a triangle. Fold the triangle in half again. Fold the triangle into thirds, bringing the outer corners towards the center, overlapping slightly. Trim the top straight across. Now, cut various shapes (triangles, curves, slits) into the folded edges. The more you cut, the lacier your snowflake will be! Carefully unfold to reveal your unique snowflake. 2. 3D Paper Stars/Ornaments: Cut out several identical star shapes (or any other shape) from cardstock or thicker paper. Fold each star precisely down the middle. Glue one half of a folded star to one half of another folded star. Repeat until all stars are glued together, forming a 3D shape. Before gluing the last two halves, insert a loop of thread or twine for hanging. 3. Paper Chain Garlands: Cut paper into strips of equal width and length (e.g., 1 inch wide, 8-10 inches long). Form the first strip into a loop and secure the ends with glue or a stapler. Thread the next strip through the first loop, then form it into a loop and secure its ends. Continue this process, interlocking the loops, until your garland reaches the desired length.
Hang individual snowflakes on windows, string them into garlands, or combine 3D stars with other elements for a sophisticated display. This craft is incredibly satisfying and yields beautiful results with minimal cost.


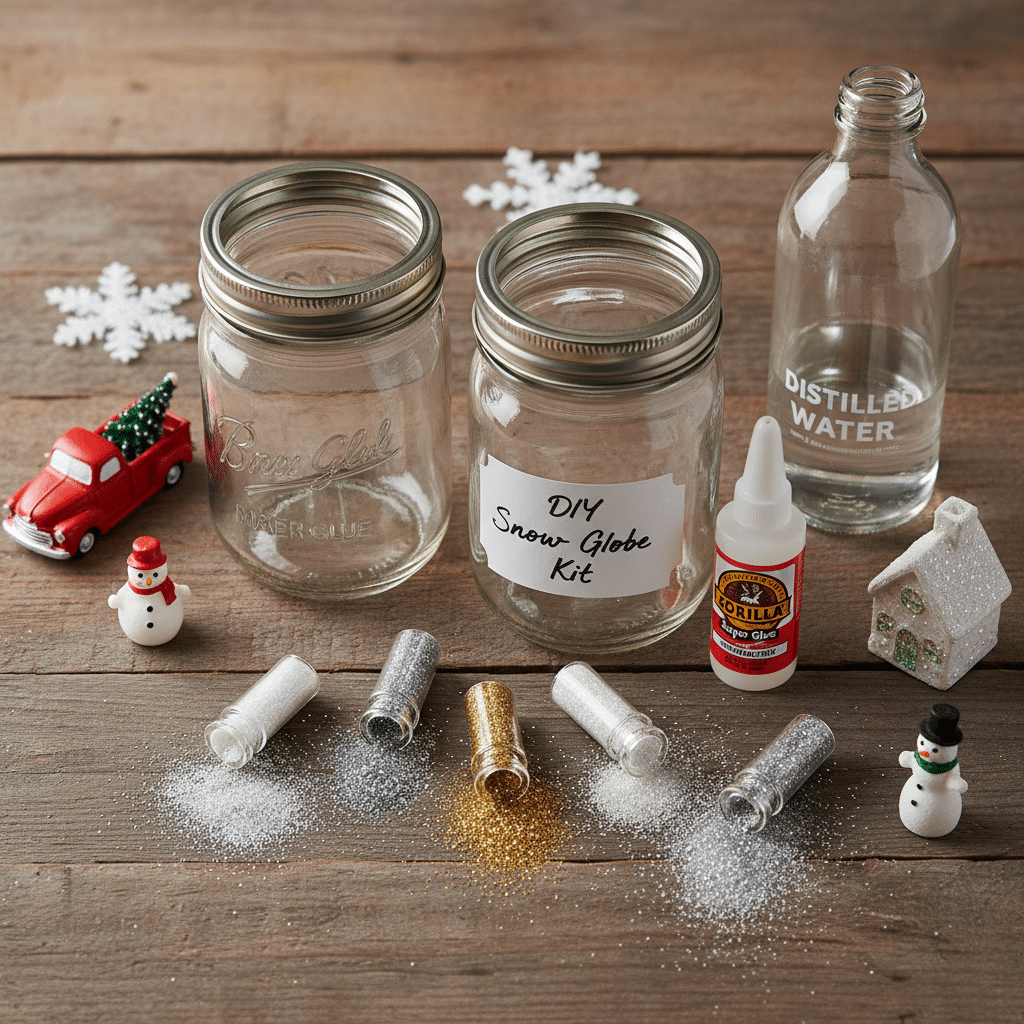
9. DIY Mason Jar Snow Globes
Remember the magic of shaking a snow globe as a child? You can recreate that enchantment with your own DIY version using everyday mason jars! These delightful little worlds are perfect for tabletops, shelves, or as unique gifts. They capture the wonder of a snowy scene in miniature and are surprisingly simple to assemble.
Materials You’ll Need:
- Clean mason jars with tight-fitting lids
- Small, waterproof figurines (tiny deer, Santa, snowman, bottle brush trees)
- Distilled water
- Glycerin (available at pharmacies or craft stores – helps the glitter float!)
- Glitter (fine white or silver works best for “snow”)
- Waterproof epoxy glue or super glue
- Optional: Small pebbles or sand for the base
How to Make Them: 1. Prepare the Lid: Turn the mason jar lid upside down. Glue your chosen figurine(s) to the inside of the lid using waterproof epoxy glue or super glue. If you want a small mound for your figurine to stand on, glue a few pebbles or a small amount of sand before gluing the figurine. Allow the glue to dry completely – this is crucial! 2. Fill the Jar: Fill the mason jar almost to the brim with distilled water. Distilled water prevents cloudiness. 3. Add Glycerin: Pour in a few drops of glycerin. Start with 1/2 to 1 teaspoon for a pint-sized jar. The glycerin makes the glitter fall more slowly, creating a beautiful snow effect. You can always add more later if you want a slower fall. 4. Add Glitter: Sprinkle in a teaspoon or two of fine glitter. Test by putting the lid on and shaking – you can adjust the amount of glitter and glycerin to your liking. 5. Seal It Up: Apply a thin bead of waterproof epoxy glue around the inside rim of the jar’s lid. Carefully screw the lid onto the jar, making sure it’s tight. Let the glue cure for several hours or overnight to ensure a watertight seal. 6. Shake and Enjoy: Once fully sealed, give your snow globe a good shake and watch your miniature winter wonderland come to life!
These personalized snow globes are fantastic for adding a touch of whimsy to your holiday decor or as thoughtful, homemade gifts.

10. Popcorn and Cranberry Garlands
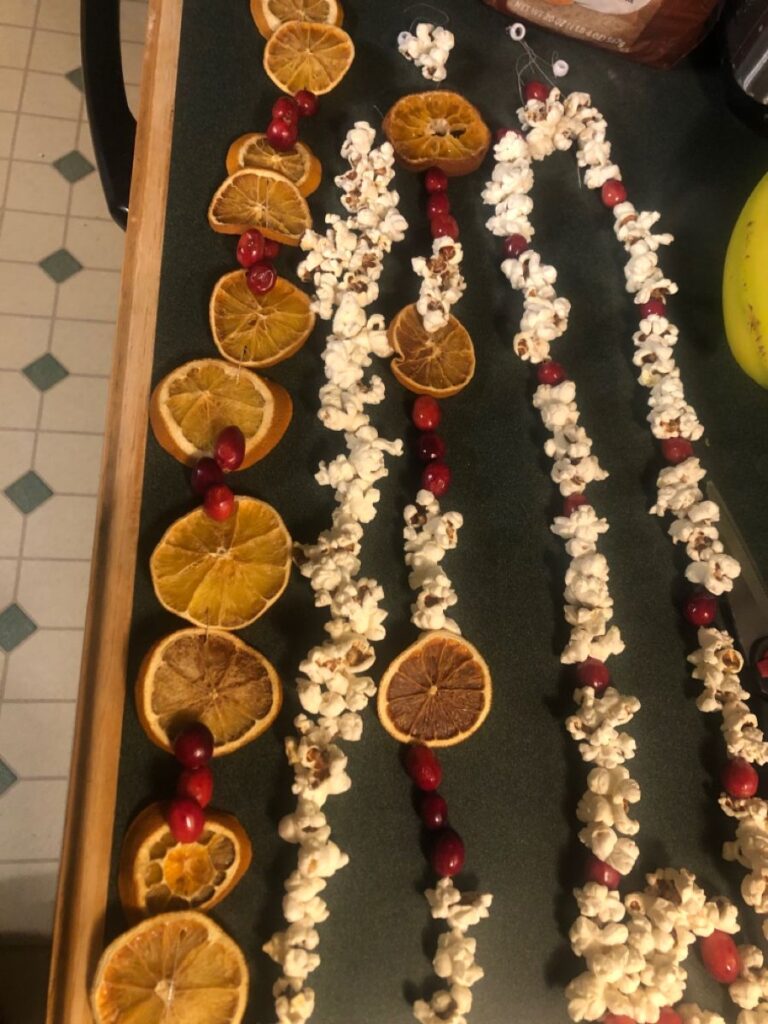
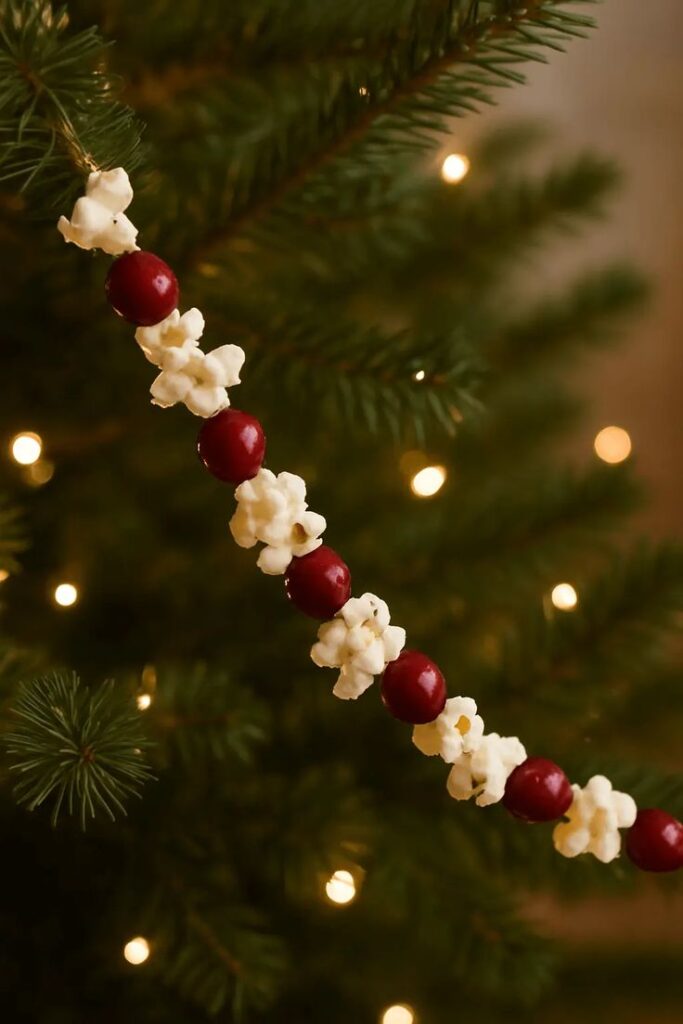
Going back to basics with natural elements, the popcorn and cranberry garland is a charming, classic Christmas decoration that’s incredibly budget-friendly and fun to make. It evokes a nostalgic, old-fashioned holiday feel and adds a lovely pop of color and texture to your tree or mantel. Plus, it’s a wonderful activity to do with kids!
Materials You’ll Need:
- Air-popped popcorn (unsalted, unbuttered, and slightly stale works best as it’s less prone to crumbling)
- Fresh cranberries
- Strong thread (like dental floss or quilting thread)
- Large sewing needle (with a blunt tip is safer for kids)
How to Make Them: 1. Pop Your Popcorn: Pop a generous amount of popcorn. Let it sit out for a day or so to become slightly stale – this makes it less likely to break when you string it. 2. Prepare Cranberries: Rinse your fresh cranberries. 3. Thread Your Needle: Cut a long piece of thread (about 3-4 feet, longer makes it harder to manage without tangling). Thread it through your large needle, and tie a knot at the end of the thread, perhaps with a small cranberry or popcorn kernel to secure it. 4. Start Stringing: Carefully push the needle through the center of a popcorn kernel. Then, string a cranberry. Alternate between popcorn and cranberries, or create patterns like “two popcorn, one cranberry.” 5. Be Gentle: Work slowly and gently, especially with the popcorn, as it can be fragile. 6. Extend Your Garland: When your thread gets short, tie on a new piece of thread with a secure knot, or tie off the current section and start a new one. You can then tie multiple sections together to make a long garland. 7. Hang and Enjoy: Drape your beautiful, natural garland on your Christmas tree, around windows, or over a doorway.
This garland is not only pretty but also biodegradable, making it an environmentally friendly choice. It’s a truly classic and enchanting way to adorn your home for the holidays. For more ways to personalize and decorate your home, you might enjoy exploring articles on DIY Room Makeover or even Living Room Interior Design Ideas for inspiration beyond the holidays.
Bring the Magic Home, Without Breaking the Bank
There you have it – ten incredibly charming and budget-friendly Christmas DIYs that prove you don’t need a massive budget to create a truly magical holiday experience. These projects aren’t just about saving money; they’re about infusing your home with personality, warmth, and the joy of creation. Each handmade ornament, garland, or luminary tells a story, making your decor uniquely yours.
Embracing DIY this festive season is a wonderful way to slow down, get creative, and spend quality time with loved ones. Imagine the pride you’ll feel when guests admire your beautifully decorated home, knowing that every piece was crafted with love and ingenuity. So, gather your materials, put on some festive tunes, and let your inner crafter shine. This Christmas, make it memorable, make it personal, and most importantly, make it your own!
Which DIY will you try first? The possibilities for a personalized, budget-friendly Christmas are endless. Happy crafting, and happy holidays!
- 1.0Kshares
- Facebook0
- Pinterest1.0K
- Twitter3
- Reddit0

