Ever wondered how some folks consistently churn out perfect 3D prints while yours sometimes resemble abstract art? You’re not alone! 3D printing is a fantastic hobby and a powerful tool, but it definitely has a learning curve. Achieving those flawless prints often comes down to mastering a few fundamental techniques and understanding your machine inside and out. That’s why we’re diving deep into 10 3D printing tips and tricks that will transform your printing experience from frustrating failures to consistent successes. Get ready to unlock the full potential of your printer and produce stunning models every time.
Understanding the role of Rapid prototyping in 3d printing can also provide valuable insight into how professionals refine their designs and optimize print quality. This process involves quickly creating sample models to evaluate form, fit, and function before final production. By applying rapid prototyping principles, makers can identify design issues early, make precise adjustments, and better predict how different materials and settings impact the final outcome. Over time, this approach helps improve consistency and overall print performance.
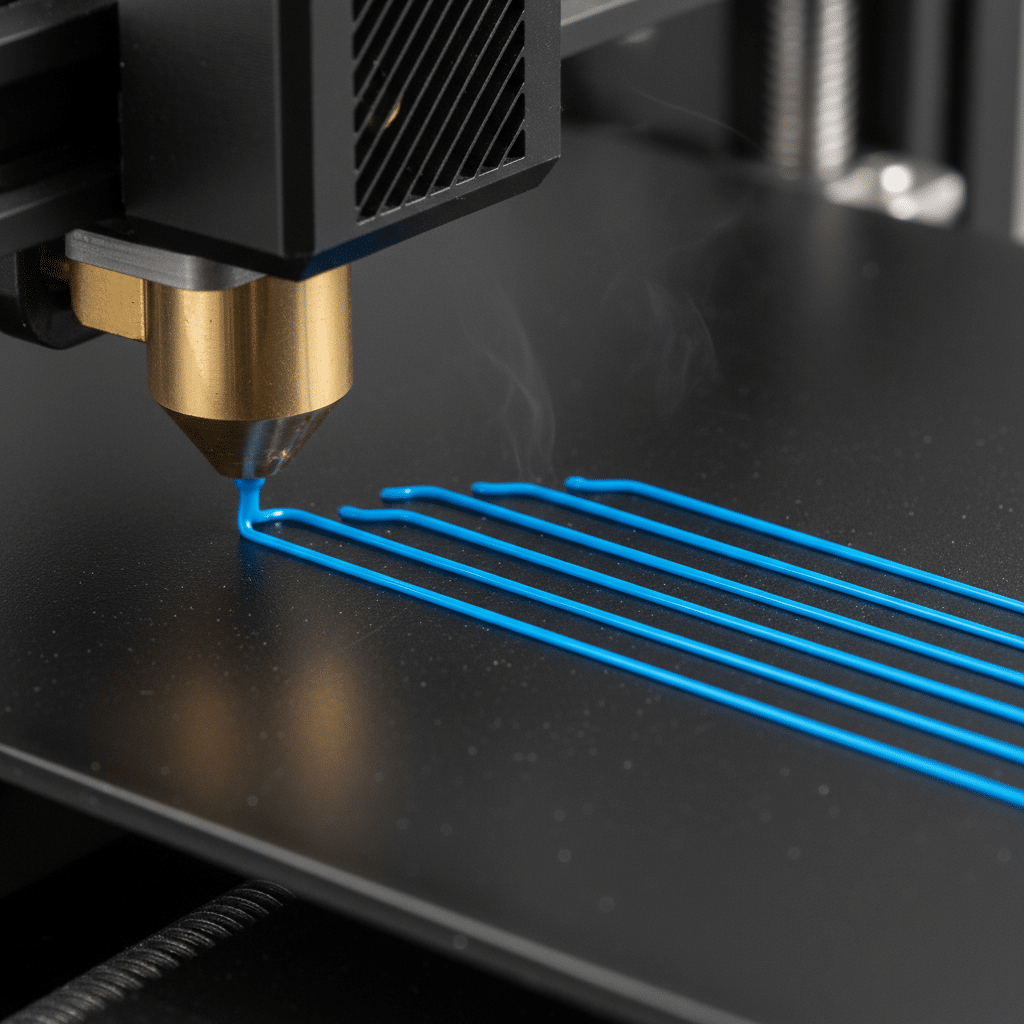
1. Master Your First Layer Adhesion
The first layer is arguably the most critical part of any 3D print. If it doesn’t stick properly, or if it’s uneven, your entire print is likely to fail. Think of it as the foundation of a building – a shaky base means a shaky structure. Good first layer adhesion is the secret sauce to successful prints.
Why it Matters
Poor adhesion leads to warping, lifting, and prints detaching from the build plate mid-job. This wastes filament, time, and your patience. A perfect first layer ensures your print remains anchored, providing a stable base for subsequent layers.
How to Achieve It
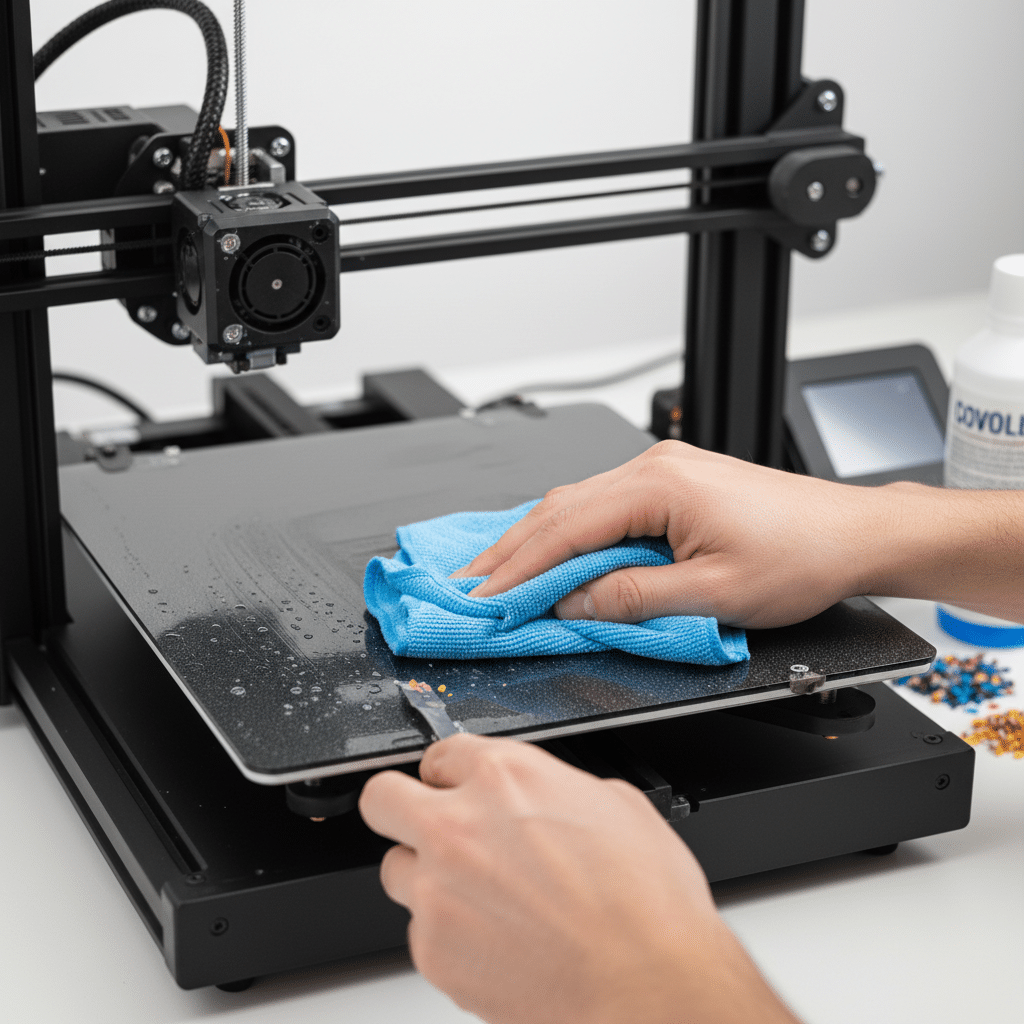
- Clean Your Build Plate: This is paramount. Oils from your fingers, dust, or residual filament can all prevent adhesion. Use isopropyl alcohol (IPA) for most surfaces like glass or PEI. For stubborn grime, a light soap and water wash followed by IPA can work wonders.
- Level Your Bed: An unlevel bed means some areas will be too close, crushing the filament, while others will be too far, leading to poor sticking or spaghetti. Many modern printers have auto-bed leveling, but even these benefit from a manual check and adjustment now and then. For manual leveling, use a piece of paper (or a feeler gauge) between the nozzle and the bed. You want a slight drag, like a sticky note.
- Optimize Your Z-Offset: This setting fine-tunes the nozzle’s height relative to the bed after leveling. Even a perfectly leveled bed can benefit from a small Z-offset adjustment to get that “squish” just right. Too high, and the lines won’t bond; too low, and the nozzle scrapes the bed.
- Use Adhesives Wisely: Depending on your build plate material and filament, you might need a little extra help. Glue sticks, hairspray (unscented, extra hold!), or specialized 3D printing adhesives can dramatically improve stick for materials like ABS or PETG. Just remember to clean these off regularly to prevent build-up.
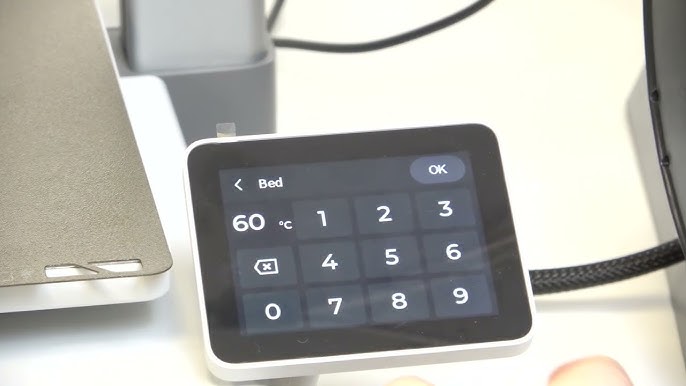
- Temperature Control: Ensure your bed temperature is appropriate for your filament. PLA typically likes 50-60°C, while ABS often requires 90-110°C.
2. Dial In Your Print Temperatures
Temperature is the silent hero (or villain) of 3D printing. Getting your nozzle and bed temperatures right for your specific filament can make all the difference between a smooth print and a stringy mess. It’s not just about getting the filament to melt; it’s about getting it to flow and solidify optimally.
The Nozzle Temperature Sweet Spot
Each filament type, and even different brands of the same type, has an optimal printing temperature range.
- Too Low: You’ll experience under-extrusion, skipping, and poor layer adhesion because the plastic isn’t melting fast enough to flow smoothly.
- Too High: This leads to oozing, stringing, blobs, and potentially melted details, as the plastic becomes too liquid and doesn’t hold its shape as it exits the nozzle.
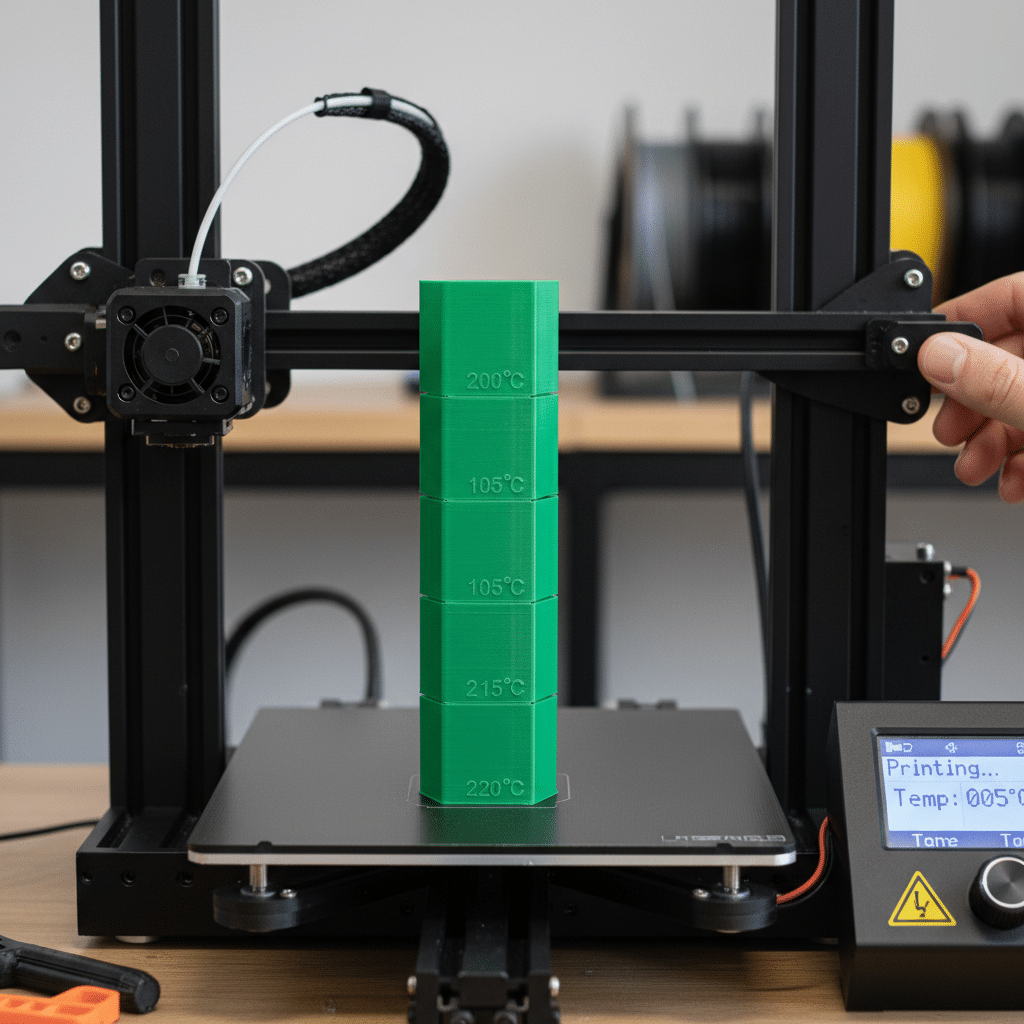
Start with the manufacturer’s recommended temperature and print a temperature tower. This is a model designed to be printed at different temperatures at various heights, allowing you to visually identify the best temperature for your specific roll of filament.
Bed Temperature for Stability
Your heated bed’s temperature directly impacts first layer adhesion and helps prevent warping.
- PLA: Usually 50-60°C.
- PETG: Often 70-85°C.
- ABS: Typically 90-110°C, requiring an enclosure to maintain ambient heat and prevent cracks.
Experimenting with temperatures might seem tedious, but it’s a game-changer. It helps your prints achieve better structural integrity and surface finish.
3. Understand Filament Quality and Storage
Not all filaments are created equal. Just like with any material you use for summer DIY projects, quality matters. Cheap filament might save you a few bucks upfront, but it can lead to inconsistent diameters, contaminants, and poor print results, ultimately costing you more in failed prints and frustration.
Choosing Good Filament
- Brand Reputation: Stick to reputable brands known for consistency.
- Diameter Tolerance: Look for filaments with tight diameter tolerances (e.g., +/- 0.02mm). Inconsistent diameter leads to inconsistent extrusion.
- Material Type: Understand the properties of different materials (PLA, PETG, ABS, Nylon, TPU, etc.) and choose the one best suited for your project.
Proper Filament Storage
Filaments, especially hygroscopic ones like PETG, Nylon, and even PLA to some extent, absorb moisture from the air. This moisture turns into steam in the hot nozzle, causing popping, bubbles, and weak, brittle prints.
- Keep it Dry: Store filament in airtight containers with desiccant packets (silica gel). Vacuum-sealable bags are also excellent.
- Dry Damp Filament: If your filament has absorbed moisture, you can often save it by drying it out. A dedicated filament dryer, a food dehydrator, or even your oven at a very low temperature (check filament specs, usually 40-70°C for several hours) can work wonders.
- Environmental Control: If you’re struggling with prints lifting, consider the environment of your print area. Drafts can cause rapid cooling and warping. Maintaining a stable ambient temperature, perhaps with an enclosure, can significantly improve results, especially for materials like ABS. This is similar to how managing your home’s ventilation planning can affect comfort and efficiency.

4. Optimize Your Slicer Settings
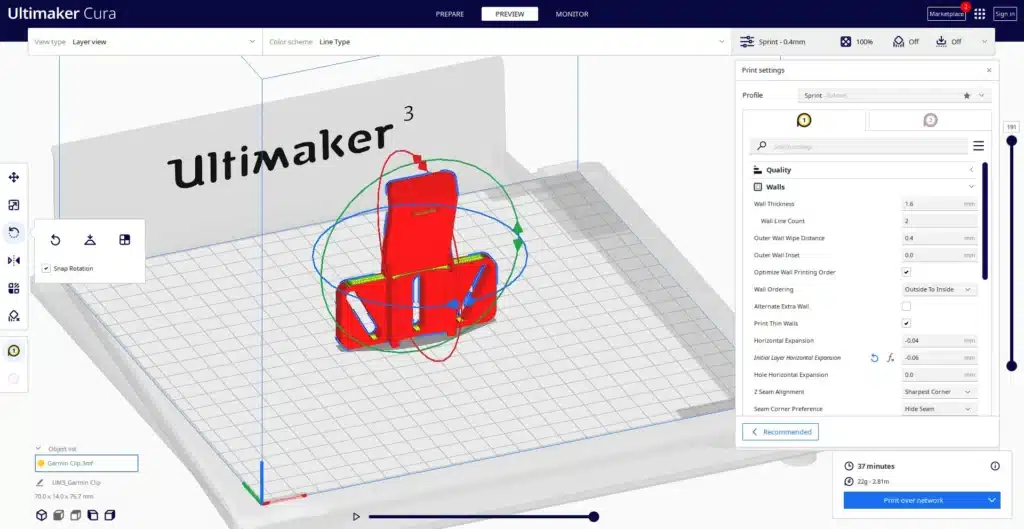
Your slicer software (Cura, PrusaSlicer, Simplify3D, etc.) is the command center for your 3D printer. It takes your 3D model and translates it into instructions (G-code) your printer can understand. Understanding and tweaking these settings is where much of the magic happens.
Key Settings to Tweak
- Layer Height: Thinner layers (e.g., 0.12mm) yield higher detail but take longer to print. Thicker layers (e.g., 0.28mm) are faster but show more prominent layer lines. Find a balance based on your desired print quality and speed.
- Infill: This determines the internal structure of your print.
Infill Density: From 0% (hollow) to 100% (solid). Most functional parts do well with 20-30%. Less for aesthetic pieces, more for strength. Infill Pattern: Different patterns offer different strengths and print times. Grid, honeycomb, gyroid are common. Gyroid is excellent for multi-directional strength.
- Retraction: Crucial for preventing stringing and oozing. When the nozzle moves between print areas, retraction pulls the filament back slightly to relieve pressure, stopping plastic from dripping.
Retraction Distance: How far the filament is pulled back. Retraction Speed: How quickly it’s pulled back. * Too much retraction can cause clogs or wear filament; too little causes strings. Fine-tune these with retraction tests.
- Print Speed: Faster speeds save time but can reduce print quality, especially for intricate details or overhangs. Slower speeds generally lead to better quality and adhesion. It’s a trade-off.
- Cooling (Part Cooling Fan): Essential for materials like PLA to solidify quickly after extrusion, preventing warping, drooping, and improving overhangs. ABS and Nylon often require less or no cooling to prevent layer delamination.
Experimenting with slicer settings is an ongoing process. Don’t be afraid to create specific profiles for different filament types or project requirements. Many resources are available to help you understand these settings further, similar to guides for creative fonts for digital design.
5. Calibrate Your E-Steps (Extruder Steps)
Your extruder needs to push out the exact amount of filament that your slicer tells it to. If it’s extruding too much or too little, your prints will suffer from under-extrusion (gaps, weak layers) or over-extrusion (blobs, dimensional inaccuracies). Calibrating your E-steps (steps per millimeter) ensures your extruder is accurate.
The Calibration Process
1. Mark Your Filament: Measure 120mm from the point where the filament enters your extruder and make a mark. 2. Command Extrusion: Tell your printer to extrude 100mm of filament (e.g., using G-code M83 followed by G1 E100 F100). 3. Measure Again: After the extrusion, measure the distance from your mark to the extruder entry point. If it’s exactly 20mm, your E-steps are perfect. If not, calculate the new E-steps using a simple formula: (Current E-steps 100) / (Actual extruded length). 4. Update and Save:* Input the new E-steps value into your printer’s firmware and save it.
This calibration is a fundamental step that many beginners overlook, but it’s crucial for achieving dimensionally accurate and robust prints.

6. Leverage Support Structures Wisely
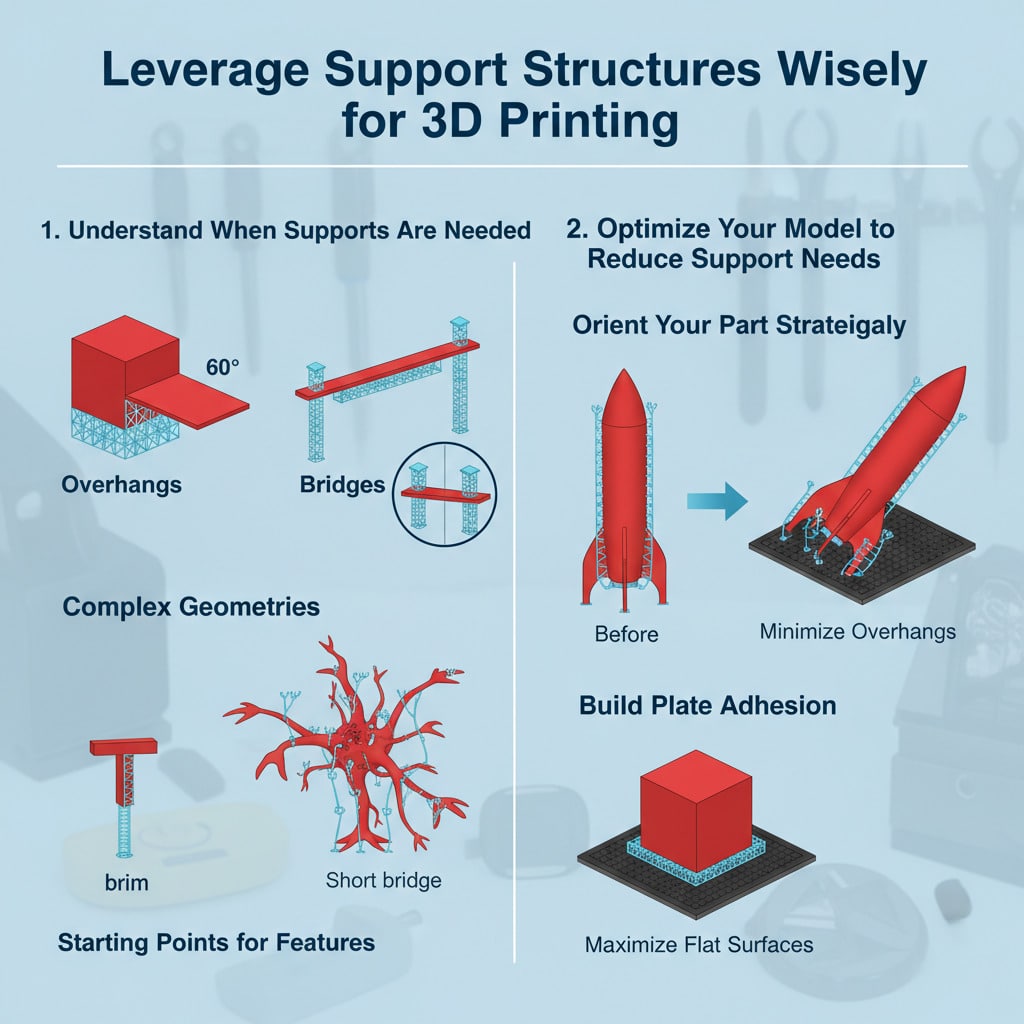
When your 3D model has overhangs or bridges that defy gravity, support structures become your best friend. They provide temporary scaffolding for your print, preventing material from drooping or printing into thin air. However, using them effectively is an art.
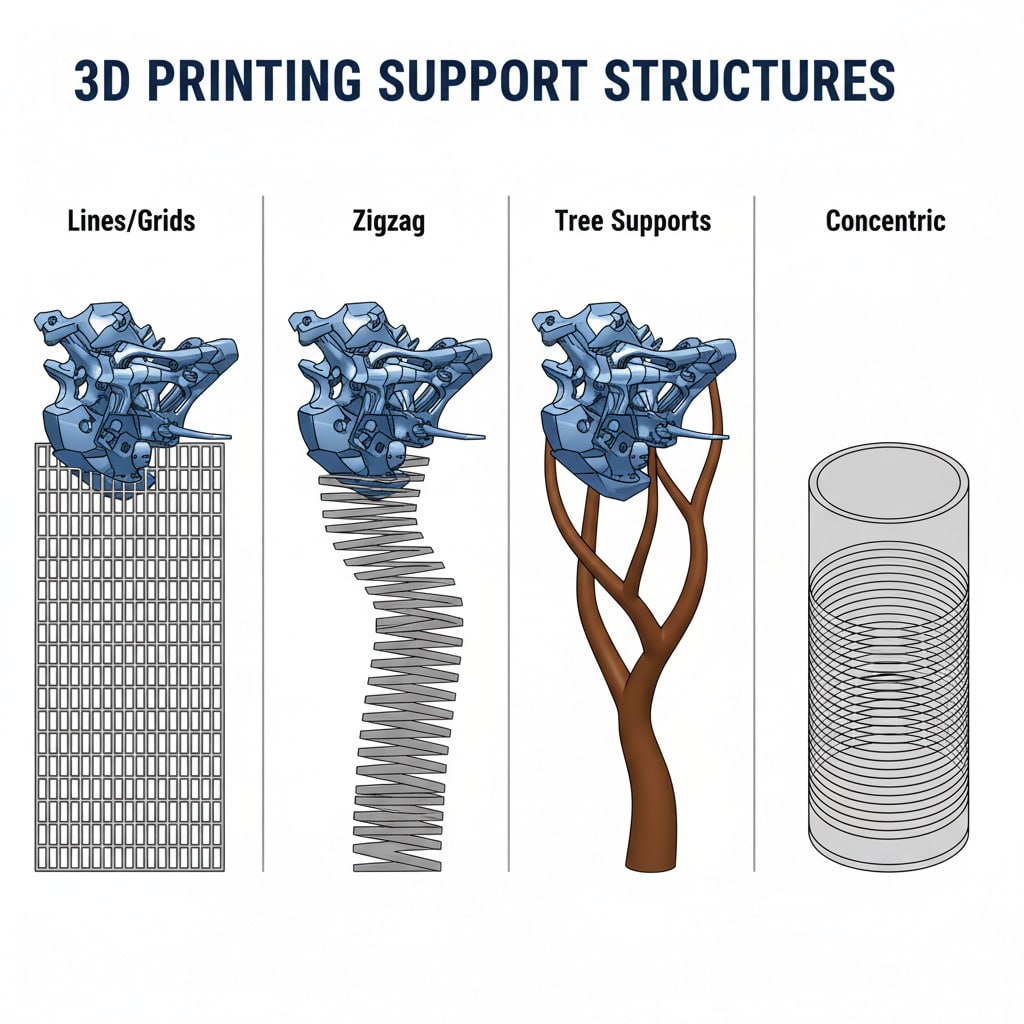
Types of Supports
- Tree Supports: Often found in PrusaSlicer and Cura, these mimic tree branches, using less material and often easier to remove while supporting complex geometries.
- Standard Supports: Grid-like structures that provide solid support but can be harder to remove and use more material.
When to Use Them
- Overhangs: Generally, if an overhang extends beyond a 45-60 degree angle without support from below, you’ll need supports.
- Bridges: Short bridges (horizontal gaps printed in the air) can sometimes be printed without support due to filament tension, but longer ones will sag.
Optimizing Support Settings
- Support Density: Lower density uses less material and is easier to remove, but might be less stable. Higher density is stronger but harder to clean up.
- Z-Distance (Support Top Distance): This is the gap between the top of the support and the bottom of your print. A larger gap makes supports easier to remove but can lead to a rougher underside. A smaller gap makes for a smoother surface but harder removal. Experiment to find your sweet spot.
- Support Interface: Adding an interface layer to your supports can provide a smoother surface for the print and make supports easier to peel off.
- Breakaway vs. Soluble: For dual-extruder printers, soluble supports (like PVA) are amazing as they dissolve in water, leaving a perfectly smooth surface. For single-extruder printers, breakaway supports require careful removal.
Understanding how to use and remove supports properly is key to achieving clean, finished prints, especially for intricate models or top 10 3D prints to sell.
7. Embrace Post-Processing Techniques
Once your print comes off the build plate, the journey isn’t always over. Post-processing can elevate a good print to a great one, refining its appearance and functionality. Don’t be afraid to put in a little extra effort for that polished look.
Common Post-Processing Steps
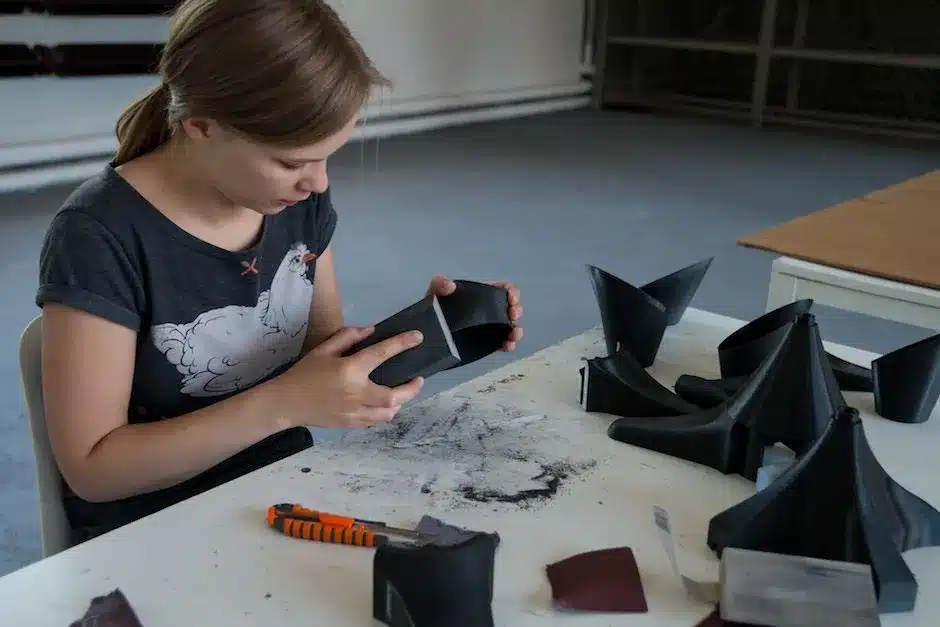
- Support Removal: Carefully remove any support structures. Pliers, flush cutters, and a craft knife are your friends here. Be gentle to avoid damaging the print surface.
- Sanding: For a smoother surface and to remove layer lines, sanding is a classic. Start with a coarse grit (e.g., 200-grit) and progressively move to finer grits (e.g., 400, 800, 1200+). Wet sanding can help achieve an even smoother finish.
- Filling Gaps/Smoothing: For highly detailed or functional parts, you might use epoxy resin, wood filler, or specialized 3D print fillers to smooth surfaces or fill small imperfections before sanding.
- Painting: Acrylic paints work well on most 3D prints. For best results, prime the print first, then apply thin, even coats of paint. Clear coats can add protection and a desired finish (matte, gloss).
- Acetone Vapor Smoothing (for ABS): This technique uses acetone vapor to melt and smooth the outer layers of ABS prints, removing layer lines entirely. Caution: Acetone is flammable and its fumes are harmful. This should only be done in a well-ventilated area with proper safety precautions.
- Assembly: Many complex models are printed in multiple parts. Precision in your initial print helps with assembly, whether it’s snapping pieces together, using adhesive, or employing fasteners.

8. Prioritize Regular Printer Maintenance
A 3D printer is a machine, and like any machine, it needs regular care to perform its best. Neglecting maintenance can lead to breakdowns, inconsistent prints, and a shorter lifespan for your equipment. Think of it like taking care of a DIY raised garden bed – regular attention ensures bountiful results.
Your Maintenance Checklist
- Clean Your Nozzle: Filament residue can build up on the nozzle, causing clogs or poor extrusion. A brass wire brush (for brass nozzles) or a nozzle cleaning needle can help keep it clear.
- Inspect and Clean the Build Plate: As mentioned earlier, a clean build plate is a happy build plate. Regularly remove adhesive residue and general grime.
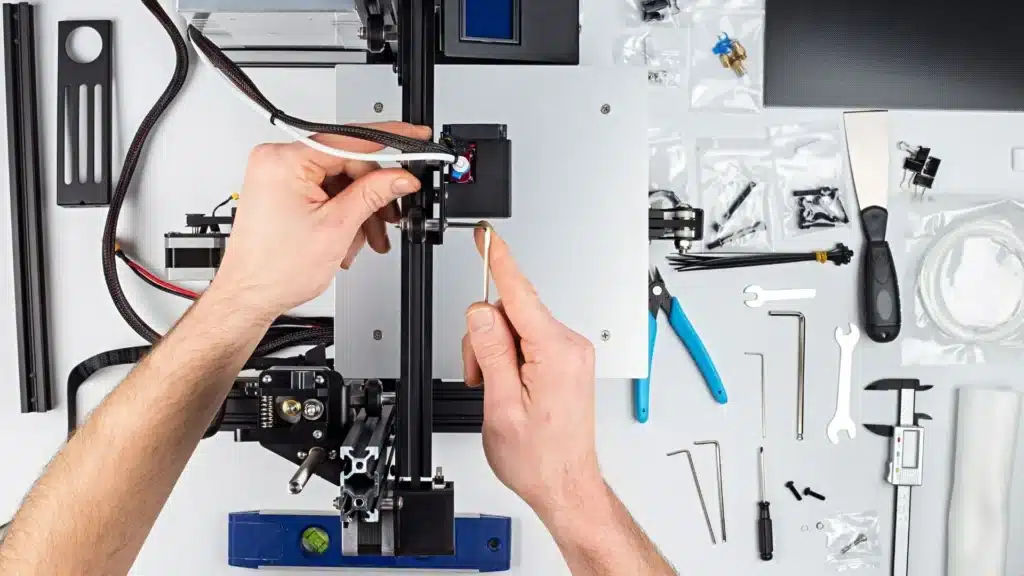
- Lubricate Moving Parts: The Z-screw (leadscrew) and linear rails/rods need occasional lubrication to ensure smooth movement and prevent binding. Check your printer’s manual for recommended lubricants.
- Tighten Belts: Over time, your printer’s belts can loosen, leading to “ghosting” or “ringing” (repeating patterns) on your prints. Gently tension them, but don’t overtighten.
- Check Electrical Connections: Ensure all wires and connectors are secure. Loose connections can lead to intermittent issues or even fire hazards.
- Clean the Extruder Gear: Filament dust can accumulate in the teeth of your extruder gear, reducing its grip on the filament. Use a small brush or compressed air to clean it.
- Firmware Updates: Periodically check for new firmware versions for your printer. Updates can bring bug fixes, new features, and performance improvements.
Establishing a routine maintenance schedule – perhaps weekly for lighter checks and monthly for deeper dives – will save you headaches in the long run.
9. Calibrate Flow Rate / Extrusion Multiplier
Even after calibrating your E-steps, you might find that your printer is still extruding slightly too much or too little material. This is where the flow rate (or extrusion multiplier) setting in your slicer comes into play. It’s a percentage adjustment that fine-tunes the amount of plastic pushed out.
Why Calibrate Flow Rate?
Different filaments, even from the same manufacturer, can have slightly different properties or densities. A perfect E-step calibration ensures your motor turns the correct amount, but the flow rate accounts for the actual volume of plastic coming out of the nozzle relative to your desired line width.
- Too High Flow: Leads to over-extrusion, causing blobs, elephant’s foot, and dimensional inaccuracy (parts are too large).
- Too Low Flow: Results in under-extrusion, causing gaps between lines, weak layers, and rough surfaces.
How to Calibrate It
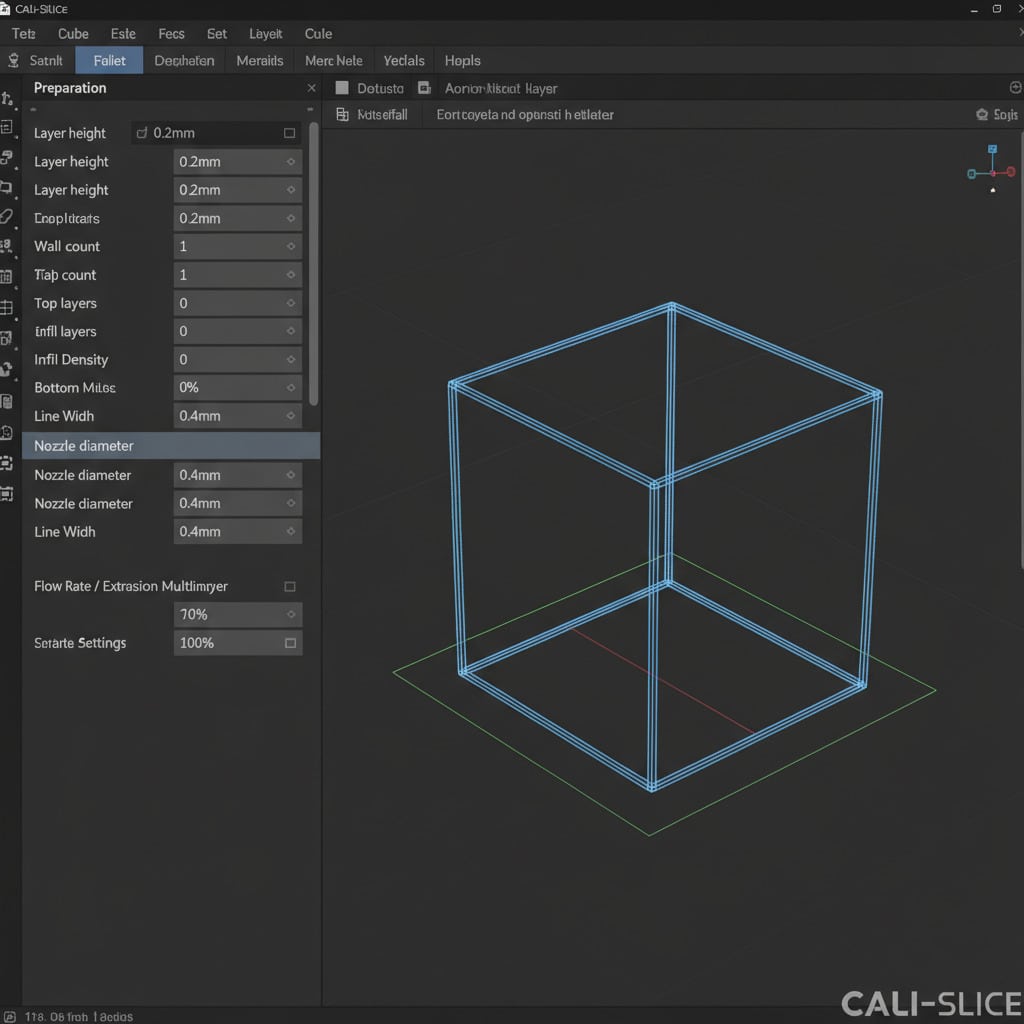
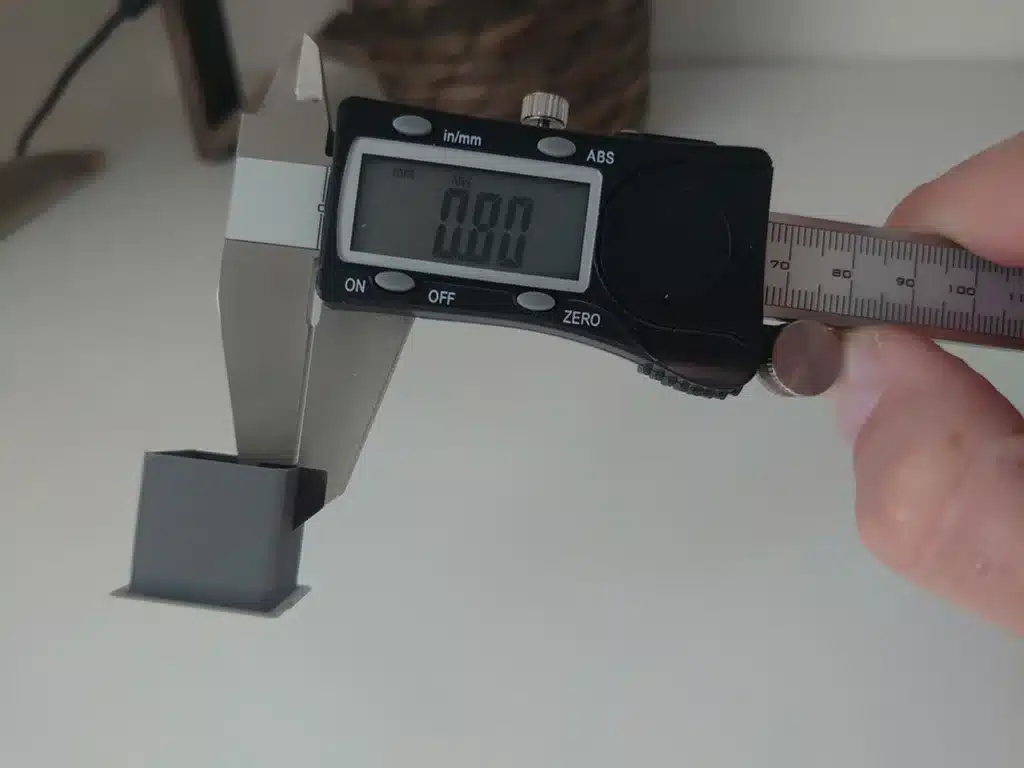
The simplest way is to print a single-wall cube (no top, no bottom, 0% infill). Measure the thickness of the printed wall with calipers. Compare it to the line width setting in your slicer. If your slicer says 0.4mm but your wall prints at 0.45mm, you’re over-extruding. Adjust your flow rate percentage down accordingly. Repeat until the measured wall thickness matches your slicer’s line width.
This precise calibration ensures your prints are dimensionally accurate and your layers bond perfectly, enhancing both aesthetics and strength.
10. Troubleshoot Common Issues Systematically
Every 3D printer user faces problems, from stringing to warping to failed prints. The key is not to panic, but to approach troubleshooting systematically. Often, a few common culprits are behind most issues.
Common Problems and Quick Fixes
- Stringing/Oozing:
Cause: Too high nozzle temperature, insufficient retraction, or wet filament. Fix: Lower nozzle temp slightly, increase retraction distance/speed, dry your filament.
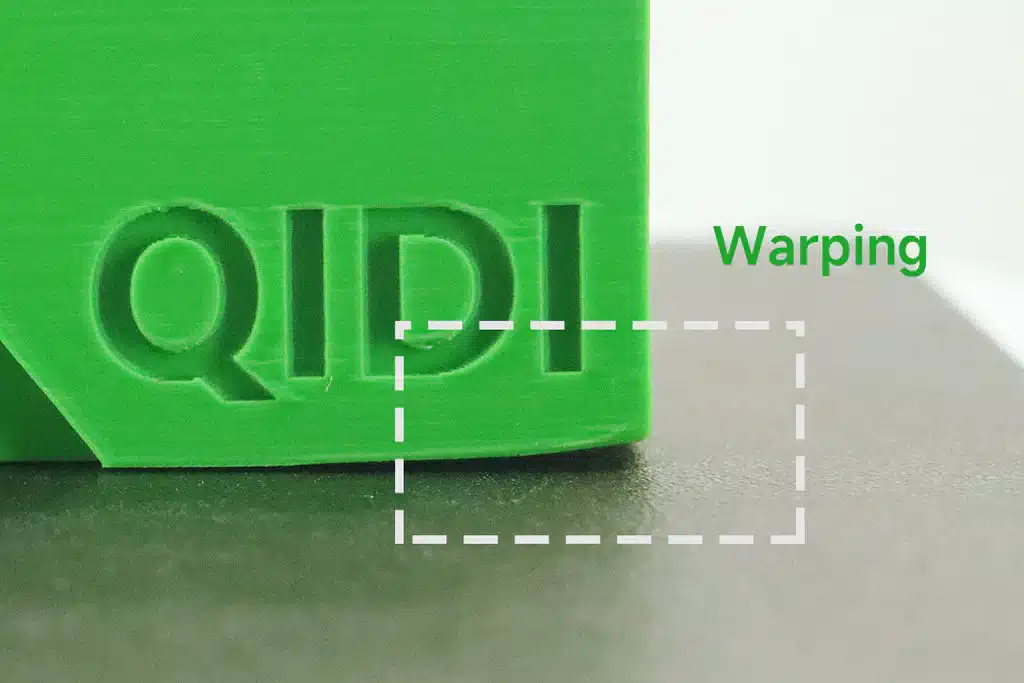
- Warping/Lifting:
Cause: Poor first layer adhesion, insufficient bed temperature, drafts, or lack of enclosure for certain materials. Fix: Clean/level bed, use adhesive, increase bed temp, add a brim/raft in slicer, use an enclosure.
- Layer Shifting:
Cause: Loose belts, motor skipping steps (due to speed or too much resistance), or print head colliding with print. Fix: Tighten belts, reduce print speed, check for obstructions, adjust motor current (if possible).
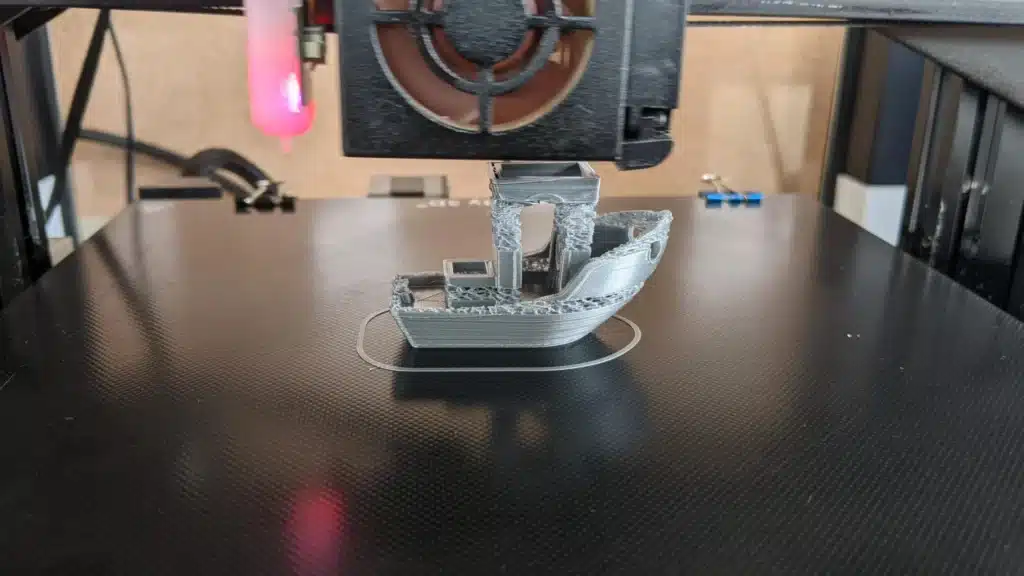
- Under-Extrusion/Gaps:
Cause: Clogged nozzle, incorrect E-steps, too low flow rate, or filament too wet. Fix: Clean nozzle, calibrate E-steps/flow, dry filament, increase nozzle temp slightly.
- Over-Extrusion/Blobs:
Cause: Too high flow rate, incorrect E-steps, or too high nozzle temperature. Fix: Calibrate E-steps/flow, lower nozzle temp slightly.
- Nozzle Clogging:
Cause: Dust/debris in filament, hotend gap, retraction issues, or printing too cold. Fix: Cold pull (atomic pull), clean nozzle, ensure hotend is assembled correctly, increase print temperature.
A Systematic Approach
1. Isolate the Variable: Change only one setting at a time when troubleshooting. This helps you pinpoint the exact cause. 2. Start with the Basics: Always check bed leveling and first layer adhesion first. Many problems stem from here. 3. Consult Resources: Online communities, forums, and YouTube are invaluable. Someone else has likely faced your exact problem. 4. Keep a Log: Document what you changed and the result. This builds your knowledge base.
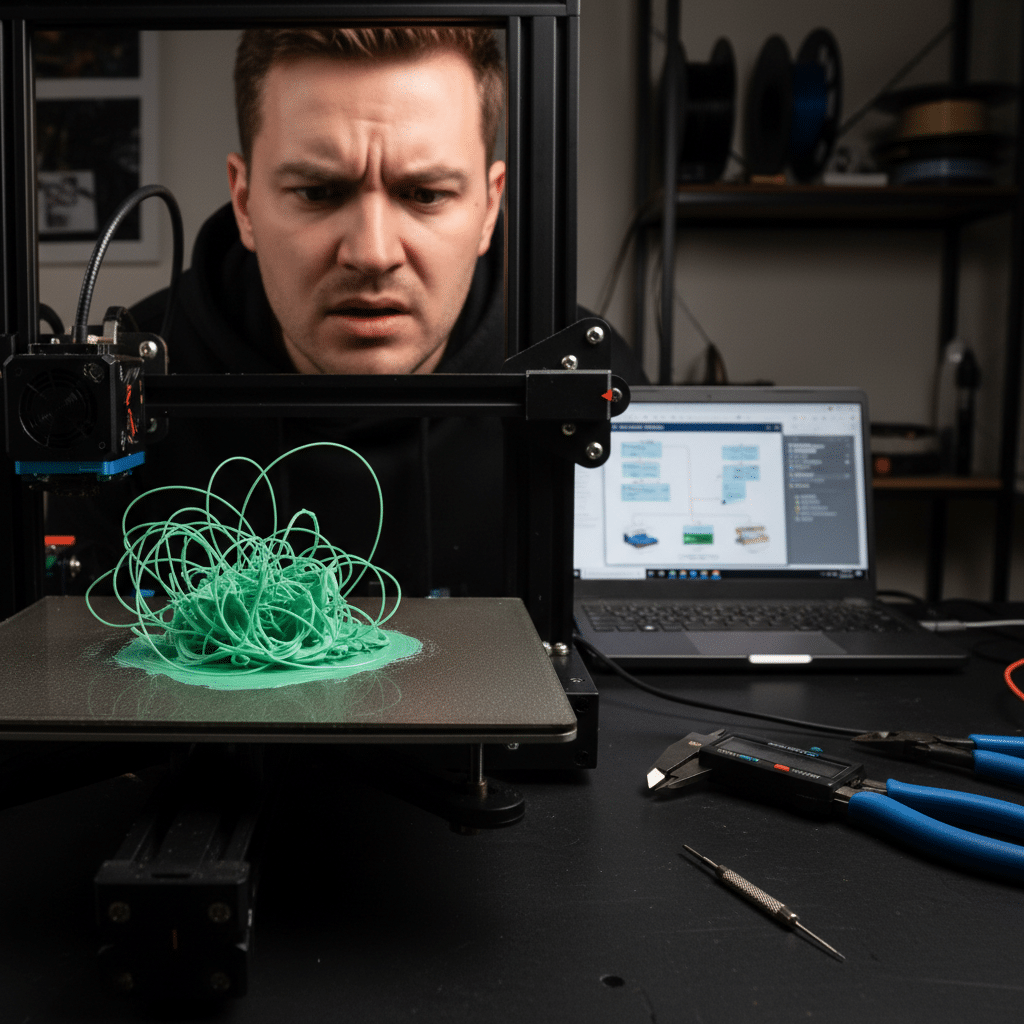
Embarking on the 3D printing journey is an exciting adventure, and by implementing these 10 3D printing tips and tricks, you’re well on your way to becoming a master of your machine. From nailing that first layer to understanding your slicer settings, each step contributes to consistently successful and stunning prints. Don’t be afraid to experiment, learn from your failures, and most importantly, have fun creating! The world of possibilities with 3D printing is vast and constantly expanding, so keep exploring and pushing the boundaries of what you can create.
How can I improve the adhesion of the first layer in 3D printing?
To improve first layer adhesion, clean your build plate thoroughly with isopropyl alcohol, ensure it is properly leveled, adjust your Z-offset for the right nozzle height, and consider using adhesives like glue stick or hairspray if needed. Also, set the correct bed temperature for your filament.
Why is understanding and tweaking print temperatures important?
Adjusting nozzle and bed temperatures for your specific filament ensures optimal flow and solidification, which prevents issues like stringing or warping and results in smoother, more accurate prints.
What should I consider when choosing filament for my 3D printer?
Choose reputable brands with tight diameter tolerances, suited to your project, and store filament in an airtight container with desiccants to prevent moisture absorption, which can cause defects in your prints.
How can I optimize my slicer settings for better print quality?
Adjust settings like layer height, infill density and pattern, retraction distance and speed, print speed, and cooling. Experimenting with these parameters allows you to achieve the best balance between print quality and speed for your project.
What is the process for calibrating your extruder’s flow rate?
Print a single-wall cube, measure the wall thickness with calipers, compare it to your slicer setting, and adjust the flow rate percentage in your slicer until the printed wall matches the expected line width, ensuring accurate and dimensionally correct prints.
- 14shares
- Facebook0
- Pinterest14
- Twitter0
- Reddit0

