Introduction to Procreate Brushes
Procreate has emerged as one of the most widely utilized digital painting applications among both amateur and professional artists. With its user-friendly interface and robust features, this app enables users to create stunning artwork using various tools, among which brushes play a pivotal role. The brushes available in Procreate allow artists to experiment with different styles and techniques, significantly impacting the final outcome of their work.


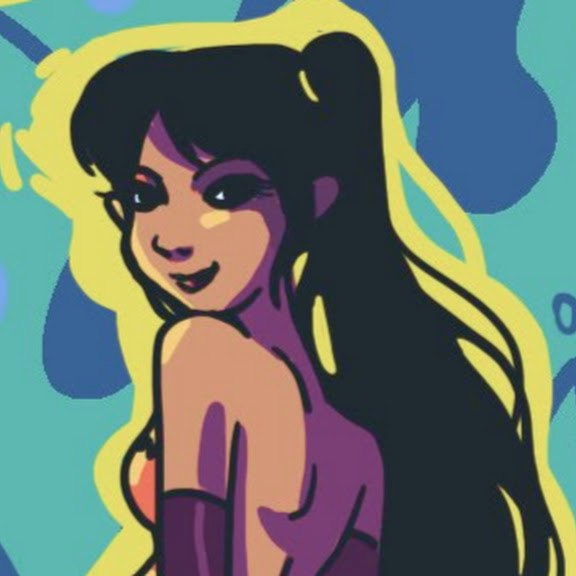
The importance of selecting the right brush cannot be overstated; it sets the atmosphere for a design and greatly influences the texture and depth of the painting. In Procreate, brushes can emulate traditional mediums such as watercolor, oil, and ink, providing artists with a versatile canvas for their creativity. The default Procreate brushes are particularly noteworthy, as they come pre-installed with the app and offer a wide range of capabilities suitable for various artistic needs.
This blog post aims to provide an in-depth exploration of the best default Procreate brushes for painting. By focusing specifically on the brushes that come with Procreate, readers can gain insight into their unique features, strengths, and uses. Each default brush has been meticulously crafted to cater to different painting styles, ensuring that users can find the perfect tool to help realize their artistic vision. Throughout this guide, we will delve into the characteristics of these brushes, providing artists with the knowledge they need to select the right options for their projects. Ultimately, understanding the potential of Procreate’s default brushes can elevate the overall quality of digital paintings, making this exploration vital for any aspiring digital artist.
Overview of Default Brushes in Procreate

Procreate, a favorite among digital artists, comes equipped with a diverse range of default brushes designed to enhance creative expression. These brushes are thoughtfully categorized based on functionalities such as sketching, inking, painting, and adding texture. Each category provides a unique method for artists to explore their styles and techniques. For instance, the sketching brushes allow for quick and responsive strokes that resemble traditional pencil and charcoal, making them ideal for preliminary drawings and concepts.
When it comes to inking, Procreate offers a selection of brushes that mimic various types of pens and markers, allowing artists to create clean, precise lines. This is particularly beneficial for those looking to achieve a polished finish in their work. In contrast, the painting brushes in Procreate are designed to replicate the qualities of different paint mediums, including acrylics, watercolors, and oils. These brushes enable artists to blend colors seamlessly and add depth to their artwork, contributing to a more immersive experience.
Furthermore, the texture brushes provide interest and dimension, enabling artists to incorporate various surface qualities into their creations. By using these brushes, artists can simulate the effects of fabric, paper, or other materials, enhancing their work’s overall visual appeal. The comprehensive array of the best default Procreate brushes for painting serves both novices and experienced artists alike. Beginners can take advantage of this foundational selection to develop their skills, while seasoned professionals can use these versatile tools to achieve intricate designs and unique styles.
The extensive offerings in Procreate ensure that there is something for everyone, allowing artists to experiment and refine their techniques to their liking. Overall, the default brushes included in Procreate are essential for nurturing creativity and providing a reliable starting point for artistic endeavors.
The Studio Pen: A Versatile Tool for Artists

The Studio Pen is one of the standout options among the best default Procreate brushes for painting, recognized for its adaptability and precision. This brush is tailored to meet the demands of artists who seek both finesse in line work and the capability to render detailed illustrations. Its design allows for smooth stroke quality, enabling users to achieve clean, well-defined lines that are essential for intricate artwork.
One of the defining features of the Studio Pen is its responsiveness. It reacts dynamically to pressure sensitivity, allowing artists to create varying line thickness with ease. This characteristic makes it particularly effective for sketching, inking, and even coloring, as users can switch seamlessly between different styles of work without having to change brushes frequently. The intuitive control it offers ensures a fluid drawing experience, ideal for both beginners and seasoned professionals alike.
Artwork produced with the Studio Pen often exemplifies its versatility. Many artists have utilized this brush to create everything from dynamic comic art, where clean lines are essential, to delicate mandala designs requiring precision. By combining this brush with layering techniques, users can enhance their illustrations with depth and texture, further showcasing the potential of the Studio Pen as a key component in digital artwork.
For those aiming to maximize their proficiency with the Studio Pen, best practices include adjusting the brush settings to suit individual style preferences and exploring various layer blending modes. As artists become more familiar with the capabilities of this tool, they can elevate their work, making the Studio Pen an indispensable asset in their Procreate toolkit.
The Round Brush: A Classic Choice for Painting
The Round Brush is a staple in the toolkit of many digital artists using Procreate. With its distinctive round shape, this brush is versatile, offering the capability to create both fine details and broad strokes that are essential for various painting techniques. Artists have long appreciated the Round Brush for its adaptability; it can be used for everything from fine line work to creating wash-like blends in larger areas.


One of the most compelling aspects of the Round Brush is how manipulable it is. By adjusting the settings, users can create diverse effects suited to their artistic desires. For example, altering the size, opacity, and flow settings can dramatically change the outcome of your strokes. A larger size can produce bolder, sweeping strokes while a smaller size allows for intricate details. Furthermore, by changing the brush’s pressure sensitivity, artists can control the thickness of their lines based on how hard they press their stylus. This enhances the painting experience, making it feel more natural and fluid.
In conclusion, the Round Brush is more than just a tool—it’s a classic choice that provides the foundation for a wide array of artistic expression in Procreate. By mastering its settings and understanding its capabilities, artists can greatly enhance their painting skills and create stunning, innovative artworks.
The Soft Brush: Ideal for Blending and Shadows
The Soft Brush stands out among the default Procreate brushes for painting, particularly due to its unique ability to blend colors seamlessly and achieve soft edges. This brush is designed with pressure sensitivity, allowing artists to vary stroke opacity based on the pressure applied to the stylus, which grants greater control over the application of color. For instance, a lighter touch produces delicate shades, while firm pressure leads to vivid, opaque strokes. Such versatility makes the Soft Brush a favored choice for artists who wish to create smooth transitions and depth in their artwork.


When utilizing the Soft Brush, one can create realistic shadows and gradients, which are essential elements in paintings that aim for realism. To achieve effective shadowing, it is recommended to use a darker shade of the base color and apply it gradually with the Soft Brush. This method avoids the harsh lines that can occur with harder brushes and instead lays down layers that mimic natural light behavior.
Furthermore, the Soft Brush allows artists to create a range of textures, from subtle gradients on a portrait to the soft diffusion of light in landscapes. An effective technique is to build up colors in layers, starting from light to dark, refining the tones as you go. This approach allows more precise control over the final appearance of the painting, contributing to an overall polished effect.
Examples of artworks that effectively utilize the Soft Brush show how its application can elevate depth and detail, resulting in stunning compositions. Artists leverage the blendable nature of this brush, showcasing its capability to evoke emotion and atmosphere through color harmony. Overall, the Soft Brush is an indispensable tool in the arsenal of the best default Procreate brushes for painting, especially when aiming for nuanced blending and shadow creation.
The Painting Brush: Adding Texture and Character
The Painting Brush in Procreate serves as a versatile tool for artists looking to enrich their digital paintings with depth and character. This brush is specifically designed to replicate traditional painting techniques, allowing artists to experiment with textures that breathe life into their artwork. By adjusting the brush settings, you can achieve a variety of effects, from fine details to bold strokes that mimic the essence of oil or acrylic paints.


To effectively utilize the Painting Brush, start by selecting a canvas that suits your project’s scope. Using a larger brush size, you can apply broad strokes for initial layering, establishing a foundational texture. As you progress, you can create dimension by gradually decreasing the brush size, incorporating finer details that showcase both depth and intricacy. This method is particularly effective when working on landscapes or portrait illustrations, where subtle nuances greatly enhance the overall composition.


Furthermore, the Painting Brush can produce a range of effects that cater to various artistic styles. For instance, when creating a more abstract piece, allow the brush to blend colors directly on the canvas. This integration of hues mimics watercolor techniques and introduces a fluidity often desired in modern digital art. Alternatively, for more structured styles such as realism, consider leveraging the brush’s opacity settings to control how much texture is laid down, allowing for meticulous detailing in facial features or intricate landscapes.
In addition to these techniques, experimenting with the brush’s dynamics can unlock even more creative possibilities. By adjusting the tilt and pressure settings, you can gain further control over stroke variability, leading to unique patterns that enrich your artwork. This adaptability of the Painting Brush makes it one of the best default Procreate brushes for painting, as it empowers artists to explore a wide range of creative expressions.
The Watercolor Brushes: Capturing Fluidity and Transparency
Procreate’s watercolor brush collection stands out for its ability to mimic the delicate nuances of traditional watercolor techniques. These brushes are designed to replicate the fluidity and transparency inherent in watercolor painting, allowing artists to create stunning pieces that resonate with the charm of hand-painted works. The key to mastering this technique lies in understanding the unique features of these brushes, which can enhance the painting experience and output.


One of the defining characteristics of Procreate’s watercolor brushes is their capability to simulate water diffusion. When applied, these brushes create soft edges and natural-looking blends, ensuring that the colors appear to flow and mix on the canvas just as they would in real life. The opacity settings of these brushes can be adjusted, providing artists with the flexibility to layer colors and build depth, which is crucial for achieving realistic watercolor effects. Furthermore, the ability to alter the brush’s wetness and texture settings significantly enhances the ease of applying washes and creating detailed textures that replicate various watercolor techniques.
To fully leverage the potential of the best default Procreate brushes for painting, artists are encouraged to experiment with varying brush settings. For instance, adjusting the flow rate can allow for more intricate detailing, while tapping into the smudge tool can create soft transitions between colors. Additionally, exploring layers while using these brushes can elevate a piece by allowing for transparent overlays, echoing the beauty discovered in classic watercolor artistry. Demonstrative artwork is crucial for inspiration, showcasing how these techniques come to life through digital means.
Ultimately, Procreate’s watercolor brushes offer a remarkable avenue for artists to explore the timeless quality of watercolor painting. Their exceptional ability to capture elements such as fluidity and transparency makes them an indispensable resource for any artist looking to blend the traditional with the digital.
The Charcoal Brush: For Textured and Expressive Art
The Charcoal Brush in Procreate is a powerful tool for artists looking to add depth and emotive quality to their illustrations. Known for its unique textured appearance, this brush mimics the look and feel of traditional charcoal, allowing for bold strokes and expressive detailing. By adjusting the brush settings, users can achieve a wide variety of effects, from soft, subtle shading to harsh, dramatic lines, making it an essential component of the best default Procreate brushes for painting.

When utilizing the Charcoal Brush, it is important to consider the pressure and angle of your strokes. A lighter touch can create wispy textures that evoke a sense of delicacy, while applying more pressure results in saturated and bold lines. This versatility enables artists to explore a range of styles, from detailed portraits to abstract compositions. For those looking to experiment further, layering multiple strokes can enhance the depth of the artwork, allowing for an interplay of light and shadow.
Artworks that effectively showcase the Charcoal Brush might include dynamic landscapes or expressive human figures. In landscape paintings, the brush can be employed to capture the natural roughness of trees or rocky surfaces, adding life and movement to the composition. Alternatively, in figure drawing, the brush can convey emotion through line weight and texture, drawing the viewer’s eye to specific areas of the artwork. By examining pieces that utilize the Charcoal Brush, artists can gain insights into how this tool can transform their artistic endeavors from ordinary to extraordinary.
Overall, the Charcoal Brush stands out among the best default Procreate brushes for painting, offering incomparable textured effects that can elevate any artwork. By mastering its use, artists can expand their creative horizons and explore new avenues for expression.
Tips on Customizing Default Brushes
Customizing default brushes in Procreate can significantly enhance your painting experience and allow for personal style to shine through. Procreate offers a range of adjustable settings that can be tailored to meet the unique needs of each artist. The first step in customizing brushes is to select the default brush that most closely aligns with your intended use. Once selected, you can access the brush settings to modify critical parameters like opacity, size, and flow.

To adjust the opacity, navigate to the “Brush Studio” and locate the opacity slider. Lowering the opacity can create subtle layers of color while increasing it results in bolder strokes. Similarly, the brush size can be fine-tuned according to the level of detail required for the work at hand. A larger brush size is useful for broad strokes and backgrounds, whereas a smaller one is perfect for detailed work or fine lines.
The flow setting, which controls how much paint is placed on the canvas with each stroke, can also be modified to create different effects. A lower flow rate will produce a soft, airbrush-like effect, ideal for blending colors or creating gradients. In contrast, a higher flow will deliver more paint with each stroke, useful for achieving more saturated colors and distinct lines.

Once you have adjusted these settings to your liking, it is crucial to save your customized brush to ensure it is available for future projects. Procreate allows you to create a duplicate of the brush and name it accordingly, enabling you to easily access your personalized tool whenever inspiration strikes. Examples of personalized brushes might include a textured brush that mimics real paint strokes or a soft brush used for creating atmospheric backgrounds.
By taking the time to customize default Procreate brushes, artists have the potential to transform their painting techniques, making them more suited to their individual artistic vision and resulting in truly unique artworks.
Conclusion
In the world of digital painting, selecting the right tools can significantly affect the quality and enjoyment of the artwork. Throughout this guide, we explored a variety of the best default Procreate brushes for painting, detailing their unique characteristics and ideal use cases. Each brush has been designed to cater to different artistic needs, from texture to smooth blending, allowing artists of all skill levels to take full advantage of Procreate’s capabilities.


It is essential for artists to understand that the most suitable brush varies depending on personal style and desired outcomes. By experimenting with various default brushes within Procreate, artists can discover which ones resonate with their creative vision. For instance, some may excel with traditional oil brush effects, while others may prefer the nuanced strokes achievable with textured or pencil brushes. The vast array of options allows for incredible versatility, which can greatly enhance the painting experience.
As you navigate through the default brush selection in Procreate, consider the emotions and themes you wish to convey in your work. Some brushes might evoke a certain feeling or style that could become a signature feature of your rendering techniques. Remember that the journey of finding the best tools for your artistic style is personal and could lead to unexpected discoveries.
We encourage you to engage with the community and share your experiences regarding your favorite Procreate brushes. What have you found to be the best default Procreate brushes for painting? How have they transformed your creative process? Your insights could provide valuable inspiration for fellow artists embarking on their own painting journeys. Feel free to leave your thoughts in the comments section below!
- 923shares
- Facebook0
- Pinterest923
- Twitter0
- Reddit0