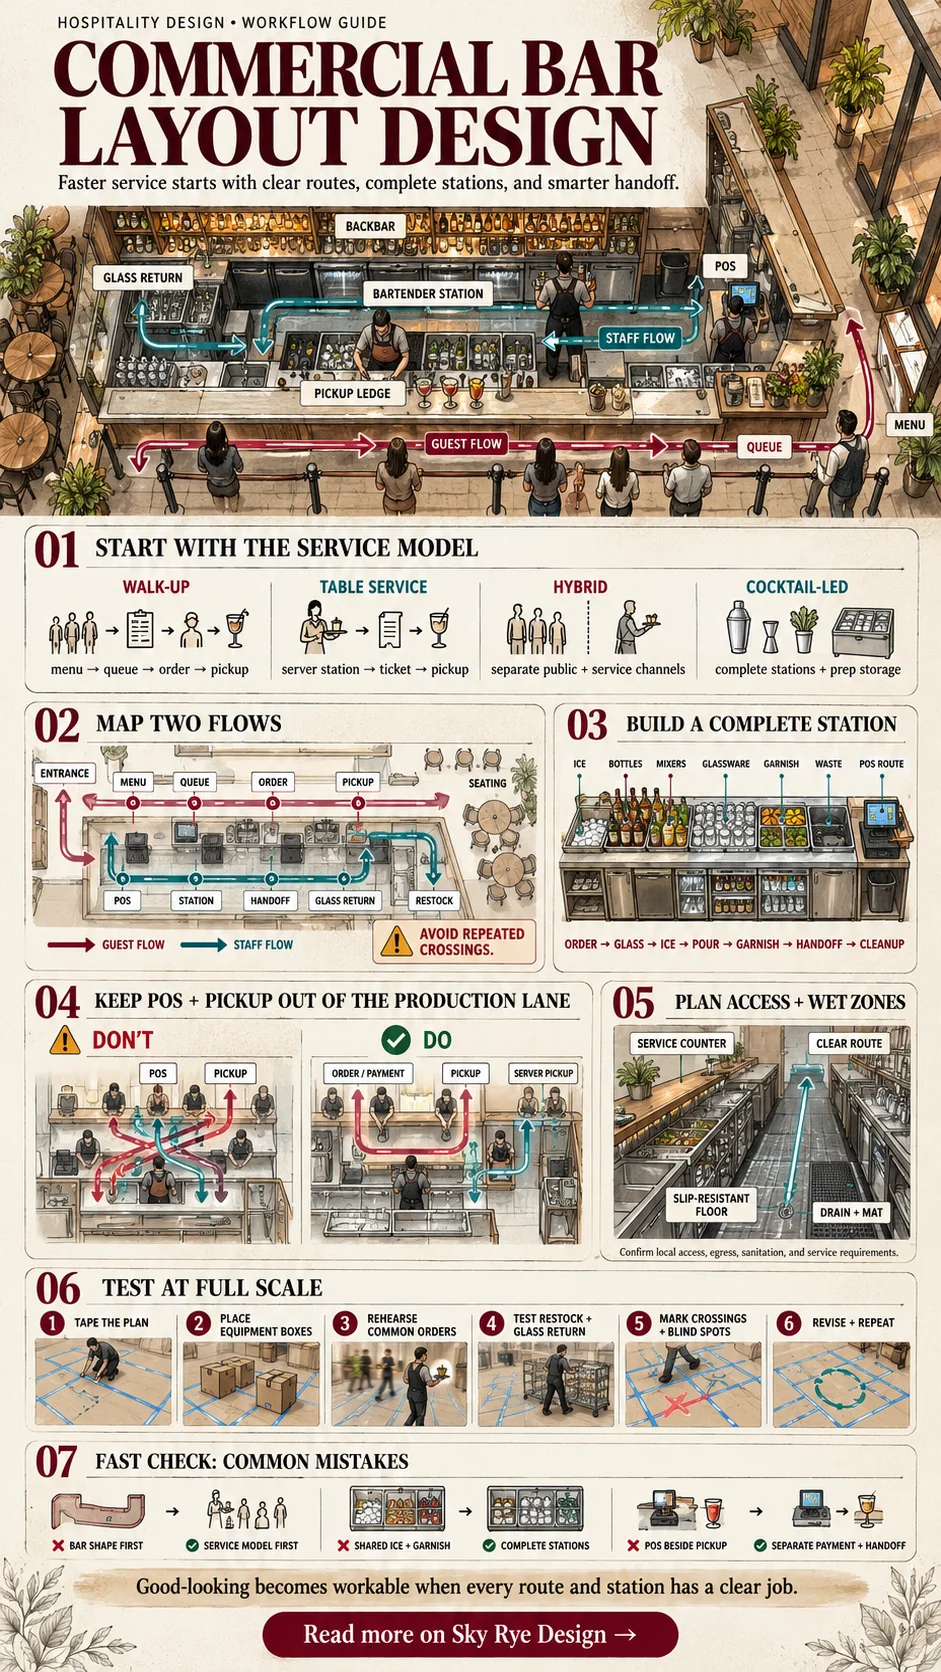
Commercial bar layout design is the planning of guest flow, bartender stations, POS, pickup, glass return, and restocking as one operating system. A good plan shortens repeated movements without forcing staff into the same narrow lane or making guests guess where to order and collect drinks.
Start with the service model, not the bar shape. Then trace one order from menu to payment, production, handoff, and cleanup. The aim is not a universal “perfect” distance. It is a layout that fits the menu, staffing level, peak demand, equipment, accessible route, and local code.

What should a commercial bar layout solve?
A commercial bar layout should make five actions obvious: where guests queue, where orders are taken, where drinks are made, where finished orders are collected, and how stock and used glassware move behind the scenes. Those routes should not repeatedly cross. Bartenders need complete workstations, servers need a service point that does not block walk-up guests, and barbacks need a restock path that stays out of the production lane. The floor also has to tolerate spills, while accessible service and circulation must be resolved before counters and equipment are fixed. If the room looks polished but every order requires a bartender to walk across another station, the design is unfinished.
Choose the service model before drawing stations
| Service model | Layout priority | Typical pinch point |
|---|---|---|
| Walk-up counter | Visible menu, queue, order point, pickup | Pickup blocks new orders |
| Table service | Server station, ticket rail, dish and glass return | Servers cross bartender lanes |
| Hybrid | Separate public and service channels | Two payment flows share one POS |
| Cocktail-led | Complete stations and prep storage | Shared garnishes or tools create crossings |
| High-volume event | Short menu, fast payment, clear handoff | Guest queue merges with restocking |
Use the broader bar floor plan guide for the whole venue, including seating, restrooms, kitchen, exits, and materials. This page stays deliberately narrower: it treats the bar itself as a production line inside that larger plan.
Map guest flow and staff flow separately
Draw the guest route from entrance to menu, queue, order, pickup, seating, and exit. On a second layer, draw the bartender, server, barback, delivery, waste, and glass-return routes. The same aisle may look generous until two of those routes use it in opposite directions.
Restaurant seating should support that movement rather than squeeze it. The practical checks in this guide to restaurant seating arrangements help connect table capacity with service routes. Keep the queue out of the accessible path and prevent waiting guests from surrounding seated customers.


Build complete bartender stations
A complete station contains the tools and ingredients needed for its assigned menu: ice, frequently used bottles, mixers, glassware, garnishes, a waste point, handwashing access where required, and a route to the POS. Duplication costs more, but one missing tool can make two bartenders cross paths on every order.
Group equipment by sequence rather than by appearance. Start with the order, then place the glass, ice, pour, garnish, handoff, and cleanup points in that working order. Under-counter refrigeration and storage should open without blocking the main lane. Treat the backbar as working storage first and a display second.


Place POS and pickup outside the production lane
A POS terminal should be reachable without turning the payment moment into a roadblock. For walk-up service, separate ordering from pickup when volume justifies it. For table service, give servers a dedicated ticket and pickup point so they do not lean into a bartender’s station. Handheld POS can reduce travel, but charging, receipt printing, cash handling, and network coverage still need fixed homes.
Lighting also affects speed. Screens need controlled glare, menus need readable contrast, and bottle labels need enough task light to distinguish quickly. Decorative backbar lighting can support this layer; these LED mirror lighting ideas show how reflected light changes depth and visibility.
Plan access, wet zones, and safer circulation
Accessibility and safety are design inputs, not finishing checks. In the United States, the U.S. Access Board ADA Standards require accessible routes and compliant sales or service counters, including at least one of each service type provided. Other countries use different rules, so confirm the applicable requirements with the project architect and local authority.
Behind the bar, spills, dropped ice, blind corners, and congested passageways are predictable hazards. OSHA’s restaurant serving guidance recommends keeping floors clean and dry, routes clear, wet areas visible, and traffic patterns organised. Select slip-resistant flooring and locate drains, mats, cleaning storage, and glass return as part of the layout.
The same coordination applies across larger commercial architecture projects: occupancy, egress, accessibility, services, and durable materials can reshape the plan more than the mood board does.
Test the layout before construction
From a design perspective, the most revealing check is to draw one order as a red line: order, ticket, glass, ice, bottles, mixer, garnish, handoff, payment, and glass return. Mark every turn, reach, shared tool, and route crossing. Then repeat the exercise for a server ticket and a barback restock.
- Tape the counter, equipment, doors, and main aisle at full scale.
- Use empty boxes to represent under-counter equipment and open every planned door.
- Rehearse common orders with the expected staffing level.
- Test restocking and glass return during the same rehearsal.
- Record crossings, blind spots, long reaches, and shared tools.
- Revise the plan, then run the same sequence again.
If the concept includes a domestic or resort-style element, compare the commercial workflow with these restaurant design principles and the more weather-focused outdoor bar planning guide.
10 commercial bar layout concepts
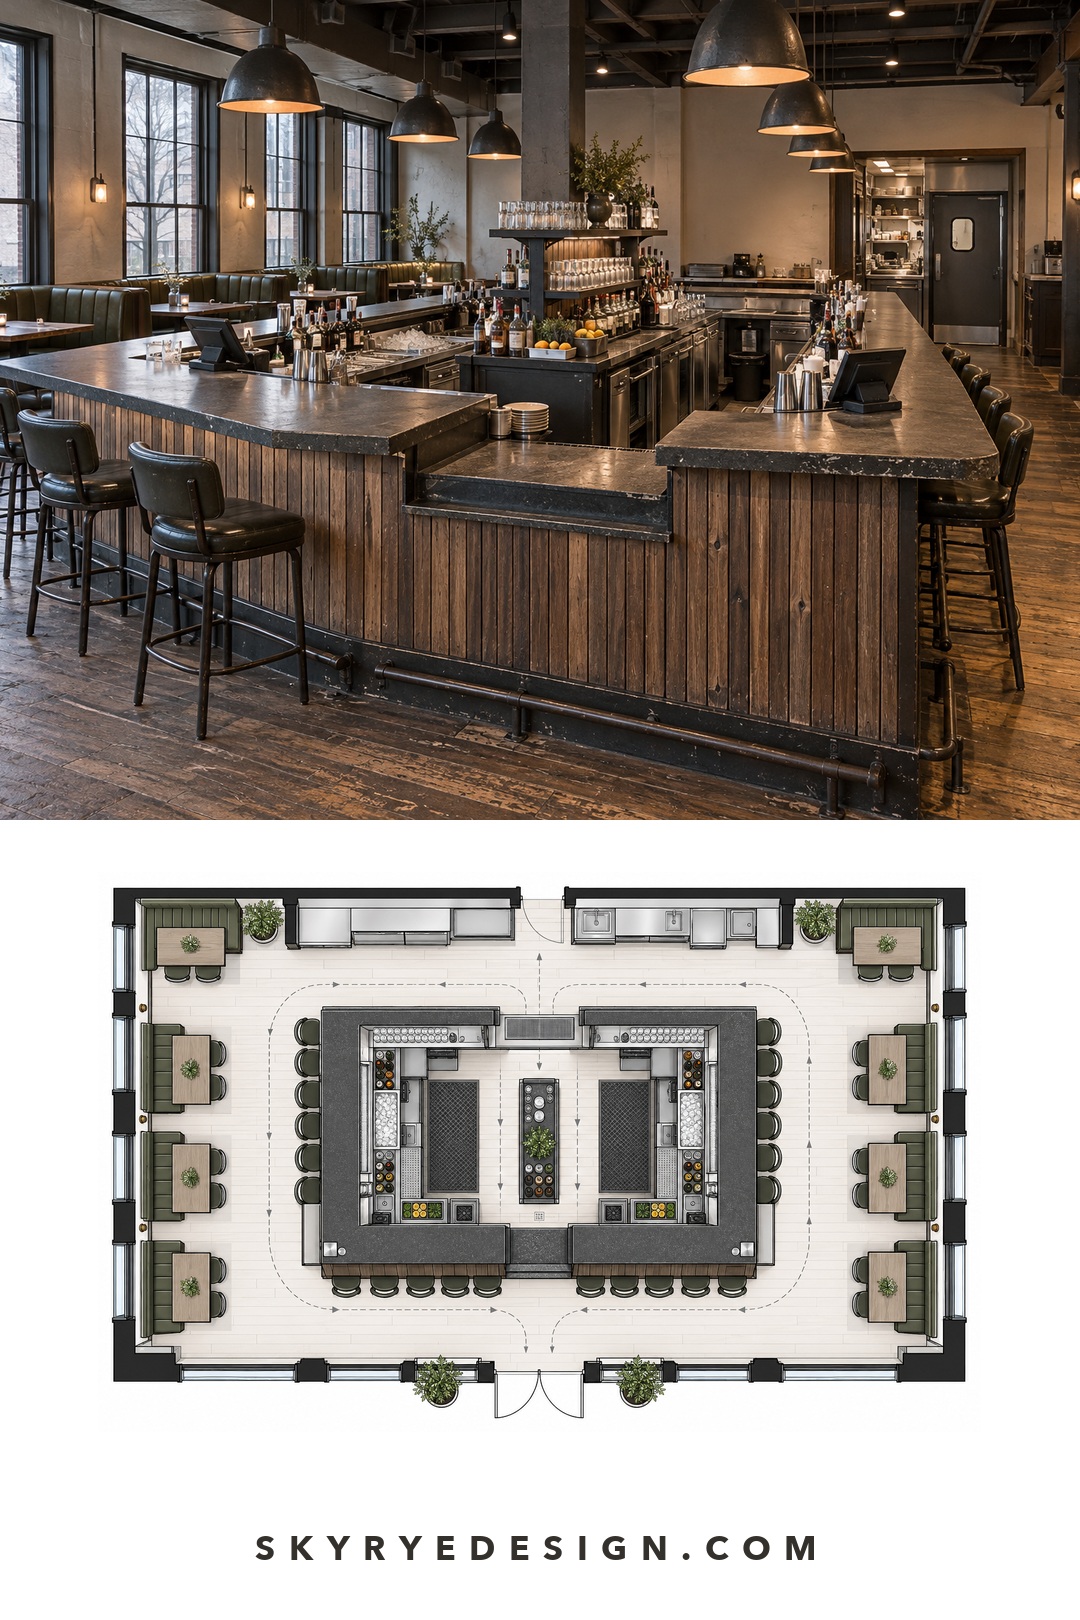
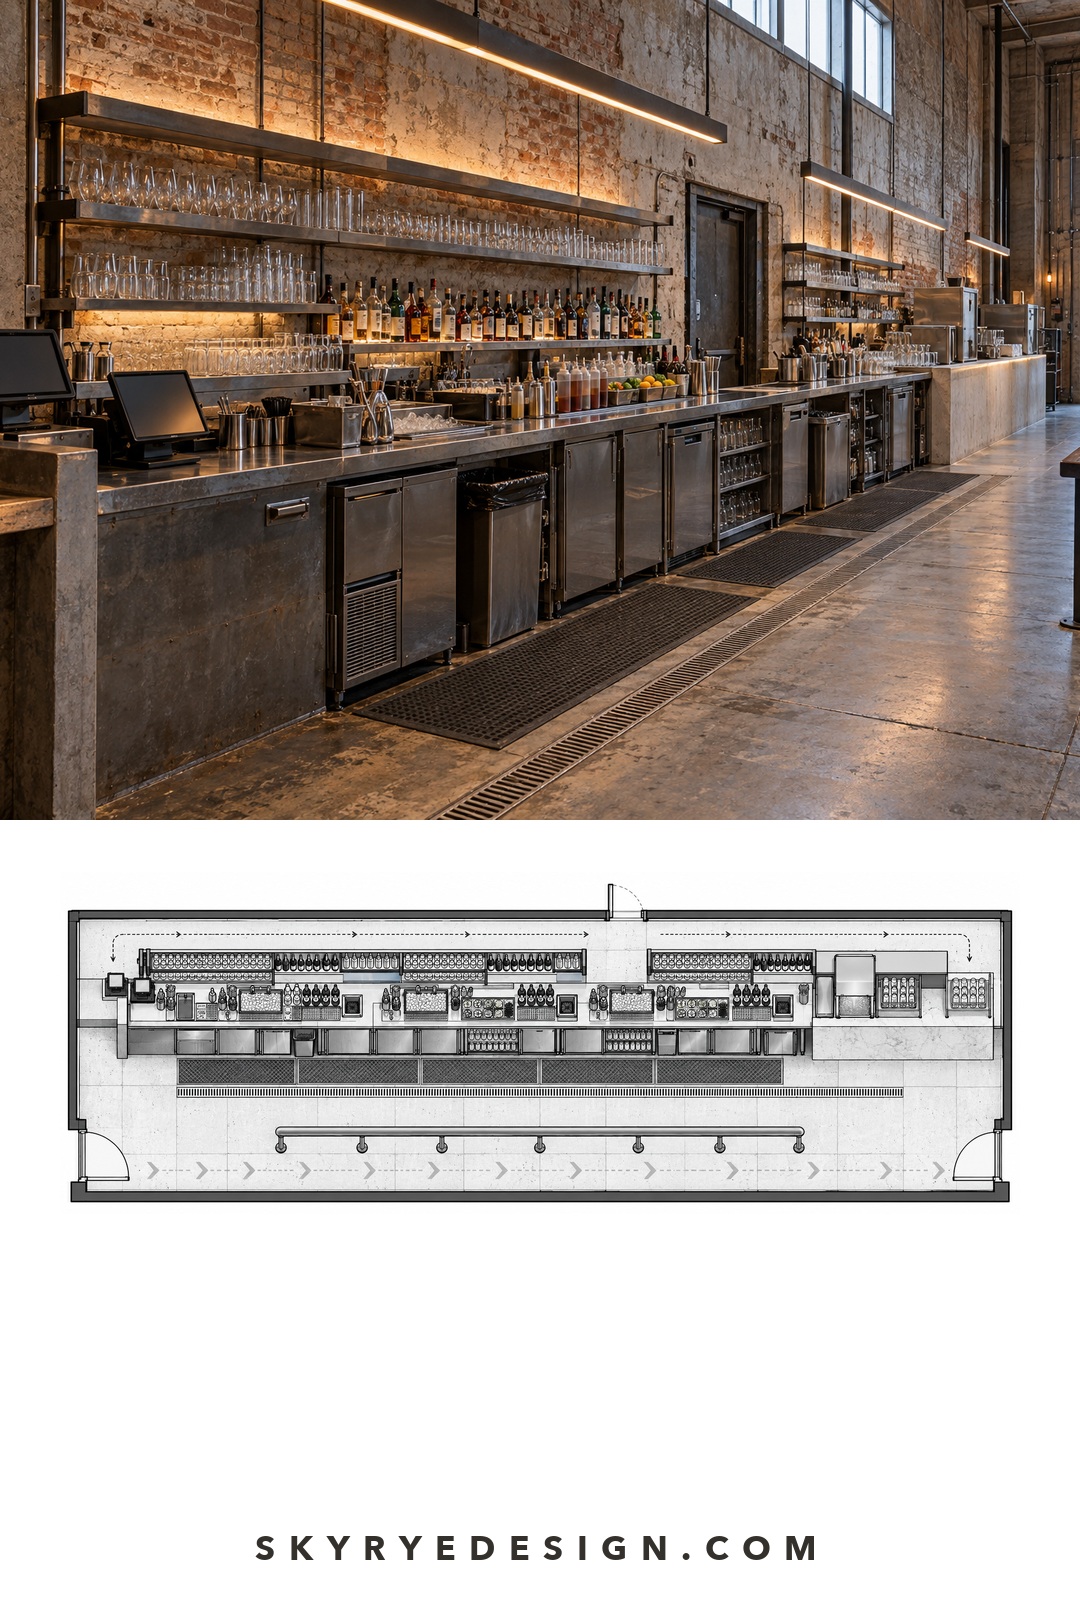
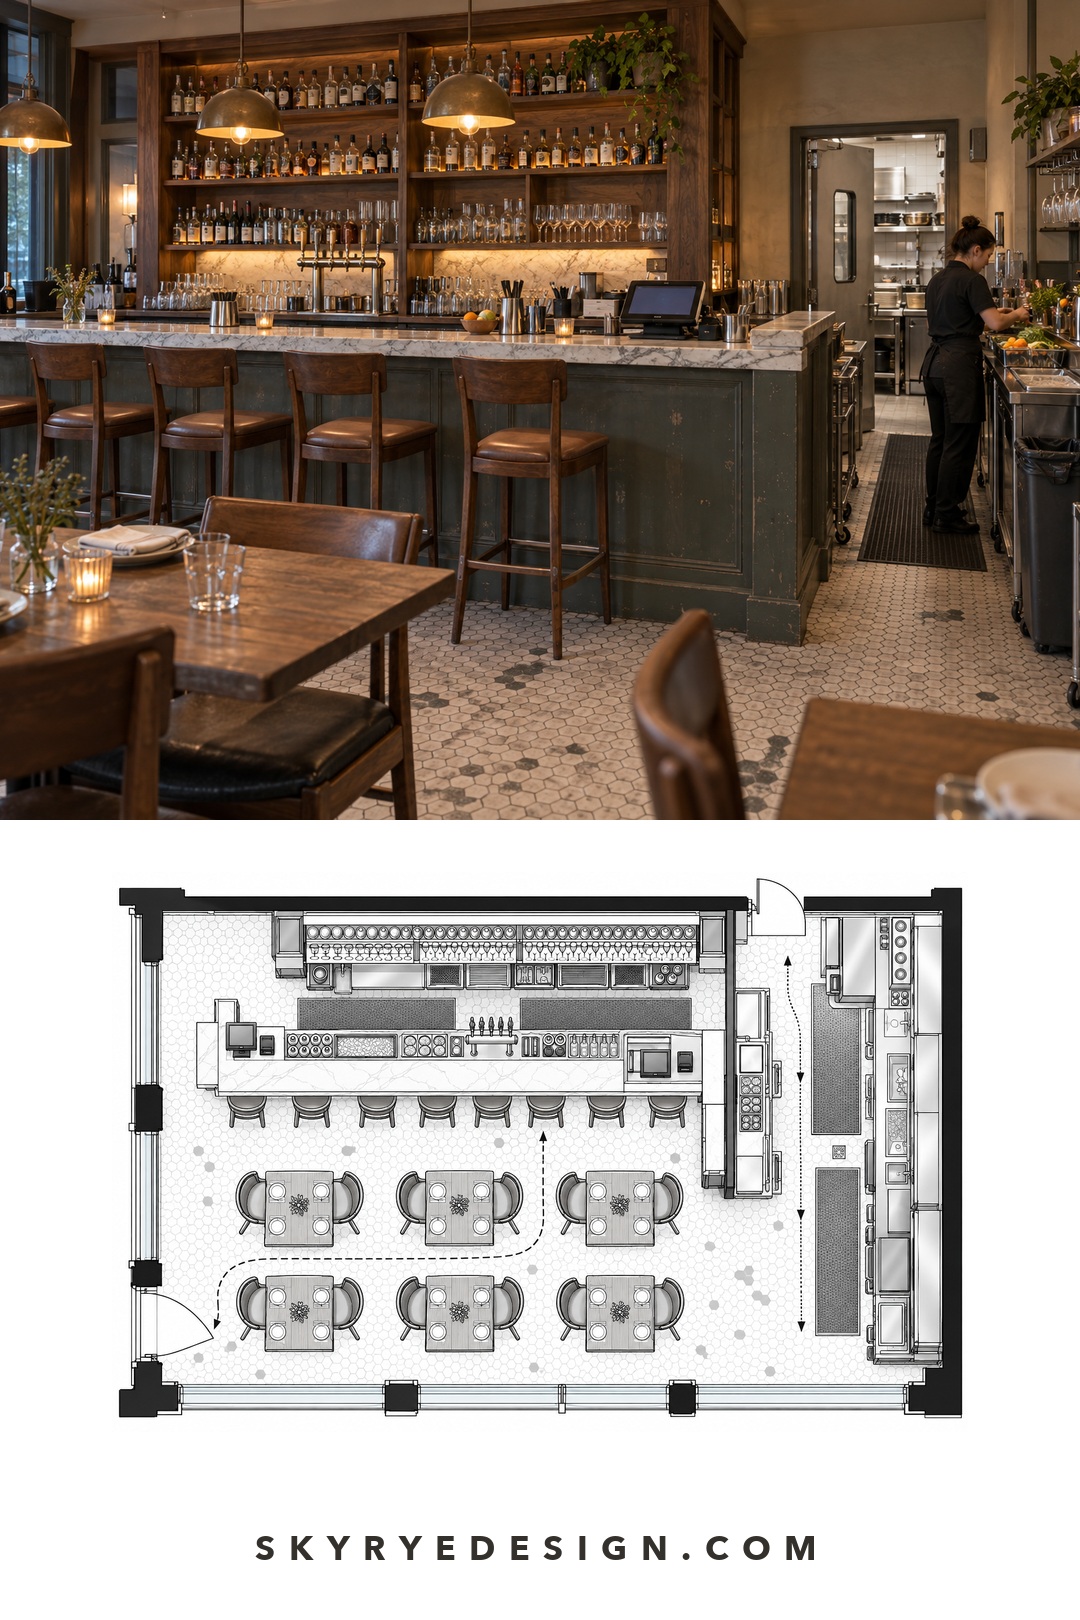
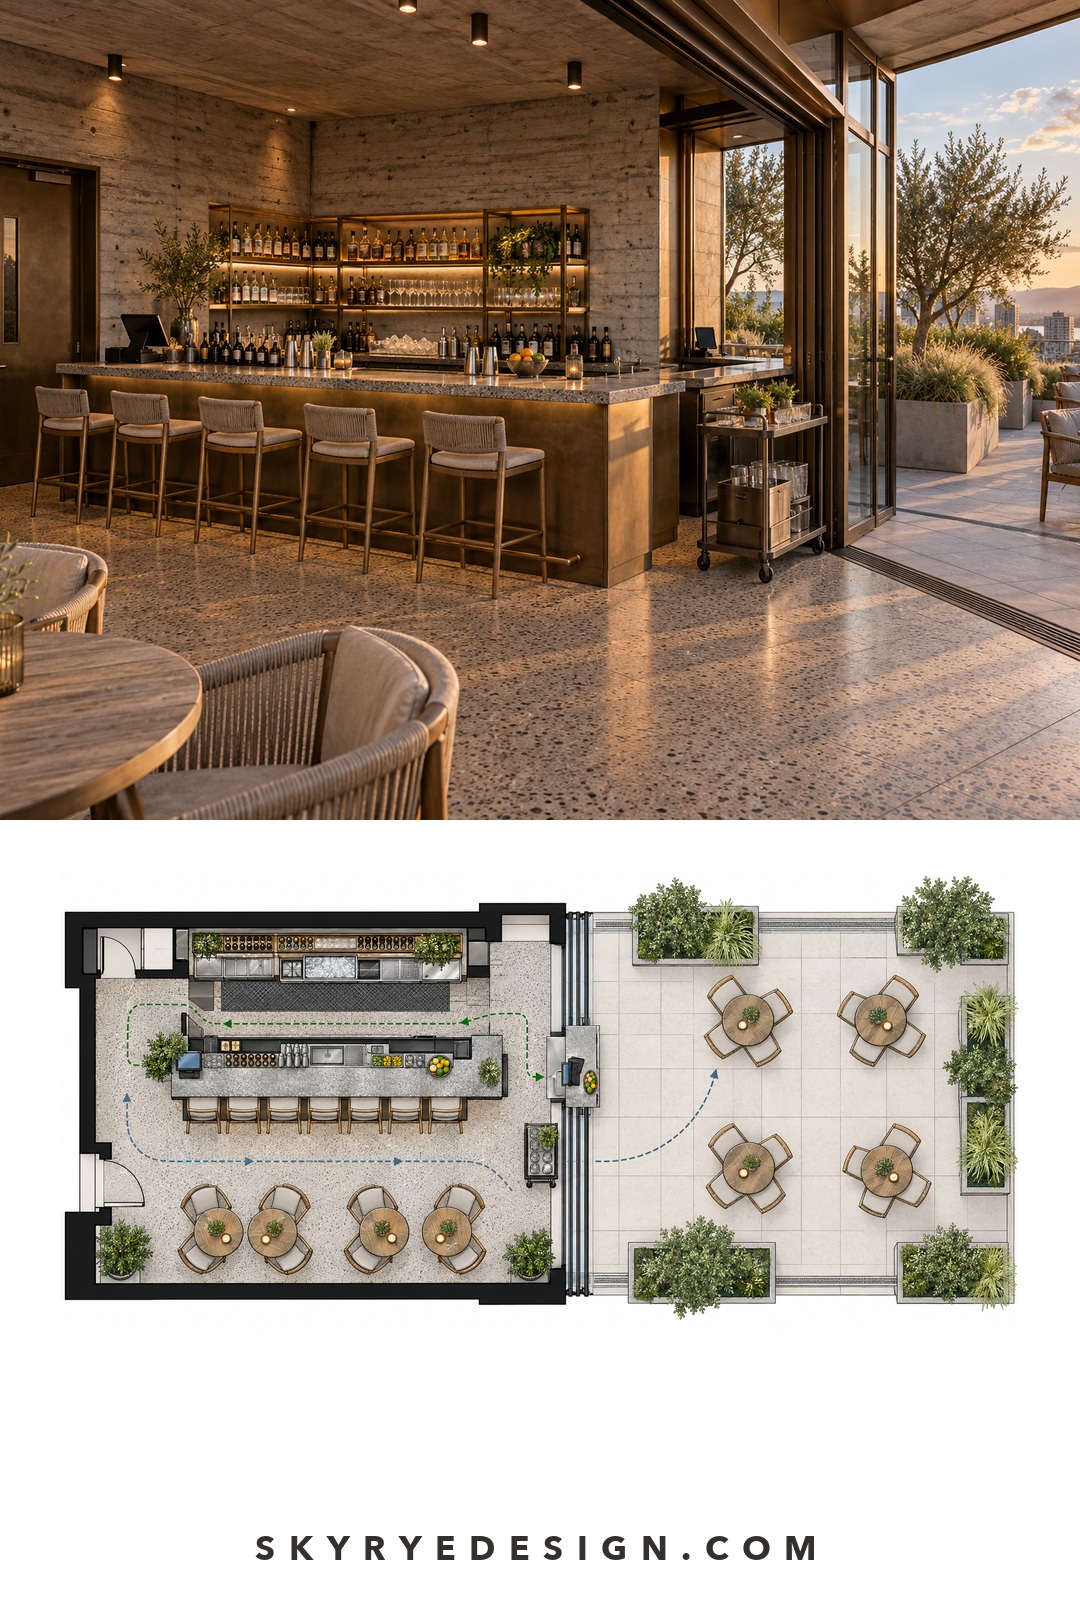
These photo-and-plan studies translate the workflow rules into ten different bar geometries. They are editorial planning concepts, not construction drawings: use them to compare guest routes, bartender stations, POS, pickup, glass return, and restocking before a project team resolves dimensions and local requirements.
Compact Straight Neighborhood Cocktail Bar
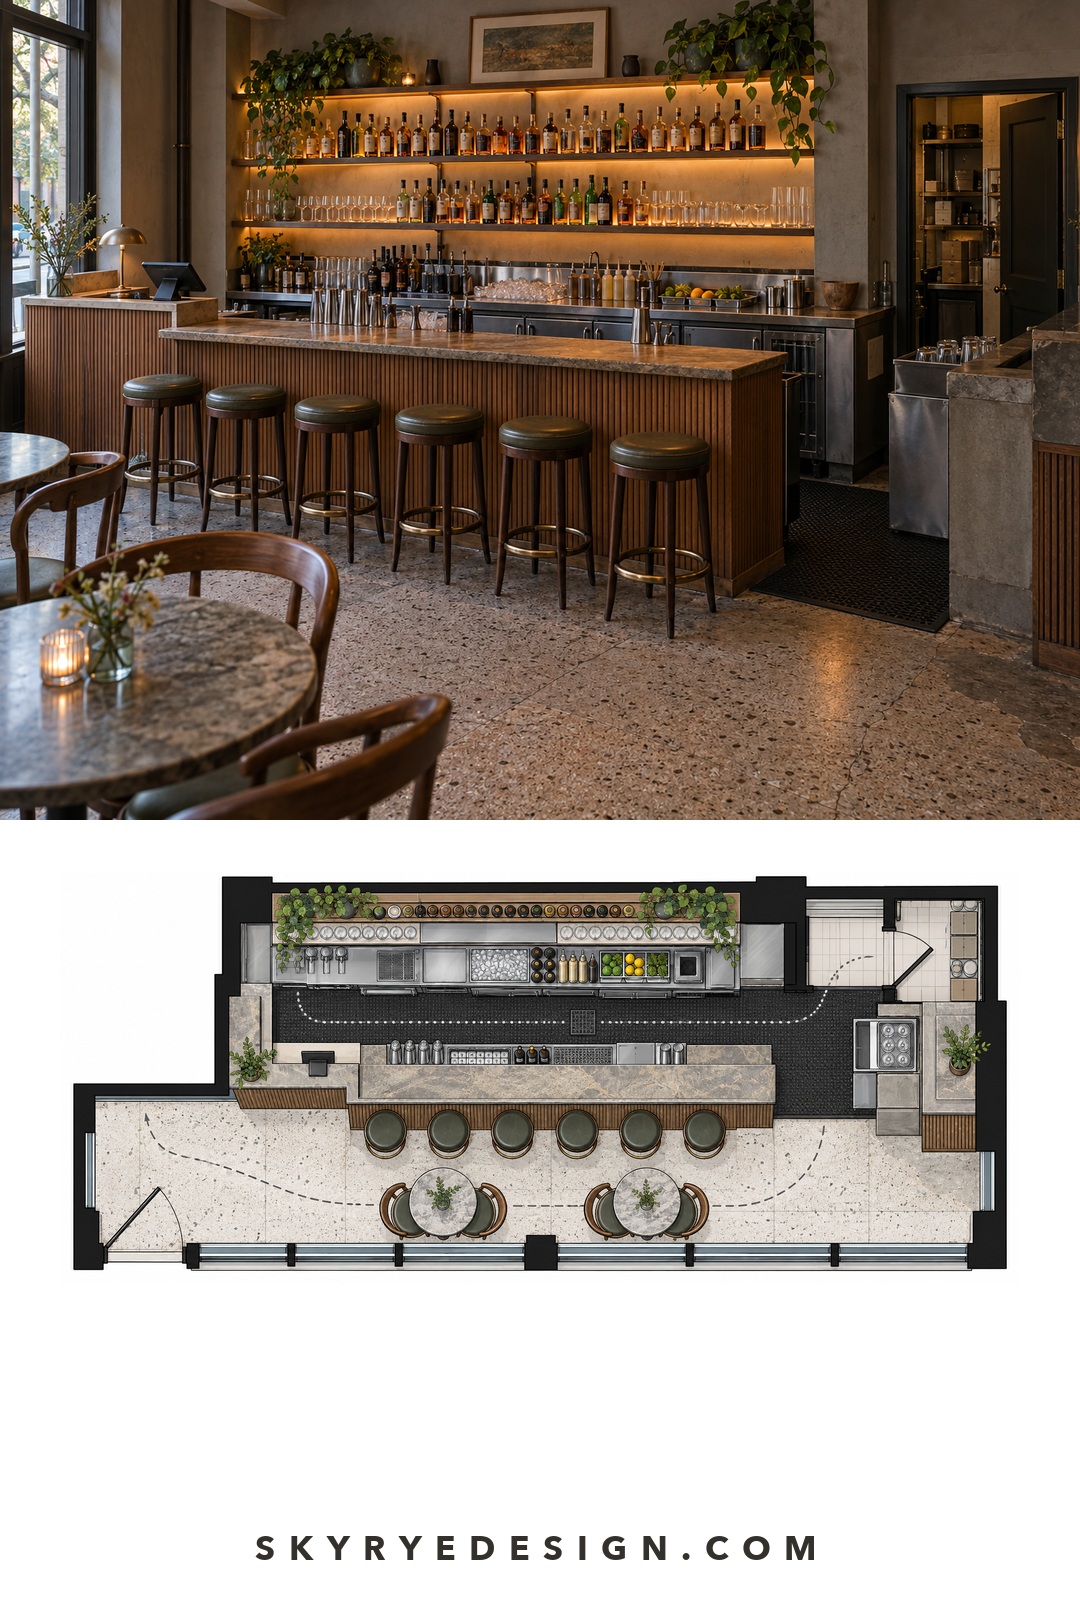
L-Shaped Hybrid Hotel Lobby Bar
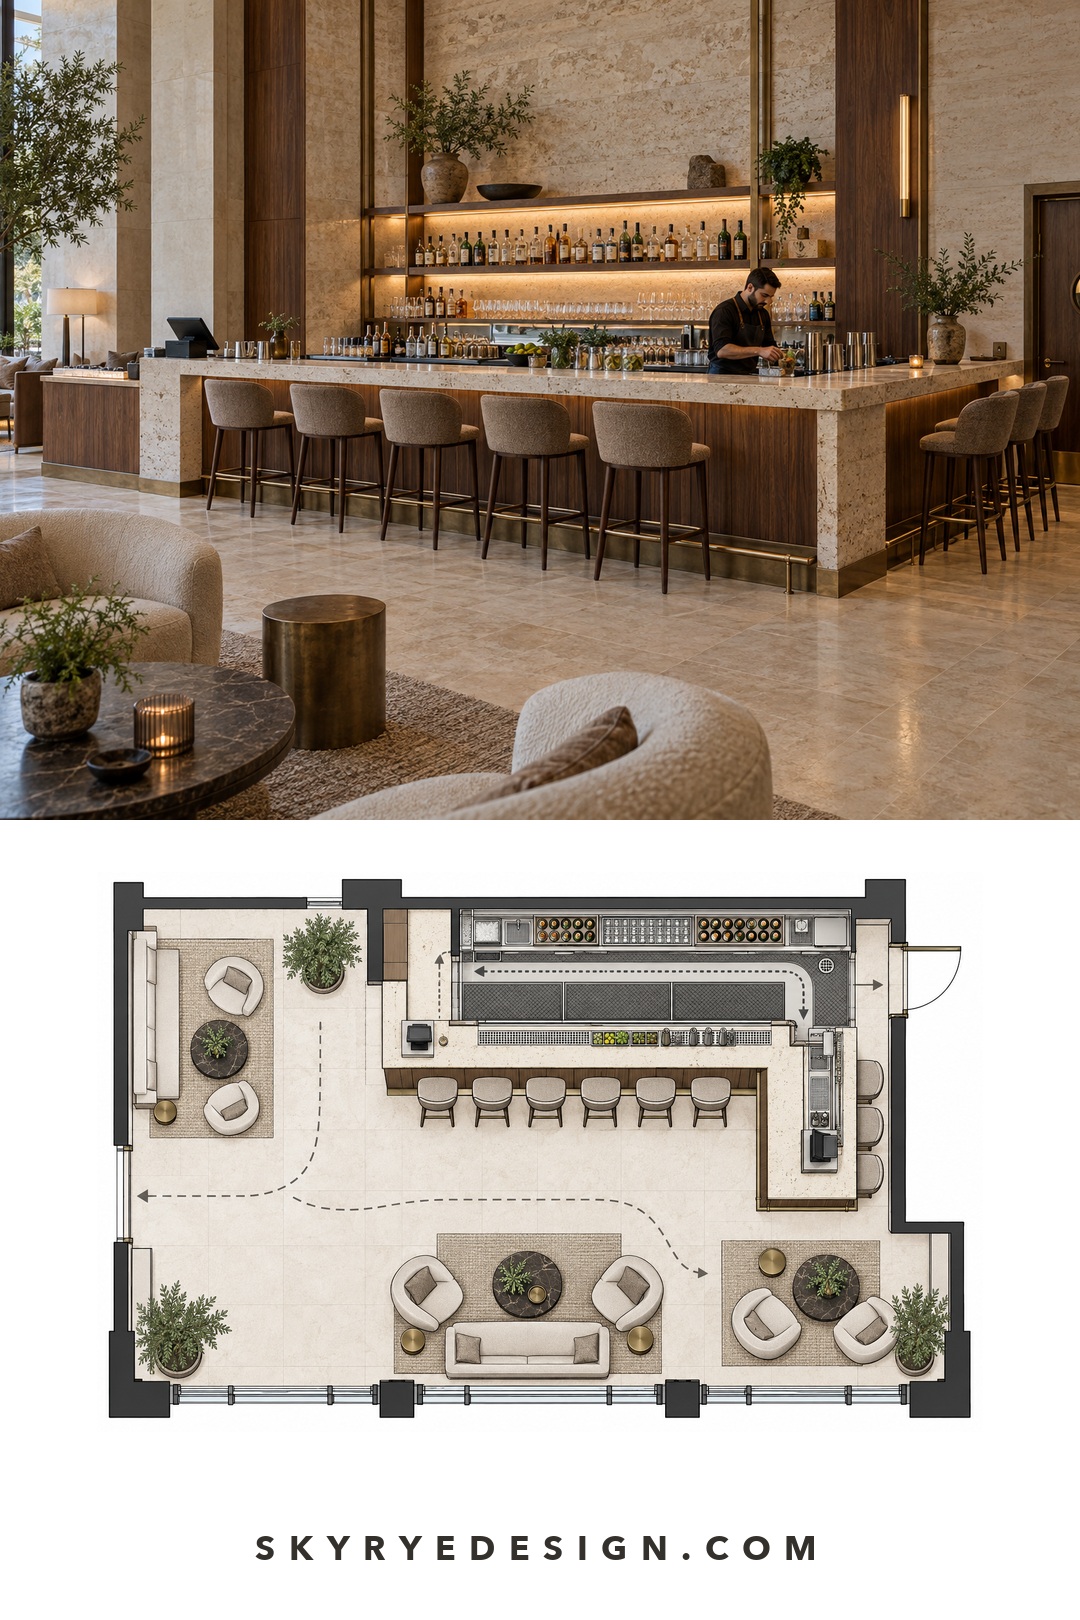
U-Shaped Craft Cocktail Bar
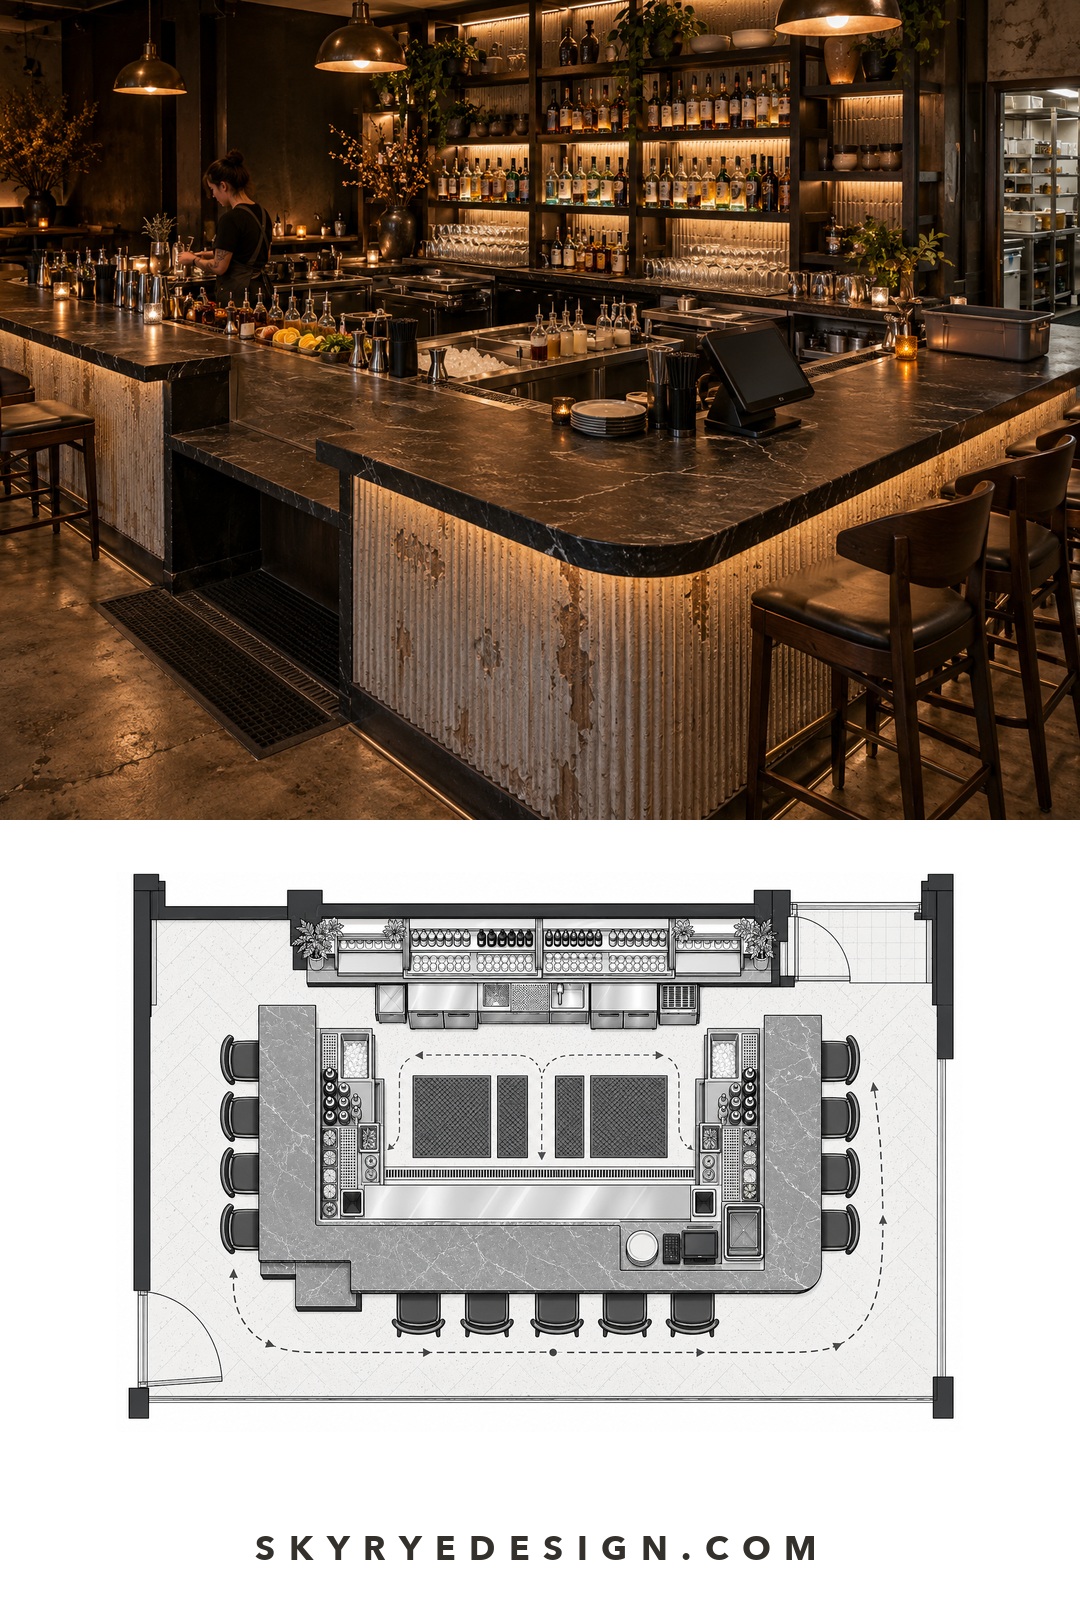
Central Island Bar
Long Narrow High-Volume Bar
Restaurant Service Bar with Server Pickup
Rooftop Bar with Terrace Connection
Accessible Café-Wine Bar
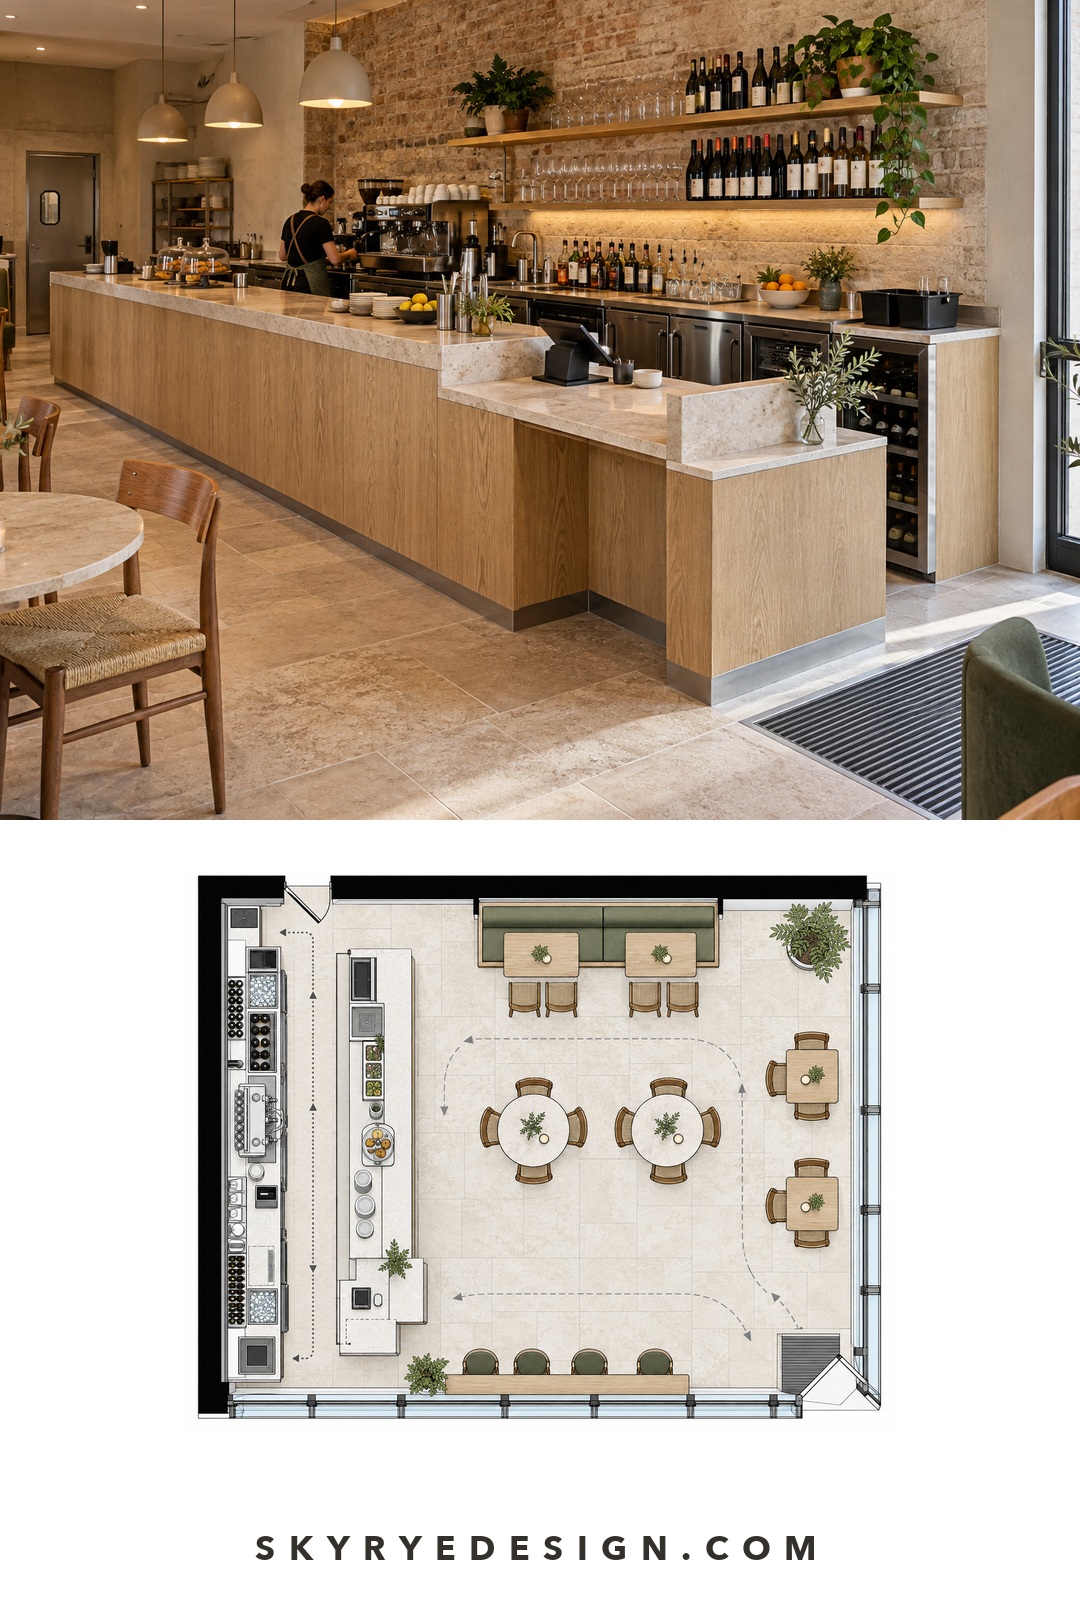
Event Venue Satellite Bar
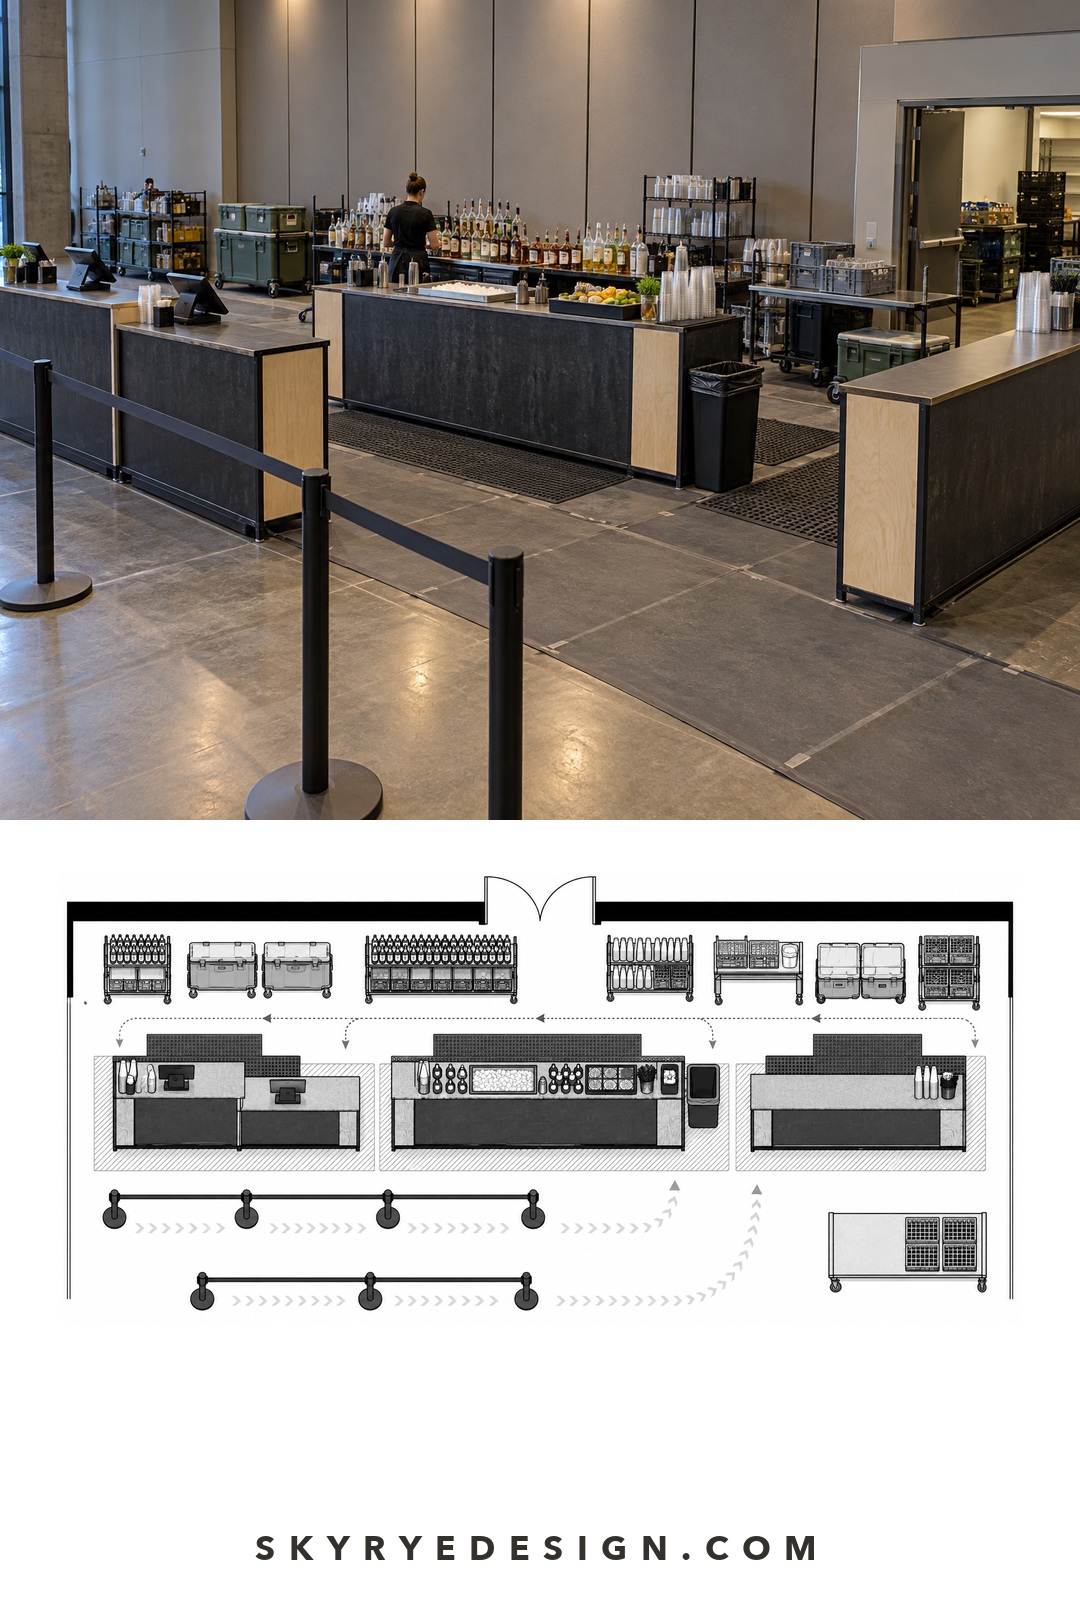
Premium Speakeasy with Two Complete Stations
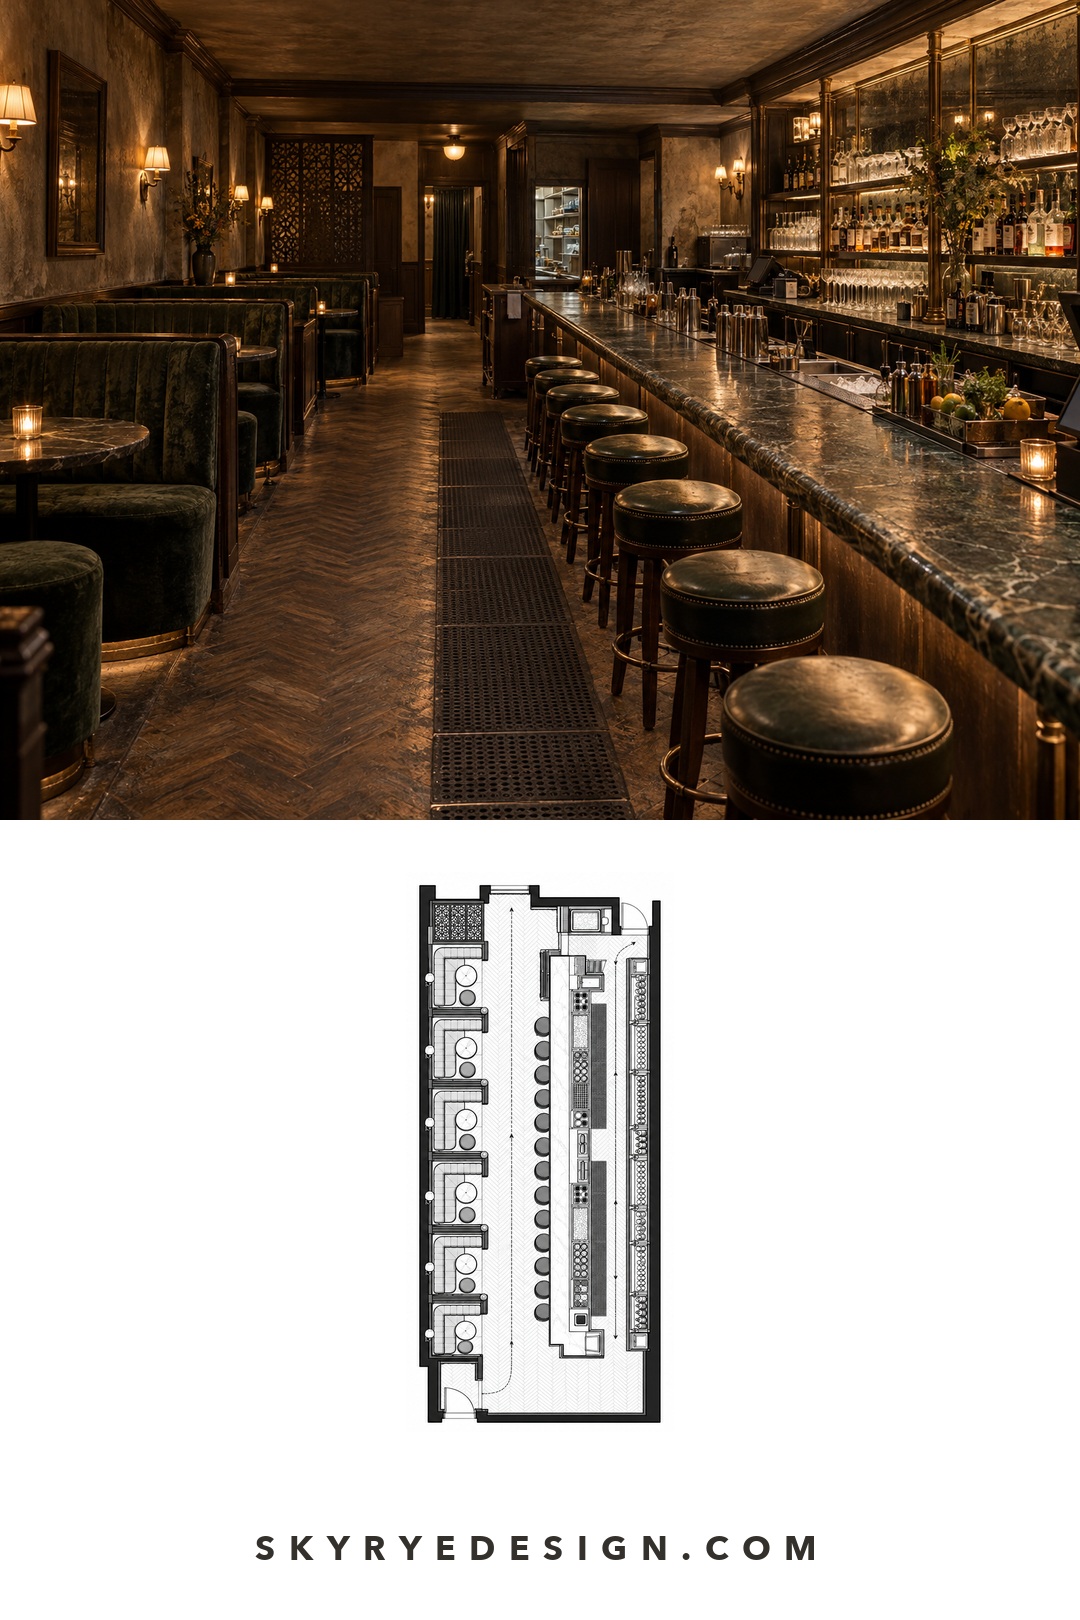
Common bar layout mistakes
| Mistake | Better design check |
|---|---|
| Choosing the bar shape first | Define service model, menu, staffing, and routes first |
| One shared ice or garnish point | Test whether stations can complete their assigned orders |
| POS beside pickup | Separate payment from completed-order handoff |
| Restocking through the guest queue | Create a service-side route and scheduled storage points |
| Decorative lighting only | Add task light for labels, worktops, menus, and screens |
| Code checks after millwork | Confirm access, egress, sanitation, and services before build |
Commercial bar layout checklist
- Service model and busiest menu sequence defined
- Guest, bartender, server, barback, waste, and delivery routes mapped
- Each main station has the tools and stock needed for its role
- Order, payment, pickup, and glass-return points do not conflict
- Accessible route and service counter reviewed for the project location
- Wet areas, drainage, flooring, mats, and cleaning storage resolved
- Power, data, water, waste, ventilation, and equipment doors coordinated
- Full-scale rehearsal completed before fixed construction
Commercial bar layout design FAQ
What is a commercial bar layout?
A commercial bar layout maps guest arrival, ordering, payment, drink production, pickup, glass return, restocking, and staff circulation during a busy service period.
Where should POS terminals go in a bar?
Place POS terminals where payment does not block production or pickup. Each main station needs a practical route to a terminal; table service also needs a separate server pickup point.
How many bartender stations does a bar need?
The number depends on the menu, service model, peak demand, staffing, and frontage. Test whether each station can complete busy orders without borrowing ice, tools, glassware, or garnishes.
How should a bar queue and pickup area be arranged?
Make the queue, order point, and pickup point readable as separate steps. Completed drinks should be collected without crossing new orders or staff routes.
What accessibility checks belong in a bar layout?
Check the route, service counter, seating, queue, restrooms, and clear floor space against local rules. In the United States, at least one of each service-counter type must meet applicable ADA requirements.
How do you test a bar layout before construction?
Mark equipment at full scale, rehearse common orders, and trace guest and staff routes separately. Resolve repeated crossings, blind corners, and shared tools before millwork is built.
The practical takeaway
A fast bar is not created by squeezing every object closer together. It comes from giving each route and workstation a clear job. Set the service model, map the flows, build complete stations, separate payment from pickup, and rehearse the busiest sequence before construction. That is the point where a good-looking floor plan becomes a workable bar.
- 36shares
- Facebook0
- Pinterest36
- Twitter0
- Reddit0